- sales/support
Google Chat:---
- sales
+86-0755-88291180
- sales01
sales@spotpear.com
- sales02
dragon_manager@163.com
- support
tech-support@spotpear.com
- CEO-Complaints
zhoujie@spotpear.com
- Only Tech-Support
WhatsApp:13246739196
- Purchase/Shipping/Refund
WhatsApp:13424403025
5inch Raspberry Pi Touch Display 2 User Guide
Features
- 5inch DSI touch screen, supports five-point capacitive touch control
- IPS display panel with a hardware resolution of 720×1280
- Compatible with Raspberry Pi 5/4B/CM4/3B+/3A+/3B/CM3+/CM3
- Directly drive the LCD through the Raspberry Pi's DSI interface, with a refresh rate of up to 60Hz
- When used with Raspberry Pi, it is compatible with Bookworm system
- Support adjusting backlight brightness through software
Hardware Connection
Working with Raspberry Pi 5
1. Use the "Pi5 DSI FFC cable" to connect the DSI port of the display to the 22PIN DSI1 port of the Raspberry Pi motherboard.
2. Use the "GPIO cable" to connect the power connector of the display to the pin header of the Raspberry Pi motherboard.
3. Secure the Raspberry Pi to the display with M2.5 screws.
The installation effect is as follows: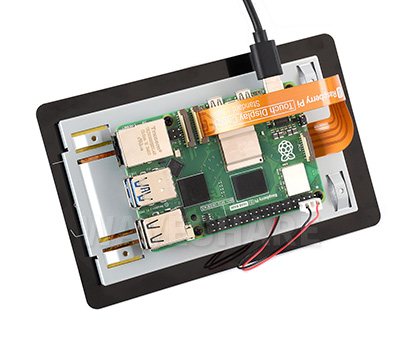
Note: Make sure that the DSI cable is connected in the correct direction and 5V power is supplied through the GPIO pins.
Working with Raspberry Pi4B/3B+/3B/3A+
1. Use the "Pi4 DSI FFC cable" to connect the DSI port of the display to the DSI port of the Raspberry Pi motherboard.
2. Use the "GPIO cable" to connect the power connector of the display to the pin header of the Raspberry Pi motherboard.
3. Secure the Raspberry Pi to the display with M2.5 screws.
The installation effect is as follows: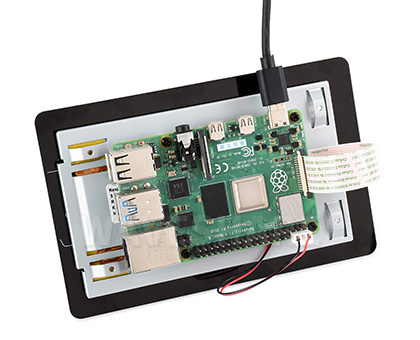
Note: Make sure that the DSI cable is connected in the correct direction and 5V power is supplied through the GPIO pins.
Software Setting
For Bookworm System
- 1. Connect the TF card to the PC, download and use Raspberry Pi Imager to flash the corresponding system image.
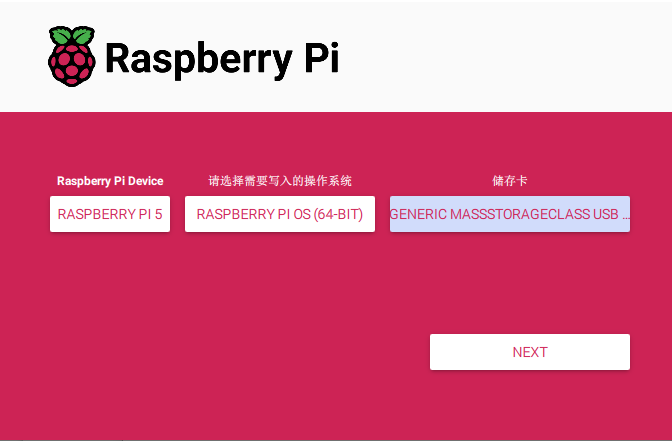
- 2. After flashing the image, insert the TF card into the Raspberry Pi, power it on, and wait a few seconds for the display to initialize. After the system starts, it can be touched normally.
Touch Screen Virtual Keyboard
Raspberry Pi OS Bookworm and later versions include Squeekboard on-screen keyboard by default. When a touch display is attached, the on-screen keyboard should automatically show when it is possible to enter text and automatically hide when it is not possible to enter text.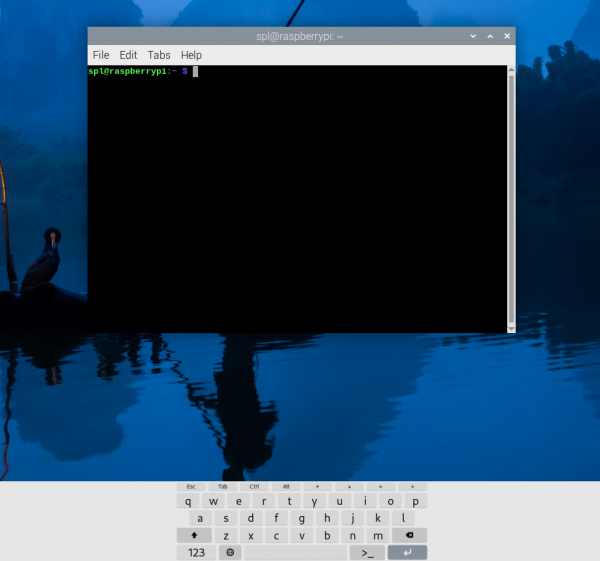
For applications which do not support text entry detection, use the keyboard icon at the right end of the taskbar to manually show and hide the keyboard.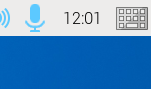
You can also permanently show or hide the on-screen keyboard in the Display tab of Raspberry Pi Configuration or the Display section of raspi-config.
Note: In Raspberry Pi OS releases prior to Bookworm, use matchbox-keyboard instead. If you use the wayfire desktop compositor, use wvkbd instead.
Adjust Backlight Brightness
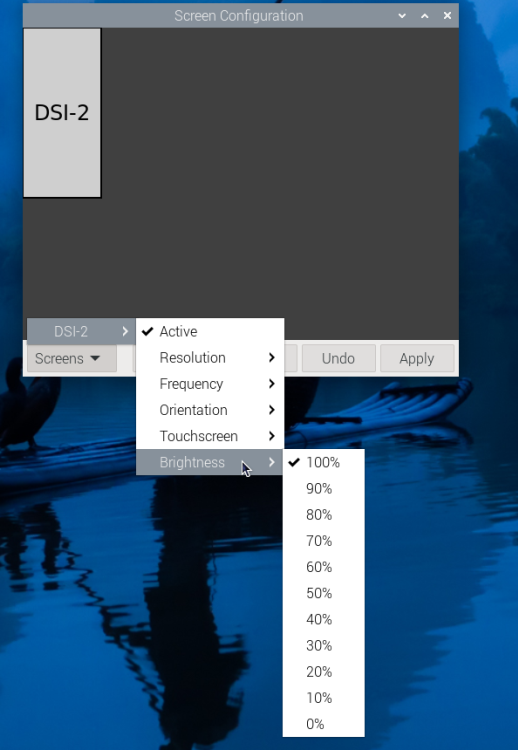
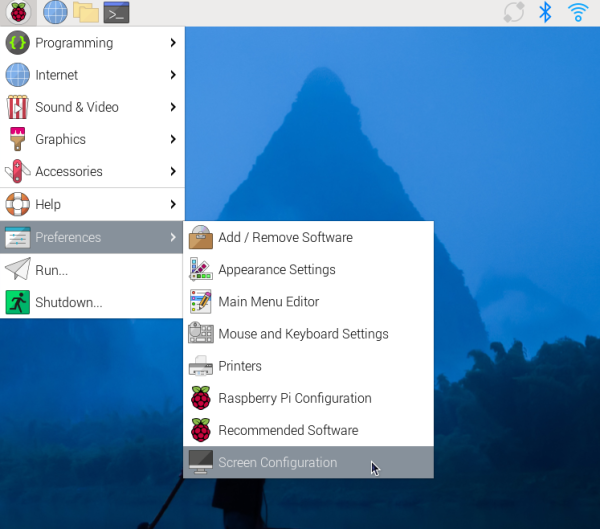
- 1. Open the "Screen Configuration" application;
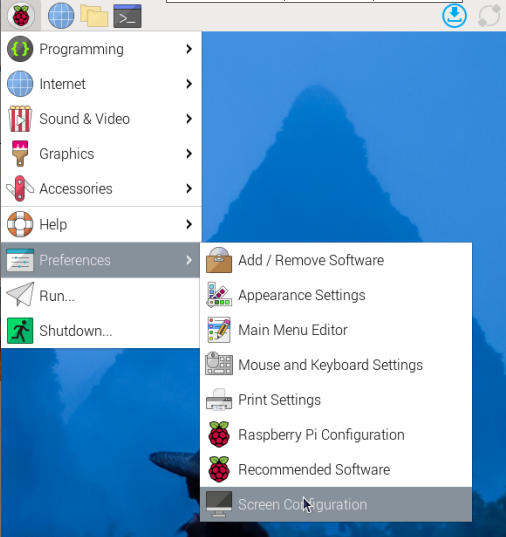
- 2. Go to "Screen" -> "DSI-2" -> "Brightness", check the backlight brightness you need to set, and finally click "Apply" to complete the backlight setting.
Waveshare also provides a corresponding demo (the demo is only used for Bookworm and Bullseye systems), users can download, install and use in the following way:
wget https://files.waveshare.com/wiki/common/Brightness.zip
unzip Brightness.zip
cd Brightness
sudo chmod +x install.sh
./install.sh
After the installation is completed, you can open the demo in the Start Menu -> Accessories -> Brightness, as shown below:
In addition, you can also control the brightness of the backlight by entering the following command on the terminal:
echo X | sudo tee /sys/class/backlight/*/brightness
Where X represents any number from 0 to 255. 0 means the darkest backlight, and 255 means the brightest backlight. For example:
echo 100 | sudo tee /sys/class/backlight/*/brightness
echo 0 | sudo tee /sys/class/backlight/*/brightness
echo 255 | sudo tee /sys/class/backlight/*/brightness
Use Touchscreen Virtual Keyboard
Raspberry Pi OS Bookworm and later versions include Squeekboard on-screen keyboard by default.
When connecting to the touch display, the on-screen keyboard will automatically appear if text input is possible, and it will automatically hide if text input is not possible.
For applications that do not support automatic text input detection, you can manually display or hide the on-screen keyboard by clicking the keyboard icon at the far right of the task bar.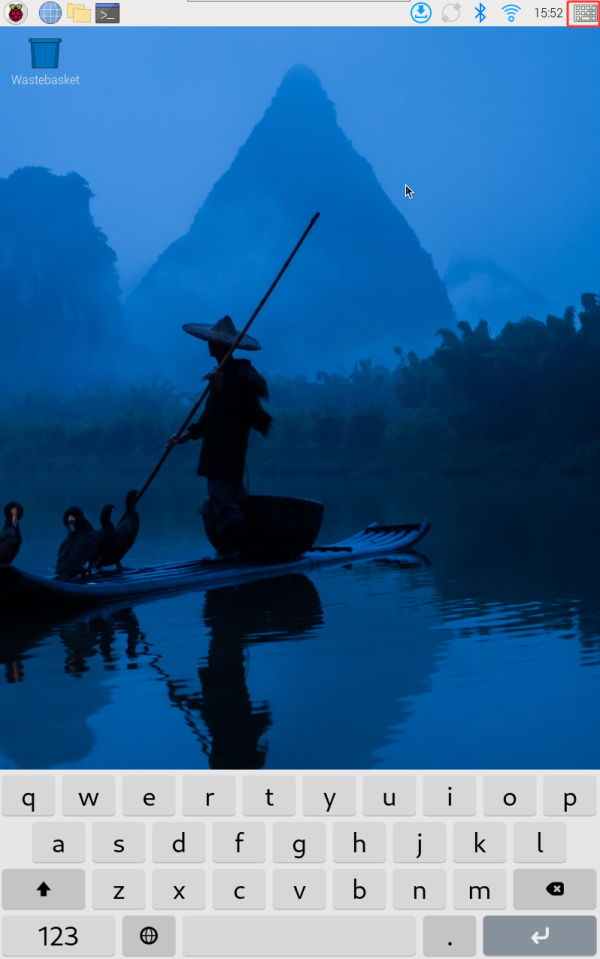
You can also set the display or hide the screen keyboard through the "Display" option under "Raspberry Pi Configuration" or through the "Display" section in raspi-config.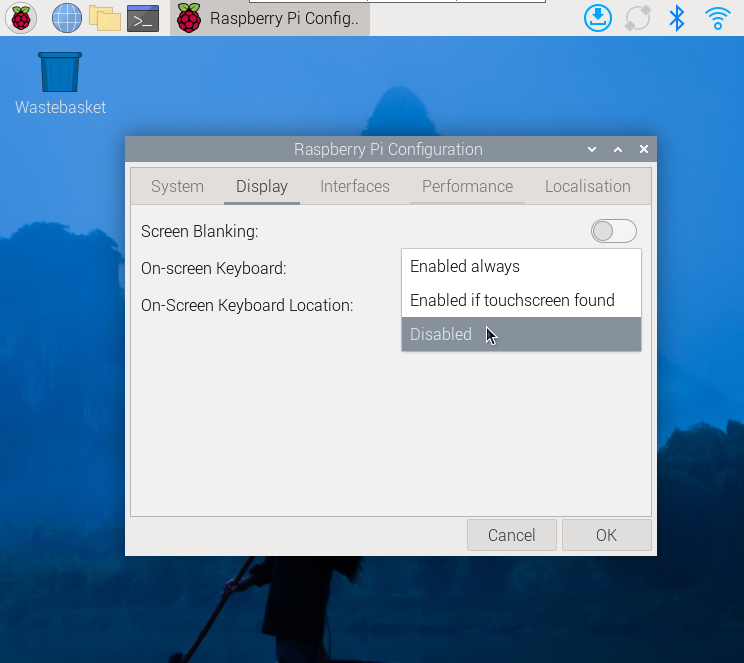
- Note:
For versions of Raspberry Pi OS before Bookworm, use matchbox-keyboard. If you are using the wayfire desktop compositor, use wvkbd.
Bookworm Touch Screen Rotation
- 1. Open the "Screen Configuration" application;
- 2. Go to "Screen"->"DSI-2"->"Touchscreen", check "11-005d Goodix Capacitive TouchScreen", and click "Apply" to complete the selection of the specified touchscreen;
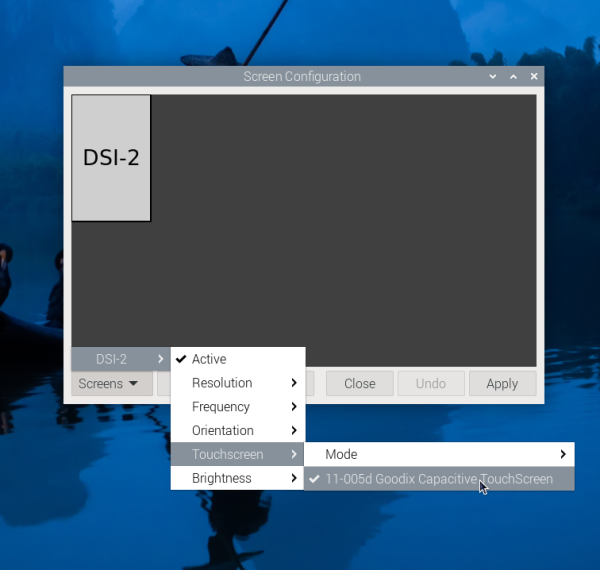
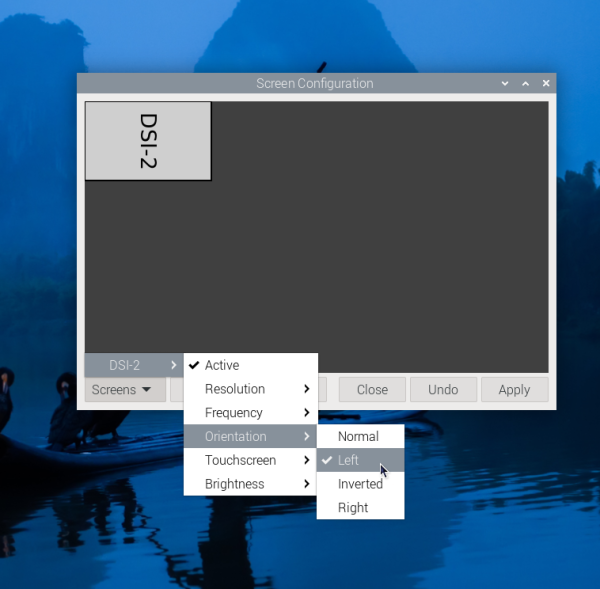
- 3. Go to "Screen"->"DSI-2"->"Orientation" , check the direction you need to rotate, and finally click "Apply" to complete the display and touch synchronous rotation.
Note: Only the Bookworm system supports the above synchronization rotation method. For Bullseye and Butser systems, after displaying rotation, touch rotation needs to be manually set separately.
lite Version Display Rotation
sudo nano /boot/firmware/cmdline.txt
#Add a command to display the rotation angle at the beginning of the cmdline.txt file, and save it to take effect after restarting
#Display rotation 90 degrees
video=DSI-1:720x1280@60,rotate=90
#Display rotation 180 degrees
video=DSI-1:720x1280@60,rotate=180
#Display rotation 270 degrees
video=DSI-1:720x1280@60,rotate=270
Touch Display 2 Device Tree Option Reference
The vc4-kms-dsi-ili9881-5inch overlay supports the following options:
| DT parameter | Action |
|---|---|
| sizex | Sets X resolution (default 1280) |
| sizey | Sets Y resolution (default 720) |
| invx | Invert X coordinates |
| invy | Invert Y coordinates |
| swapxy | Swap X and Y coordinates |
| disable_touch | Disables the touch overlay totally |
To specify these options, add them, separated by commas, to your dtoverlay line in /boot/firmware/config.txt.
For instance, to invert both X and Y coordinates, use the following line:
dtoverlay=vc4-kms-dsi-ili9881-5inch,invx,invy
Note: After adding a command, it needs to be restarted to take effect.
Safety Instructions
To avoid any malfunction or damage to this product, please follow the following instructions:
- Turn off your Raspberry Pi computer and disconnect the external power supply before connecting the device.
- If the cable falls off, pull the locking device on the connector forward, insert the ribbon cable with the metal contacts facing you, and push the locking device back into place.
- This device should be operated in a dry environment between 0-50℃.
- Do not expose the device to water or humid environments during operation, nor place it on conductive surfaces.
- Do not expose it to any overheated environment.
- Be careful not to fold or tighten the ribbon cable.
- Be careful when screwing in the parts. Misalignment of threads may cause irreparable damage and void the warranty.
- Please be careful during transportation to avoid mechanical or electrical damage to printed circuit boards and connectors.
- Store in a cool and dry place.
- Avoid sudden temperature changes, otherwise it may lead to the accumulation of moisture inside the device.
- The screen is fragile and may break.
Resources
FAQ
Question: How to replace Raspberry Pi boot logo image?
Replace the image in the directory (/usr/share/plymouth/themes/pix/splash.png) with your customized image
Support
Monday-Friday (9:30-6:30) Saturday (9:30-5:30)
Email: services01@spotpear.com