


- sales/support
Google Chat:---
- sales
+86-0755-88291180
- sales01
sales@spotpear.com
- sales02
dragon_manager@163.com
- support
tech-support@spotpear.com
- CEO-Complaints
zhoujie@spotpear.com
- Only Tech-Support
WhatsApp:13246739196
- Purchase/Shipping/Refund
WhatsApp:13424403025
GamePi13 User Guide
Introduction
- Offers Raspberry Pi series and RP2040-PiZero series tutorials.
- 1.3inch IPS screen with 240×240 resolution, good image quality, bright colors and wide viewing angle.
- It supports RetroPie game system and Recalbox game system, with thousands of classic games. As long as the TF card capacity is big enough, you can add your favorite games at will.
- On-board PWM audio output speaker and earphone Jack, convenient for listening to the familiar BGM.
Specifications
- Working voltage: 3.3V
- Communication interface: SPI
- Screen type: IPS
- Control chip: ST7789
- Resolution: 240(H)RGB x 240(V)
- Display size: 23.4 (H) x 23.4 (V) (mm)
- Pixel size: 0.0975 (H) x 0.0975 (V) (mm)
- Product size:65 x 31(mm)
Functional Pins
| Functional pins | Board physical pin serial number | BCM coding | Description |
|---|---|---|---|
| 5V | 2/4 | / | 5V power supply positive |
| 3.3V | 1 | / | 3.3V power supply positive |
| GND | 6/9/30/34 | / | Power supply ground |
| R | 8 | 14 | Key TR |
| L | 16 | 23 | Key TL |
| X | 10 | 15 | Key X |
| Y | 32 | 12 | Key Y |
| B | 38 | 20 | Key B |
| A | 40 | 21 | Key A |
| Up | 29 | 5 | Key Up |
| Left | 36 | 16 | Key Left |
| Down | 31 | 6 | Key Down |
| Right | 33 | 13 | Key Right |
| Select | 35 | 19 | Key Select |
| Start | 37 | 26 | Key Start |
| DC | 22 | 25 | LCD display data/command selection pin |
| SCLK | 23 | 11 | LCD SPI Clock |
| CS | 24 | 8 | LCD enable select pin; enabled low, disabled high |
| MOSI | 19 | 10 | LCD SPI data input |
| RST | 13 | 27 | LCD reset, enabled low |
| AUDIO | 12 | 18 | Audio output |
Raspberrypi Tutorial
Pre-installed Image
- For beginners, we provide a pre-installed image to help you get started with the module more quickly. After flashing the pre-installed image, simply insert the TF card into your Raspberry Pi, power it up, and you're ready to go.
- Official Systems:
- Retropie Systems:
Here are the specific configuration steps.
Official Systems
Bookworm system display configuration
Suitable for Rpi4 & Rpi5
Configure SPI Display:
After downloading the system, insert the TF card into your PC,download and copy waveshare13.dtbo to the /boot/overlays/ directory
Edit the config.txt configuration file:
- Disable KMS and dual-screen display, as shown in the figure below
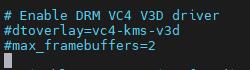
- Add the following configurations at the end of the file
dtparam=spi=on
dtoverlay=waveshare13
dtoverlay=audremap18
hdmi_force_hotplug=1
max_usb_current=1
hdmi_group=2
hdmi_mode=87
hdmi_cvt 480 480 60 6 0 0 0
hdmi_drive=2
display_hdmi_rotate=0
If you need to use it with a prism, you can change the "display_hdmi_rotate=0" at the end to "display_hdmi_rotate=0x10002", for details see #Parameter introduction
Set up CLI for automatic login:
sudo raspi-config nonint do_boot_behaviour B2
Note1:Ensure that the Raspberry Pi username is "pi"; otherwise, automatic login will not function properly
Switch to X11:
sudo raspi-config nonint do_wayland W1
sudo reboot
Note2:After setting all the above configurations, the system will take a bit longer to restart each time, and you will also need to wait a moment before you can access it via SSH
Download, compile, and install fbcp:
sudo apt install libraspberrypi-dev -y
sudo apt-get install unzip -y
sudo apt-get install cmake -y
sudo wget https://files.waveshare.com/wiki/GamePi13/Doc/Rpi-fbcp.zip
sudo unzip ./Rpi-fbcp.zip
cd rpi-fbcp/
sudo rm -rf build
sudo mkdir -m 777 ./build
cd build
sudo cmake ..
sudo make
sudo install fbcp /usr/local/bin/fbcp
Set up automatic startup at boot:
- Open the .bash_profile file; if there is no .bash_profile file, create one yourself
sudo nano ~/.bash_profile
- Add the following code to the bottom of the .bash_profile file
if [ "$(cat /proc/device-tree/model | cut -d ' ' -f 3)" = "5" ]; then
    # rpi 5B configuration
    export FRAMEBUFFER=/dev/fb1
    startx  2> /tmp/xorg_errors
else
    # Non-pi5 configuration
    export FRAMEBUFFER=/dev/fb0
    fbcp &
    startx  2> /tmp/xorg_errors
Fi
The above configuration will take effect after a reboot
sudo reboot
Suitable for all Raspberry Pi models
Operation must be based on the Bookworm-Lite version, 64-bit Lite, 32-bit Lite
Configure SPI Display:
After downloading the system, insert the TF card into your PC,download and copy waveshare13.dtbo to the /boot/overlays/ directory
Edit the config.txt configuration file:
- Disable the corresponding command for the figure below

- Add the following configurations at the end of the file
dtparam=spi=on
dtoverlay=waveshare13
dtoverlay=audremap18
hdmi_force_hotplug=1
max_usb_current=1
hdmi_group=2
hdmi_mode=87
hdmi_cvt 480 480 60 6 0 0 0
hdmi_drive=2
display_hdmi_rotate=0
arm_freq=1200
core_freq=500
over_voltage=2
gpu_freq=700
force_turbo=1
If you need to use it with a prism, you can change the "display_hdmi_rotate=0" at the end to "display_hdmi_rotate=0x10002", for details see #Parameter introduction
Download necessary software:
- Update the system
sudo apt update && sudo apt upgrade && sudo apt full-upgrade -y
- Install xorg services
sudo apt-get install --no-install-recommends xserver-xorg -y
sudo apt-get install --no-install-recommends xinit -y
- Install desktop manager
sudo apt install lightdm -y
- Install Raspberry Pi official GUI
sudo apt install raspberrypi-ui-mods -y
- Install browser (optional)
sudo apt install chromium-browser -y
- Install music player (optional)
sudo apt install vlc -y
- Install git (optional)
sudo apt install git -y
Download, compile and install fbcp:
Open the Raspberry Pi terminal and execute:
sudo apt install libraspberrypi-dev -y
sudo apt-get install unzip -y
sudo apt-get install cmake -y
sudo wget https://files.waveshare.com/wiki/GamePi13/Doc/Rpi-fbcp.zip
sudo unzip ./Rpi-fbcp.zip
cd rpi-fbcp/
sudo rm -rf build
sudo mkdir -m 777 ./build
cd build
sudo cmake ..
sudo make
sudo install fbcp /usr/local/bin/fbcp
Set up automatic startup at boot:
- Open the .bash_profile file; if there is no .bash_profile file, create one yourself
sudo nano ~/.bash_profile
Add the following code to the bottom of the .bash_profile file
if [ "$(cat /proc/device-tree/model | cut -d ' ' -f 3)" = "5" ]; then
    # rpi 5B configuration
    export FRAMEBUFFER=/dev/fb1
    startx  2> /tmp/xorg_errors
else
    # Non-pi5 configuration
    export FRAMEBUFFER=/dev/fb0
    fbcp &
    startx  2> /tmp/xorg_errors
fi
The above configuration will take effect after a reboot
sudo reboot
Set up CLI for automatic login:
sudo raspi-config nonint do_boot_behaviour B2
sudo raspi-config nonint do_wayland W1
sudo reboot
After the restart, the main screen will display normally.
Note1: Ensure that the Raspberry Pi username is "pi"; Otherwise, automatic login will not function properly
Note2:After setting all the above configurations, the system will take a bit longer to restart each time, and you will also need to wait a moment before you can access it via SSH
Bullseye/Buster system display configuration
Configure SPI Display:
Download and copy waveshare13.dtbo to the /boot/overlays/ directory
sudo cp waveshare13.dtbo /boot/overlays/
Edit the config.txt file:
Comment out the corresponding lines as shown in the figure below
Add the following code at the end of config.txt
dtparam=spi=on
dtoverlay=waveshare13
dtoverlay=audremap18
hdmi_force_hotplug=1
max_usb_current=1
hdmi_group=2
hdmi_mode=87
hdmi_cvt 480 480 60 6 0 0 0
hdmi_drive=2
display_hdmi_rotate=0
#arm_freq=1200
#core_freq=500
#over_voltage=2
#gpu_freq=700
#force_turbo=1
If you need to use it with a prism, you can change the "display_hdmi_rotate=0" at the end to "display_hdmi_rotate=0x10002", for details see #Parameter introduction
Download and run the driver:
Open the Raspberry Pi terminal and execute:
sudo apt-get install unzip -y
sudo apt-get install cmake -y
sudo wget https://files.waveshare.com/wiki/GamePi13/Doc/Rpi-fbcp.zip
sudo unzip ./Rpi-fbcp.zip
cd rpi-fbcp/
sudo mkdir -m 777 ./build
cd build
sudo cmake ..
sudo make -j8
sudo install fbcp /usr/local/bin/fbcp
sudo ./fbcp
Set up automatic startup at boot:
sudo cp ~/rpi-fbcp/build/fbcp /usr/local/bin/fbcp
sudo nano /etc/rc.local
Add fbcp& before exit 0. Be sure to add & to run it in the background; otherwise, the system may not start up properly.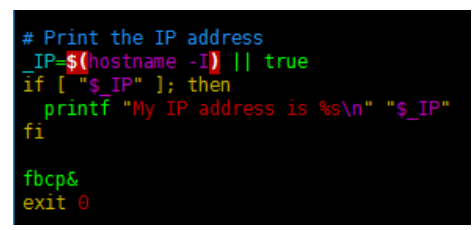
After that, you need to restart the system
sudo reboot
Then, the display should work normally
Audio configuration
1.Download and copy audremap18.dtbo to the /boot/overlays/ directory
sudo cp audremap18.dtbo /boot/overlays/
2.Edit the config.txt configuration file
- Add the following configuration at the end of the file
dtoverlay=audremap18
3.Switch audio output
sudo raspi-config
Select System Options --> Audio --> Headphones -->Ok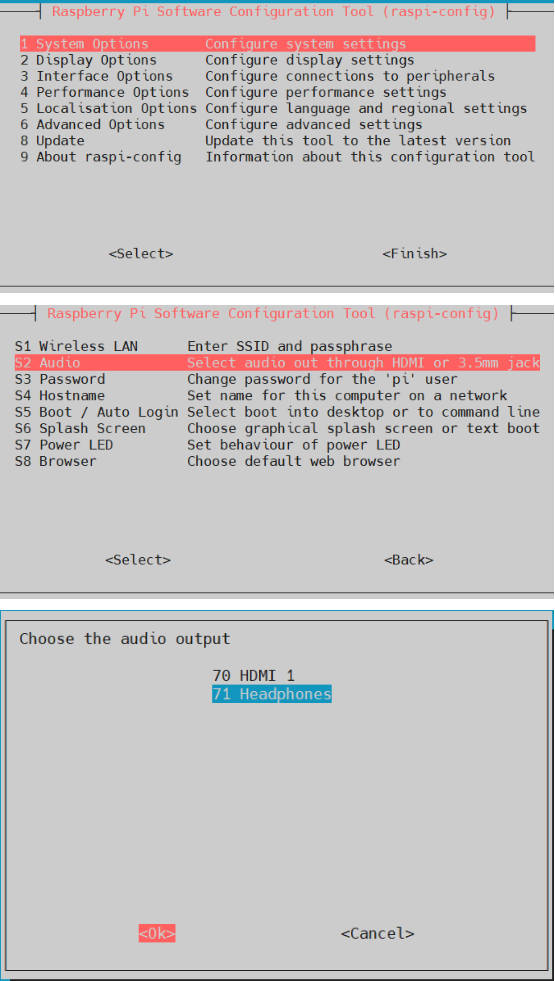
4.Restart to apply changes
sudo reboot
5.Audio output test
- Method one: Test in the command line CLI;
vlc xxx.mp3
If vlc is not installed, then
sudo apt-get install vlc
- Method two: Test in the graphical user interface GUI;
Double-click the xxx.mp3 file to open with vlc by default. If vlc is not installed, you will need to install it
sudo apt-get install vlc
Button configuration
Run the button press test Demo
 sudo wget https://files.waveshare.com/wiki/GamePi13/Doc/Button_press_detector.zip
 sudo unzip ./Button_press_detector.zip
 sudo python3 ~/Desktop/button_press_detector.py
Retropie System
Note: This system is not supported on Pi5.
Method one: Use the pre-installed driver image (recommended)
For use with Raspberry Pi Zero/Zero 2W, it is recommended to directly use the #Pre-installed image
Method two: Install the driver
Download the system
1. Connect the TF card to the PC, download, and use Raspberry Pi Imager to flash the corresponding system image.
2. After the image is written, open the config.txt file in the root directory of the TF card, add the following code at the end of config.txt, save it, and safely eject the TF card.
hdmi_force_hotplug=1
3. After the writing is complete, connect the HDMI monitor to the Raspberry Pi, power up the Raspberry Pi, and enter the system. Then press F4 on the keyboard to enter the terminal. (Alternatively, you can log in to the terminal control interface over the network)
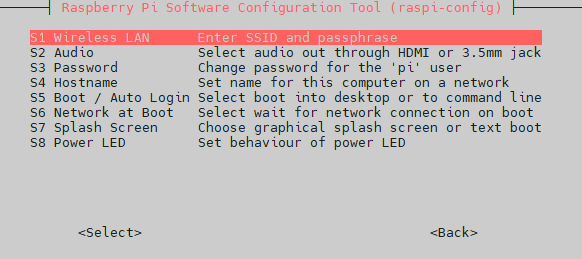
Configure WIFI
Enter the terminal and type raspi-config to open the system configuration interface, select System Options -> Wireless LAN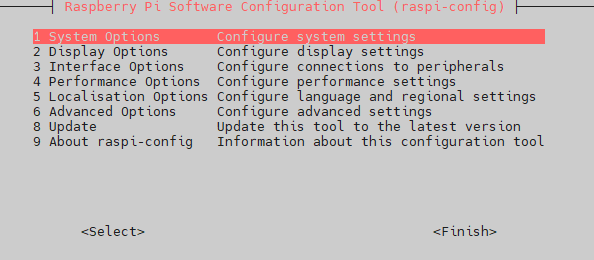
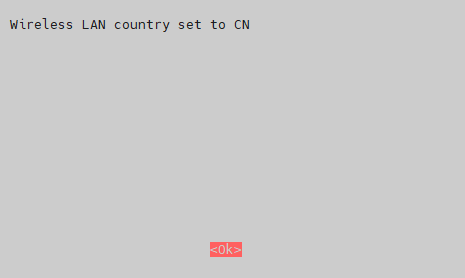
Select the country, here I chose CN China.
Enter the Wi-Fi network name.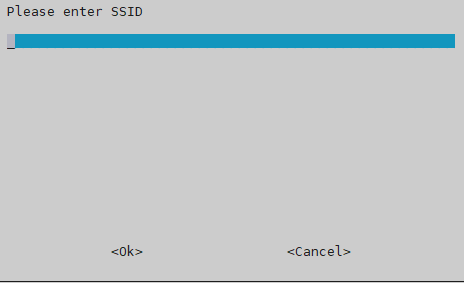
Enter the Wi-Fi password and reboot to save the changes.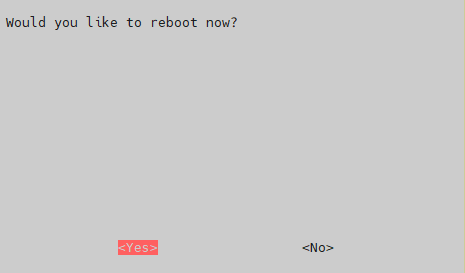
Run the fbcp porting program
cd ~
wget https://files.waveshare.com/wiki/GamePi13/Doc/Gamepi13_fbcp.zip
unzip Gamepi13_fbcp.zip
cd Gamepi13_fbcp/build
sudo chmod +x *
sudo ./fbcp-ili9341
Wait for a few seconds, and the 1.3 inch screen should display normally
Set the user interface size
Change the LCD display resolution
sudo nano /boot/config.txt
Add the following code
hdmi_force_hotplug=1
hdmi_group=2
hdmi_mode=1
hdmi_mode=87
hdmi_cvt 480 480 60 6 0 0 0
#display_rotate=0
avoid_warnings=1
Reboot to save the changes
sudo reboot
If you need to use it with a prism, you can change "display_rotate=0" to "display_rotate=0x10002", for details see #Parameter introduction
Set up automatic startup at boot
sudo nano /etc/rc.local
Add the following line before exit 0. Be sure to add "&" to run it in the background; otherwise, the system may not start up properly.
sudo /home/pi/fbcp-ili9341/build/fbcp-ili9341 &
Configure the joystick
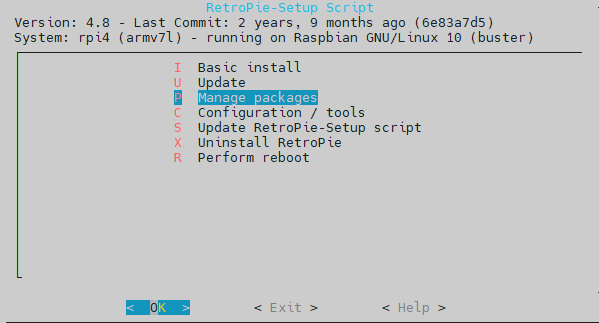
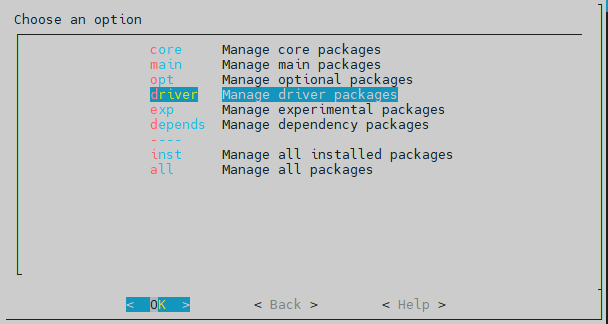
- Open the Raspberry Pi terminal and enter the following command to access the configuration interface
cd RetroPie-Setup/
sudo ./retropie_setup.sh
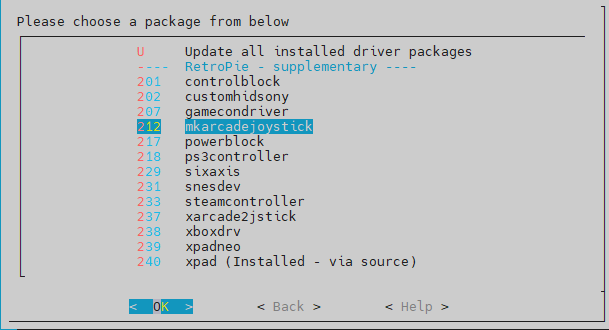
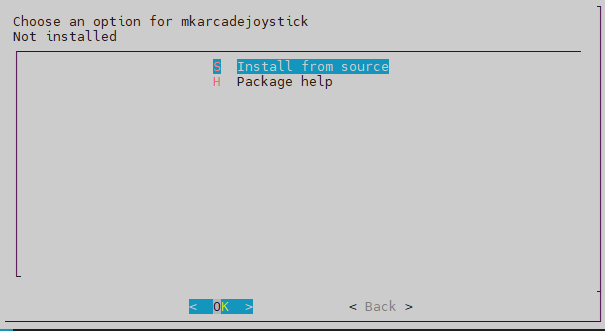
- After installing the driver, edit the mk_arcade_joystick_rpi.conf file
sudo nano /etc/modprobe.d/mk_arcade_joystick_rpi.conf
Comment out the existing lines and add the following joystick configuration to this file
options mk_arcade_joystick_rpi map=5 gpio=5,6,16,13,26,19,21,20,15,12,14,23

After restarting to remap your buttons, the Gamepad will work
Audio Configuration Tutorial
- Download audremap18.dtbo to your pi
wget https://files.waveshare.com/wiki/GamePi13/Doc/Audremap18.dtbo
sudo cp Audremap18.dtbo /boot/overlays/
- Edit config.txt
sudo nano /boot/config.txt
Add the following code at the end to enable gpio18 as a PWM audio pin
dtoverlay=audremap18,pins_18_19
- After restarting, you need to add local audio
Enter sudo raspi-config and select System Options -> Audio -> Headphones
- Go to the Retropie menu
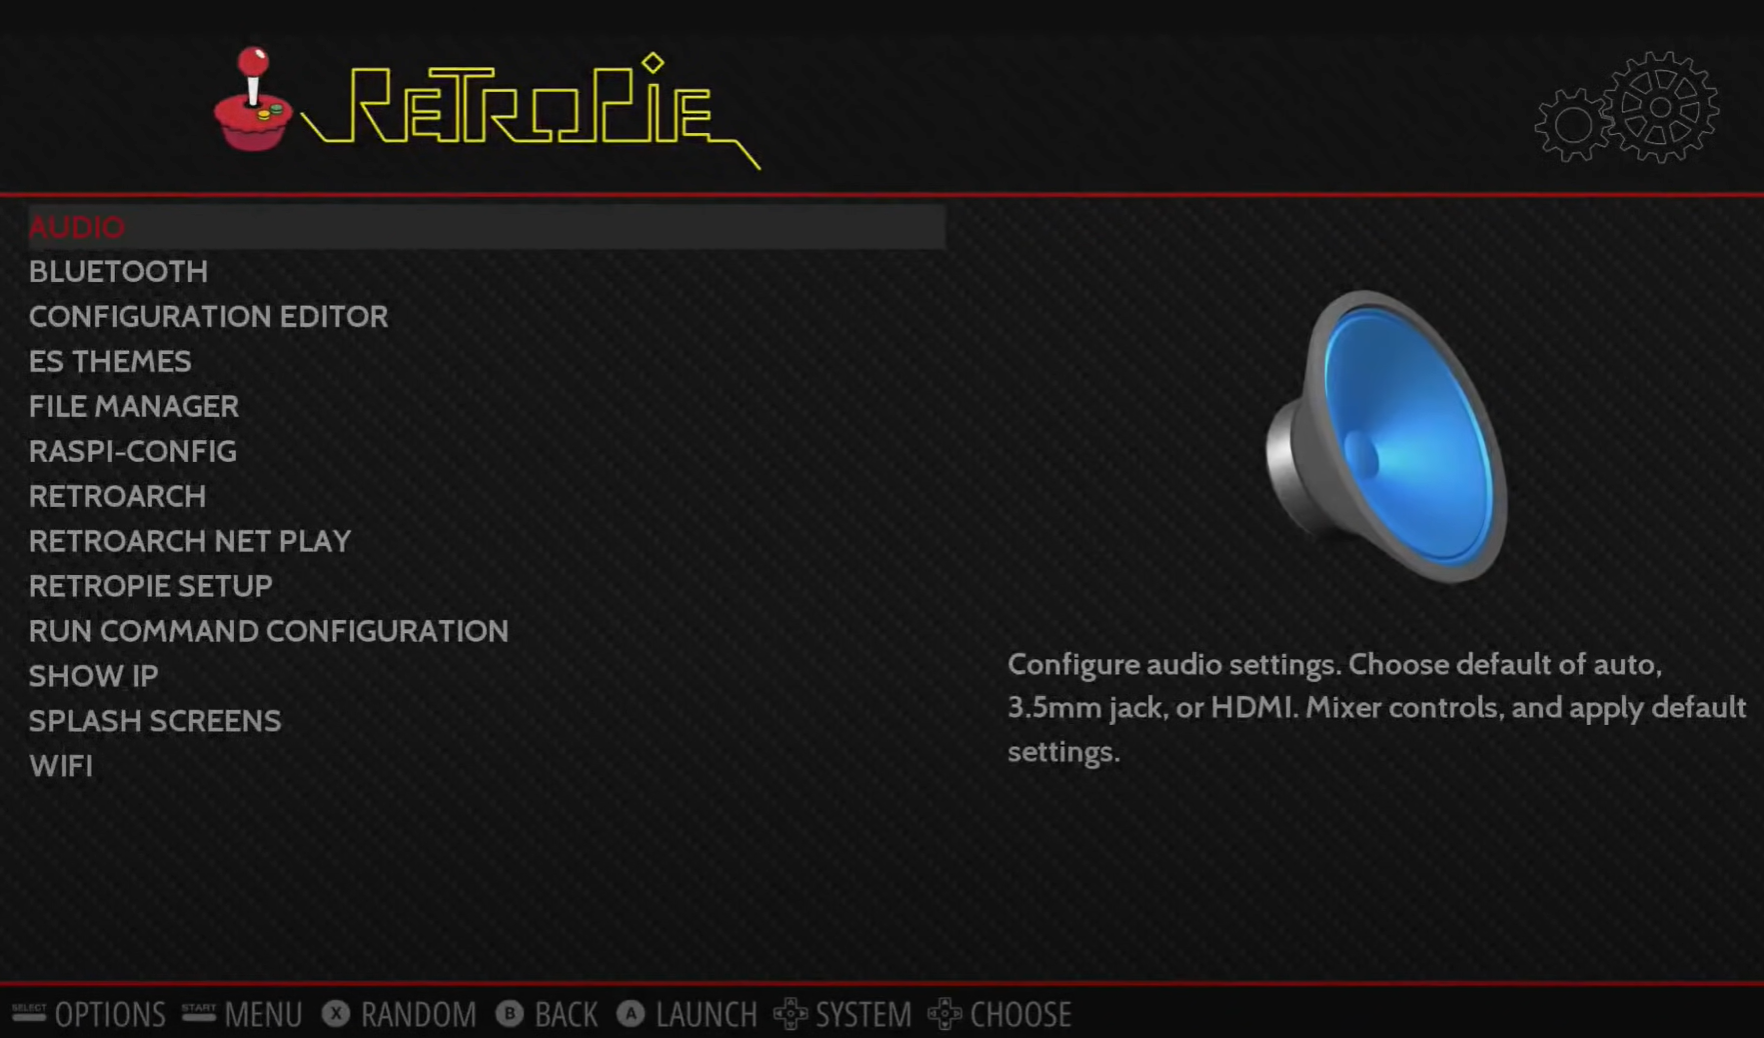
Select->Audio->Headphones,and reboot to save the audio function, which will then work properly.
Add games
- Since most games have large file sizes, we first need to expand the file system before adding games.
In the Retropie menu interface select RASPI-CONFIG 
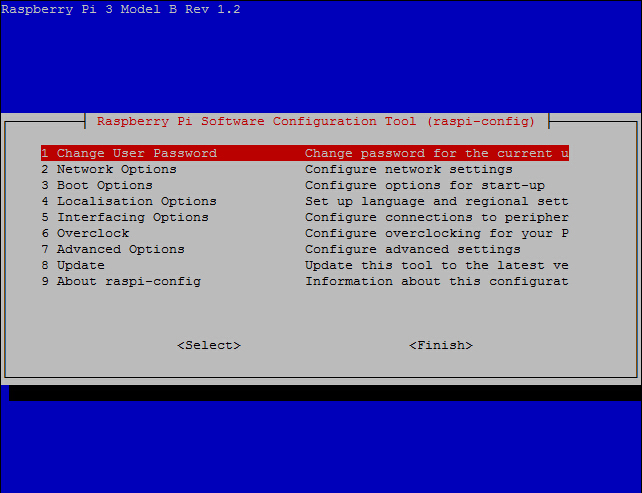
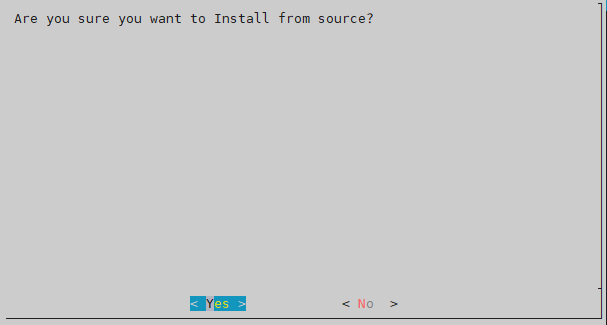
Select 7 Advanced Options -> A1 Expand Filesystem, press Enter -> Finish. (This process requires a USB keyboard to operate)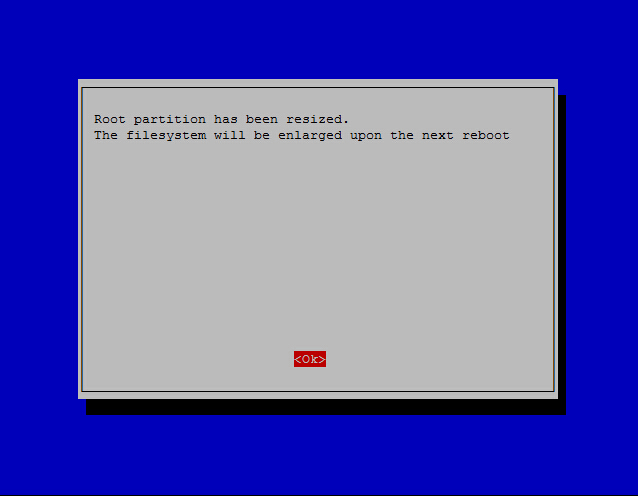
Select Ok to restart the system. After the restart, the file system expansion will be complete.
- Prepare the corresponding game ROMs.
I recommend a very cool website: http://coolrom.com/
You can download various game ROMs on your PC. For example, if you want to play Sony Playstation games, you can choose to download them from this site.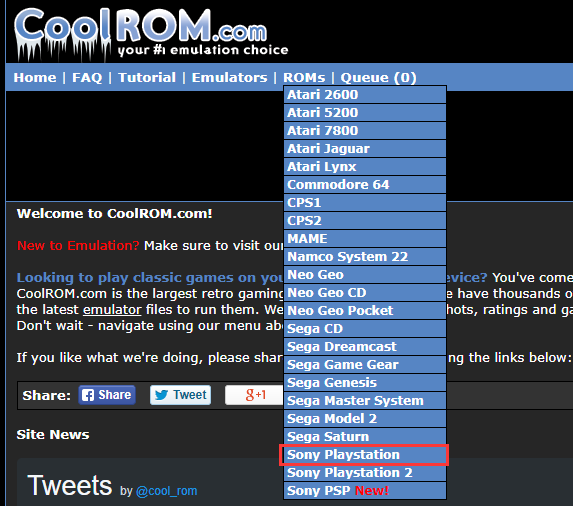
For example: http://coolrom.com/roms/psx/39719/Tekken_3.php
Click here to download.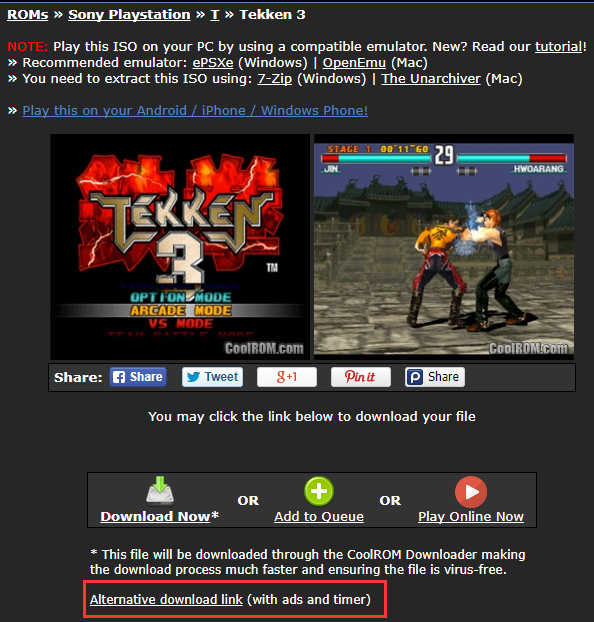
Unzip the downloaded files to obtain the following ROMs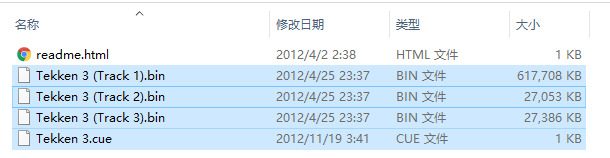
- Update ROMs
Connect an Ethernet cable to the Raspberry Pi (the Raspberry Pi needs to be on the same local network as your PC). Find SHOW IP under the RetroPie menu and press "A" to view the current Raspberry Pi's IP address. See the figure below: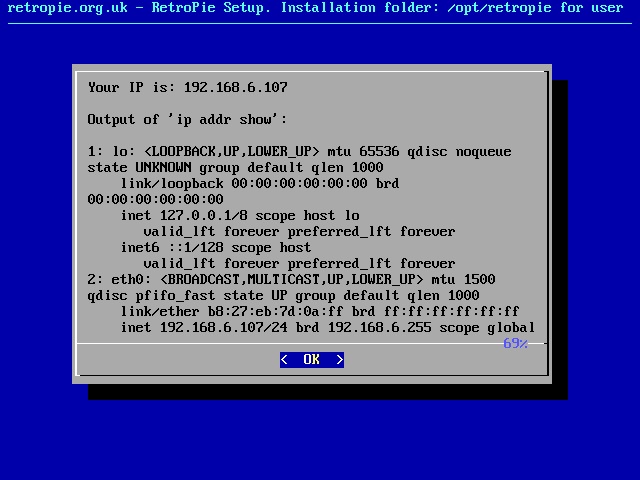
On your PC, open the corresponding IP address in a web browser. See the figure below:
Simply copy the ROMs to the relevant directory. See the figure below: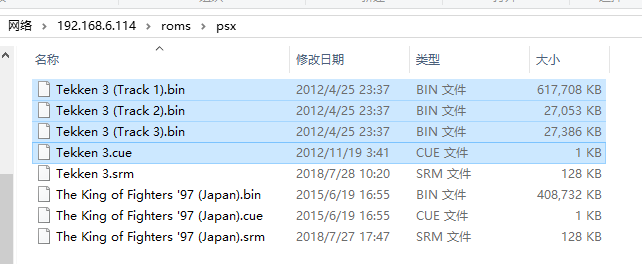
After that, in the emulator selection interface, press "Start"->QUIT->RESTART EMULATIONSTATION,and press "A" to confirm. After restarting the emulator, you will see the newly added games.
So, embark on your retro gaming journey!
Parameter introduction
By setting the display_hdmi_rotate parameter in the config.txt file, you can adjust the orientation of the HDMI display, including rotation and flipping.
Here is a detailed explanation of the parameters:
| display_hdmi_rotate | result |
|---|---|
| 0 | no rotation (default direction) |
| 1 | rotate 90 degrees clockwise |
| 2 | rotate 180 degrees clockwise |
| 3 | rotate 270 degrees clockwise |
| 0x10000 | horizontal flip |
| 0x20000 | vertical flip |
- You can also combine settings to achieve more complex effects. For example:
180-degree rotation + horizontal and vertical flip= 0x20000 + 0x10000 + 2 = 0x30002
- If you set display_hdmi_rotate=1(90 degrees) or display_hdmi_rotate=3 (270 degrees), the system will use additional GPU memory to complete the image rotation.
For devices with GPU memory set to 16MB, these options may not work properly. You can modify the gpu_mem parameter in the config.txt file to increase the GPU memory allocation.
gpu_mem=64
RP2040-PiZero Tutorial
Running Demo
Install Thonny IDE
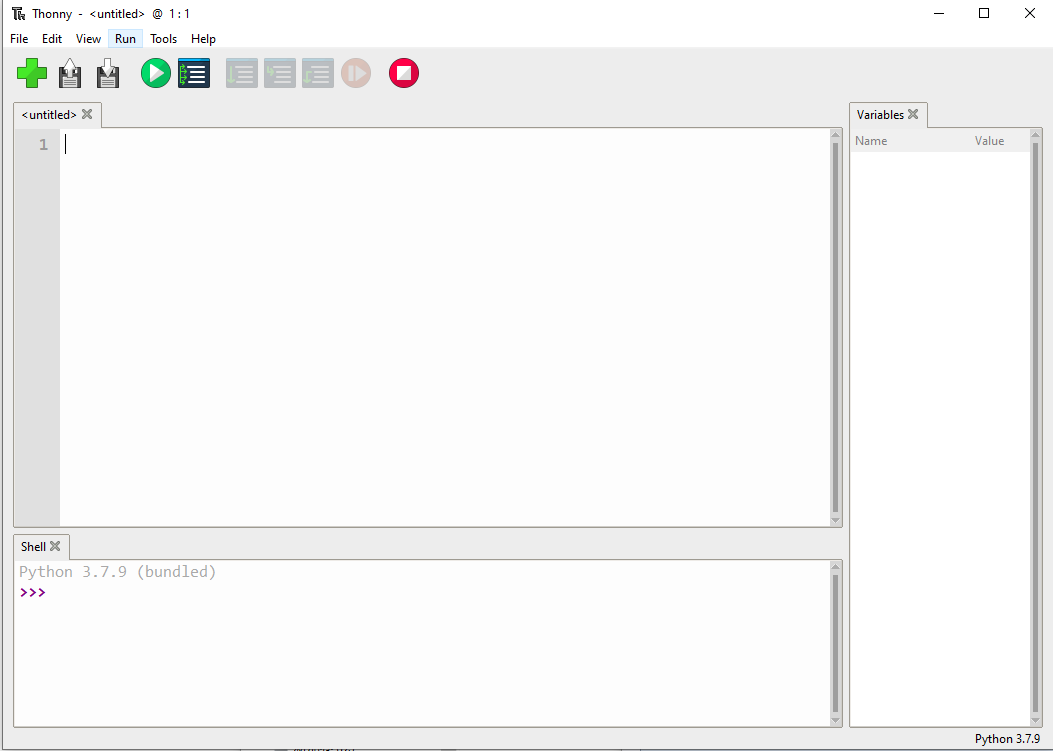
To facilitate the development of RP2040-PiZero boards using MicroPython on your computer, it is recommended to download Thonny IDE.
- Download Thonny IDE and install it according to the steps provided. The installation packages are for Windows versions; for other versions, please refer to thonny.org.
- After installation, you need to configure the language and board environment for the first time. Since we are using RP2040-PiZero, pay attention to selecting the Raspberry Pi option for the board environment
MicroPython
1.Download and unzip the MicroPython firmware in .uf2 format.
2.Hold the BOOT button, connect the device to your computer, then release the BOOT button. A removable disk will appear on your computer. Copy the firmware onto it.
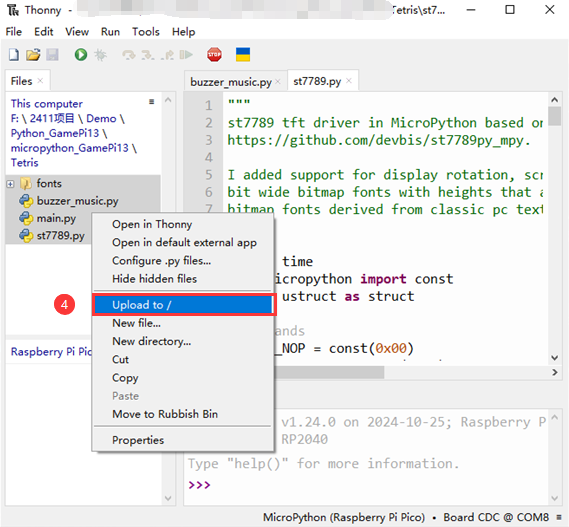
3.Download and unzip the sample program, then upload the code to the Raspberry Pi Pico. Here are the steps.(using the Tetris game as an example)
- In the view, check the files and select the corresponding file path in the left toolbar
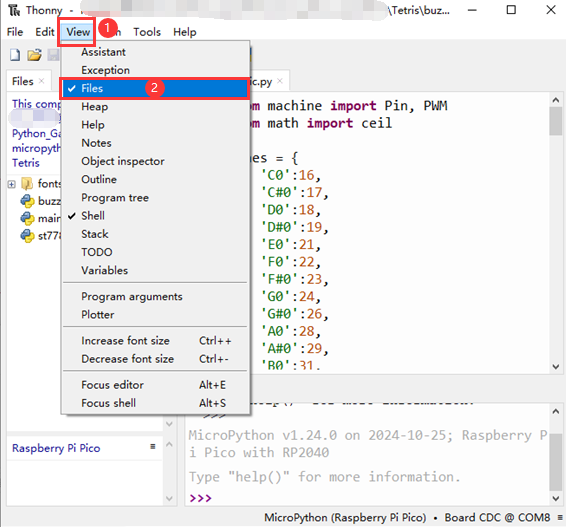
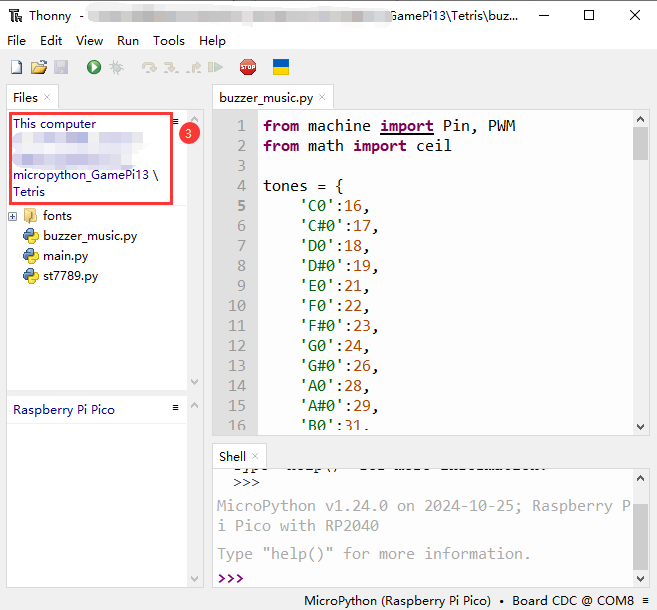
- Select all files and right-click to upload
4.After the upload is successful, unplug the USB, insert the GamePi13 into the RP2040-PiZero, and power it on again to automatically run the game program.
CircuitPython
1.Download and unzip the CircuitPython firmware in .uf2 format.
2.Hold the BOOT button, connect the device to your computer, then release the BOOT button. A removable disk will appear on your computer. Copy the firmware onto it, and wait for a few seconds for another disk to appear.
3.Delete all files in the newly generated removable disk, download and unzip the sample program , and copy all files from the "flappybird-CODE" folder of the sample program into the disk, as shown in the figure below.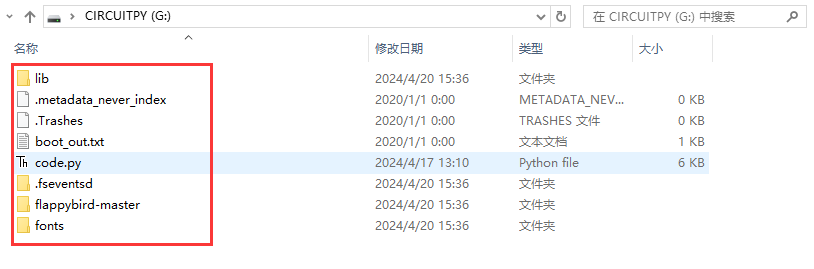
4.After the copy is successful, unplug the USB, insert the GamePi13 into the RP2040-PiZero, and power it on again to automatically run the game program.
C/C++ Series
Environment Setup
For C/C++, it is recommended to use the Pico VS Code extension, which is a Microsoft Visual Studio Code extension designed to make it easier for you to create, develop, and debug projects for the Raspberry Pi Pico series of development boards. Whether you are a beginner or an experienced professional, this tool can help you develop Pico with confidence and ease. Below, we will introduce how to install this extension and use it.
- Official tutorial:https://www.raspberrypi.com/news/pico-vscode-extension/
- This tutorial is suitable for Raspberry Pi Pico, Pico2, and the RP2040, RP2350 series development boards developed by our company
- The development environment is by default based on Windows, for other environments please refer to the official tutorial for installation
Install VSCode
1.First, click to download the pico-vscode package, unzip it, open the package, and double-click to install VSCode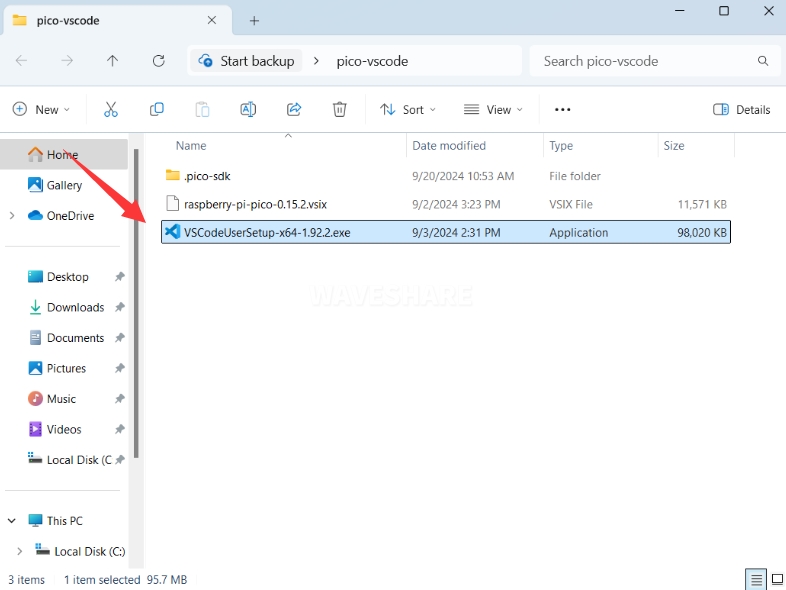
Note: If you have already installed VSCode, make sure the version is 1.87.0 or higher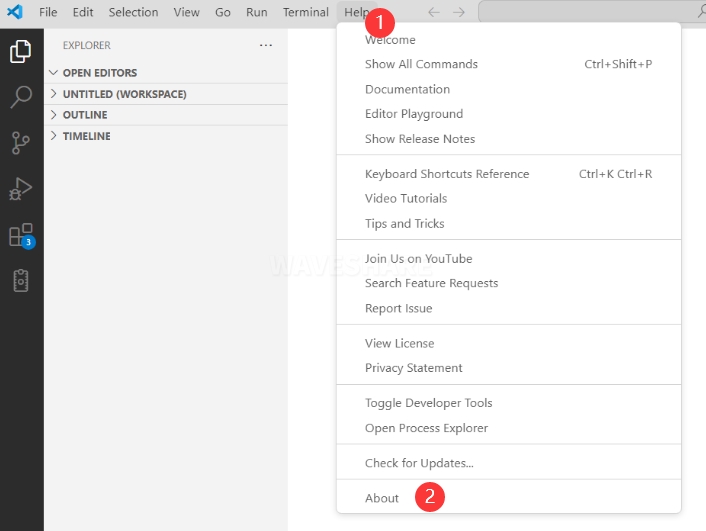

Install the extension
1.Click on Extensions, and choose to install from VSIX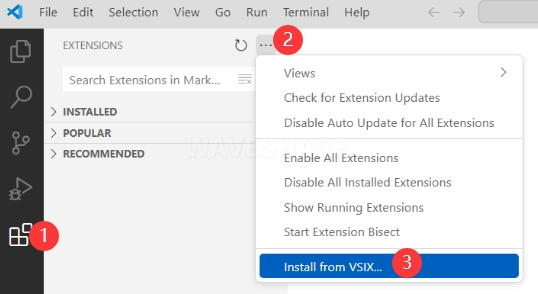
2.Select the software package with the vsix suffix and click to install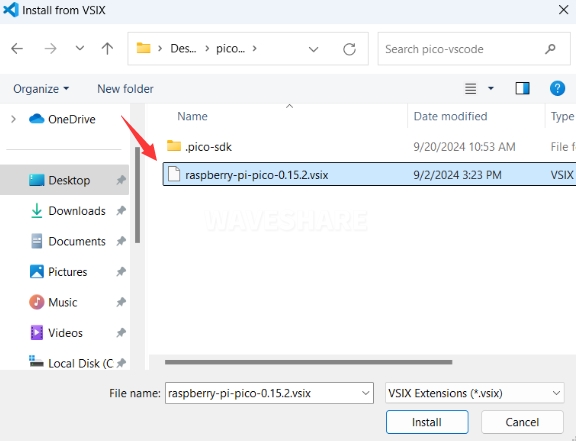
3.Then VSCode will automatically install the raspberry-pi-pico and its dependent extensions. You can click to refresh to view the installation progress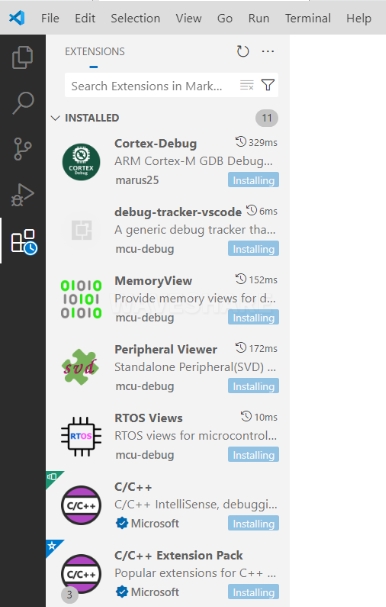
4.Once the installation is complete, as indicated in the bottom right corner, close VSCode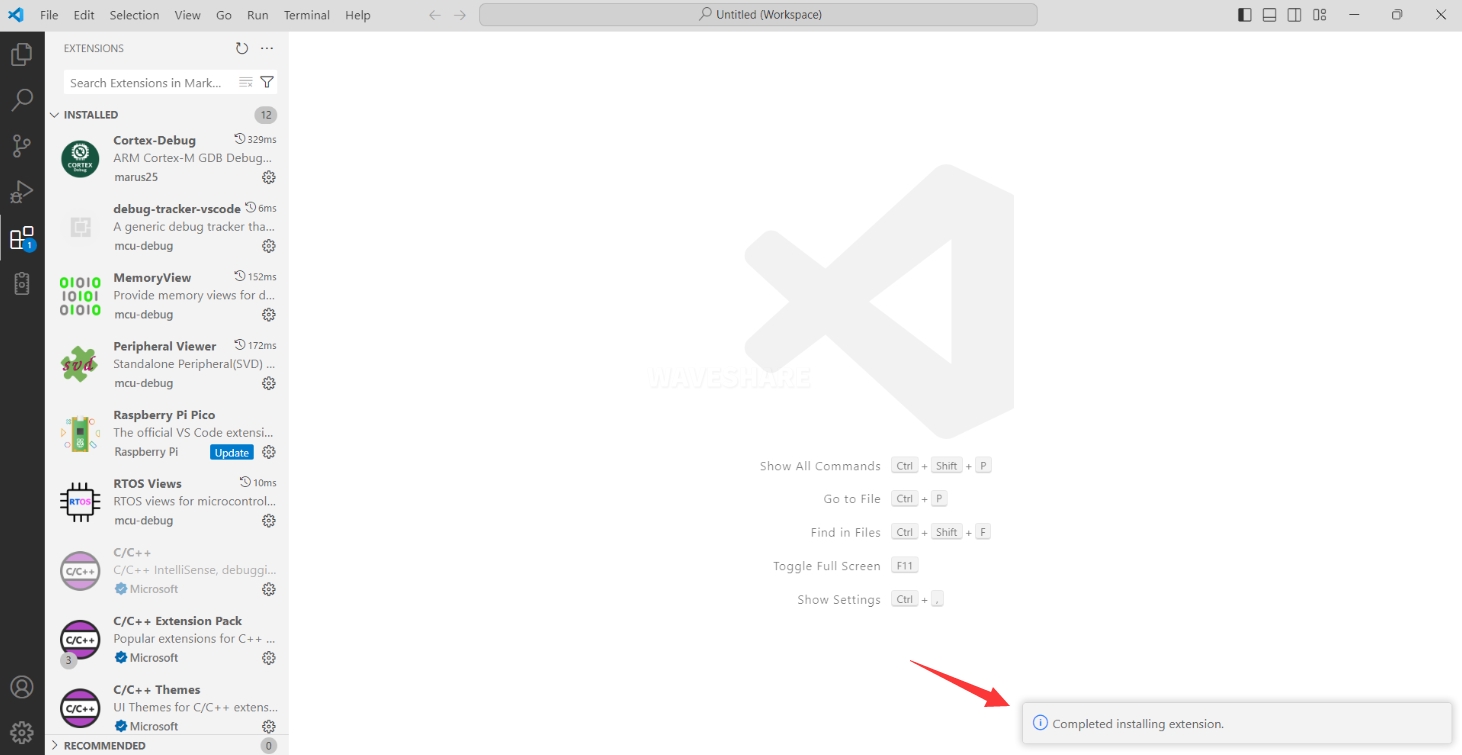
Configure the extension
1.Open the directory C:\Users\Username, and copy the entire .pico-sdk to this directory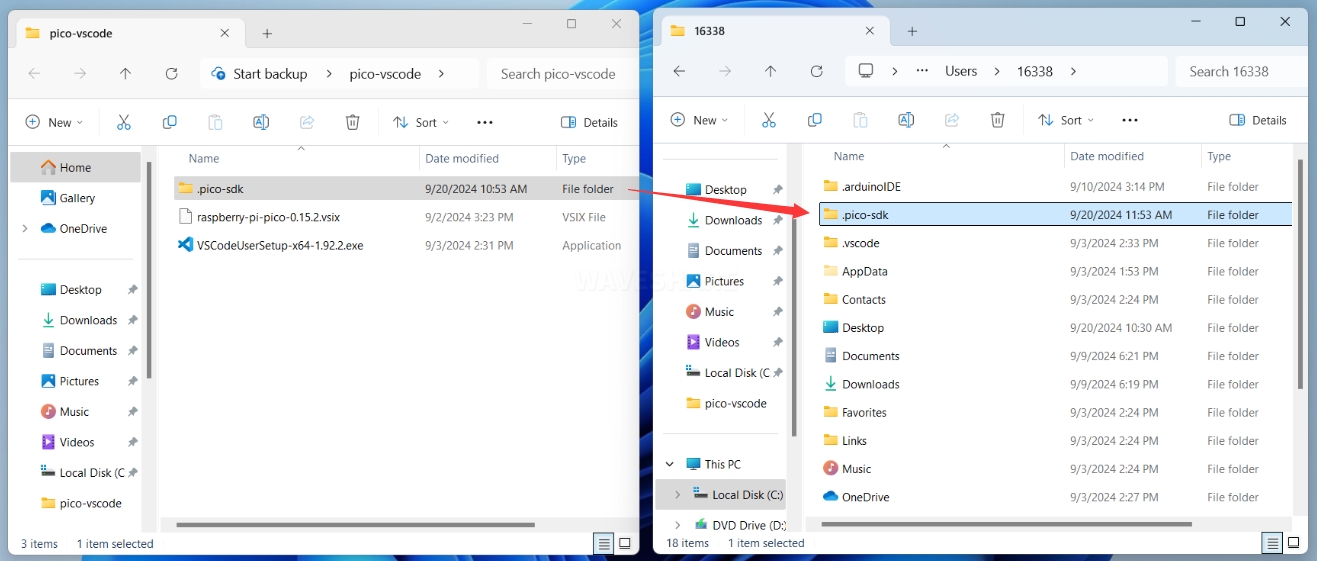
2.Copying is complete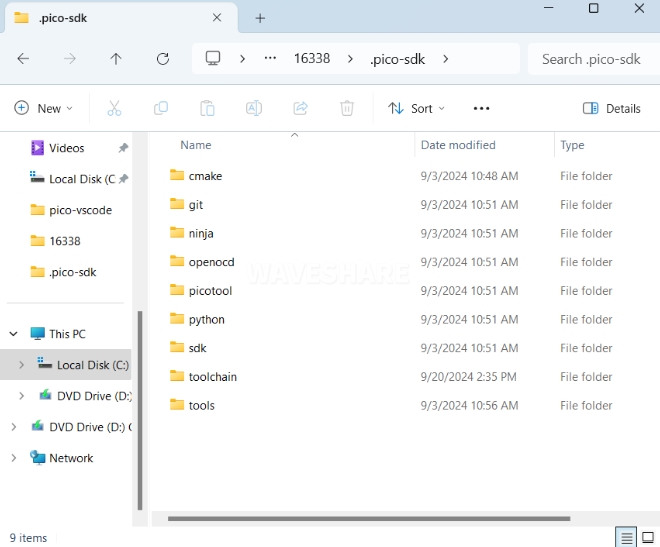
3.Open VSCode and configure the paths for the Raspberry Pi Pico extension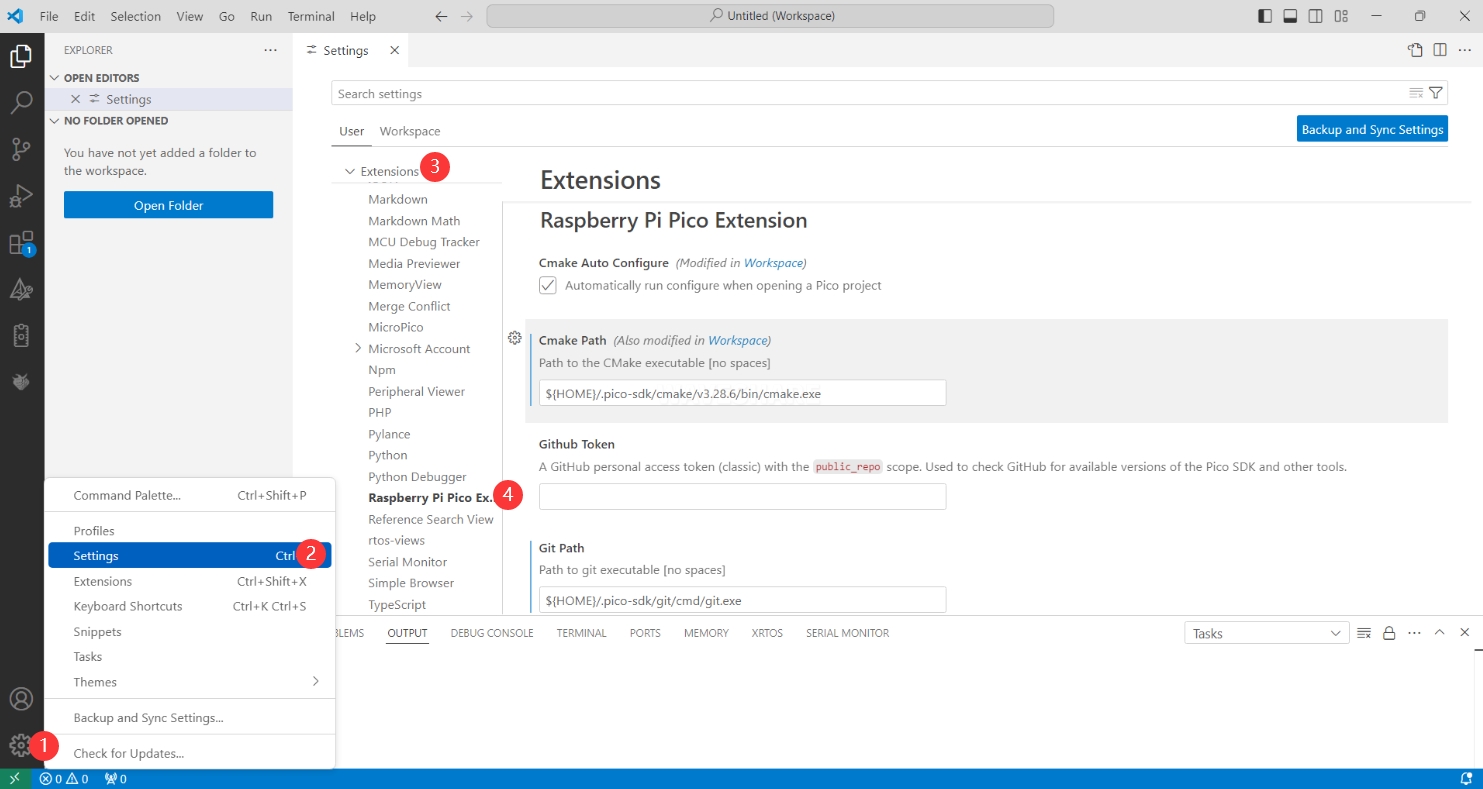
Configurations are as follows:
Cmake Path:
${HOME}/.pico-sdk/cmake/v3.28.6/bin/cmake.exe

Git Path:
${HOME}/.pico-sdk/git/cmd/git.exe

Ninja Path:
${HOME}/.pico-sdk/ninja/v1.12.1/ninja.exe

Python3 Path:
${HOME}/.pico-sdk/python/3.12.1/python.exe
Create a new project
1.After configuration, test by creating a new project. Enter the project name and select the path, then click Create to create the project
Test the official examples by clicking on the Example next to the project name to select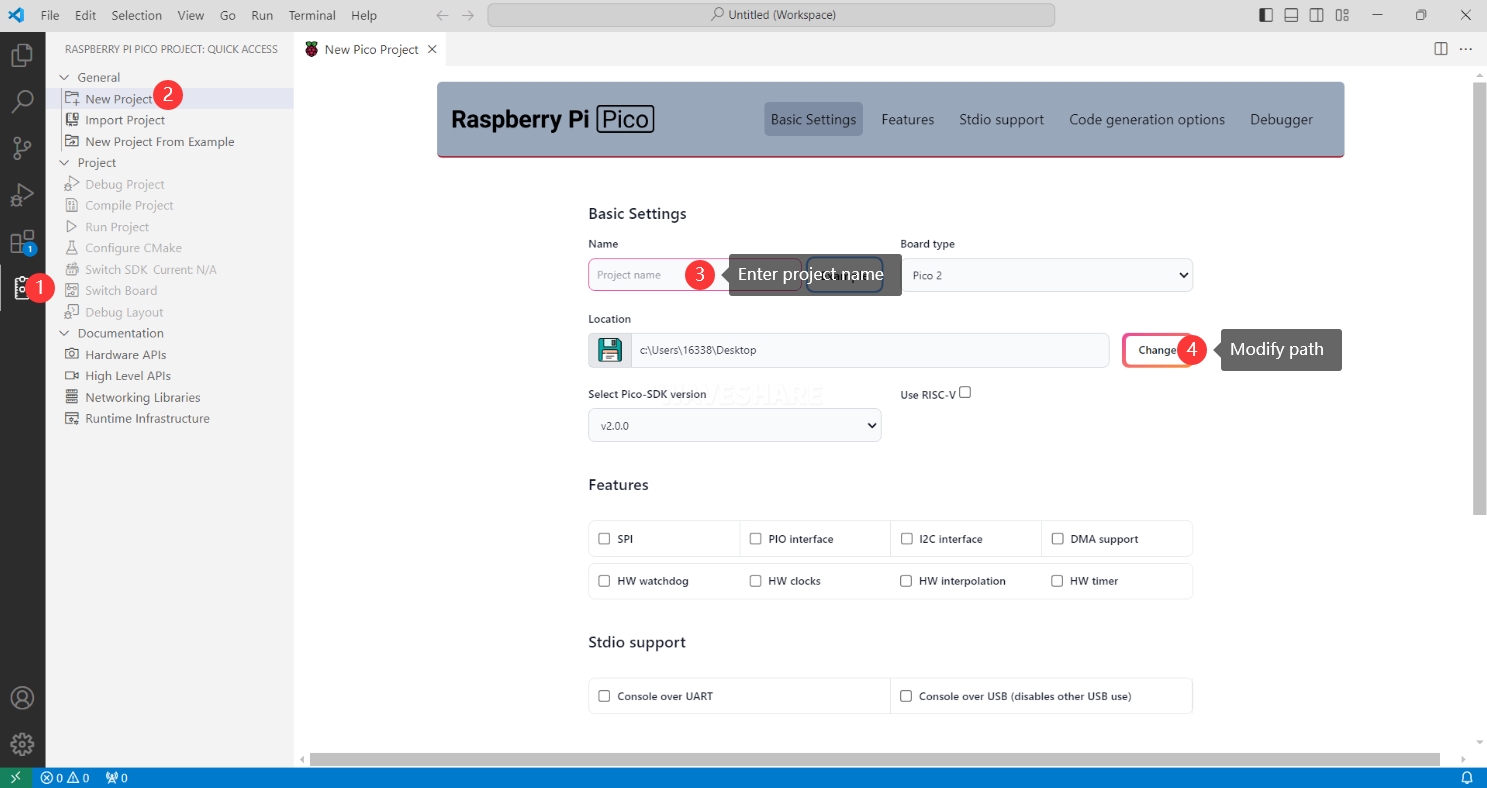
2.Once the project is created successfully, you can proceed to the next steps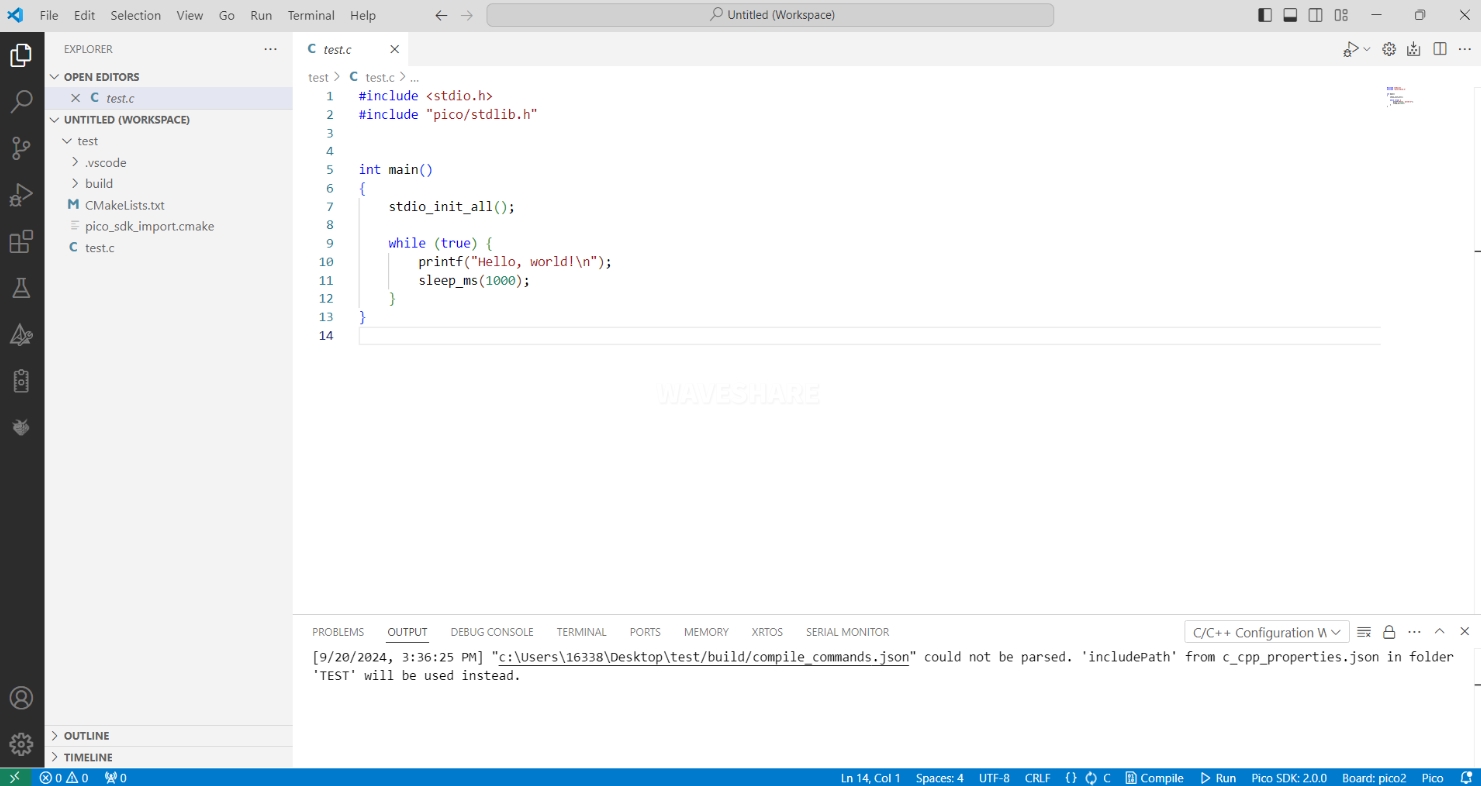
3.Select SDK Version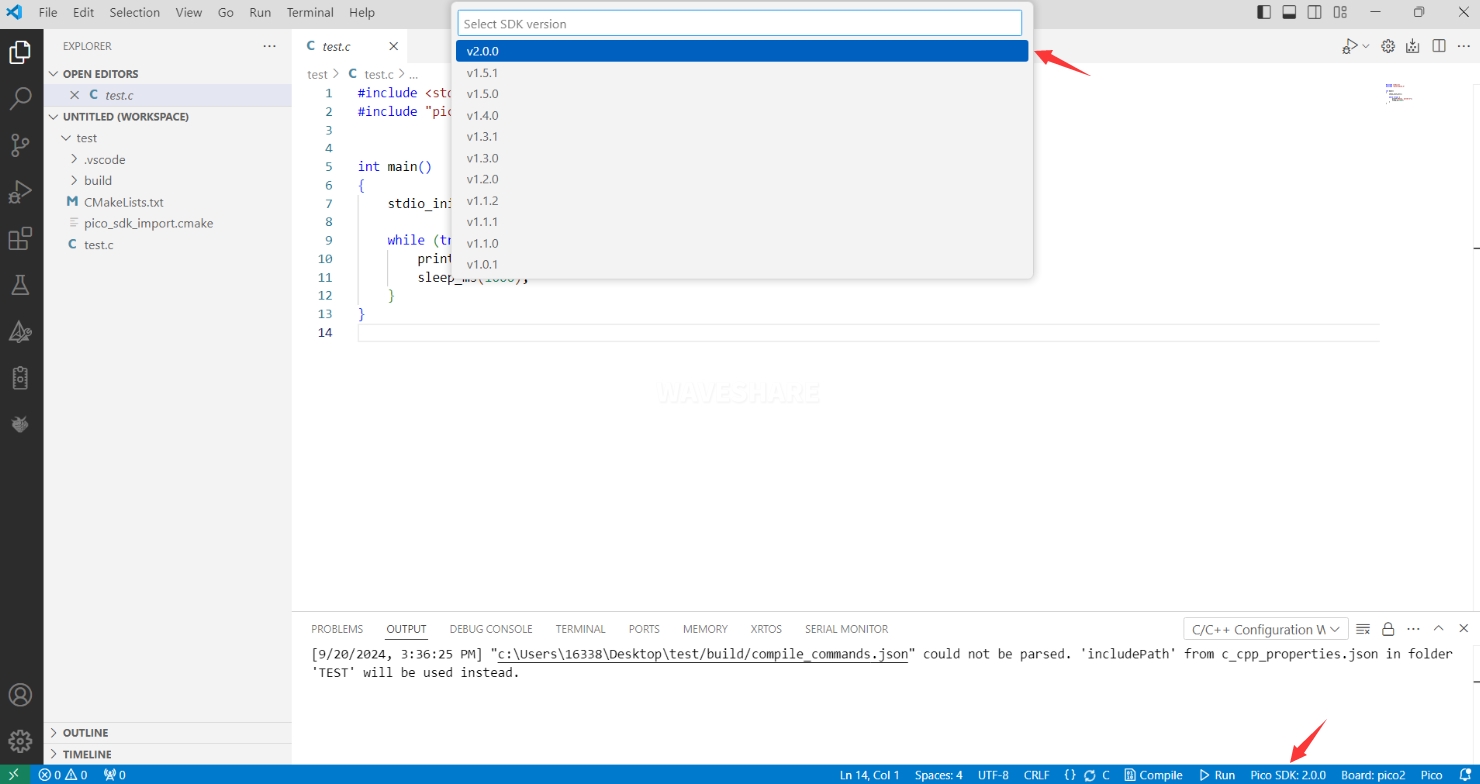
4.Choose Yes to proceed with advanced configuration
5.Select the cross-compilation toolchain. 13.2.Rel1 is suitable for ARM cores, and RISCV.13.3 is suitable for RISCV cores. You can choose either according to your needs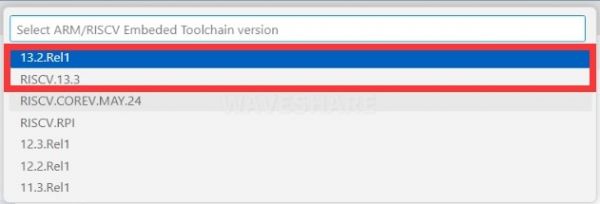
6.Choose the CMake version as Default (the path configured earlier)
7.Choose the Ninja version as Default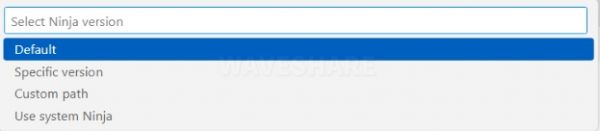
8.Select the development board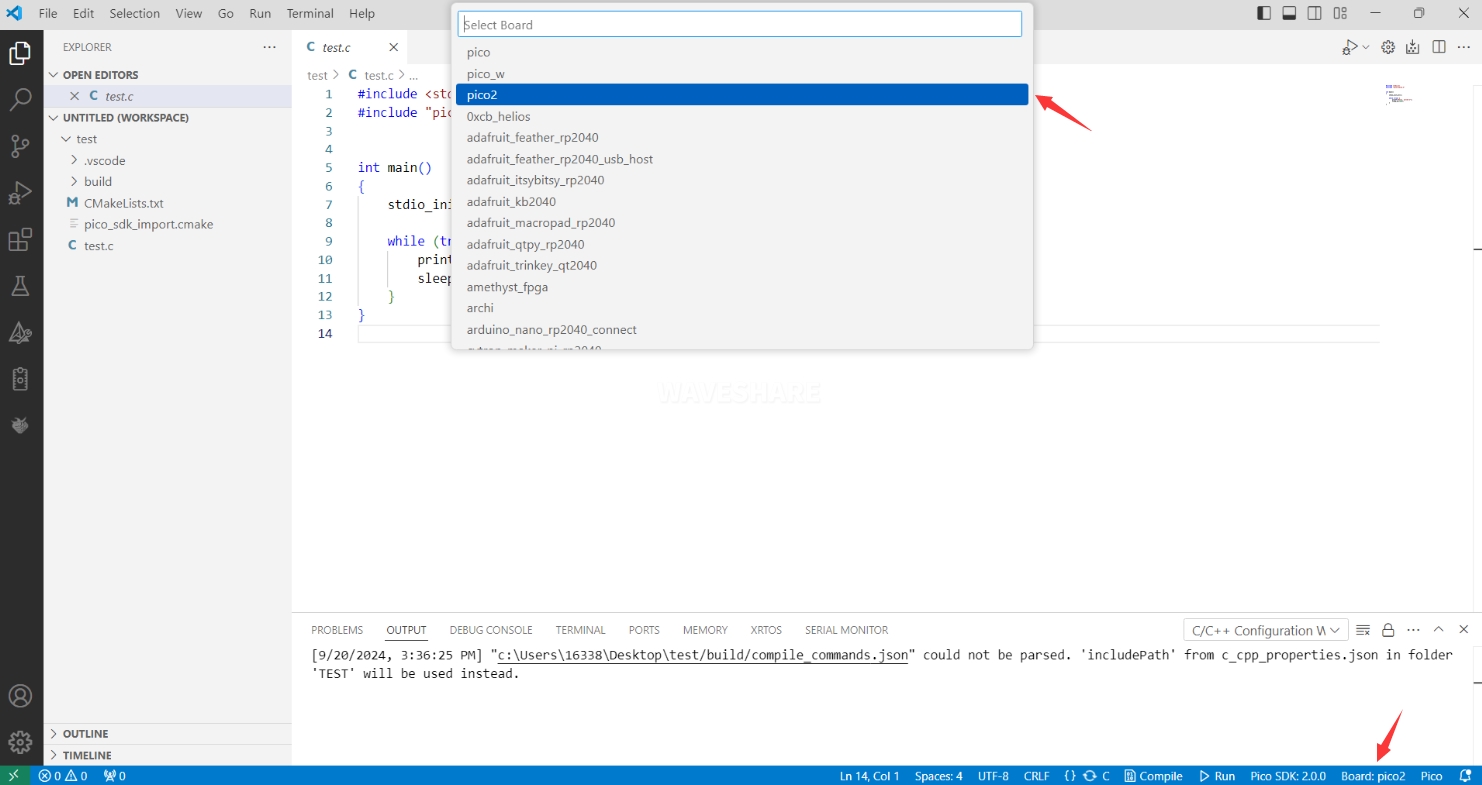
9.Click compile to compile the project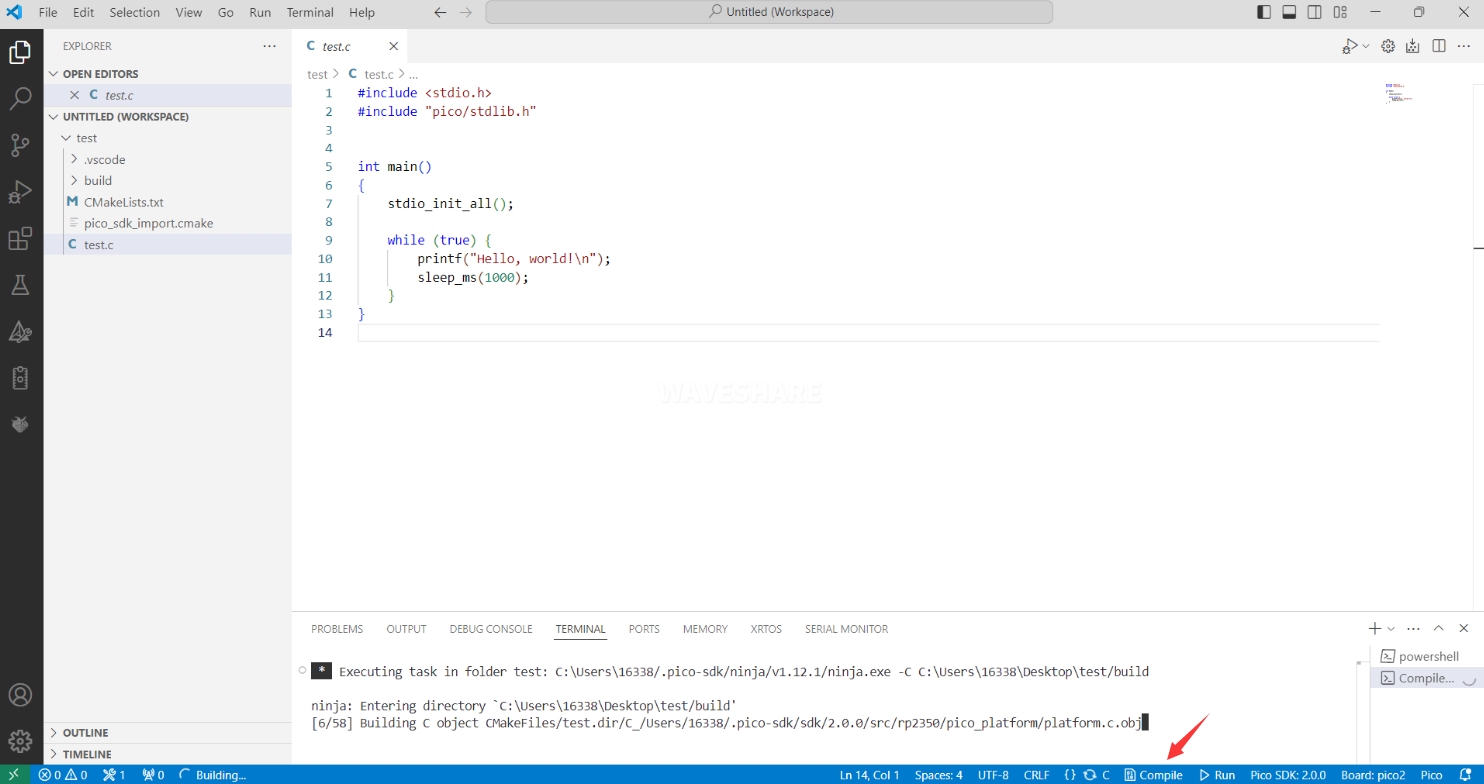
10.Once the compilation is successful, you will get a .uf2 file
Import a project
1.Open a C example program and import the project. Note: The Cmake file for the imported project must not contain Chinese characters (including comments), as this may cause the import to fail
2.Once you have successfully compiled a .uf2 file, you can proceed to update the firmware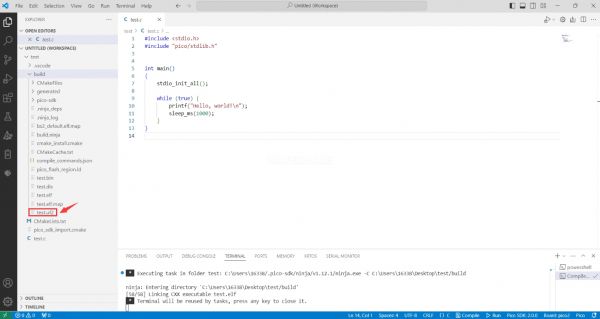
3.After connecting the device to your computer while holding down the BOOT button, release the BOOT button. A removable disk will appear on your computer. Copy the .uf2 file into it.
Update the extension
1.The extension version in the offline package is 0.15.2. After installation, you can also choose to update to the latest version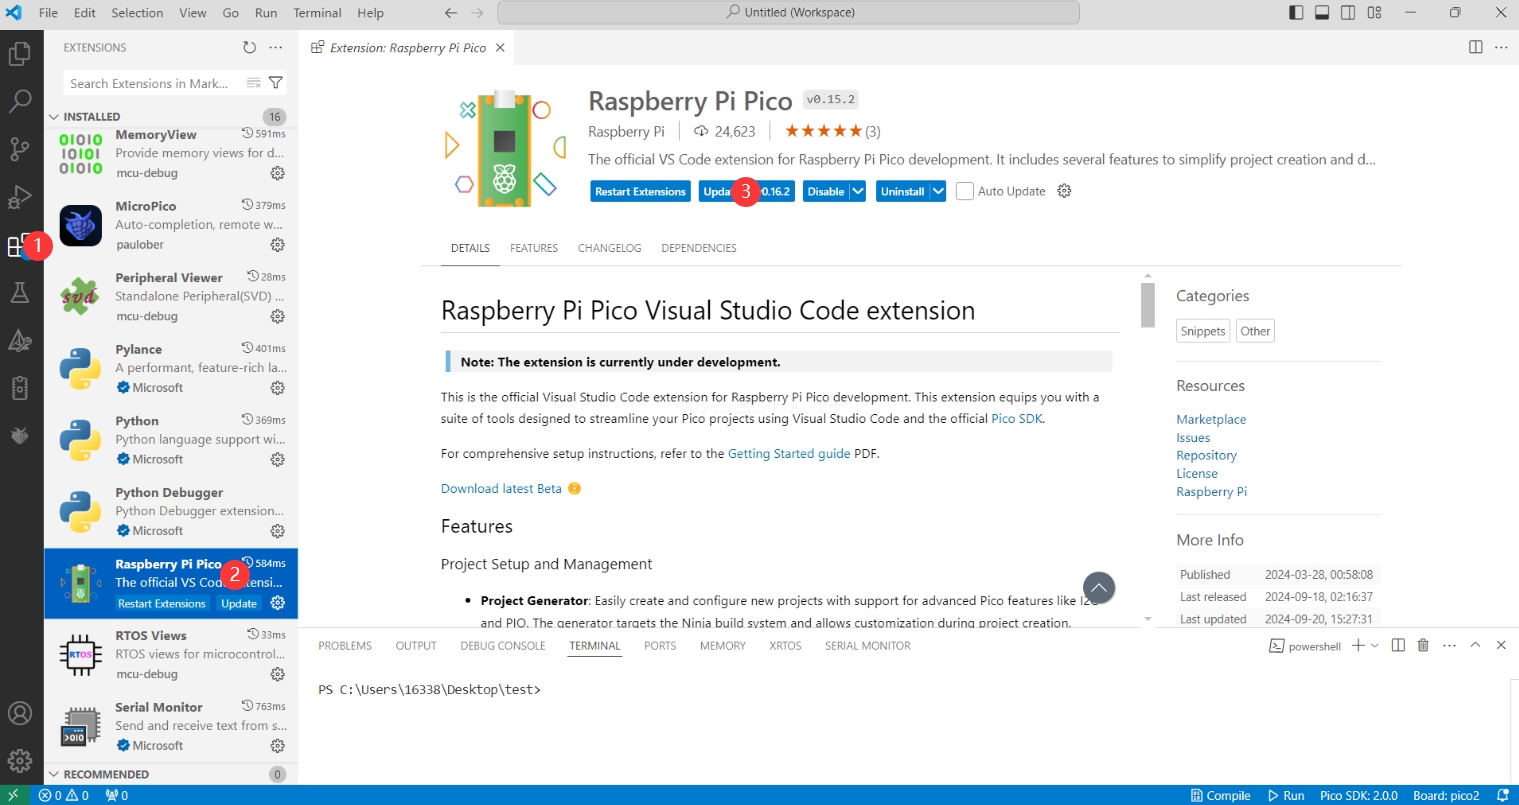
Open Source Demos
MircoPython Video Demo (github)
MicroPython Firmware/Blink Demo(C)
Raspberry Pi Official C/C++ Demos(github)
Raspberry Pi Official MicroPython Demos(github)
Resources
Demo
Datasheets
Schematic
Softwares
- Chinese Character Modulation Software
- Image2Lcd Image Modulation Software
- Image Modulation Tutorial
- Font Modulation Tutorial
- flash_download_tool_3.9.7
Support
Monday-Friday (9:30-6:30) Saturday (9:30-5:30)
Email: services01@spotpear.com

[Tutorial Navigation]
- Introduction
- Raspberrypi Tutorial
- Pre-installed Image
- Official Systems
- Bookworm system display configuration
- Bullseye/Buster system display configuration
- Audio configuration
- Button configuration
- Retropie System
- Parameter introduction
- RP2040-PiZero Tutorial
- Resources
- Support