- sales/support
Google Chat:---
- sales
+86-0755-88291180
- sales01
sales@spotpear.com
- sales02
dragon_manager@163.com
- support
tech-support@spotpear.com
- CEO-Complaints
zhoujie@spotpear.com
- Only Tech-Support
WhatsApp:13246739196
- Purchase/Shipping/Refund
WhatsApp:13424403025
- HOME
- >
- ARTICLES
- >
- Common Moudle
- >
- ESP
ESP32-C3-1.69inch LCD ST7789 User Guide
【Hardware】
[] Schematic download
[] Pin definition
[] Screen resolution: 240*280
[] Screen driver IC: ST7789
[] Screen touch IC: CST816T (not included in non-touch version)
【Demo-Code】:Download
【Environment+Library】
[] Download and install Arduino IDE: https://www.arduino.cc/en/software
[] Import ESP32 series chips and motherboard libraries in Arduino IDE
Please download the ESP32 version 2.0.13, other versions may have problems
[] Import 1.69 display library
Open the downloaded program, enter the ESP32C3_1.69inch\lib folder, and copy all the files under lib to the library storage path
C:\Documents\Arduino\libraries (click to confirm how to view your own path)
Note: If you have installed the LVGL library before, please delete the previous LVGL and copy the files in lib to the libraries folder
【Code Test】
【Astronaut/weather/Clock/MINITV】
[] Upload clock dial/digital dial/rotating astronaut clock weather ornament
--》Touch version
After opening the downloaded program package, enter the
ESP32C3_1.69inch\examples\Display-Touch version
Folder and open mainapp.ino
--》Non-touch version
After opening the downloaded program package, enter the
ESP32C3_1.69inch\examples\Display-No touch version
Folder and open mainapp.ino
[] After entering the Arduino IDE, configure ESP32C3 according to the figure below

[] In the pin_config.h file, you can configure the WIFI hotspot information

[] Click upload, upload successful

[] The phone turns on the hotspot, and the hotspot information is set to the hotspot information configured in the pin_config.h file. Here the hotspot information is configured as
Name: spotpear Password: 12345678
[] You will see:
--》Touch version: Touch Slide the screen to switch the function.
--》Non-touch version: Press the Boot button to switch the function
【Dinosaur Game】
[] Upload Dinosaur Game
--》Touch Version
Enter ESP32C3_1.69inch\examples\Touch_PixelBit_Dino_Game_esp32 folder, open Touch_PixelBit_Dino_Game_esp32.ino project
--》Non-touch Version
Enter ESP32C3_1.69inch\examples\No_Touch_PixelBit_Dino_Game_esp32 folder, open No_Touch_PixelBit_Dino_Game_esp32.ino project
[] Click Upload, You will see:
--》Touch Version: Click the screen to start the game.
--》Non-touch Version: Press the BOOT button to start the game
【Video/Image/Buzzer】
->Run Demo
[] Enter the library storage path, open the lv_conf.h file in the libraries folder,
and find "LV_COLOR_16_SWAP"
Change this to 0 (to prevent serious color difference)
[] Enter the ESP32C3_1.69inch\examples\Animation folder and open the Animation.ino project
[] Click upload, You will see:
There is a short video display and buzzer music
->Change the video
[] Download a GIF from the Internet, and then enter the online website:
Online image resizer. Resize GIF, APNG, WebP, JPG... (ezgif.com)
After entering the website, import the downloaded GIF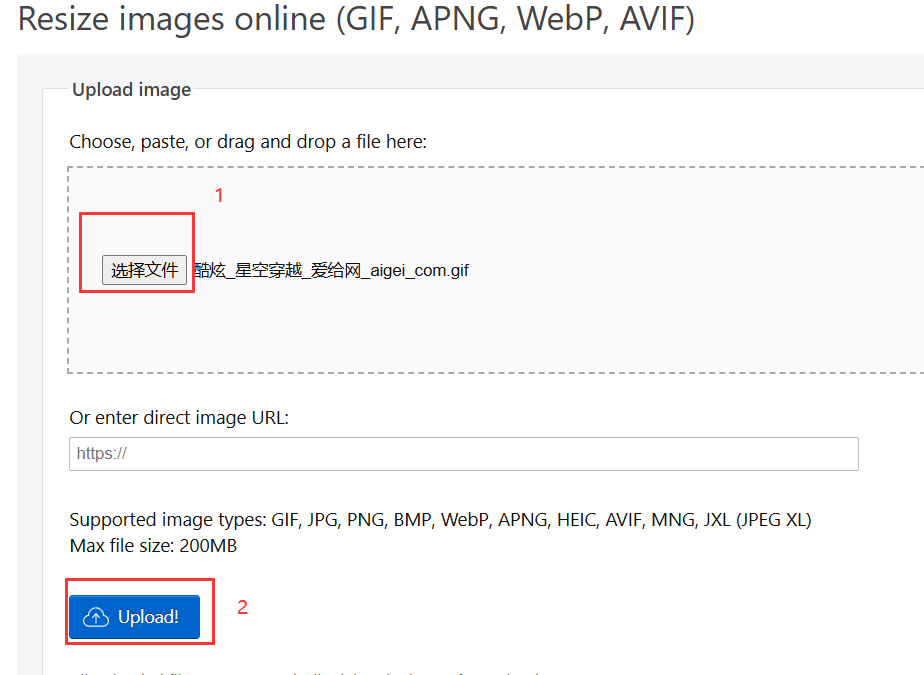
Set the GIF format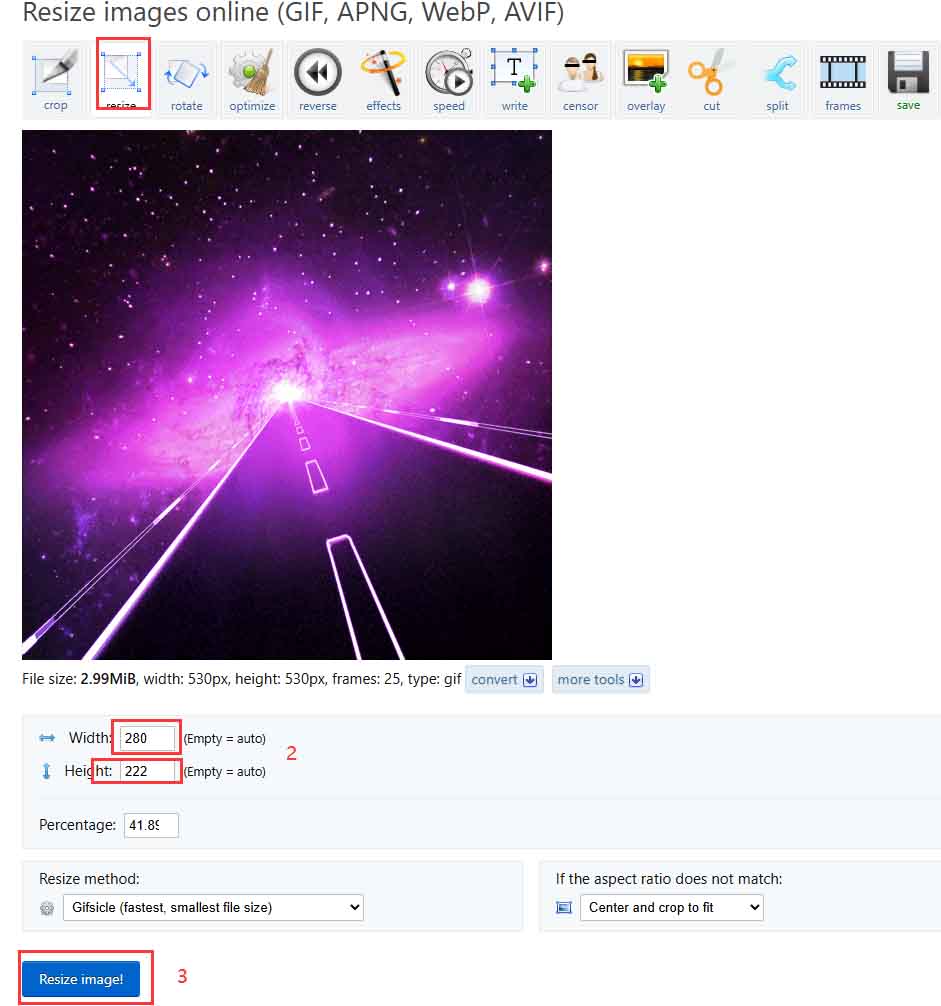
Click Download and Save. Note that the size of the generated file should not exceed 1.5M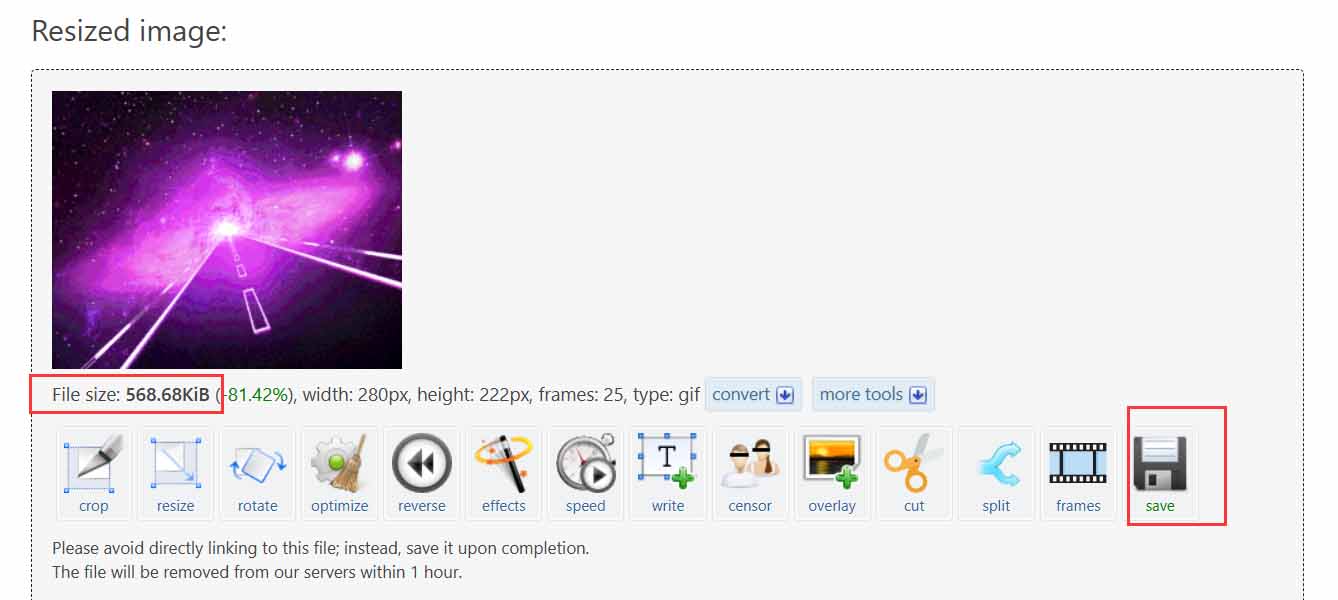
After downloading, modify the file name according to your own definition. Here it is changed to XK1
[] Enter the website: https://lvgl.io/tools/imageconverter
After opening the website, follow the steps below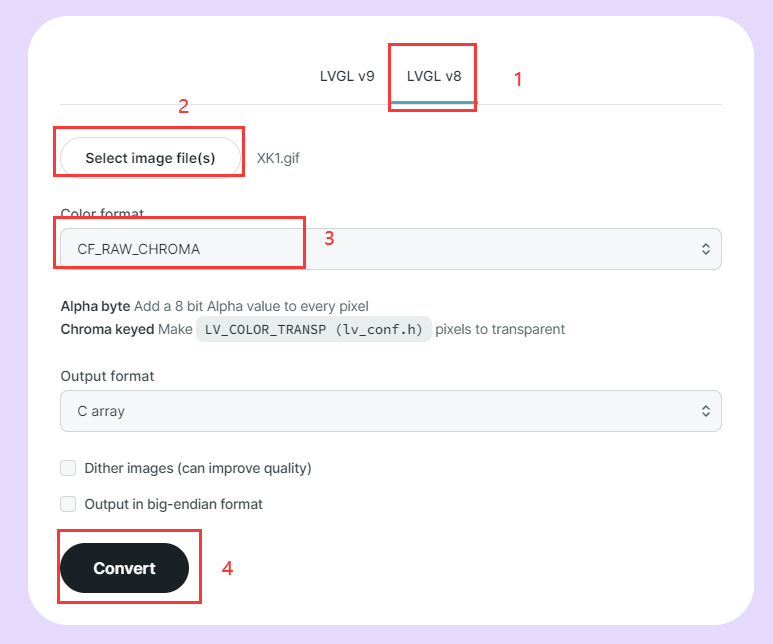
[] Copy the downloaded ,c file to the Animation folder
[] Open the "Animation.ino" project and add
LV_IMG_DECLARE(XK1); The content in the brackets must have the same name as the .C file just downloaded
Find lv_gif_set_src(logo_img, &DH14);. Change "&DH14" to "&XK1"
After the modification is completed, click Upload
->Change the image
[] Download an image .PNP file from the Internet, and then enter the online website:
Online image resizer. Resize GIF, APNG, WebP, JPG (ezgif.com)
After entering the website, import the downloaded GIF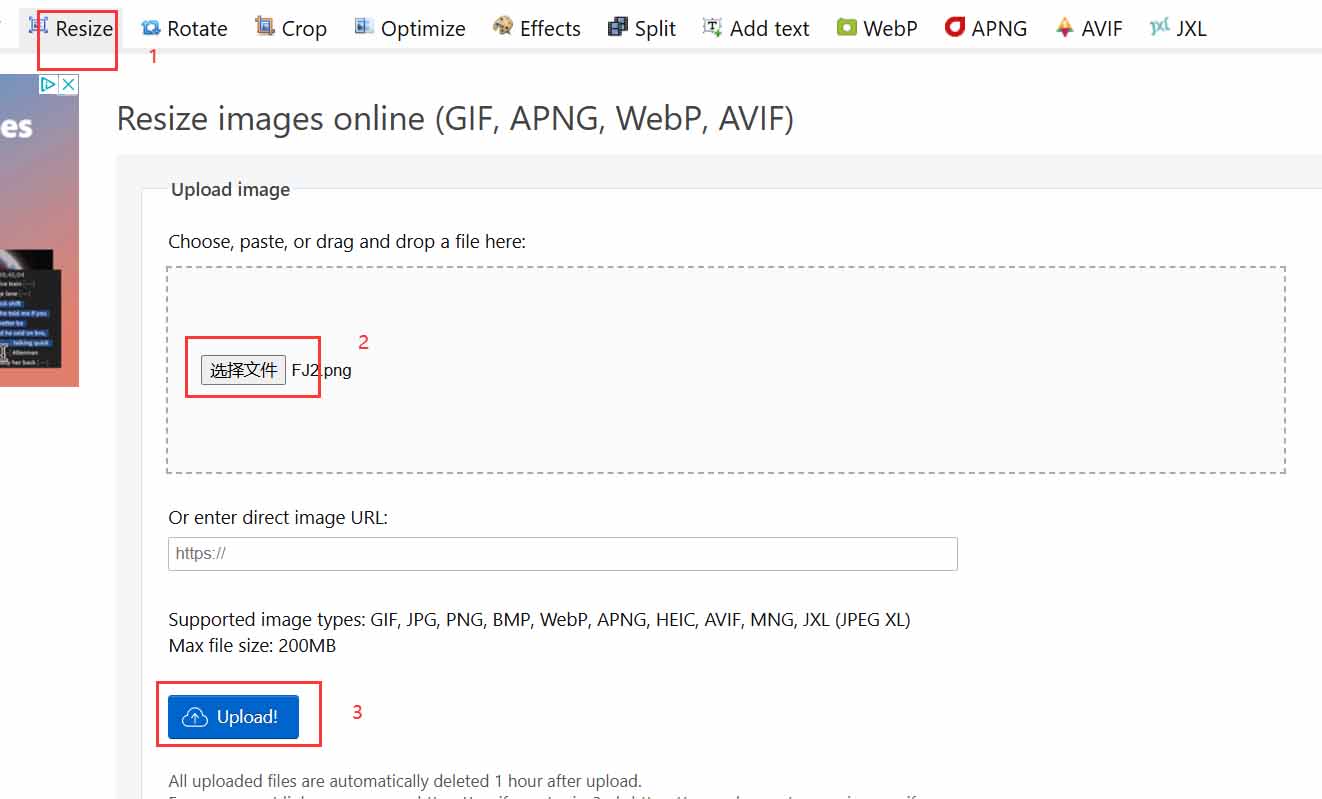
[] Change the image format to 280*240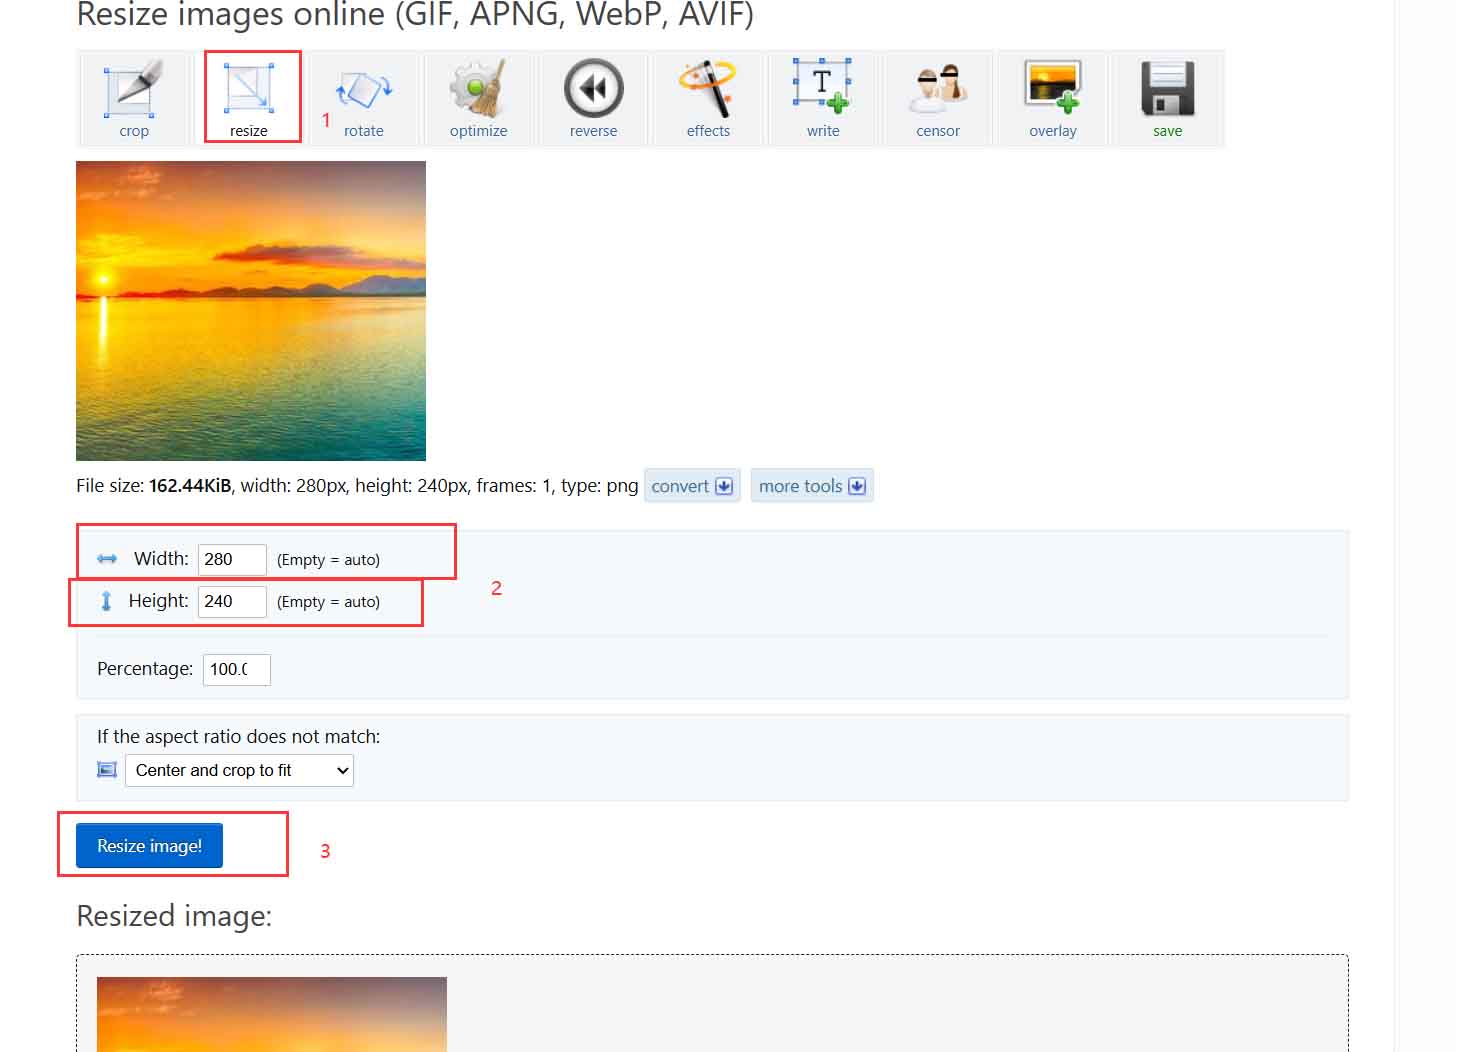
[] Download the modified image format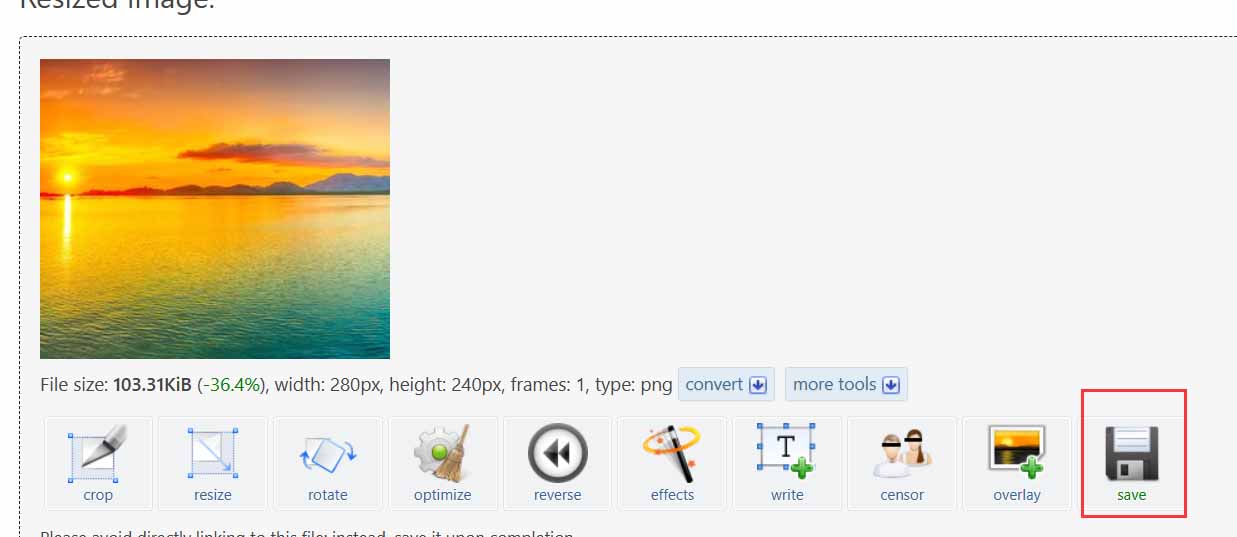
After downloading, modify the file name according to your own definition. Change it to "FJ2" here
[] Convert .PNP image file to .C file
Open LVGL's own format conversion website:
https://lvgl.io/tools/imageconverter
After entering the website, the operation is as shown below
[] Copy the downloaded ".C" file to the "Animation" folder Open the "Animation.ino" project and add
LV_IMG_DECLARE(FJ2); The content in the brackets must have the same name as the .C file just downloaded Modify lv_img_set_src(lv_img, &FJ1);
Change "&FJ1" to "&FJ2" and finally click Upload
->Play Music by Buzzer
[] Five music demos are provided in the example. You can select one of them and then upload it for burning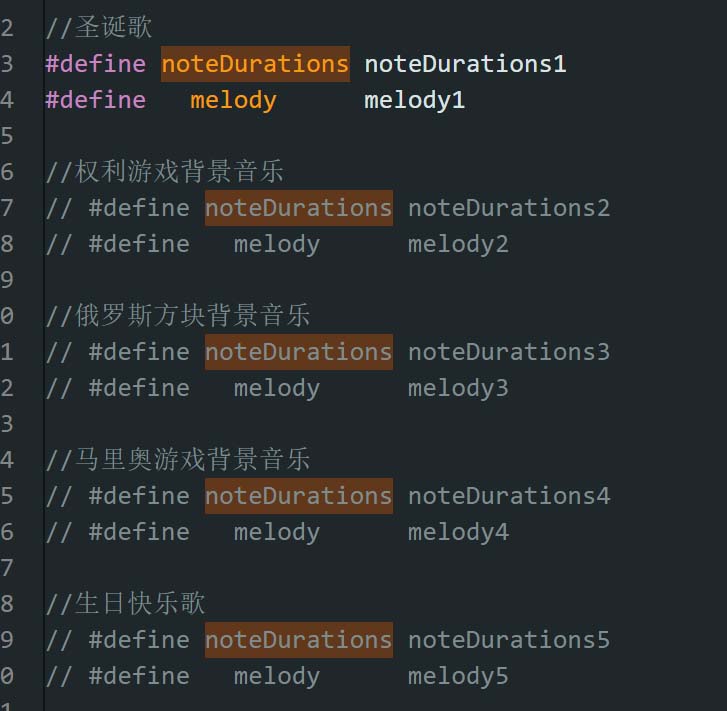
Select another music and click Upload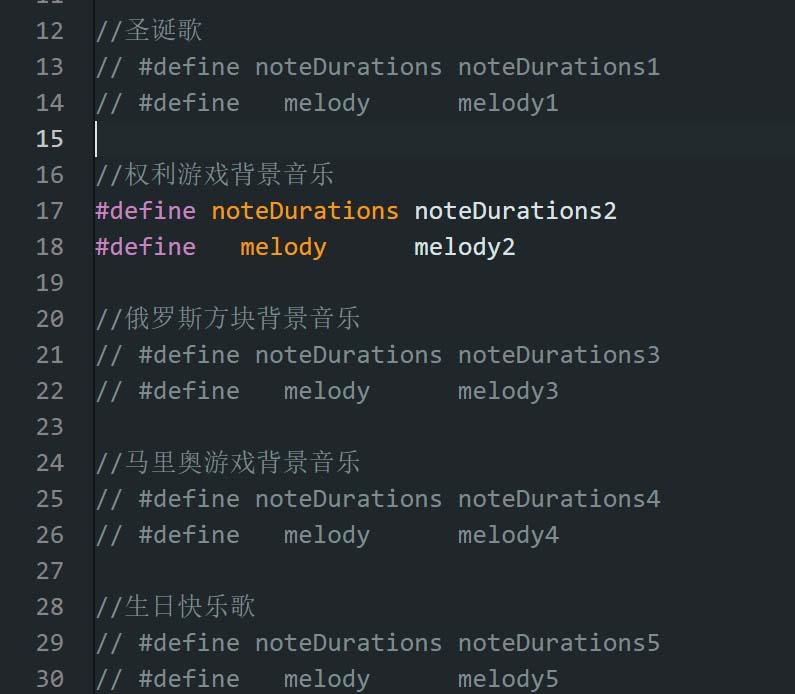
[] Add other music demos
Open the URL https://github.com/hibit-dev/buzzer/tree/master/src/other
Open the music demo, copy the code in the red box, and copy it to the "Animation.ino" project code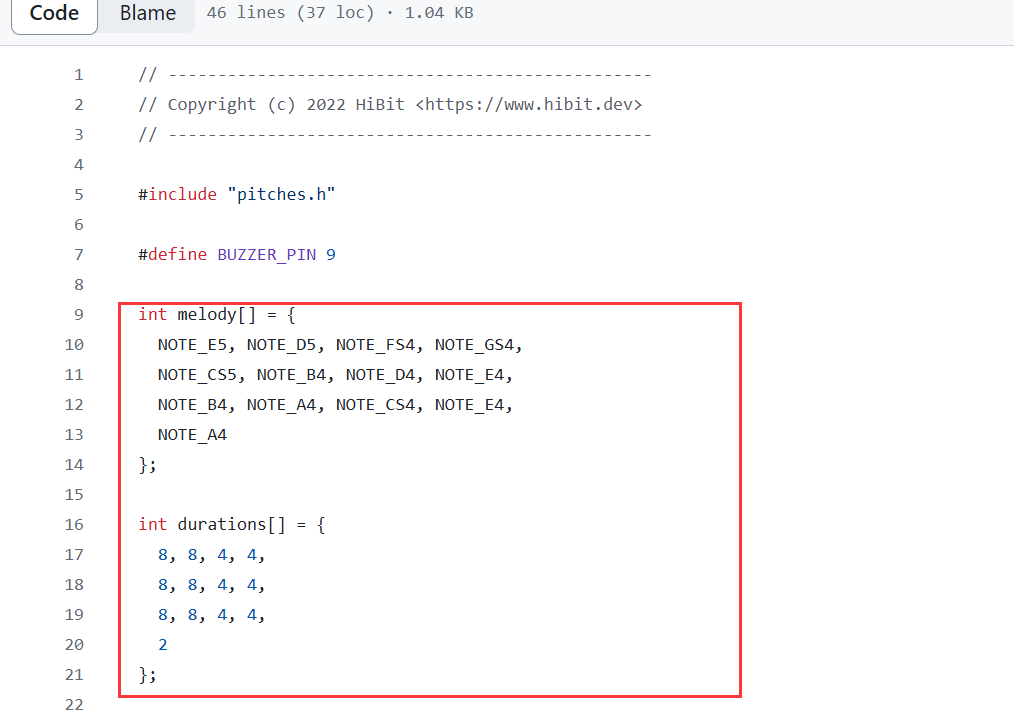
Change melody[] and durations[] in the copied code to melody6[] and noteDurations6[]
Note that the copied music demo code cannot be too long, otherwise the buzzer will not play music
[] Add macro definition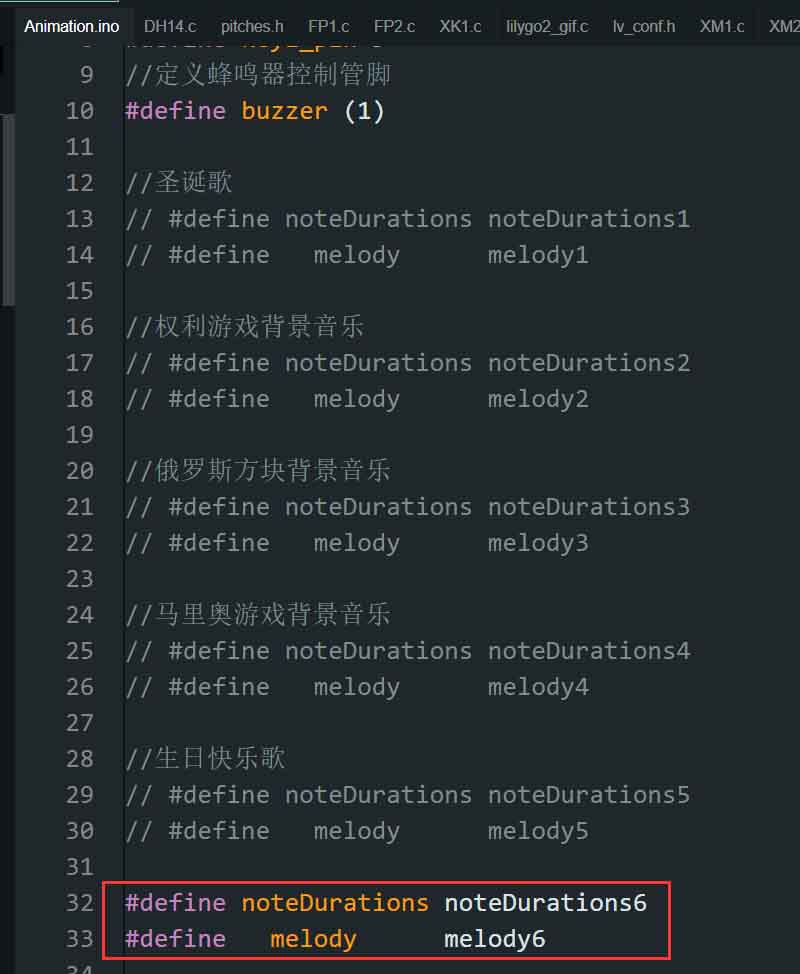
[] Click Upload code
【Other Project】
->Payment for Your Services via Toncoin and Solana
【After-sales】
Monday-Friday (9:30-6:30) Saturday (9:30-5:30) -China time
Email: services01@spotpear.com