


- sales/support
Google Chat:---
- sales
+86-0755-88291180
- sales01
sales@spotpear.com
- sales02
dragon_manager@163.com
- support
tech-support@spotpear.com
- CEO-Complaints
zhoujie@spotpear.com
- Only Tech-Support
WhatsApp:13246739196
- Purchase/Shipping/Refund
WhatsApp:13424403025
- HOME
- >
- ARTICLES
- >
- Common Moudle
- >
- LCD
1.47inch-Touch-LCD User Guide
Overview
Introduction
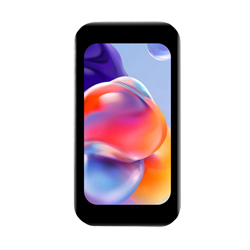
The 1.47inch Touch LCD features a 172 × 320 resolution capacitive touchscreen, supporting either a 13PIN terminal interface or an 18PIN FPC slot for connection. It also provides example documentation for Raspberry Pi, ESP32, Pico, Arduino, etc.
Features
- 172×320 resolution, 262K RGB colors, clear and colorful displaying effect
- High touch screen transmittance, fast response and long lifetime
- Embedded with JD9853 driver chip and AXS5106L capacitive touch control chip, using SPI and I2C communication respectively, minimizes required IO pins
- Lead out LCD control interface, you can choose 13PIN terminal interface or 18PIN FPC slot access display screen
- Onboard level conversion chip, supports 3.3V/5V two operating levels
Interfaces
| LCD Pin | Pin description |
| VCC | Power positive (3.3V / 5V power input) |
| GND | Ground |
| MISO | SPI communication MISO pin |
| MOSI | SPI communication MOSI pin |
| SCLK | SPI communication SCLK pin |
| LCD_CS | LCD chip select pin, active low |
| LCD_DC | LCD data/command pin, low level indicates command, high level indicates data |
| LCD_RST | LCD reset pin, active low |
| LCD_BL | LCD backlight pin |
| TP_SDA | TP data pin |
| TP_SCL | TP clock pin |
| TP_INT | TP interrupt pin |
| TP_RST | TP reset pin, active low |
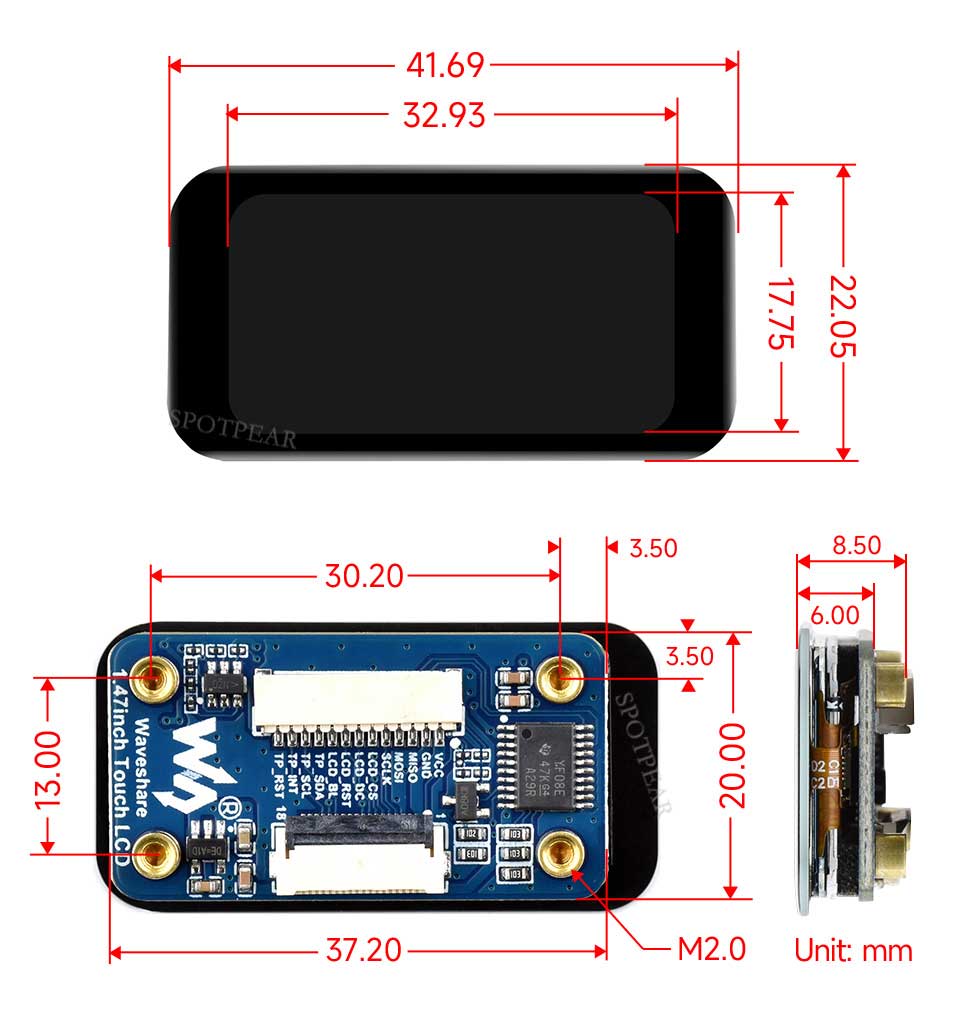
Dimensions
Specifications
(Please ensure that the supply voltage and logic voltage are consistent, otherwise, it may fail to function properly)
| Parameter Name | Parameter |
| Supply voltage | 3.3V/5V |
| LCD type | IPS |
| Communication interface | Display: SPI |
| Touch: I2C | |
| Controller chip | Display: JD9853 |
| Touch: AXS5106L | |
| Resolution | 172 (H) x 320 (V) |
| Display size | 17.63 (H) x 32.83 (V) mm |
| Dimensions | 22.05 (H) x 41.69 (V) mm |
Working with Raspberry Pi
Hardware Connection
- 13PIN cable connector
| LCD Pin | Raspberry Pi (BCM) |
| VCC | 3.3V |
| GND | GND |
| MISO | 9/NC |
| MOSI | 10 |
| SCLK | 11 |
| LCD_CS | 8 |
| LCD_DC | 25 |
| LCD_RST | 27 |
| LCD_BL | 18 |
| TP_SDA | 2 |
| TP_SCL | 3 |
| TP_INT | 4 |
| TP_RST | 17 |
Enable SPI and I2C Interfaces
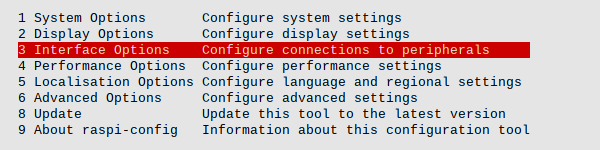
- Open the Raspberry Pi terminal and enter the following command to enter the configuration interface:
sudo raspi-config
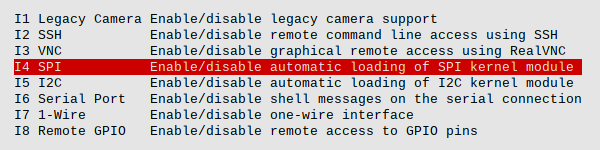
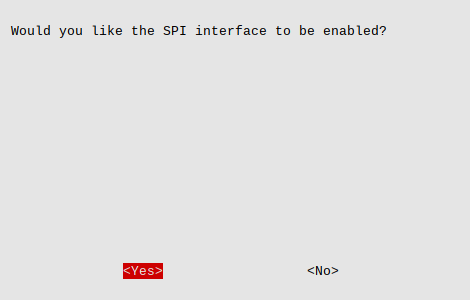
- Select Interface Options -> SPI -> Yes to enable the SPI interface

- Continue to enter the config interface:
sudo raspi-config
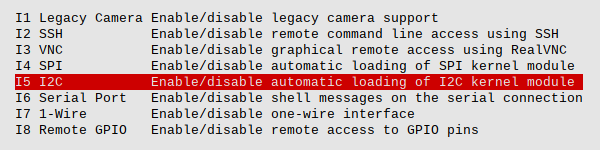
- Select Interface Options -> I2C -> Yes to enable the I2C interface

- Restart Raspberry Pi
sudo reboot
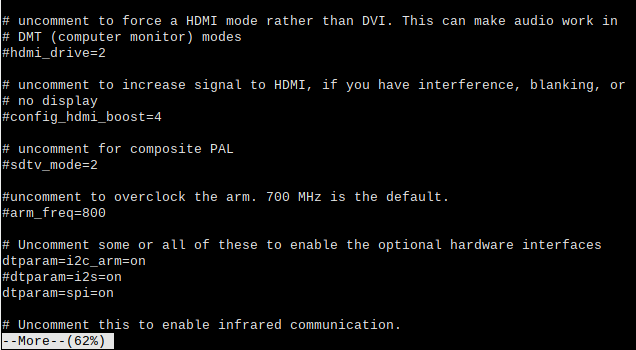
- Check /boot/config.txt, you can see "dtparam=i2c_arm=on" and "dtparam=spi=on" are written
more /boot/config.txt

- To ensure that SPI is not occupied, it is recommended that other driver overlays be temporarily turned off. You can use ls /dev/spi* to check the SPI occupancy. The terminal output /dev/spidev0.0 and /dev/spidev0.1 indicates that the SPI situation is normal
ls /dev/spi*
Python Environment
Install Libraries Files
- Install libraries
sudo apt-get update
sudo apt-get install python3-pip
sudo apt-get install python3-pil
sudo apt-get install python3-numpy
sudo apt-get install python3-spidev
Demo Operations
- Download the demo
cd
wget https://files.waveshare.com/wiki/1.47inch%20Touch%20LCD/1.47inch_Touch_LCD_Demo_Pi.zip
- Install decompression environment (optional, skip this step if you have used the command to unzip)
sudo apt-get install unzip
- Enter the file location, and execute the command to unzip
unzip 1.47inch_Touch_LCD_Demo_Pi.zip -d ./1.47inch_Touch_LCD
- Enter Python file folder
cd 1.47inch_Touch_LCD/Python
- Run the example demo will display 3 images on the screen, and it will then enter the drawing function upon completion
sudo python 1.47inch_Touch_LCD.py
C Environment
Install Libraries Files
- Install libraries
git clone https://github.com/WiringPi/WiringPi
cd WiringPi
./build
gpio -v
- Run gpio -v and corresponding version will appear. If it does not appear, there is an installation error.
- Download the demo file
- Enter the file directory, and run the demo
Demo Operations
- Download the demo
cd
wget https://files.waveshare.com/wiki/1.47inch%20Touch%20LCD/1.47inch_Touch_LCD_Demo_Pi.zip
- Install decompression environment (optional, skip this step if you have used the command to unzip)
sudo apt-get install unzip
- Enter the file location, and execute the command to unzip
unzip 1.47inch_Touch_LCD_Demo_Pi.zip -d ./1.47inch_Touch_LCD
- Enter C file folder
cd 1.47inch_Touch_LCD/C
- Clean compilation files and compile again
sudo make clean
sudo make -j
- Successfully compiled, run the example demo to perform RGB refresh on the screen, and it will then enter the drawing function upon completion
sudo ./main
Working with Raspberry Pi Pico
Hardware Connection
- 13PIN cable connector
| LCD Pin | Raspberry Pi Pico |
| VCC | 3.3V |
| GND | GND |
| MISO | GP12/NC |
| MOSI | GP11 |
| SCLK | GP10 |
| LCD_CS | GP9 |
| LCD_DC | GP14 |
| LCD_RST | GP13 |
| LCD_BL | GP15 |
| TP_SDA | GP6 |
| TP_SCL | GP7 |
| TP_INT | GP8 |
| TP_RST | GP5 |
Environment Setup
- For Pico's environment setup, please visit Pico Get Started
Python Environment Demo
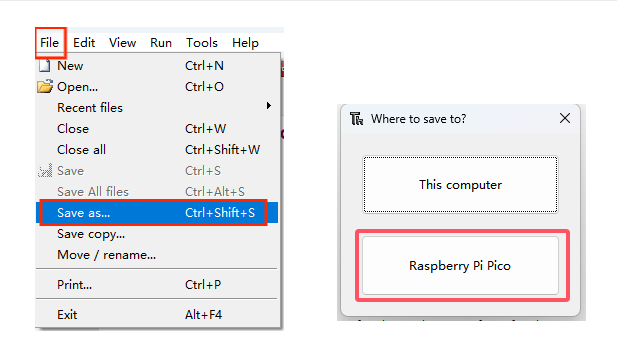
- Download the Demo
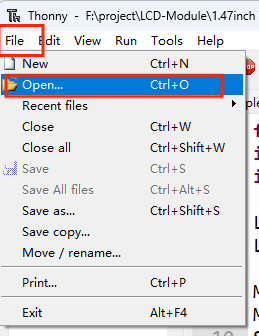
- Unzip the demo and open Thonny
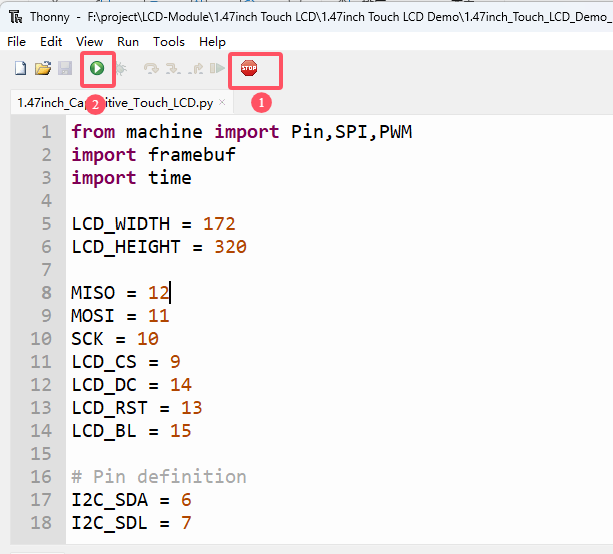
- Open the demo, the path is: 1.47inch_Touch_LCD_Demo_Pico/Python/1.47inch_Touch_LCD.py
- Run the demo to achieve the drawing board function on the screen
- If you want to run the demo automatically at power-on, change the file name to main.py
Working with ESP32
(Please note that the following examples run with ESP32S3, please adjust the pin definition for other ESP32 models)
Hardware Connection
- 13PIN cable connector
| LCD Pin | ESP32S3 |
| VCC | 3.3V |
| GND | GND |
| MISO | 42/NC |
| MOSI | 2 |
| SCLK | 1 |
| SD_CS | 38 |
| LCD_CS | 39 |
| LCD_DC | 41 |
| LCD_RST | 40 |
| LCD_BL | 6 |
| TP_SDA | 15 |
| TP_SCL | 7 |
| TP_INT | 17 |
| TP_RST | 16 |
Arduino Environment
Download and Install Arduino IDE
- Click to visit the Arduino official website, select the corresponding system and system bit to download
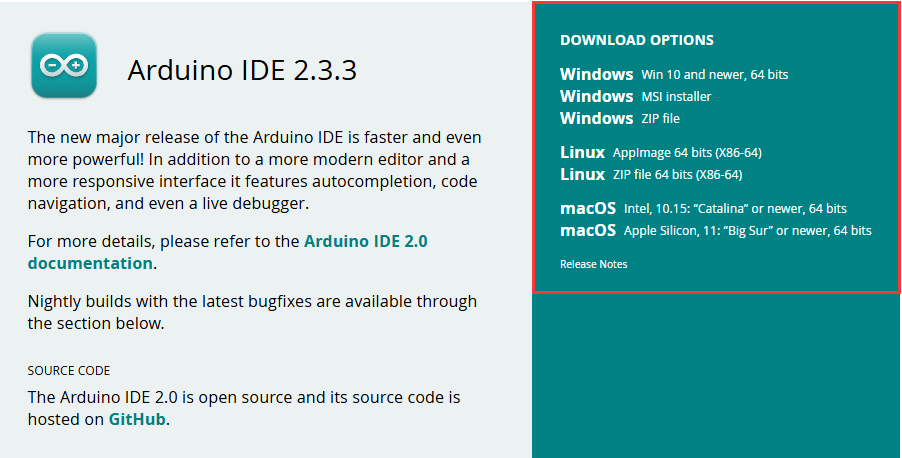
- Run the installer and install all by default
Install Arduino-ESP32
- To use ESP32-related motherboards in Arduino IDE, you must first install the Arduino-ESP32 Board library
- In some areas, it may not be able to Install online due to network factors, and Install offline is generally recommended
- To install the Arduino-ESP32 tutorial, please refer to Arduino board manager tutorial
Install Library
- When installing Arduino libraries, there are usually two ways to choose from: Install online and Install offline.
For most libraries, users can easily search and install them through the online library manager of the Arduino software. However, some open-source libraries or custom libraries are not synchronized to the Arduino Library Manager, so they cannot be acquired through online searches. In this case, users can only manually install these libraries offline. - For library installation tutorial, please refer to Arduino library manager tutorial
| Library Name | Description | Version | Library Installation Requirement |
|---|---|---|---|
| esp_lcd_touch_axs5106 | Touch driver library | --- | "Install Offline" |
| esp_lcd_jd9853 | LCD driver library | --- | "Install Offline" |
| lvgl | Graphical library | v8.4.0 | "Install Offline" |
Run the First Arduino Demo
- Click to visit Run the First Arduino Demo
Demos
lvgl_example
【Demo description】
This demo demonstrates how to use 1.47inch Touch LCD to run the lvgl demos
【Hardware connection】
- Connect the board to the computer
【Code analysis】
i2c_bus_init();           // Initialize I2C bus
spi_bus_init();           // Initialize SPI bus
display_init();           // Initialize display driver
touch_init();             // Initialize touchscreen controller

brightness_init();        // Initialize backlight brightness control module
brightness_set_level(20); // Set the current brightness to 20% (value range 0-100)

lv_port_init();           // Initialize the LVGL graphics library runtime environment (bind hardware display driver)

if (lvgl_lock(-1)) {      // Get graphics library mutex lock (to prevent multi-threaded concurrent access)
    lv_demo_widgets();    // Initialize lv_demo
    lvgl_unlock();        // Release graphics library mutex lock
}
【Result demonstration】

ESP-IDF Environment
Environment Setup
- Click to visit IDF Environment Setup
Demo
- Download the Demo and unzip it
lvgl_exampla
【Demo description】
This demo demonstrates how ESP32S3 uses 1.47inch Touch LCD to run the lvgl demo in the ESP-IDF environment
【Hardware connection】
- Connect the board to the computer
【Code analysis】
    i2c_bus_init();           // Initialize I2C
    spi_bus_init();           // Initialize SPI
    display_init();           // Initialize display screen
    touch_init();             // Initialize touchscreen driver
    brightness_init();        // Initialize backlight control module
    brightness_set_level(20); // Set the backlight brightness to 20% (support 0-100 level adjustment)
    lv_port_init();           // Initialize LVGL
    if (lvgl_lock(-1))        // Obtain LVGL thread lock (-1 indicates blocking wait) to ensure multi-threaded safety
    {
        // lv_demo_benchmark();
        // lv_demo_music();
        lv_demo_widgets();    // Start LVGL demo
        lvgl_unlock();        // Release LVGL thread lock
    }
【Result demonstration】
lvgl_brightness
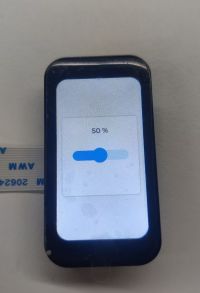
【Demo description】
This demo demonstrates how ESP32S3 uses 1.47inch Touch LCD to run the lvgl demo in the ESP- IDF environment and control screen brightness using a touch screen.
【Hardware connection】
- Connect the board to the computer
【Code analysis】
    i2c_bus_init();           // Initialize I2C
    spi_bus_init();           // Initialize SPI
    display_init();           // Initialize display screen
    touch_init();             // Initialize touchscreen driver
    brightness_init();        // Initialize backlight control module
    brightness_set_level(20); // Set the backlight brightness to 20% (support 0-100 level adjustment)
    lv_port_init();           // Initialize LVGL
    if (lvgl_lock(-1))        // Obtain LVGL thread lock (-1 indicates blocking wait) to ensure multi-threaded safety
    {
        // lv_demo_benchmark();
        // lv_demo_music();
        // lv_demo_widgets();
        lvgl_brightness_ui_init(lv_scr_act()); // Initialize ui
        lvgl_unlock();                         // Release LVGL thread lock
    }
【Result demonstration】
Working with Arduino UNO
Hardware Connection
- 13PIN cable connector
| LCD Pin | Arduino |
| VCC | 5V |
| GND | GND |
| MISO | 12/NC |
| MOSI | 11 |
| SCLK | 13 |
| LCD_CS | 10 |
| LCD_DC | 7 |
| LCD_RST | 8 |
| LCD_BL | 9 |
| TP_SDA | SDA |
| TP_SCL | SCL |
| TP_INT | 3 |
| TP_RST | 4 |
Install Libraries
- When installing Arduino libraries, there are usually two ways to choose from: Install online and Install offline.
For most libraries, users can easily search and install them through the online library manager of the Arduino software. However, some open-source libraries or custom libraries are not synchronized to the Arduino Library Manager, so they cannot be acquired through online searches. In this case, users can only manually install these libraries offline. - For library installation tutorial, please refer to Arduino library manager tutorial
| Library Name | Description | Library Installation Requirement |
|---|---|---|
| GFX_Library_for_Arduino | LCD driver library | "Install Online" or "Install Offline" |
| axs51061_device | Touch driver library | "Install Offline" |
Demo
- Download the Demo and unzip it
- Enter the sample demo file folder 1.47inch_Touch_LCD_Demo_Arduino/1.47inch_Touch_LCD.ino , double click on 1.47inch_Touch_LCD.ino to open the demo
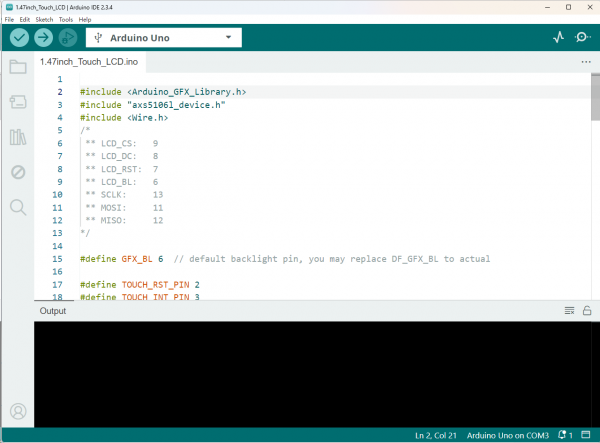
- Select the device and the port, compile and flash the demo
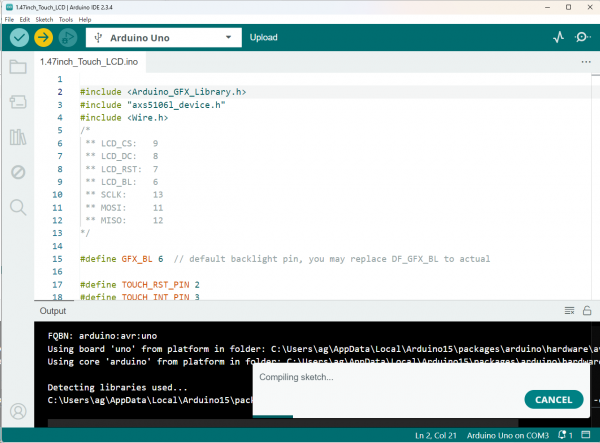
- Successfully flashed, and enter the drawing board function
Resources
Documents
Schematic Diagram
Datasheet
Demos
FAQ
Question: The demo fails to run and cannot communicate?
Please note whether the GPIO level on the board matches the power supply voltage of the product!
Support
Monday-Friday (9:30-6:30) Saturday (9:30-5:30)
Mobile: +86 13434470212
Email: services01@spotpear.com
[Tutorial Navigation]
- Overview
- Working with Raspberry Pi
- Working with Raspberry Pi Pico
- Working with ESP32
- Hardware Connection
- Arduino Environment
- ESP-IDF Environment
- Working with Arduino UNO
- Resources
- FAQ
- Support