


- sales/support
Google Chat:---
- sales
+86-0755-88291180
- sales01
sales@spotpear.com
- sales02
dragon_manager@163.com
- support
tech-support@spotpear.com
- CEO-Complaints
zhoujie@spotpear.com
- Only Tech-Support
WhatsApp:13246739196
- Purchase/Shipping/Refund
WhatsApp:13424403025
- HOME
- >
- ARTICLES
- >
- Common Moudle
- >
- LCD
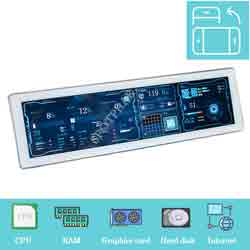
8.8inch PC Monitor Screen User Guide
Overview
This product is a general-purpose 8.8-inch HDMI display with 480 × 1920 resolution. It can be used as a secondary screen of the chassis, and also supports Raspberry Pi and Jetson Nano.
Features
- 8.8inch IPS display with a hardware resolution of 480 x 1920.
- Full metal CNC alloy shell.
- Use with Raspberry Pi, it supports Raspberry Pi OS / Ubuntu / Kali and Retropie.
- Use with Jetson Nano, it supports Ubuntu.
- Use with Desktop PC, it supports Windows 11 / 10 /8.1 / 8 /7 without a driver.
- Support backlight control for power saving.
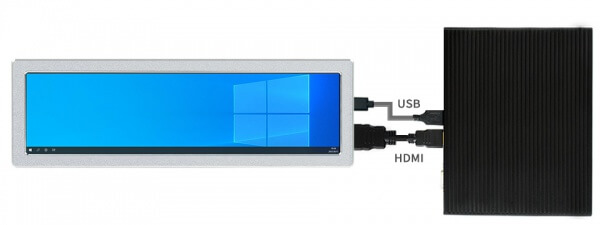
Work with PC
To work with Desktop PC, the display supports Windows 11/10/8.1/8/7.
Instructions:
- Connect the Power interface of LCD to the USB port of PC or 5V power adapter
- Connect the HDMI interface of the LCD to the HDMI interface of the PC
Note that the default orientation of the display is vertical with 480x1920 hardware. If you want to change it to horizontal though software setting, you can refer to the #Orientation
Work with Raspberry Pi
Supported Raspberry Pi OS / Ubuntu / Kali and Retropie systems.
To work with the Raspberry Pi board, you need to configure the system resolution manually, otherwise the display cannot work.
- Download the newest image from the Raspberry Pi website
- Unzip the archive downloaded to get the .img file
- Use the SDFormatter to format the Micro SD card
- Wite the .img file to the SD card by Win32DiskImager file
- After writing, open and modify the config.txt file, which locates at boot directory.
- Add the following lines to the config.txt file and save
max_framebuffer_height=1920
hdmi_mode=87
hdmi_group=2
hdmi_force_mode=1
hdmi_timings=480 0 30 30 30 1920 0 18 6 6 0 0 0 60 0 66280000 3
gpu_mem=512 #Pi Zero series please change to gpu_mem=256
- Insert the Micro SD card to the Raspberry Pi
- Connect the Power interface of LCD to the USB port of the Raspberry Pi or 5V power adapter
- Connect the HDMI interface of the LCD to the HDMI port of the Raspberry Pi
- Start the Raspberry Pi and the display could work after a few seconds.
Note: The default orientation of the display is vertical with 480x1920 hardware. If you want to change it to horizontal, you can refer to the #Orientation.
Orientation
Windows PC
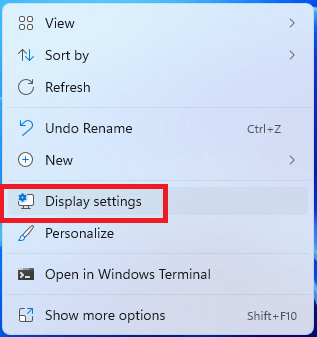
- Right-click and choose the Display setting
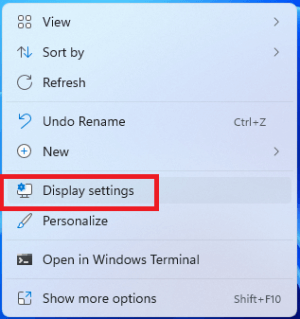
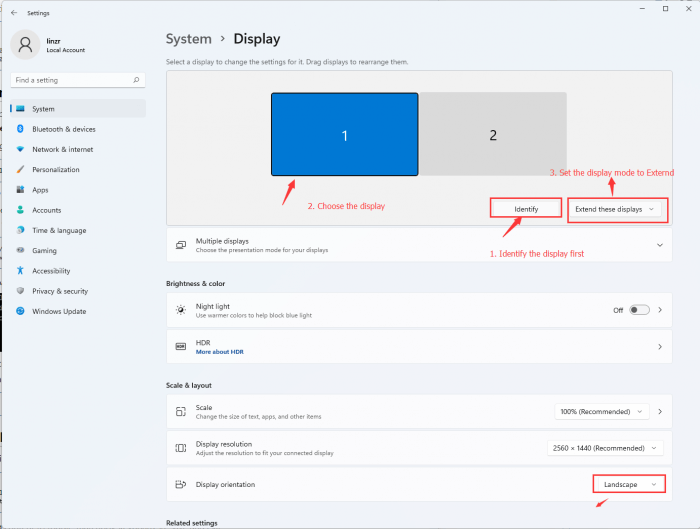
- Click the Identify to detect the display
- Choose the display, set the display mode to extend, and change the orientation

Raspberry Pi
- Update the system. Raspberry Pi OS Bullseye branch needs to update the software version, other systems can omit this step.
sudo apt-get update
sudo apt-get full-upgrade
- Choose Preferences -> Screen Configuration

- Choose Configure -> Screens -> HDMI-1 -> Orientation and change the orientation
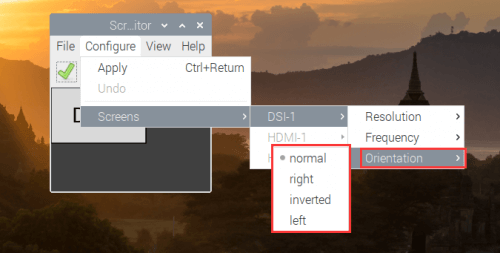
normal: Default orientation
Right: Rotate 90°
inverted: Rotate 180°
left: Rotate 270°
Note: If you use Raspberry Pi 4, please enable the dtverlay=vc4-fkms-V3D
Others
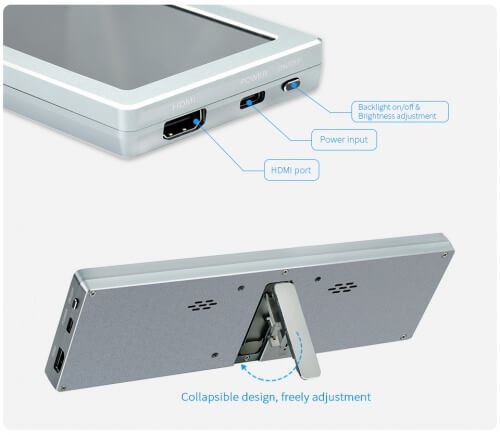
Control Backlight
The brightness can be adjusted by the buttons on the side。
AIDA64 Setup Tutorial
- Use a USB cable to connect the USB port of the host to the power port on the side of the screen for power supply
- Use an HDMI cable to connect the HDMI port of the host to the HDMI port on the side of the screen for display
② Computer display settings:
- Right-click and choose the Display setting
- Click the Identify to detect the display
- Choose the display, set the display mode to extend, and change the display orientation
③ AIDA64 software settings
- Download the AIDA64 software https://download.aida64.com/aida64extreme633.zip , unzip and open the aida64.exe application
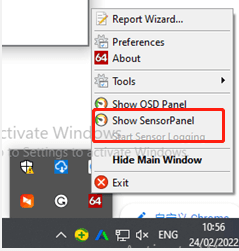
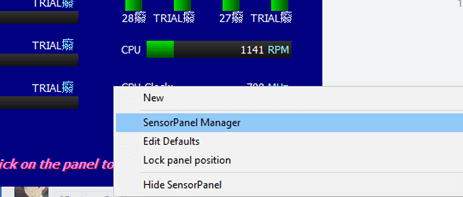
- Right-click to open the "AIDA64" software icon on the taskbar, and enter "Show SensorPanel"
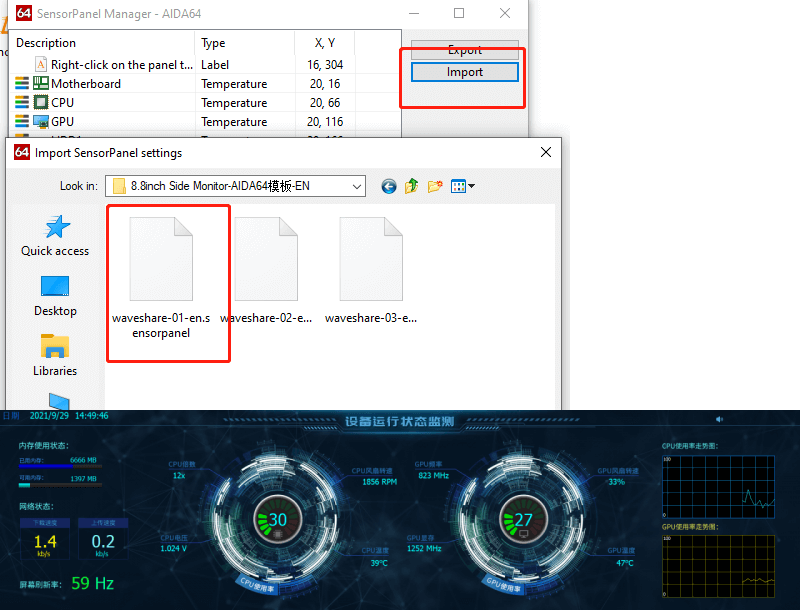
- Right-click the blue area that pops up and go to "SensorPanel Manager"
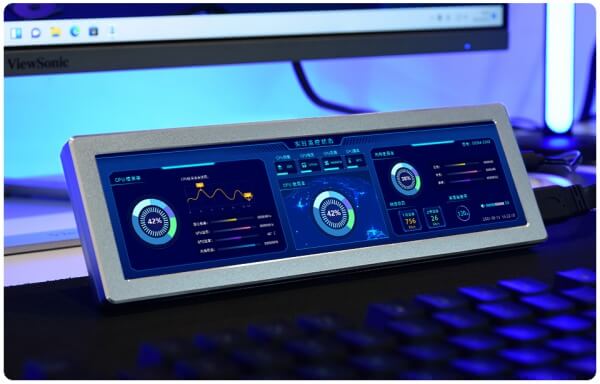
- Import the project template provided by Waveshare, and drag the "Sensor Information Board" to the secondary screen to complete the setting.
AIDA64 + Wallpaper Engine dynamic background making tutorial
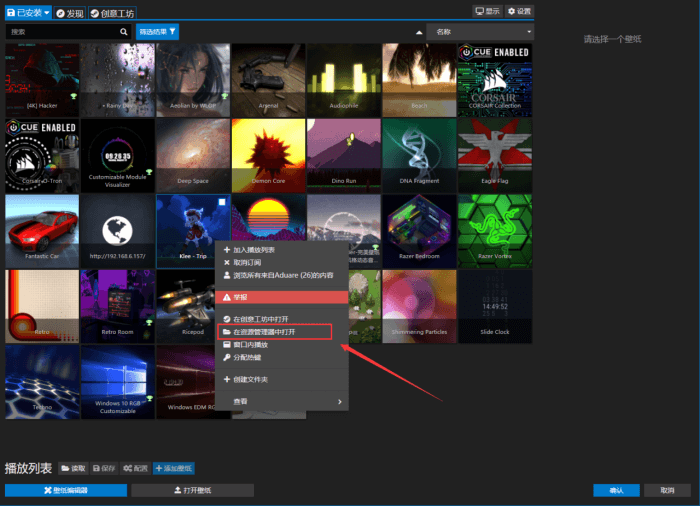
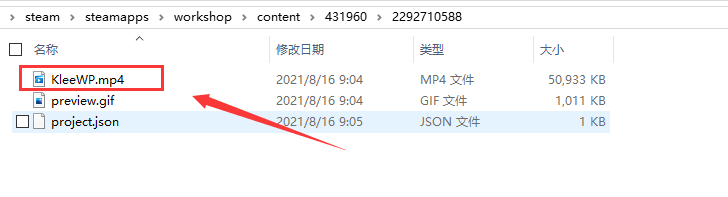
① Download the steam software, install the Wallpaper Engine application (the application needs to be purchased for a fee), open Wallpaper Engine and download your favorite live wallpaper in the "Creative Workshop", right-click and select "Open in Explorer", in the corresponding folder you can See the downloaded wallpaper MP4 file.
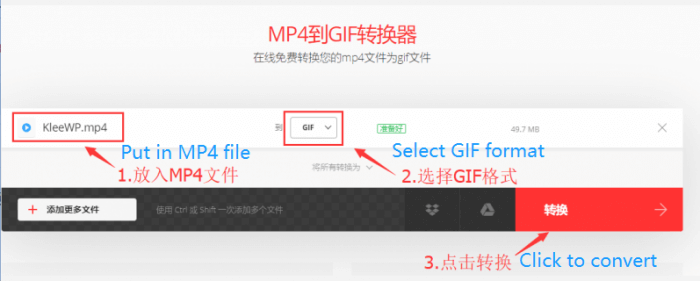
② Open the format conversion website: https://convertio.co/zh/mp4-gif/ to convert the MP4 file to GIF format
③ Right-click the GIF file, click "Properties" to view the "Resolution" of "Details", if it is inconsistent with the screen resolution, you need to modify the resolution of the GIF file to 1920 x 480 through PhotoShop (or other software).
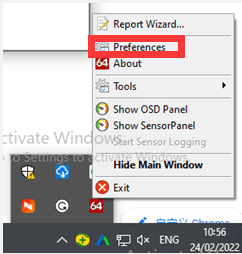
④ Right-click the AIDA64 icon and select "Preferences"
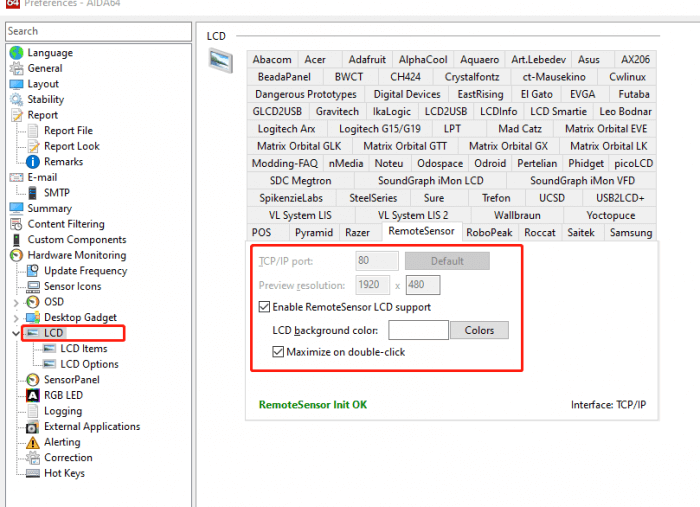
Enter "LCD" to set the resolution and port parameters as shown below:
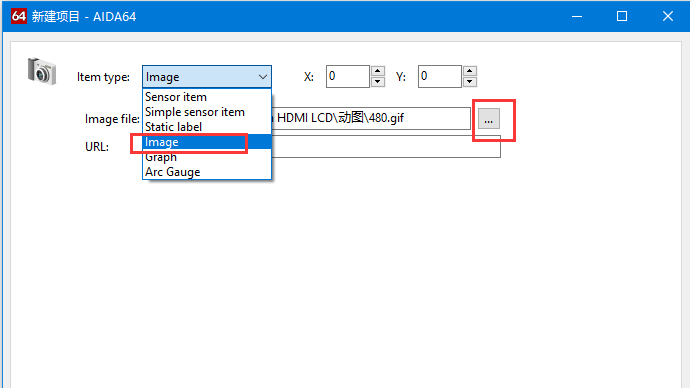
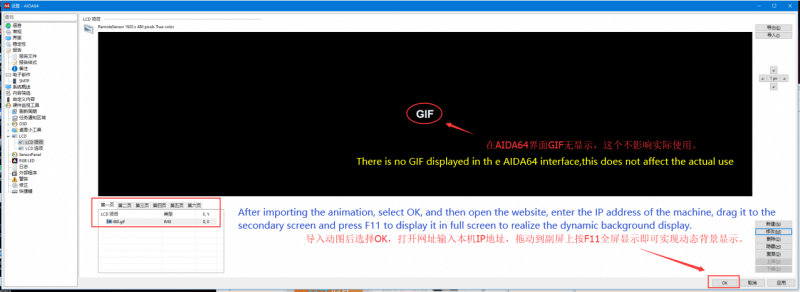
⑤ In the pop-up LCD project, click "New" → "Image" → Import .gif dynamic basemap in the lower right corner.
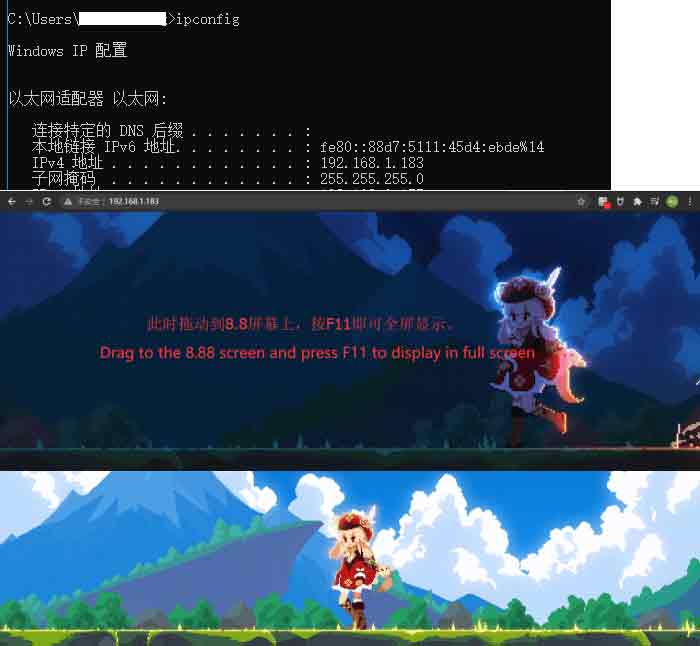
⑥ After importing the animation, select OK, open the website and enter the IP address of the machine, drag the webpage to the secondary screen and press F11 to display it in full screen to realize the dynamic background display.
Take my computer as an example: my IP is 192.168.1.183. After entering the webpage, you can view the AIDA64 setting effect.
