- sales/support
Google Chat:---
- sales
+86-0755-88291180
- sales01
sales@spotpear.com
- sales02
dragon_manager@163.com
- support
tech-support@spotpear.com
- CEO-Complaints
zhoujie@spotpear.com
- sales/support
WhatsApp:13246739196
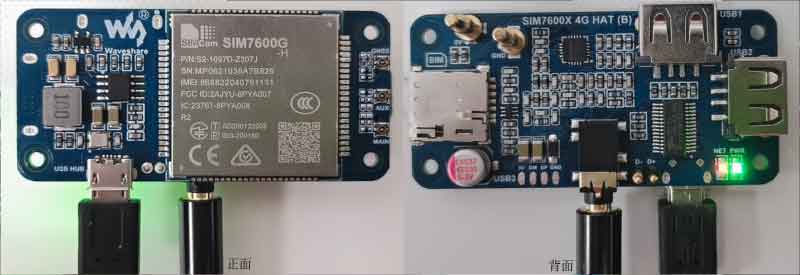
Raspberry Pi SIM7600G-H 4G HAT (B) User Guide
Feature
- Connected via pogo pin or MicroUSB connector
- Dedicated pogo pin for Raspberry Pi Zero/Zero W
- MicroUSB connector for other Raspberry Pi boards or PC
- Incorporates SIM7600G-H global band 4G module, compatible with 2G/3G/4G network with global support
- USB HUB connector for other Raspberry Pi boards or PC, providing USB extension and 4G network access
- Supports dial-up, telephone call, SMS, TCP, UDP, DTMF, HTTP, FTP, etc.
- Supports GPS, BeiDou, Glonass, LBS base station positioning
- SIM card slot, supports 1.8V/3V SIM card
- Onboard audio jack and audio decoder for making the telephone calls
- 2x LED indicators, easy to monitor the operating status
- Control via AT commands (3GPP TS 27.007, 27.005, and V.25TER command set)
- Supports SIM application toolkit: SAT Class 3, GSM 11.14 Release 99, USAT
- Comes with development resources and manual (examples for Raspberry Pi)
Test
- To test this device, you should prepare the following components:
SIM7600G-H 4G HAT (B) × 1
LTE Antenna × 1
GPS Antenna × 1
USB-A to micro-B cable × 1
4G SIM card × 1
An earphone with a microphone × 1 (optional)
- Insert the activated 4G SIM card and the earphone(optional) to the HAT when the HAT is power off, and then connect it to the PC by the USB cable.
- The PWR indicator turns on after connecting.
- When the NET light starts to flash once every second, the module starts to work.
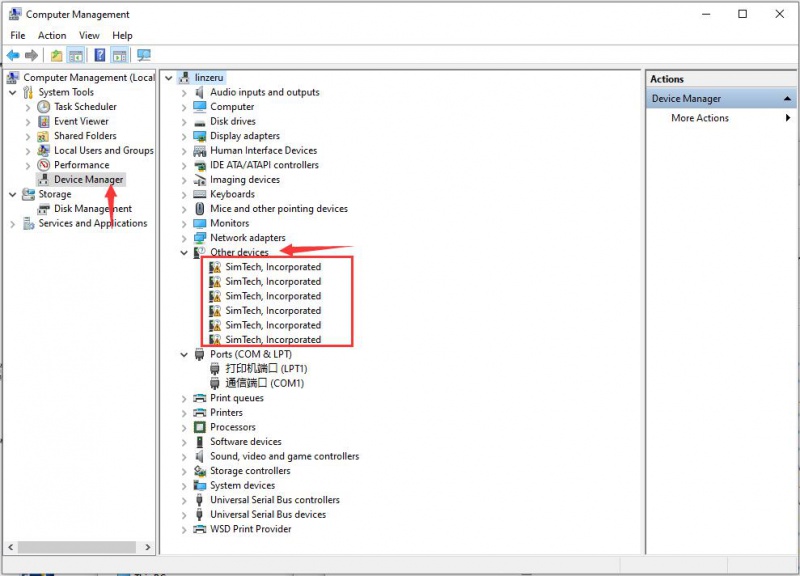
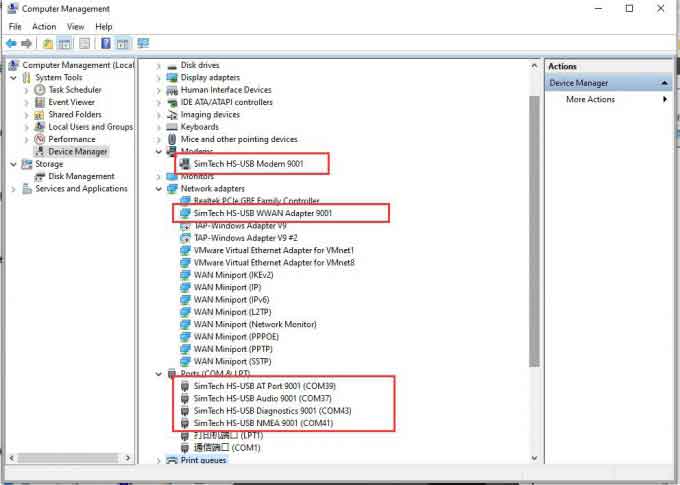
- Check the Device Manager of PC, the several COM ports will be recognized:

- If the COM ports are recognized with an exclamation symbol, you should install the driver manually.
- Connect the 4G HAT to Windows PC (Hereafter we use Windows 10 PC as example))
- Open Device Manager—>Other Devices—>“SimTech, Incorporated”—>Update driver—>Browse my compute for driver software—>Choose the driver according to your OS—>Install it
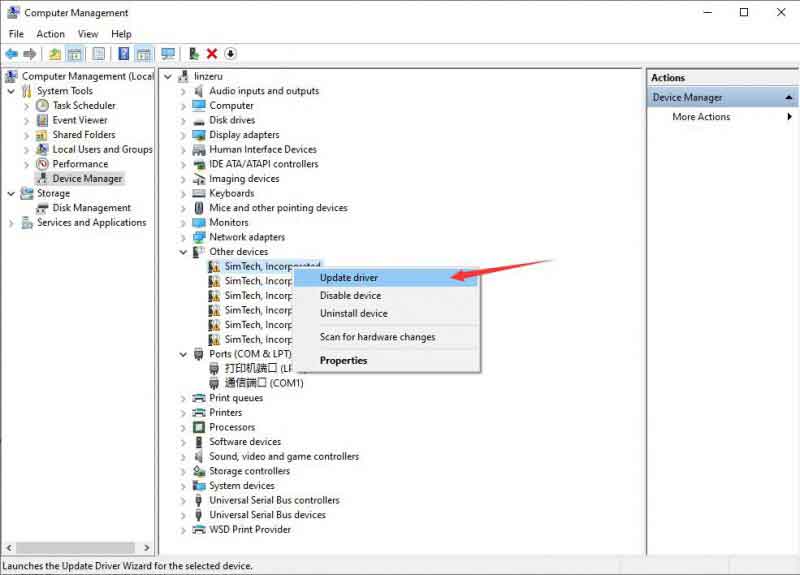
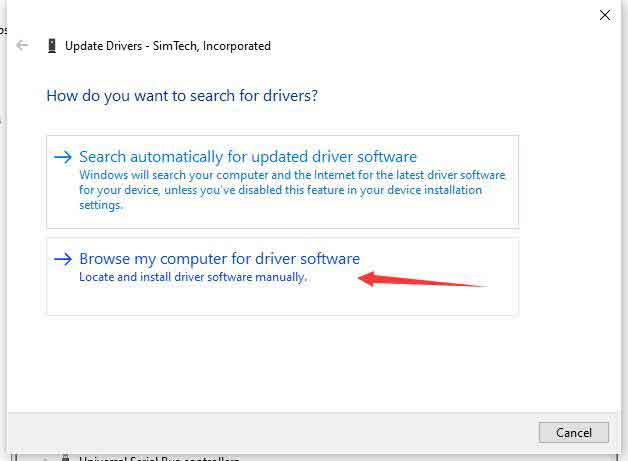
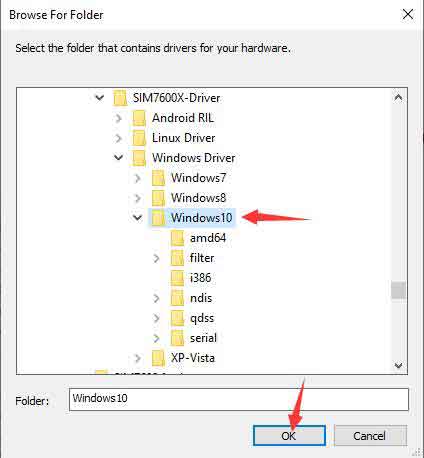
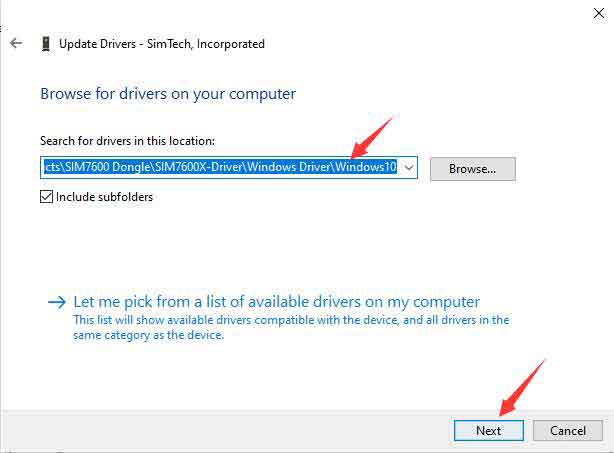
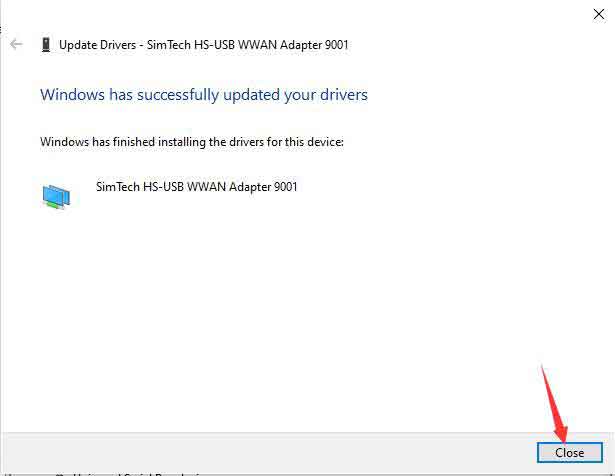
- After installation, all the devices should be recognized normally as below:
NET working status
Reference of indicators
AT commands for testing
| AT Command | Description | Return |
|---|---|---|
| ATE | ATE1: Echo mode on ATE0: Echo mode off | OK |
| AT+CGMI | Request manufacturer indentification | OK |
| AT+CGMM | Request model indentification | OK |
| AT+CGSN | Request product serial number identification | OK |
| AT+CSUB | Request porduct version | OK |
| AT+CGMR | Request firmware version | OK |
| AT+IPREX | Configure buad rate of model | +IPREX:OK |
| AT+CRESET | Reset model | OK |
| AT+CSQ | Query signal quality | OK |
| AT+CPIN? | Query SIM card status | +CPIN:RRADY |
| AT+COPS? | Query provider information | +COPS:OK |
| AT+CREG? | Query network registation status | +CREG: OK |
| AT+CPSI? | Query UE system information | |
| AT+CNMP | Select Network Mode: 2: Automatic | OK |
For more information about the AT command, you can refer to AT command manual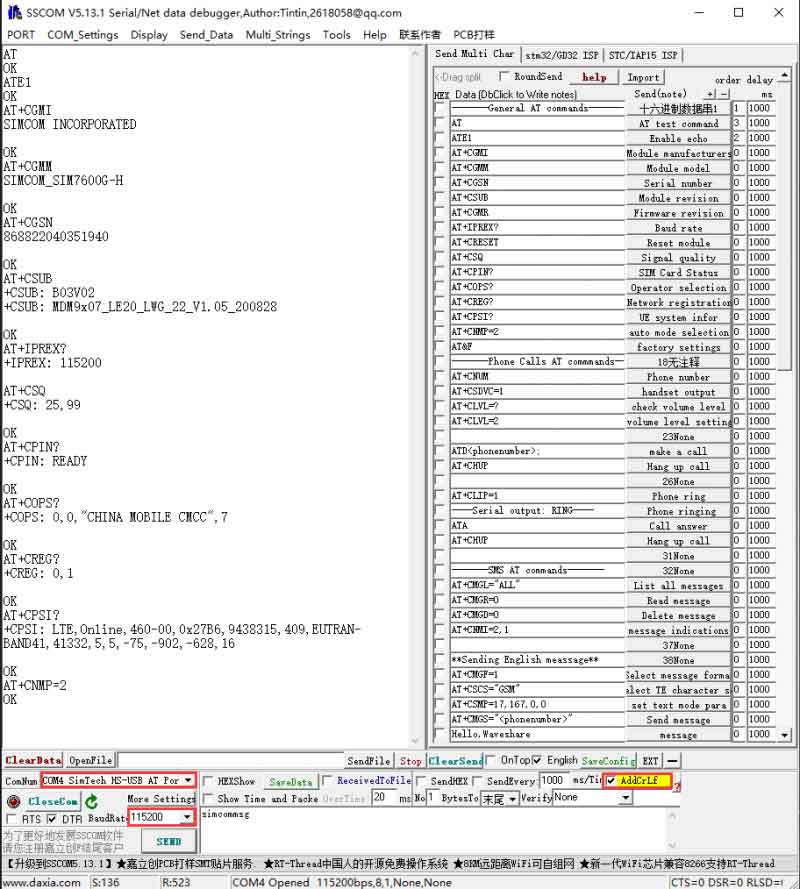
Dial-up Networking
【Note】:You must use a SIM card with GPRS networking enabled and haven't out of service.
Dial-up Networking with Windows PC
- Connect the SIM7600G-H 4G HAT (B) with the 4G SIM card to your win10 PC. After installing the driver, the PC will automatically recognize the module.
- If Windows PC still cannot access the Internet, you need to start NDIS dial-up manually.
Open the SIM7600 AT port and send the command:
AT$QCRMCALL=1,1
And then press 'Enter'. At this time, NDIS dialing will take effect, and the PC can connect to the network.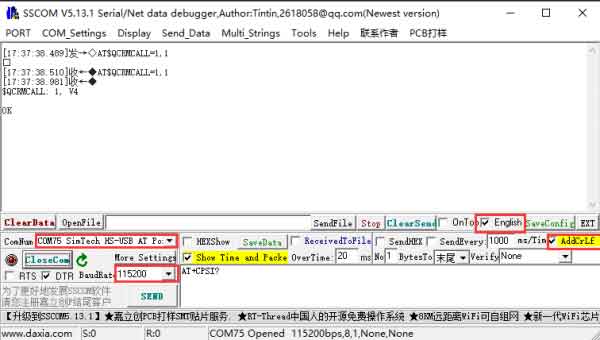
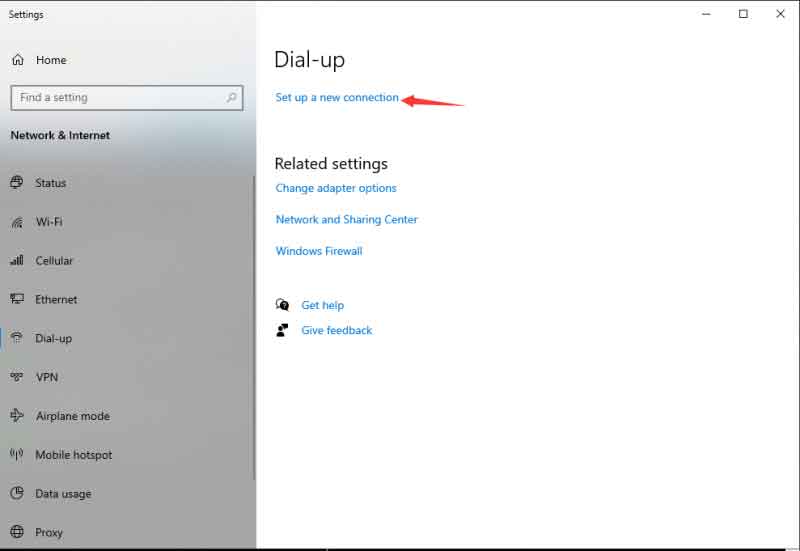
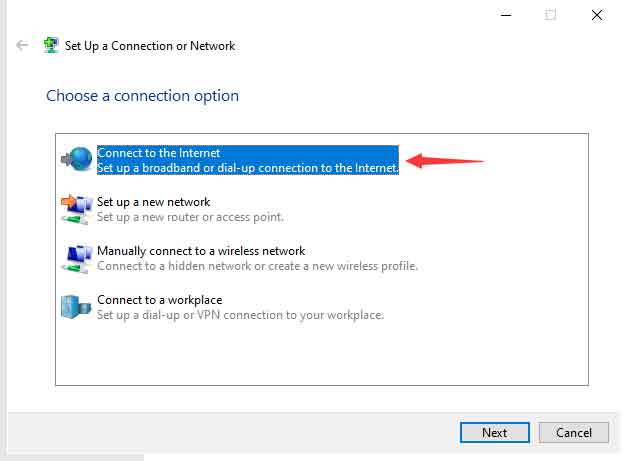
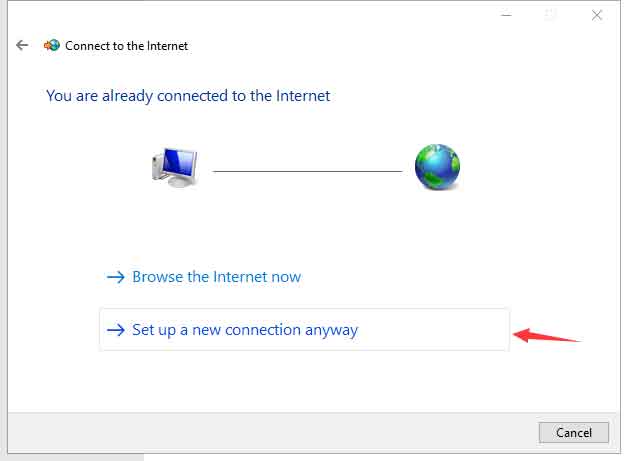
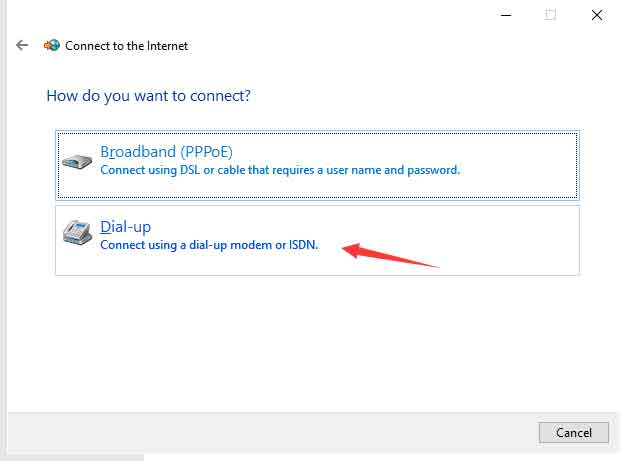
- If you still can’t connect automatically, you can use PPP dial-up. The operation steps are as follows:
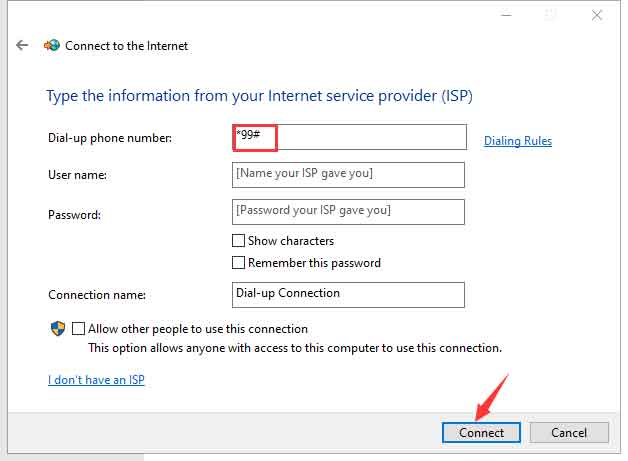
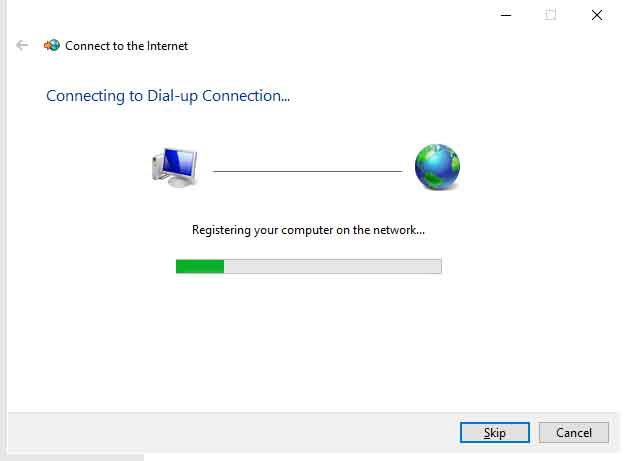
GPS debugging
- Plugin the GPS antenna and place the 4G HAT in an open outdoor (note that it cannot be tested in rainy weather). It takes about 1 minute to receive the positioning signal after power-on;
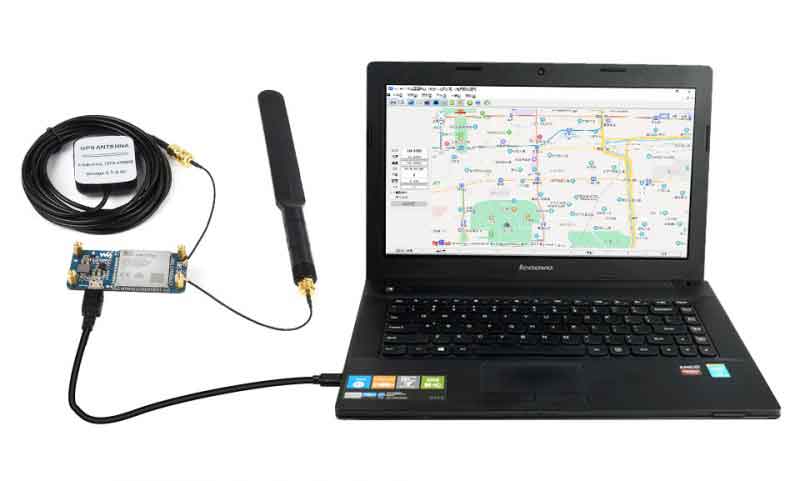
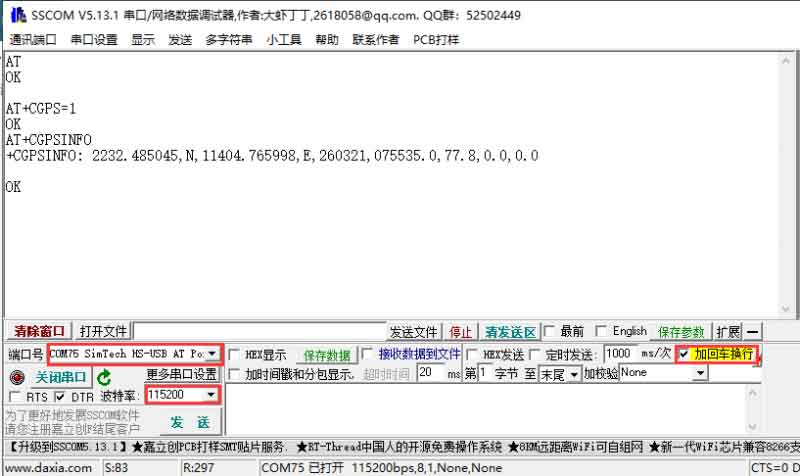
The test commands and screenshots are as follows:
AT+CGPS=1	       //Open GPS
AT+CGPSINFO          //Print GPS information to the serial port
AT+CGPS=0          //Close GPS
Make calls and answer
- Insert the SIM card, connect the LTE antenna and connect the USB interface of SIM7600E-H 4G HAT to PC, Then press the PWRKEY to power on the boardl
- Check whether the indicators blink correctly (PWR's and NET's flashes)
- Send AT commands as bellow:
| Commands | Description | Return |
|---|---|---|
| AT+CNUM | Phone number (only supported by some SIM cards) | +CNUM OK |
| AT+CSDVC | AT+CSDVC=1: Handset output AT+CSDVC=3: Speaker output | OK |
| AT+CLVL=? | Check volume level | OK |
| AT+CLVL=2 | Volume level set to 2 | OK |
| ATD<phone_number>; | Make calls | OK |
| AT+CHUP | Hang up call | OK |
| AT+CLIP=1 | Phone ring | OK |
| ATA | Answer call | OK |
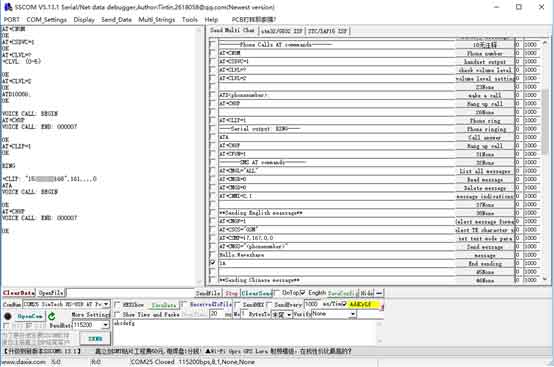
Voice output mode and volume adjustment
AT+CSDVC=1 		//Switch to earphone
AT+CSDVC =3 	        //Switch to speaker
AT+CLVL =?		//Query the volume range. If it returns +CLVL: (0-5), it means that the volume is adjustable from 0 to 5
AT+CLVL=2     	        //Set the volume to 2, return to OK
Answer the phone
Display the serial port of incoming call: RING
Send "ATA"                  //Answer the call
Send "AT+CHUP"               //Hang up the call
Audio parameter debugging
AT+CACDBFN=?
+CACDBFN: (Handset_cal.acdb,Handset_tianmai.acdb)	// It is recommended to consider setting this set of parameters
OK
- In the initialization phase of the module startup, before making a call, add the following
AT^PWRCTL=0,1,3		// Improve TDD noise effect
OK
- During the establishment of a voice call
VOICE CALL:BEGIN      // Module call establishment and execution to improve call effect
AT+CECM=1        //Echo suppression processing
OK
AT+CECH=0x500       //Improve the volume effect of the mobile phone
OK
For more details, please check the file of "SIM7X00_Audio_Application_Note".
Send the massage
- 1. Plug the SIM card, connect the LTE antenna and connect the USB interface of the 4G HAT to PC, and power on the device.
- 2. Check whether the indicators blink correctly: the PWR indicator is always on, and the NET indicator is flashing.
- 3. Send AT commands as bellow:
AT+CMGF=1 //Set the massage mode to TEXT;
- 4.Enter AT+CMGS="phone number" and then press <Enter> to set the recipient's mobile phone number, then this command will return: ">". And then you can enter the content to be sent, such as "Send message test!", and don't need to check 'AddCrLf'. After editing the message, send the information in HEX format, enter 1A in the send box, and then click SEND. After sending successfully, the module will return +CMGS: 15. You can see in the picture below:
【Note】: 1A is the key value of "CTRL+Z", which is used to tell the module to perform the sending operation. You can also send 1B that is "ESC'" to cancel the current operation.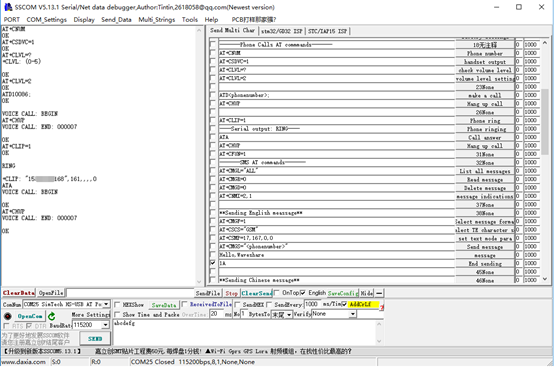
Receive the massage
- 1. Send a message with your phone, such as "This is a receive test for SIM7600X!" to the module.
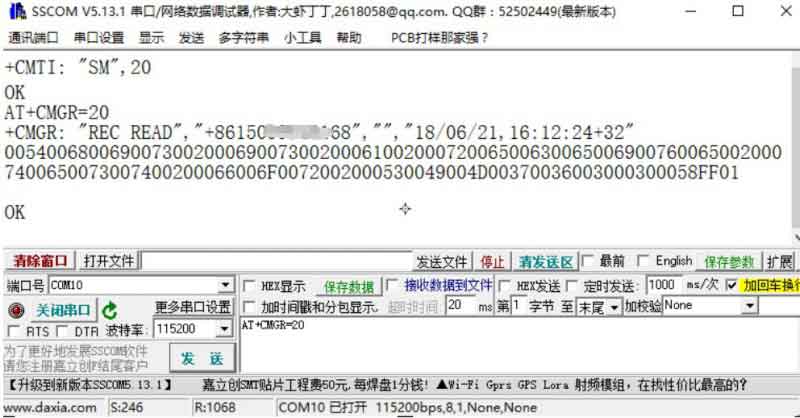
- 2. When receiving the information, the serial port will automatically report the information, "SM", 20, which means there are 20 messages in the SM, and the message just sent is the 20th message.
- 3. Read the massage:
AT+CMGR=20 //Read the 20th information (AT+CMGL="ALL" means to read all the information);
- 4. Delete the massage:
AT+CMGD=20
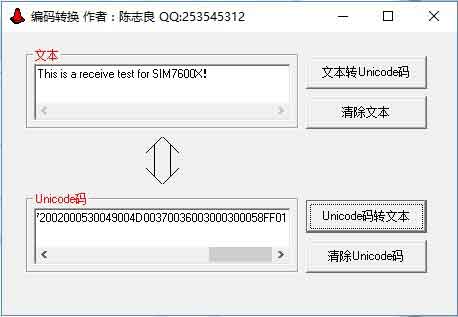
- 5. Convert the displayed information into a text through a code converter
