- sales/support
Google Chat:---
- sales
+86-0755-88291180
- sales01
sales@spotpear.com
- sales02
dragon_manager@163.com
- support
tech-support@spotpear.com
- CEO-Complaints
zhoujie@spotpear.com
- Only Tech-Support
WhatsApp:13246739196
- Purchase/Shipping/Refund
WhatsApp:13424403025
- HOME
- >
- ARTICLES
- >
- Common Moudle
- >
- LCD
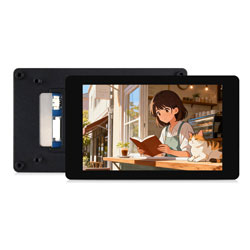
Raspberry Pi Guides User Guide
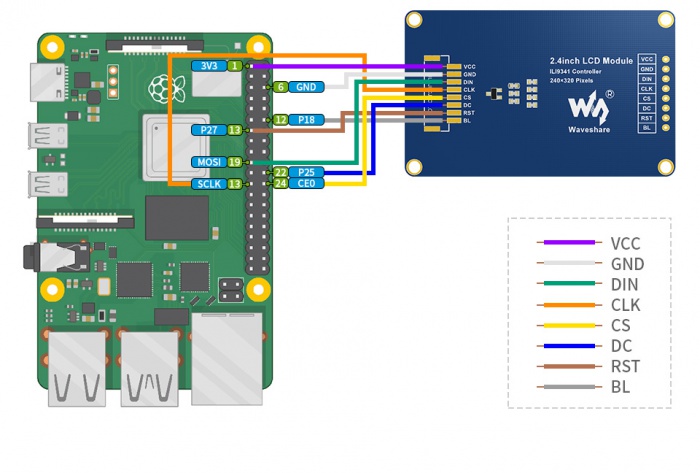
Hardware connection
Please connect the LCD to your Raspberry Pi by the 8PIn cable according to the table below
| LCD | Raspberry Pi | |
| BCM2835 | Board | |
| VCC | 5V | 5V |
| GND | GND | GND |
| DIN | MOSI | 19 |
| CLK | SCLK | 23 |
| CS | CE0 | 24 |
| DC | 25 | 22 |
| RST | 27 | 13 |
| BL | 18 | 12 |
The color of actual cable may be different with the figure here, please connect them according to the pins instead of color.
Enable SPI interface
- Open terminal, use command to enter the configuration page
sudo raspi-config
Choose Interfacing Options -> SPI -> Yes  to enable SPI interface
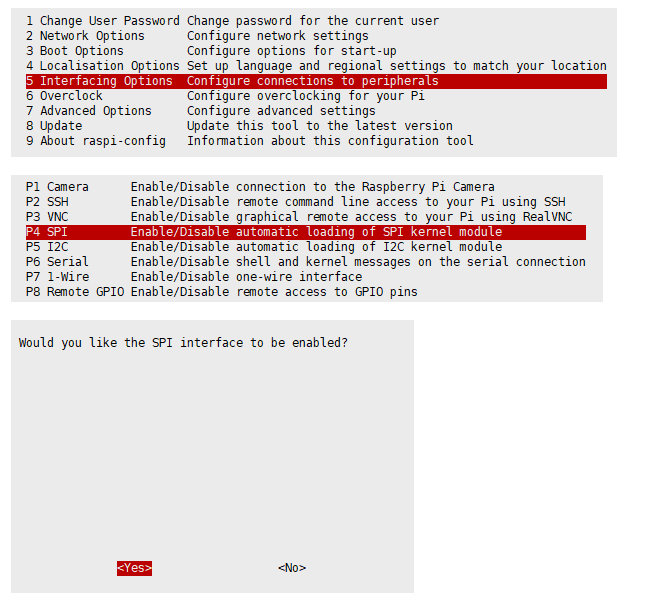
Reboot Raspberry Pi:
sudo reboot
Please make sure that SPI interface was not used by other devices
Install Libraries
- Install BCM2835 libraries
wget http://www.airspayce.com/mikem/bcm2835/bcm2835-1.60.tar.gz
tar zxvf bcm2835-1.60.tar.gz
cd bcm2835-1.60/
sudo ./configure
sudo make
sudo make check
sudo make install
#For more details, please refer to http://www.airspayce.com/mikem/bcm2835/
- Install wiringPi libraries
sudo apt-get install wiringpi

#For Pi 4, you need to update it:
cd /tmp
wget https://project-downloads.drogon.net/wiringpi-latest.deb
sudo dpkg -i wiringpi-latest.deb
gpio -v
#You will get 2.52 information if you install it correctly
- Install Python libraries
#python2
sudo apt-get update
sudo apt-get install python-pip
sudo apt-get install python-pil
sudo apt-get install python-numpy
sudo pip install RPi.GPIO
sudo pip install spidev
#python3
sudo apt-get update
sudo apt-get install python3-pip
sudo apt-get install python3-pil
sudo apt-get install python3-numpy
sudo pip3 install RPi.GPIO
sudo pip3 install spidev
Download Examples
Open Raspberry Pi terminal and run the following command
sudo apt-get install p7zip-full
sudo wget  https://www.waveshare.net/w/upload/a/a8/LCD_Module_RPI_code.7z
7z x LCD_Module_RPI_code.7z -O./LCD_Module_code
cd LCD_Module_code/RaspberryPi/
Run the demo codes
Please go into the RaspberryPi directory (demo codes) first and run the commands in terminal
C codes
- Re-compile the demo codes
cd c
sudo make clean
sudo make -j 8
This examples are made for multi-dusplay, you can input the type of the LCD when using.
sudo ./main <<type of LCD>>
Use the command according to LCD::
sudo ./main 0.96
sudo ./main 1.14
sudo ./main 1.3
sudo ./main 1.54
sudo ./main 1.8
sudo ./main 2
sudo ./main 2.4
python
- Enter the python directory and run ls -al
cd python/examples
ls -l
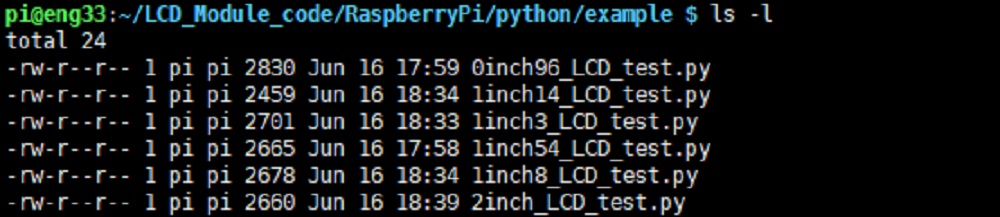
You can check all the files which are listed in type:
| 0inch96_LCD_test.py | 0.96inch LCD example |
| 1inch14_LCD_test.py | 1.14inch LCD example |
| 1inch3_LCD_test.py | 1.3inch LCD example |
| 1inch54_LCD_test.py | 1.54inchLCD example |
| 1inch8_LCD_test.py | 1.8inch LCD example |
| 2inch_LCD_test.py | 2inch LCD example |
| 2inch4_LCD_test.py | 2.4inch LCD example |
- Run the example
# python2
sudo python 0inch96_LCD_test.py
sudo python 1inch14_LCD_test.py
sudo python 1inch3_LCD_test.py
sudo python 1inch54_LCD_test.py
sudo python 1inch8_LCD_test.py
sudo python 2inch_LCD_test.py
sudo python 2inch4_LCD_test.py
# python3
sudo python3 0inch96_LCD_test.py
sudo python3 1inch14_LCD_test.py
sudo python3 1inch3_LCD_test.py
sudo python3 1inch54_LCD_test.py
sudo python3 1inch8_LCD_test.py
sudo python3 2inch_LCD_test.py
sudo python3 2inch4_LCD_test.py