


- sales/support
Google Chat:---
- sales
+86-0755-88291180
- sales01
sales@spotpear.com
- sales02
dragon_manager@163.com
- support
tech-support@spotpear.com
- CEO-Complaints
zhoujie@spotpear.com
- Only Tech-Support
WhatsApp:13246739196
- Purchase/Shipping/Refund
WhatsApp:13424403025
RP2040-Tiny-Kit User Guide
Schematic diagram
Application program
Official Raspberry Pi Documents
- Raspberry Pi Pico MicroPython Book
- Raspberry Pi related books
- Pico datasheet
- RPI-PICO-R3-PUBLIC-SCHEMATIC
- Pico R3 A4 Pinout
- Getting started with pico
- Pico c sdk
- Pico python sdk.pdf
- Pico datasheet
- Rp2040 datasheet
- Hardware design with rp2040
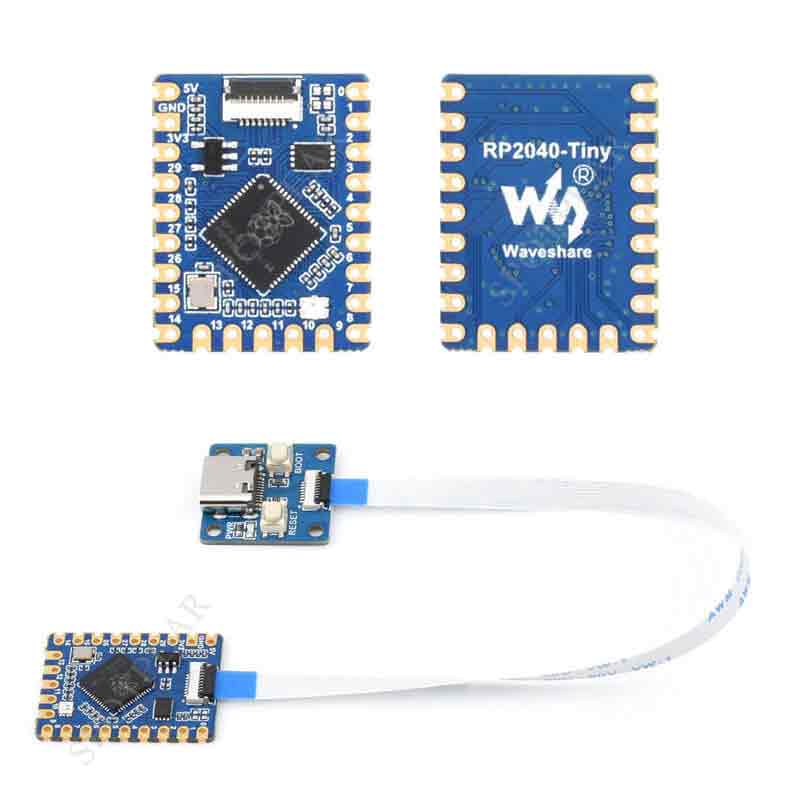
Overview
[] RP2040-Tiny Development Board, Raspberry Pi Microcontroller Development Board, Based On Official RP2040 Dual Core Processor, USB Port Adapter Board Optional
Product Features
[] RP2040 microcontroller chip designed by Raspberry Pi in the United Kingdom
[] Dual-core Arm Cortex M0+ processor, flexible clock running up to 133 MHz
[] 264KB of SRAM, and 2MB of onboard Flash memory
[] Onboard FPC 8PIN connector, adapting USB Type-C port via adapter board
[] Castellated module allows soldering direct to carrier boards
[] USB 1.1 with device and host support
[] Low-power sleep and dormant modes
[] Drag-and-drop programming using mass storage over USB
[] 20 × multi-function GPIO pins
[] 2 × SPI, 2 × I2C, 2 × UART, 4 × 12-bit ADC, 16 × controllable PWM channels
[] Accurate clock and timer on-chip
[] Temperature sensor
[] Accelerated floating-point libraries on-chip
[] 8 × Programmable I/O (PIO) state machines for custom peripheral support
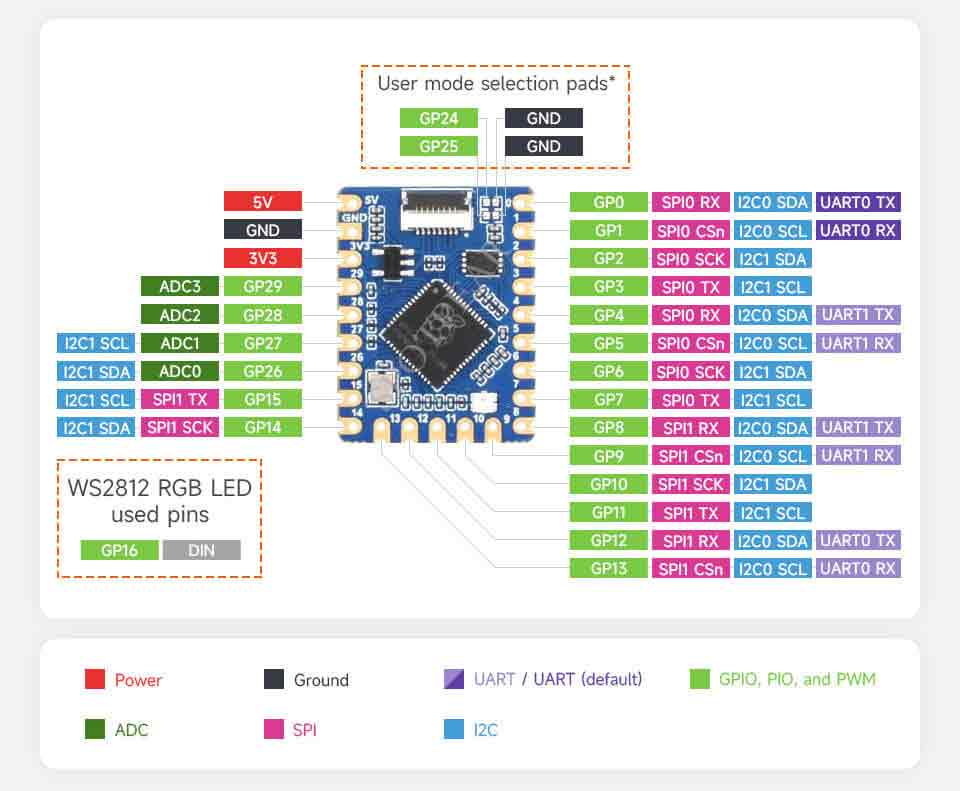
20 × Multi-Function GPIO Pins
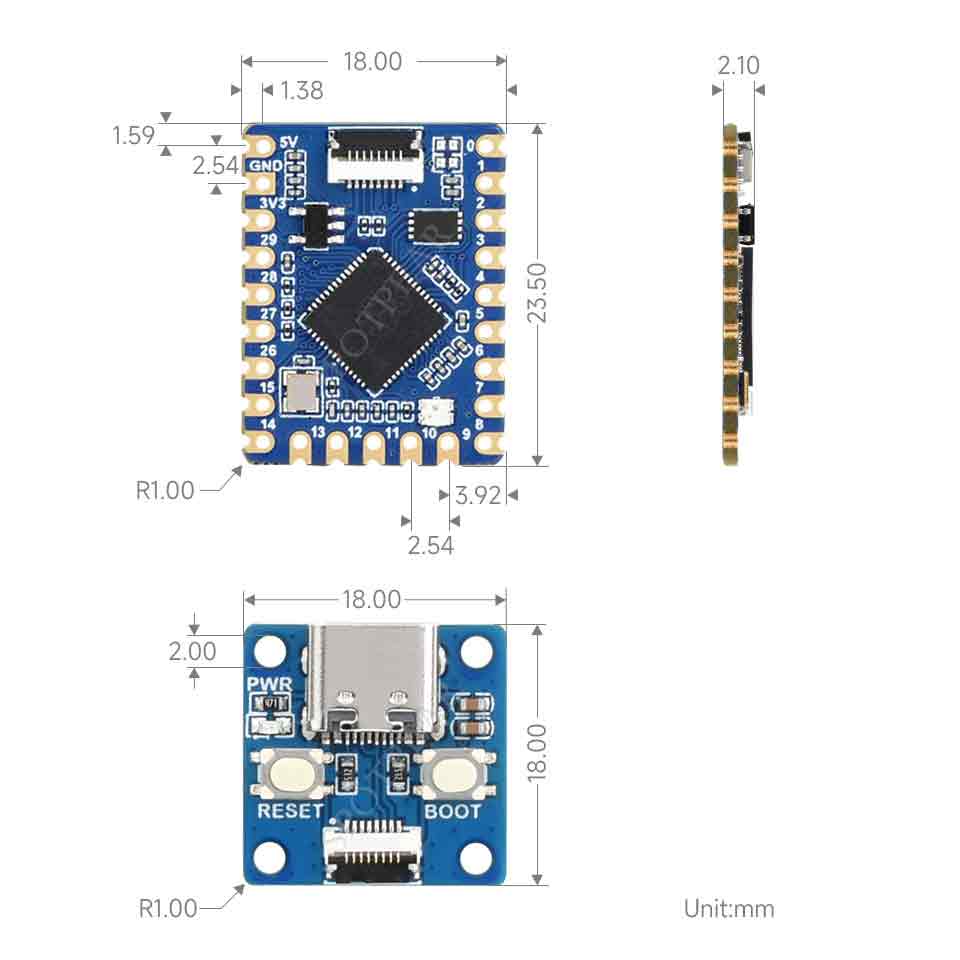
Outline Dimensions
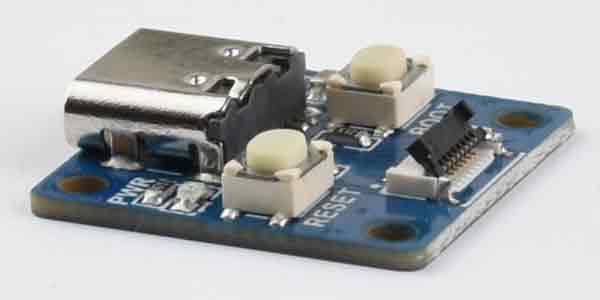
Cable installation
[] Please read this chapter and precautions thoroughly before installing the wiring, otherwise it may cause device damage or short circuit!
- 1. Open the cable connector flip
- 2. Please make sure to install the cable in the middle when installing it
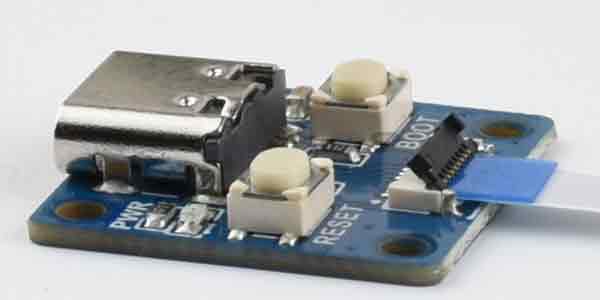
- 3. Close the flip cover, which can be fully closed under normal circumstances
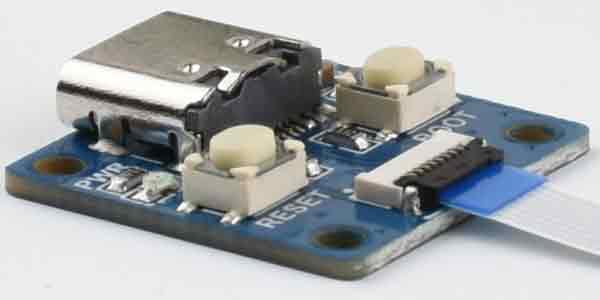
- 4. If the cable is not installed properly, it may cause the flip to fail to close properly. Please adjust the cable position before attempting to close the flip
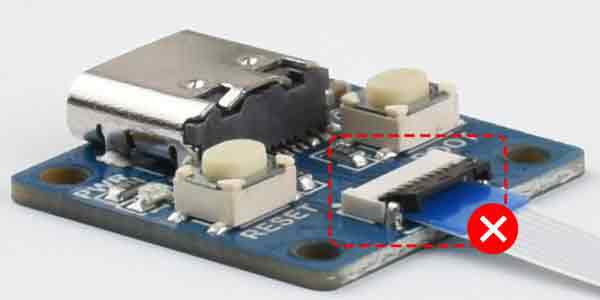
[] Note
- Do not plug or unplug the cable with power, otherwise it may cause a short circuit
- When installing the cable, it should be noted that the cable is installed in the middle and inserted to the bottom. If not installed correctly, it may cause abnormal connections or even short circuits.
Download Firmware
- MicroPython Firmware Download

- C_Blink Firmware Download

Official Raspberry Pi Documents
- Raspberry Pi Pico MicroPython Book
- Raspberry Pi related books
- Pico datasheet
- RPI-PICO-R3-PUBLIC-SCHEMATIC
- Pico R3 A4 Pinout
- Getting started with pico
- Pico c sdk
- Pico python sdk.pdf
- Pico datasheet
- Rp2040 datasheet
- Hardware design with rp2040
Raspberry Pi Demo
Arduino IDE
- Environmental construction
- Open the Arduino IDE and enter File ->Preferences
- In the pop-up dialog box, enter the following URL in the "Additional Boards Manager URLs" field:
https://github.com/earlephilhower/arduino-pico/releases/download/global/package_rp2040_index.json
- Click OK to close the dialog box.
- Go to Tools in the IDE ->Development Board Manager
- Enter 'pico' in the search box and select 'add':