- sales/support
Google Chat:---
- sales
+86-0755-88291180
- sales01
sales@spotpear.com
- sales02
dragon_manager@163.com
- support
tech-support@spotpear.com
- CEO-Complaints
zhoujie@spotpear.com
- Only Tech-Support
WhatsApp:13246739196
- Purchase/Shipping/Refund
WhatsApp:13424403025
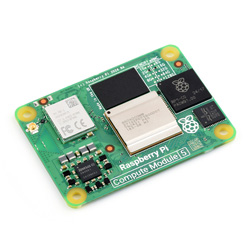
Compute-Module-5 User Guide
Overview
Introduction
This is the Raspberry Pi 5, compared to the Raspberry Pi 4B, its processor speed is 2-3 times that of the previous generation product, it has rich multimedia, multiple memory versions, and better connectivity. It is integrated with the RP1 I/O controller, USB3 with greater total bandwidth, and a new PCIe interface, offering faster transmission speeds.
Features
- Broadcom BCM2712 (Arm Cortex A76)
- 64-bit 2GHz quad-core, 512KB L2 cache and 2MB shared L3 cache
- Multiple memory and EMMC options
- Gigabit Ethernet
- 2.4GHz/5GHz dual-band 802.11ac Wi-Fi
- Bluetooth 5.0, BLE
- USB 3.0 x 2 (supports 5Gbps synchronous operation), USB 2.0 x 1
- HDMI x 2 (supports 4Kp60)
- TF card
- GPIO × 28
- 2 × 4-lane MIPI DSI/CSI interface
- USB Type C Power (5V/5A)
- Real-time clock (RTC), powered from external battery
- PCIe 2.0 interface x1
Dimensions
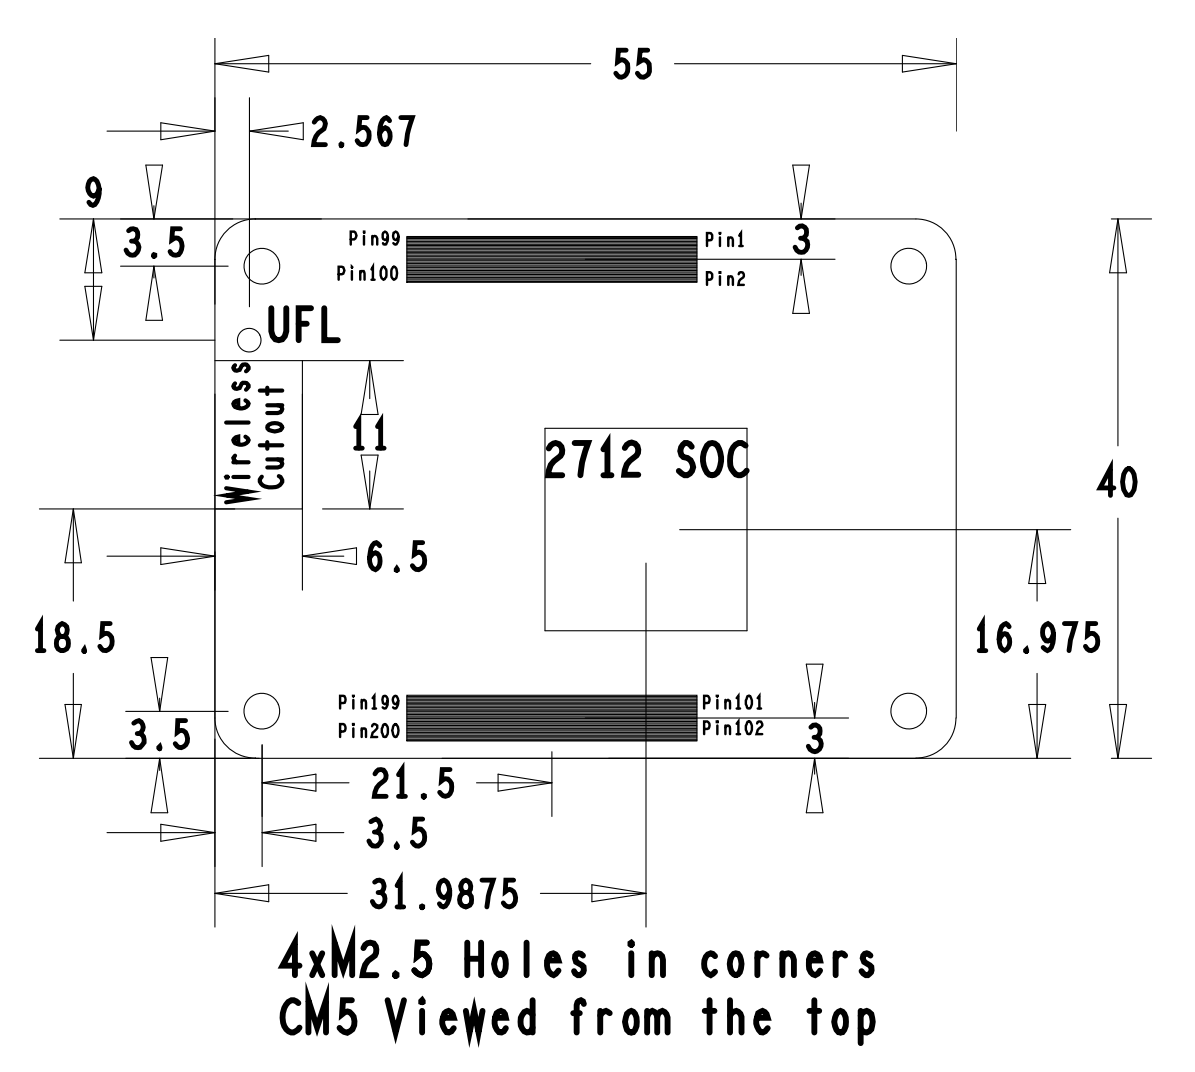
Adaptation of CM4 baseboard
Click [here] for more details
Fan control
The PI5 fan defaults to starting when the temperature reaches 50 degrees. If you want to control it at other temperatures, you can do so by adding specific content to /boot/firmware/config.txt, for example:
dtparam=fan_temp0=36000,fan_temp0_hyst=2000,fan_temp0_speed=90
dtparam=fan_temp1=40000,fan_temp1_hyst=3000,fan_temp1_speed=150
dtparam=fan_temp2=52000,fan_temp2_hyst=4000,fan_temp2_speed=200
dtparam=fan_temp3=58000,fan_temp3_hyst=5000,fan_temp3_speed=255
Among them:
fan_temp0/1/2/3               Indicates the temperature (36000 means 36℃)

fan_temp0/1/2/3_speed  Indicates the corresponding rotational speed (value up to 255)

fan_temp0/1/2/3_hyst      Indicates the hysteresis temperature
For more details, refer to here
Notice: There are only 4 temperatures, 0, 1, 2 and 3, and it's not possible to set other temperatures. The hysteresis temperature must not exceed the step range between two temperatures
MIPI
Support dual MIPI, customers can freely choose CSI or DSI connections
The DSI screen is 800x480 resolution screen by default, please refer to the corresponding WIKI for other resolution screens
DSI
#Add the following to the config.txt file:
sudo nano /boot/firmware/config.txt
#DSI1
dtoverlay=vc4-kms-dsi-7inch,dsi0
#DSI0
dtoverlay=vc4-kms-dsi-7inch,dsi1
CSI
Add the following to the config.txt file:
sudo nano /boot/firmware/config.txt
| Mode | CAM0 setup statement | CAM1 setup statement |
|---|---|---|
| OV9281 | dtoverlay=ov9281,cam0 | dtoverlay=ov9281,cam1 |
| IMX290/IMX327 | dtoverlay=imx290,clock-frequency=37125000,cam0 | dtoverlay=imx290,clock-frequency=37125000,cam1 |
| IMX378 | dtoverlay=imx378,cam0 | dtoverlay=imx378,cam1 |
| IMX219 | dtoverlay=imx219,cam0 | dtoverlay=imx219,cam1 |
| IMX477 | dtoverlay=imx477,cam0 | dtoverlay=imx477,cam1 |
| IMX708 | dtoverlay=imx708,cam0 | dtoverlay=imx708,cam1 |
Allow one connection to DSI and one connection to CSI, for example, use IMX219 to connect to MIPI1
For example, if you want to connect a DSI display to MIPI0, add the following to the config.txt file
dtoverlay=imx219,cam1
dtoverlay=vc4-kms-dsi-7inch,dsi0
Real-Time Clock (RTC)
There is no battery by default, and an additional RTC battery (CR/ML2032 battery) is required
Software debugging
The default device is /dev/rtc0
Regarding time, by inputting "date" in the command line, you can see the current time. Connecting the Raspberry Pi system to the network will automatically synchronize the time. If the default RTC device is connected and functioning properly, the RTC time will be updated after the automatic network synchronization
sudo hwclock -r Read the RTC time, if there are multiple RTC devices, you can use -f to select the corresponding devices (for example: sudo hwclock -f /dev/rtc1 -r)
Hwclock
System clock -> Hardware clock (RTC)
sudo hwclock -w
Synchronize hardware clock (RTC) -> System clock
sudo hwclock  -s
 #Need to turn off the network, or disable network time synchronization, otherwise it will be changed back
Set the hardware clock time (RTC):
sudo hwclock --set --date="9/8/2023 16:45:05"View the hardware clock (RTC)
sudo hwclock -r
Show version information.
sudo hwclock --verbose
Automated wakeup
To support a low-power mode for wake-up alarms, add the configuration:
sudo -E rpi-eeprom-config --edit
#Add the following 2 lines
POWER_OFF_ON_HALT=1
WAKE_ON_GPIO=0
#Restart the device after adding (if you connect to the serial port log, you can see that there are update related logs)
sudo reboot
#You can use the following methods to test the function:
echo +600 | sudo tee /sys/class/rtc/rtc0/wakealarm
sudo halt  or  sudo poweroff
#10 minutes later, it will be awakened and restarted
RTC battery charging
Note: Before adding this, make sure your RTC battery allows charging and check the maximum allowable voltage
sudo nano /boot/firmware/config.txt
#Add
dtparam=rtc_bbat_vchg=3000000
#Among these, 3,000,000 represents the maximum voltage. Charging will stop when it reaches 3V, and the charging will restart with a trickle charge when the voltage drops below 3V
Resources
Resources
CM5 Core board datasheet
CM5 Core board 3D
CM5 Core introduction
Related links
Differences between CM4 and CM5
FAQ
Question: Can the old versions of the Raspberry Pi operating system be used with CM5?
CM5 requires the latest version of Raspberry Pi OS Bookworm (2024-11-19 or later).
Support
Monday-Friday (9:30-6:30) Saturday (9:30-5:30)
Email: services01@spotpear.com