- sales/support
Google Chat:---
- sales
+86-0755-88291180
- sales01
sales@spotpear.com
- sales02
dragon_manager@163.com
- support
tech-support@spotpear.com
- CEO-Complaints
zhoujie@spotpear.com
- Only Tech-Support
WhatsApp:13246739196
- Purchase/Shipping/Refund
WhatsApp:13424403025
11EP-CAPLCD User Guide
Features
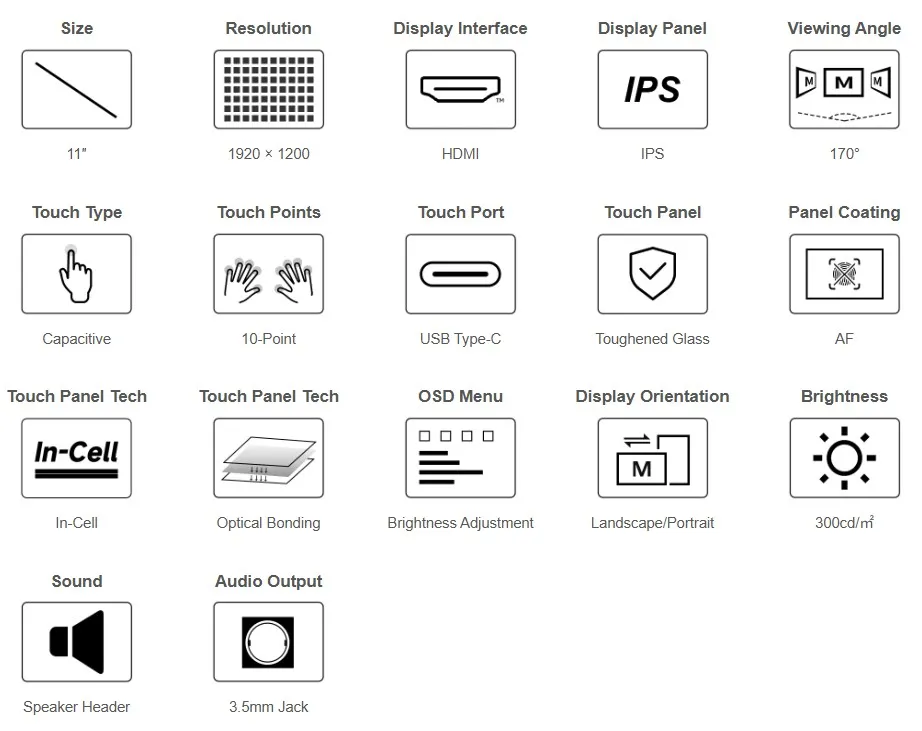
- 11inch IPS display with 1920 × 1200 hardware resolution.
- Capacitive touch, supports 10-point touch.
- Tempered glass panel with 7H hardness.
- In-Cell touch panel technology with optical bonding.
- Supports Raspberry Pi OS / Ubuntu / Kali and RetroPie when used with Raspberry Pi.
- Supports Windows 11 / 10 / 8.1 / 8 / 7 when used as a computer monitor.
- Brightness adjustment and screen rotation via onboard buttons.
- Supports HDMI audio output, with a 3.5mm headphone jack and 4PIN speaker interface.
Specifications
| Item | Description | Unit |
|---|---|---|
| Model | 11EP-CAPLCD | / |
| Size | 11 | Inch |
| Viewing Angle | 170 | Deg |
| Resolution | 1920×1200 | Pixels |
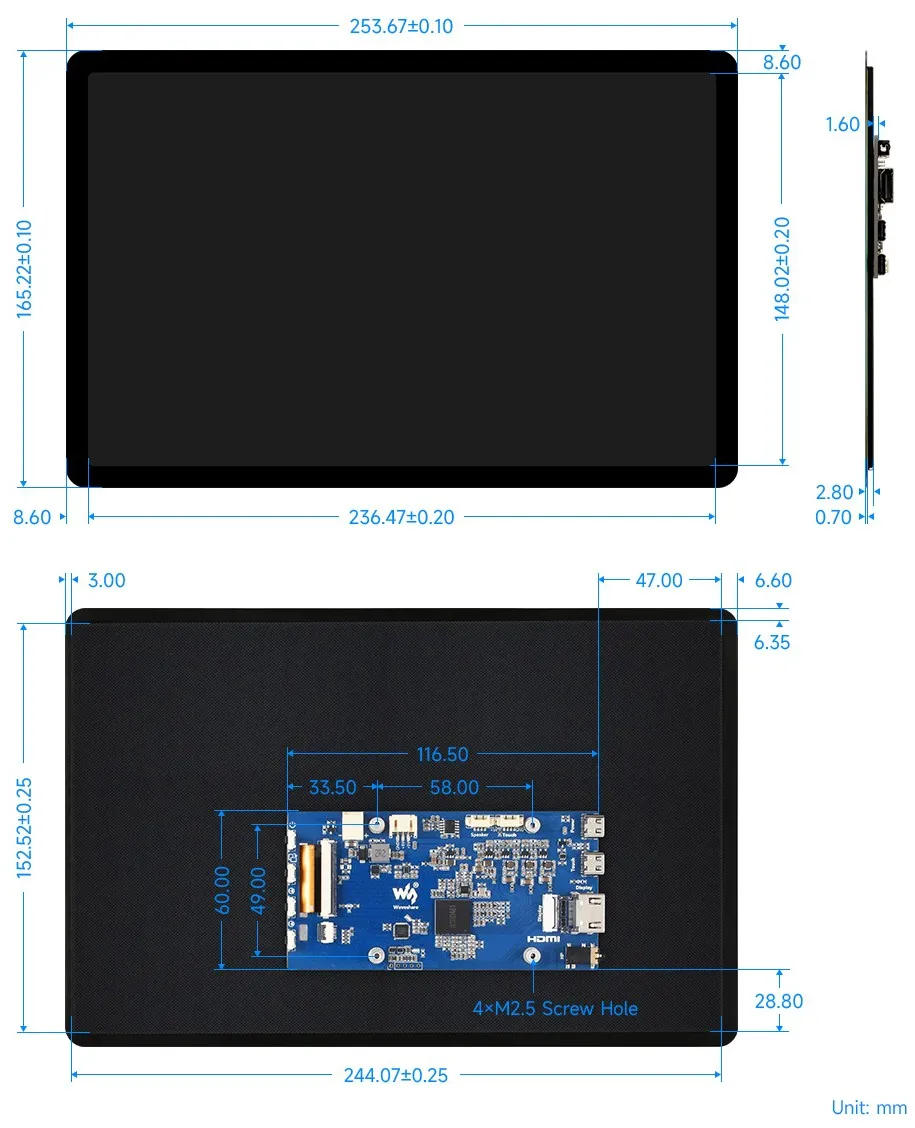
| Dimensions | 253.67(H) × 165.22(V) × 2.8(D) | mm |
| Active Area | 253.87(H) × 147.42(V) | mm |
| Pixel Pitch | 0.1128(H) × 0.1128(V) | mm |
| Color Gamut | 70% | NTSC |
| Contrast Ratio | 1300:1 | / |
| Backlight Adjustment | OSD Menu | / |
| Refresh Rate | 60 | Hz |
| Display Interface | Standard HDMI Interface | / |
| Power Interface | 5V | / |
| Typical Power Consumption | 4.85 | Watt |
| Weight | 238 | g |
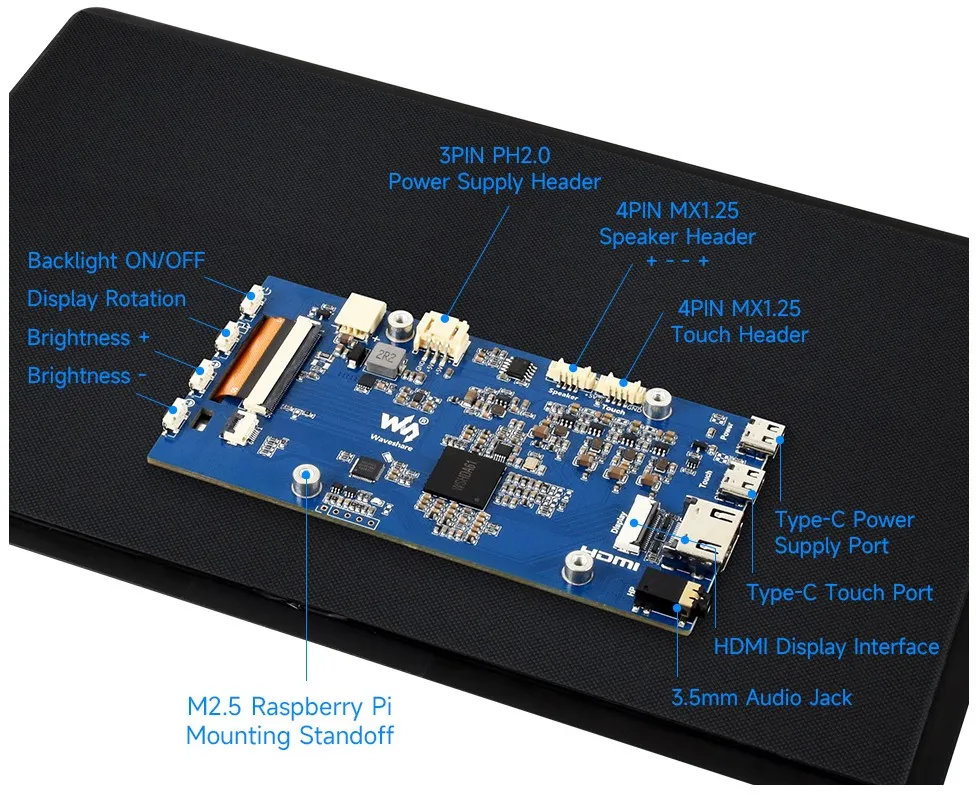
Interface Introduction
Dimensions
Working with Raspberry Pi
Hardware Connection
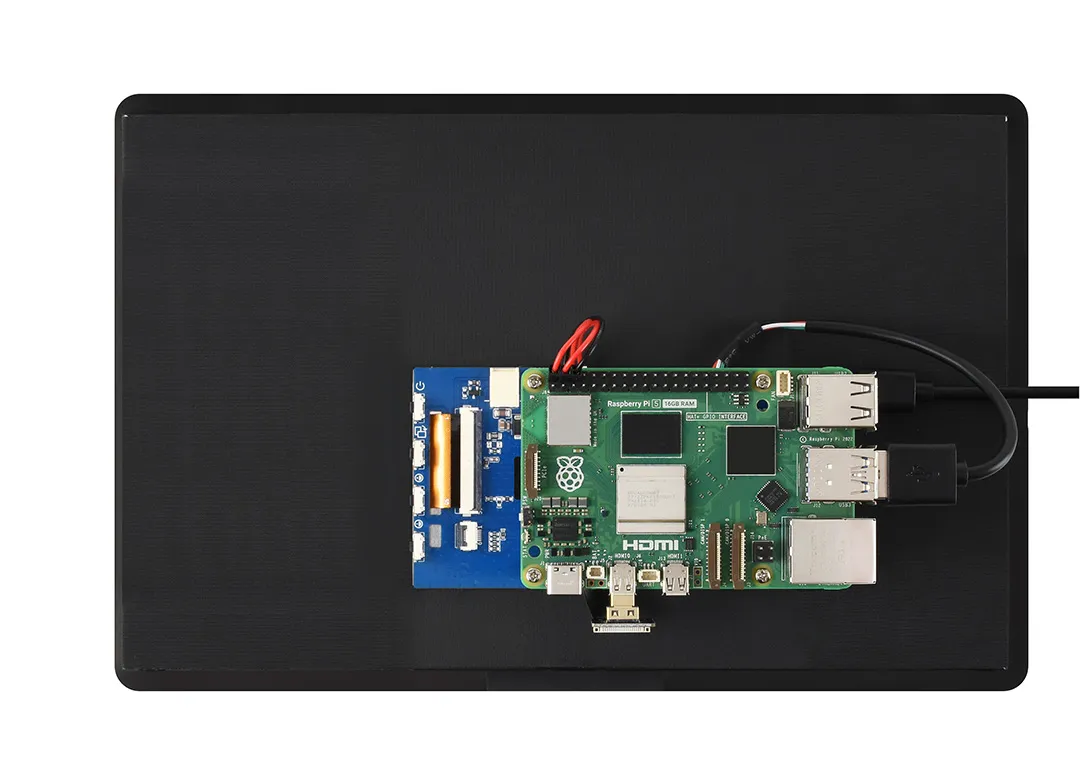
Using Raspberry Pi 5 as an example, prepare the display, Raspberry Pi board, power cable, HDMI cable, USB touch cable, and the corresponding adapters.
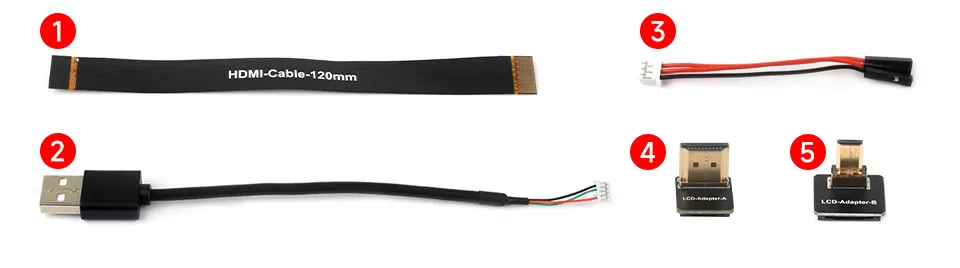
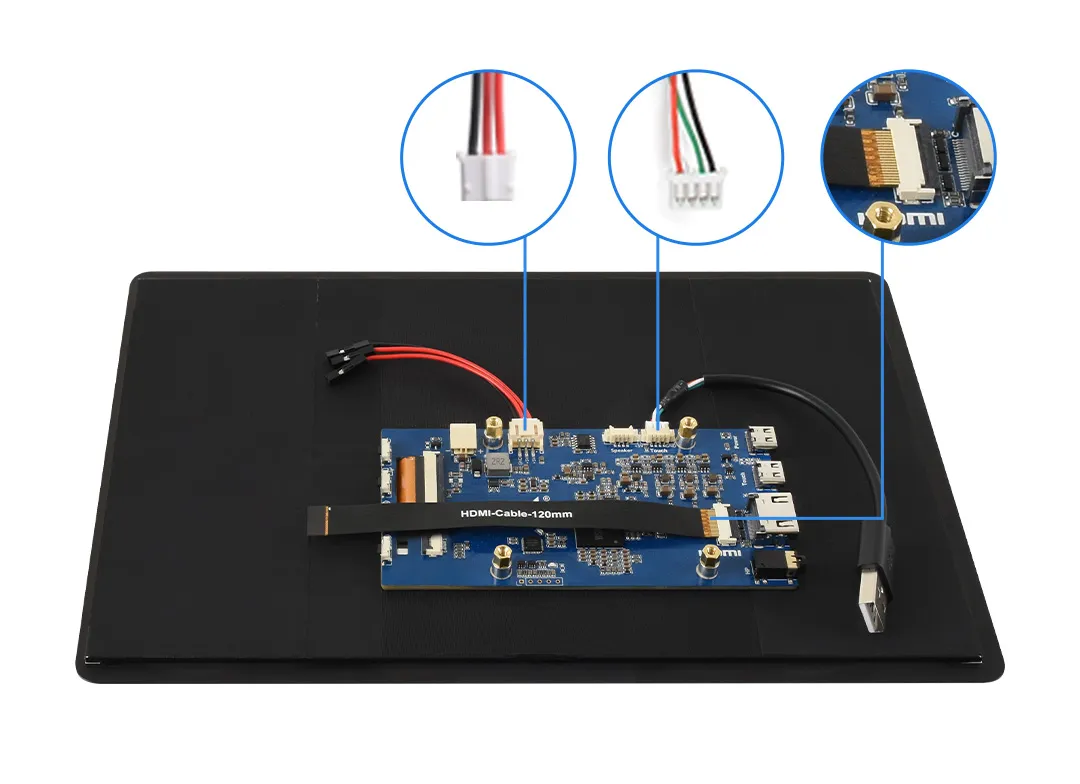
Connect cables ①, ②, and ③ to the display backplane as shown in the figure below.
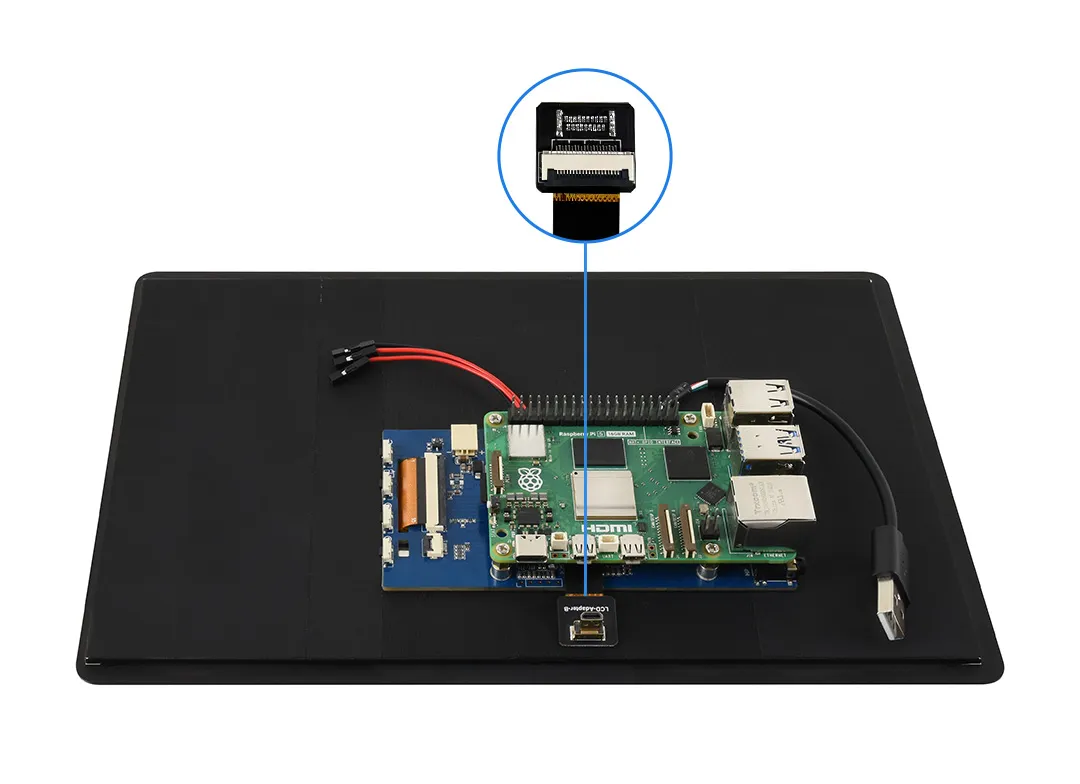
Connect the other end of cable ① to the LCD adapter (choose ④ or ⑤ based on your Raspberry Pi model), then insert the adapter into the Raspberry Pi's Micro HDMI port.
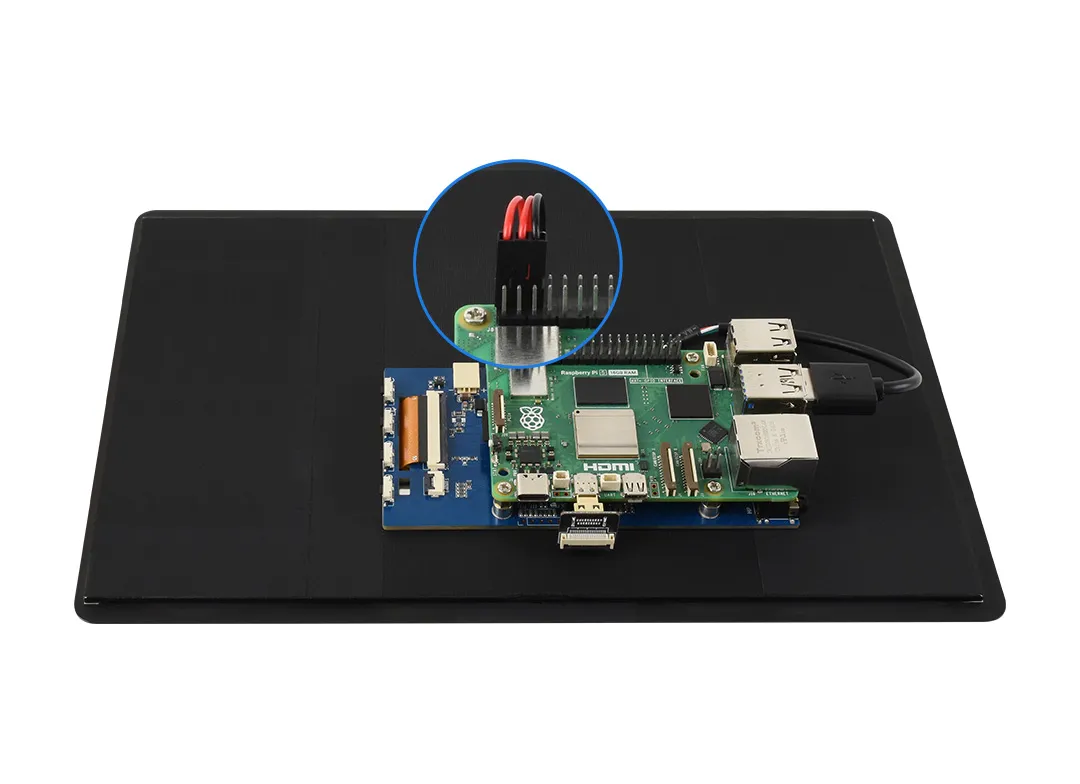
Connect the other end of cable ② to a USB port on the Raspberry Pi, and connect the other end of cable ③ to the 5V and GND pins on the Raspberry Pi.
Software Settings
Connect the TF card to the PC, download and use Raspberry Pi Imager to flash the latest Raspberry Pi OS.
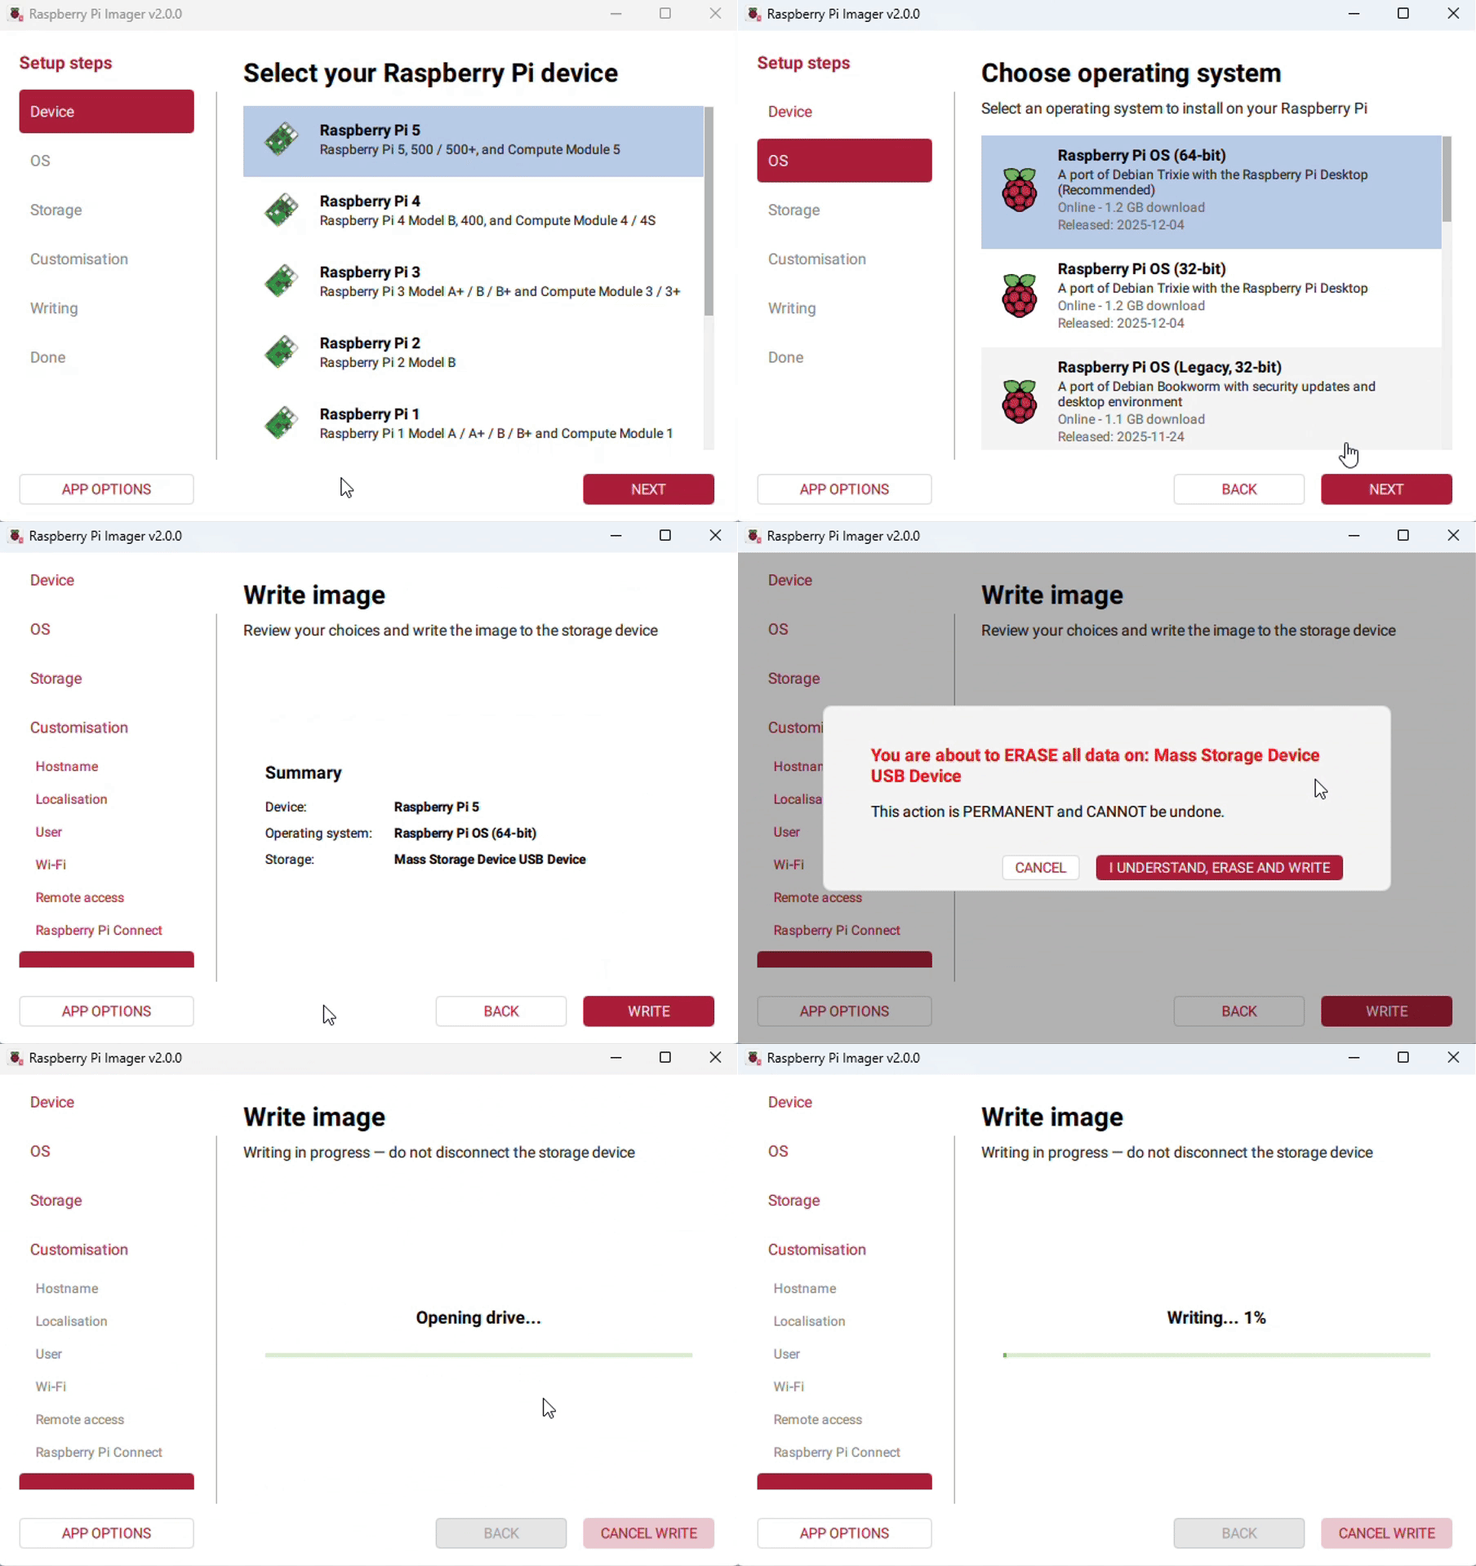
After flashing, open the
config.txtfile in the root directory of the TF card, add the following configuration at the end of the file, save, and safely eject the TF card.hdmi_force_hotplug=1hdmi_group=2hdmi_mode=87config_hdmi_boost=10hdmi_timings=1920 0 110 46 84 1200 0 5 5 78 0 0 0 60 0 164000000 0Insert the TF card into the Raspberry Pi and connect a 5V power supply to the display. After the system boots, display and touch functions will work normally.
Working with PC
Supports Windows 11 / 10 / 8.1 / 8 / 7
Hardware Connection
Connect the Touch interface of the LCD to the USB interface of the PC, and Windows will automatically recognize the touch function.
Connect the HDMI interface of the LCD to the HDMI interface of the PC, and Windows will automatically recognize the display function.
NOTESome PCs do not support HDMI plug-and-play; a system restart usually resolves this.
If the USB port cannot supply sufficient power, it may cause screen flickering. This can be resolved by connecting an external 5V 1A power adapter to the LCD's Power interface.
Windows 11 Touch Settings
If your PC has multiple displays connected, you may need to reassign touch coordinates to the 11EP-CAPLCD.
Type "Control Panel" in the Windows search box and open the Control Panel.
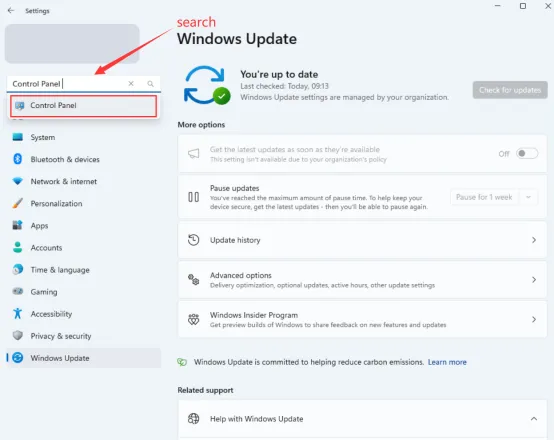
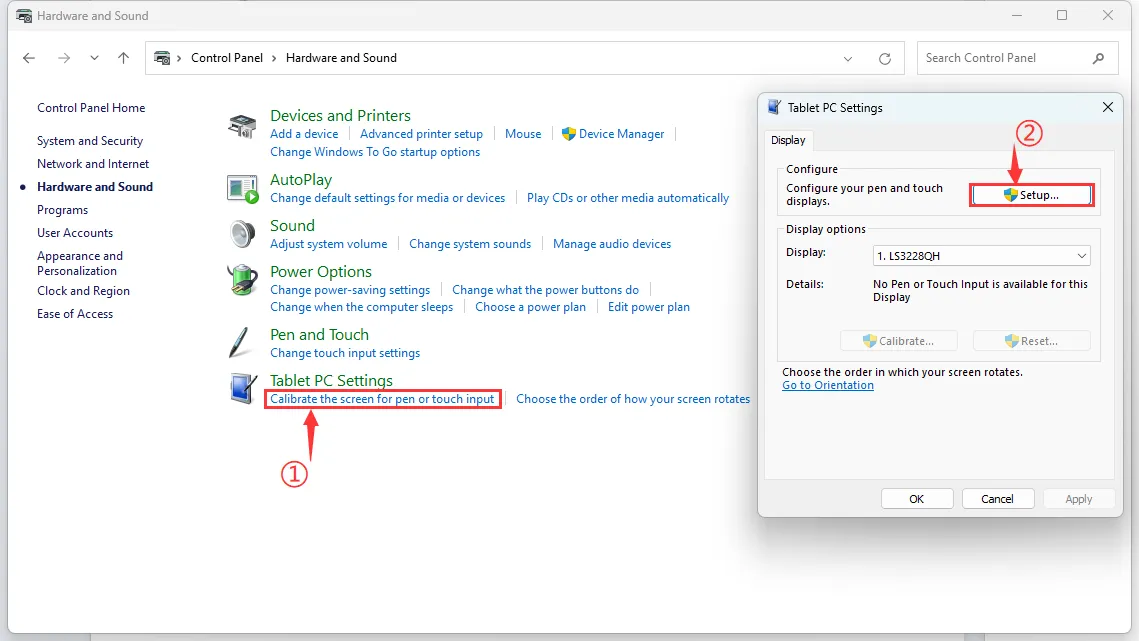
Select "Hardware and Sound" > "Tablet PC Settings".
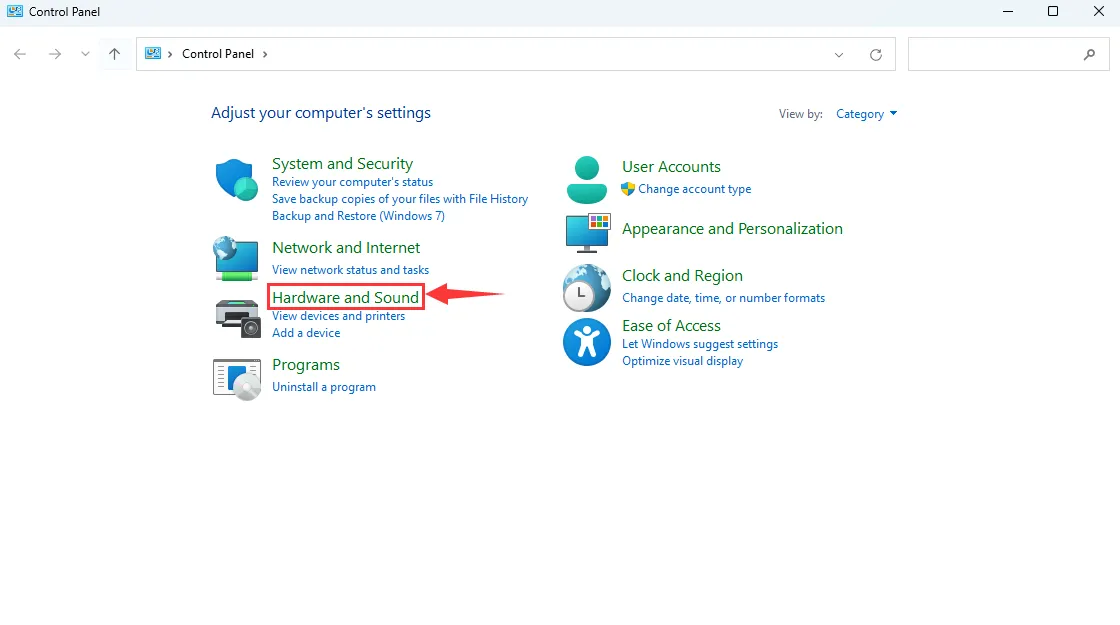
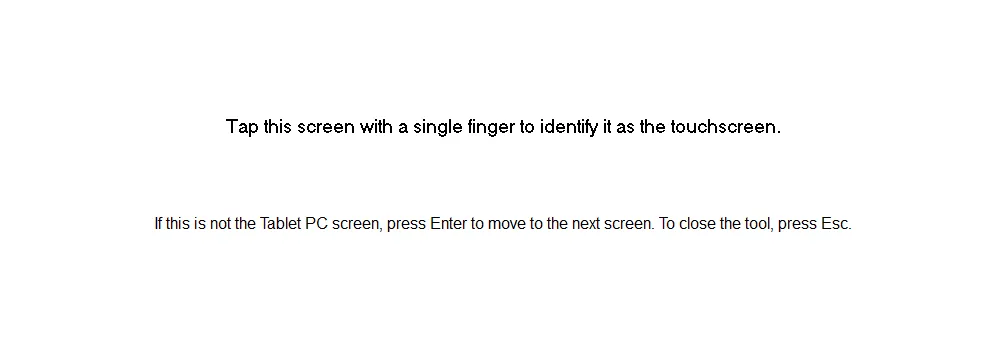
Under "Calibrate the screen for pen or touch input", click "Setup". In the pop-up Tablet PC Settings dialog, click "Setup" again. The screen will display the prompt shown below. Touch the touch panel with your finger, and the PC will identify it as the touchscreen.
 INFO
INFONote: If the screen is blank, press the "Enter" key; the text prompt will switch to the next screen. (The screen displaying the text prompt will be designated as the touch screen.)
Windows 10 Touch Settings
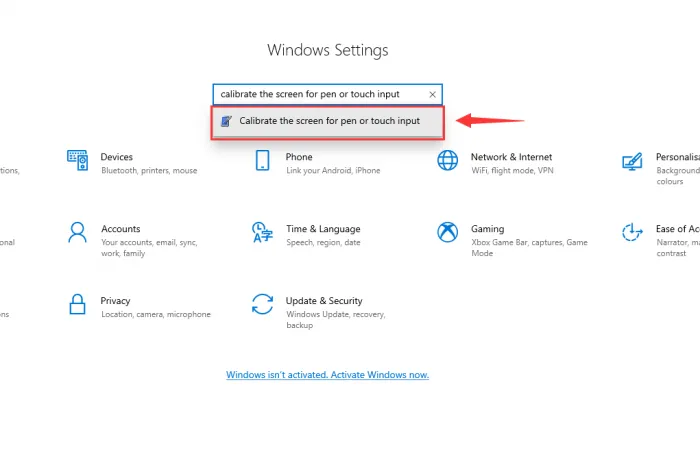
Open Windows Settings, type and click "Calibrate the screen for pen or touch input" in the search bar (as shown below).
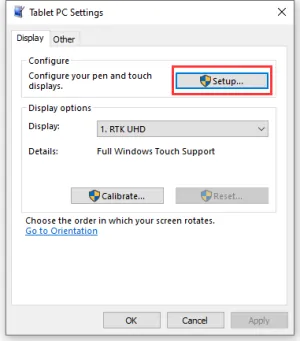
In the "Tablet PC Settings" dialog, click "Setup".
Click "Setup", follow the on-screen instructions to touch the 11EP-CAPLCD, and complete the touchscreen assignment.
Resources
Drawings
3D Drawing
2D Drawings
Support
Monday-Friday (9:30-6:30) Saturday (9:30-5:30)
Email: services01@spotpear.com