


- sales/support
Google Chat:---
- sales
+86-0755-88291180
- sales01
sales@spotpear.com
- sales02
dragon_manager@163.com
- support
tech-support@spotpear.com
- CEO-Complaints
zhoujie@spotpear.com
- Only Tech-Support
WhatsApp:13246739196
- Purchase/Shipping/Refund
WhatsApp:13424403025
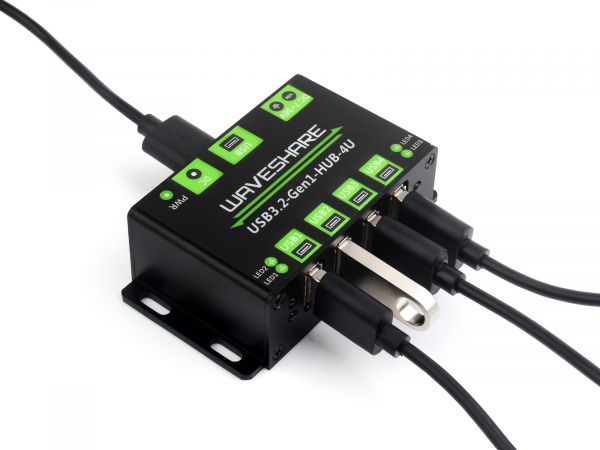
USB3.2-Gen1-HUB-4U User Guide
Overview
Features
- 4x extended USB 3.2 Gen1 ports, compatible with USB 3.2 / 2.0 / 1.1
- Onboard 7~36V DC power port to ensure more stable power supply for connected devices
- Up to 2A Max output current for each USB port, effectively preventing USB current backflow
- Multiple LED indicators for monitoring operating status of power supply and USB ports
- Metal case, rugged & durable, with mounting holes for easy installation
- Driver-free, plug-and-play, compatible with Windows, macOS, Linux and Android, etc.
Note
When using the 2PIN power supply terminal, please confirm the positive and negative poles printed on the PCB and follow the positive and negative poles printed on the PCB
Hardware Connection
- 7~36 voltage for DC power jack and round hole power port, USB only allows 5V input.
- 4x USB output ports, maximum output current is 1.2A, exceeding this limit will trigger short circuit protection, need to remove the device to recover.
- Operating temperature range: -10 ℃ ~ 85 ℃, no condensation, this module is not waterproof.
- LED1~LED4 indicates the enumeration of each USB device, there is a USB device connected and correctly enumerated successfully, the LED is on, but some modules need software to enable before it will light up.
- The red PWR light indicates the power supply, green LED identifies the use of the USB interface.
User Guide
Expected Result
Take Raspberry Pi 4B as an example:
- Insert the module to 40PIN GPIO of Raspberry Pi 4B. Connect the USB interface of USB3.2-Gen1-HUB-4U to Raspberry PI via the USB 3.0 Adapter.
- Connect the 5V power supply to the POWER ONLY port.
- Connect USB devices to USB1-UBS4, the corresponding LED (USB1-USB4) will light up in sequence, which means the device works normally.
Working with Raspberry Pi
1. Hardware preparation
- Raspberry Pi 4B x 1
- USB 3.2 Gen1 HUB HAT x 1
- USB 3.0 Adapter x 1 (or USB3.0 cable)
- USB 3.0 SSD x 1 (Speed varies with different SSD)
2. Configure Rasberry Pi
- Enter the Raspberry Pi terminal:
- Enter the root directory of Pi:
cd ../..
- Enter the directory of USB3.0 SSD.
cd media/pi/xxx (xxx is the name of the disk)
- Free Memory.
sudo sh -c "sync && echo 3 > /proc/sys/vm/drop_caches"
- Copy 2G data to the SSD disk.
dd if=/dev/zero of=./test_write count=2000 bs=1024k

- Copy 2G data to the Raspberry Pi.
dd if=./test_write of=/dev/null count=2000 bs=1024k

3. Working with Ubuntu (Raspberry Pi)
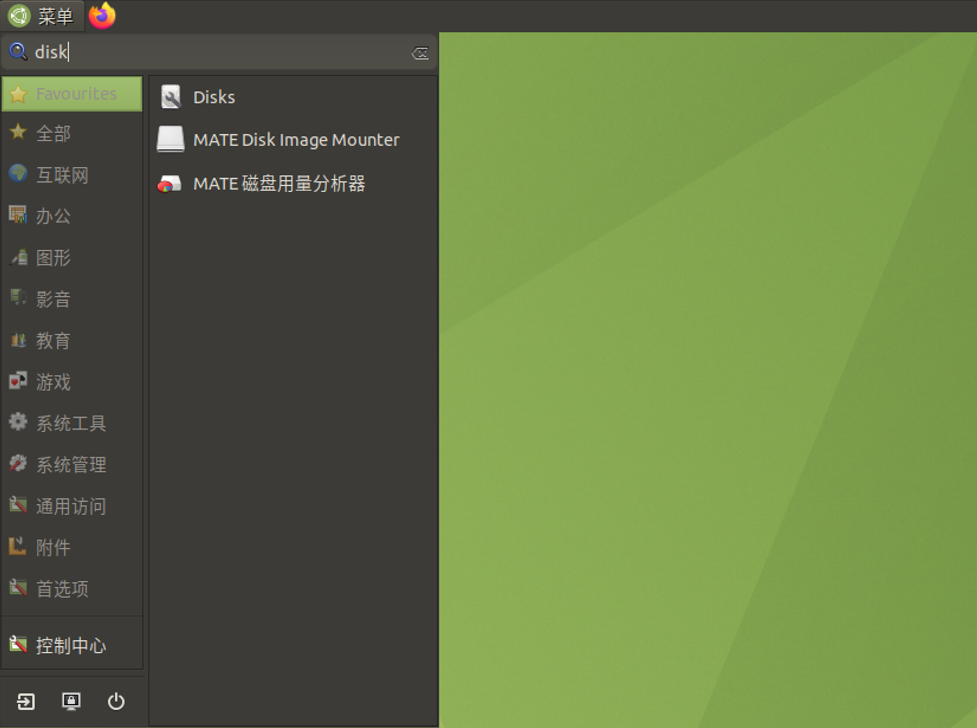
- Search disk in menu -> Enter -> Open the disk.
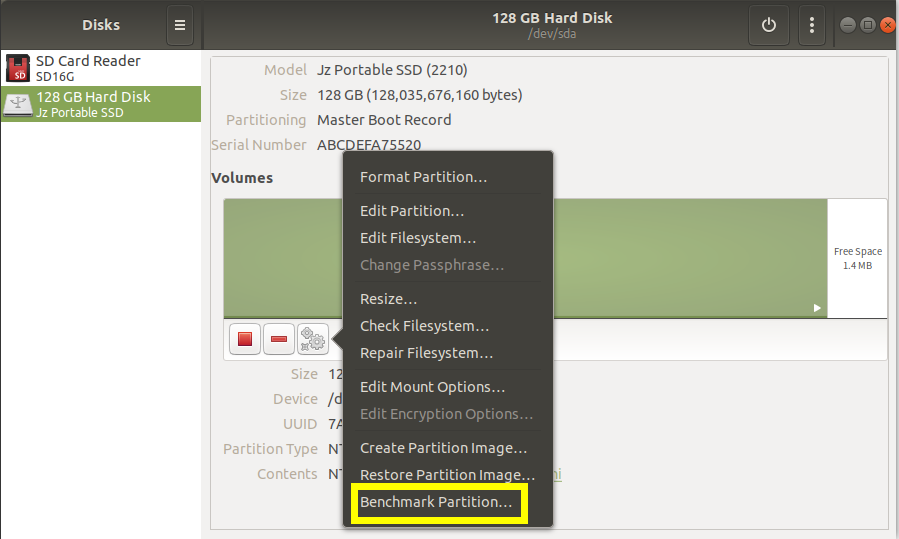
- Choose the correct disk and click the Benchmark Partition option in the Menu:
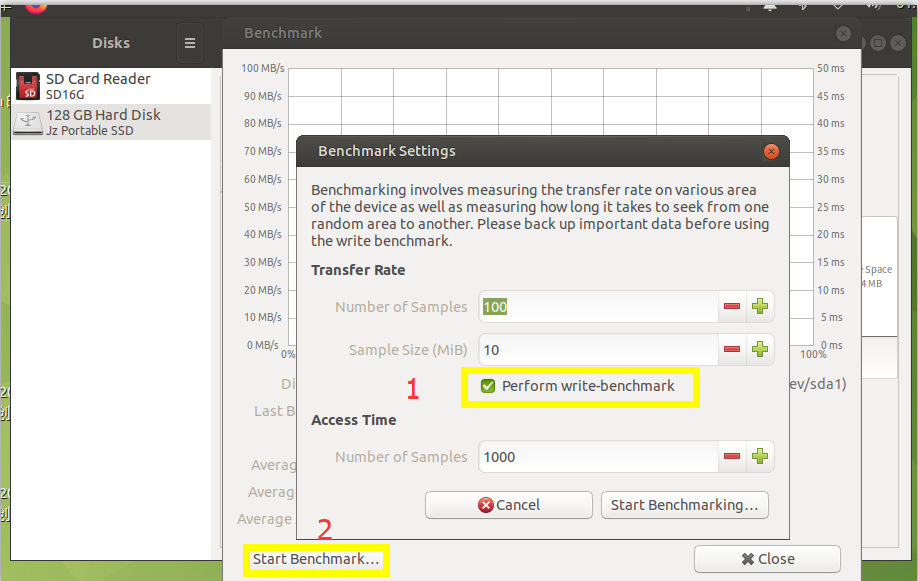
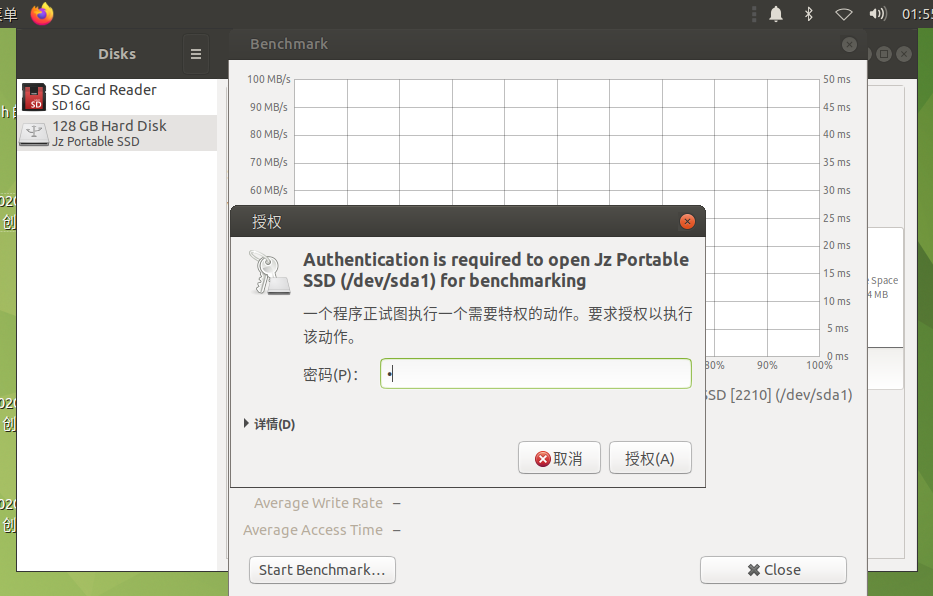
- Click Start Benchmark, check to Perform write-benchmark, and keep other default settings.
- Input the user password and authorization.
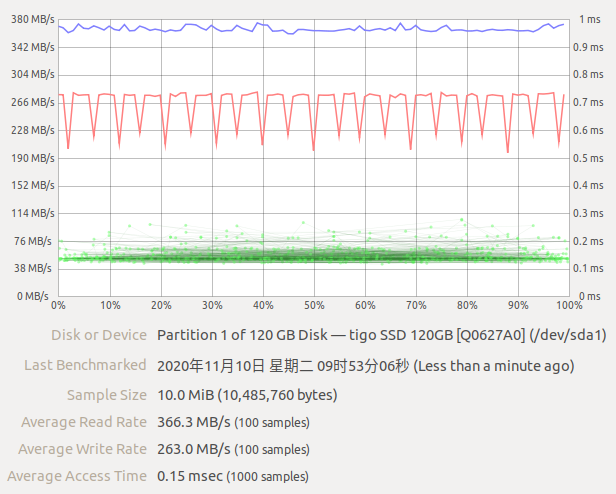
- Test.
Use with Sunrise X3 PI
- Use the USB cable to connect the USB 3.0 port of the X3 PI to the USB port of the HUB.
- Insert a USB 3.0 solid-state drive.
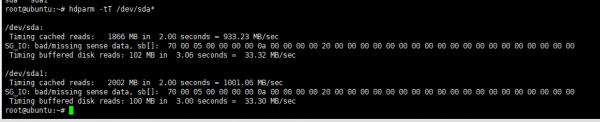
- Test Disk Speed Using Commands.
sudo apt-get update
sudo apt-get install hdpram -y
sudo hdpram -tT /dev/sda*
Working in Windows PC
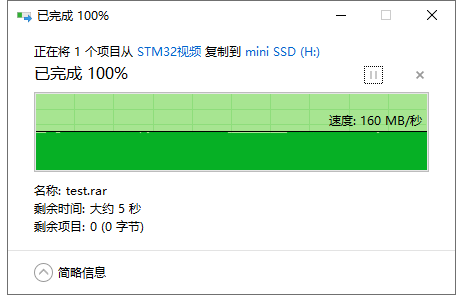
1.Connect the USB port to USB3.0 of the PC, and you can copy the file to SSD
- Copy the file to the PC.

- Copy the file to the portable SSD.
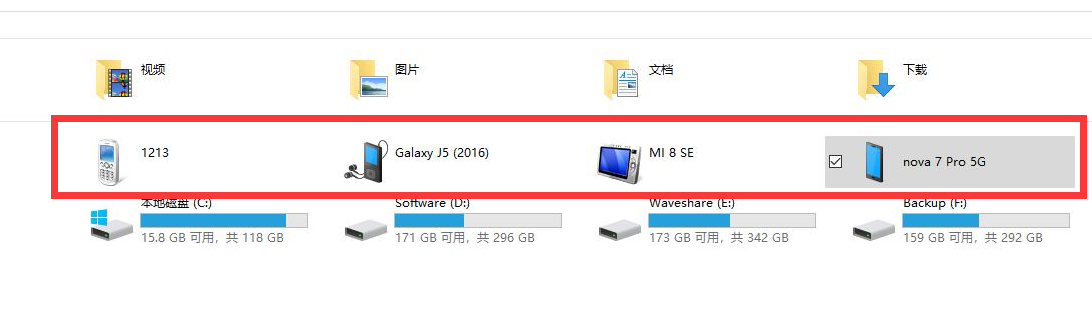
2.Connect the USB to USB3.0 Port and connect four phones at the same time
Resource
FAQ
Question:Why the LED indicator is not on and the device could not work after connecting the USB device?
Please check whether the USB device is short-circuited, and ensure that the USB device power supply is normal. Check whether the device can be normally operated on the PC or other devices. If it is connected to the industrial control machine or other devices, check whether the USB has a driver
Question:What is the diameter of the DC port?
DC-044 5.5*2.1mm
Question:What is the power consumption of USB3.2-Gen1-HUB-4U and what is the maximum current output of one interface?
The power consumption is about 38mA, as the interface current limit protection, the maximum current can be 1.7A.
Question:The Mouse or Keyboard connected cannot work?
- Re-plug the USB cable, and make sure that the connection is normal.
- Maybe the USb3.0 adapter is broken, please change to another adapter or USB 3.0 cable for a try.
Question:How to power USB3.2-Gen1-HUB-4U?
After connecting the HUB and Raspberry Pi with a USB adapter, the Raspberry Pi can supply power to the HUB; if high-power devices such as mobile hard drives are connected, an external DC 5V power supply needs to be supplied to the Type-C interface of the HUB.
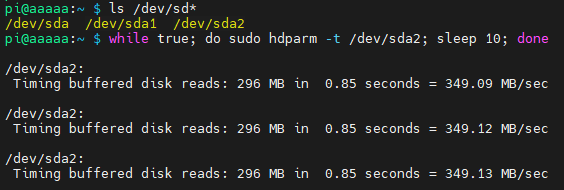
Question:How to verify USB 3.0 hard flash driver's speed and stability on Raspberry Pi?
You can verify it by the following commands:
ls /dev/sd*
while true; do sudo hdparm -t /dev/sda2;  sleep 10; done
Support
Monday-Friday (9:30-6:30) Saturday (9:30-5:30)
Email: services01@spotpear.com

[Tutorial Navigation]
- Overview
- User Guide
- Resource
- FAQ
- Question:Why the LED indicator is not on and the device could not work after connecting the USB device?
- Question:What is the diameter of the DC port?
- Question:What is the power consumption of USB3.2-Gen1-HUB-4U and what is the maximum current output of one interface?
- Question:The Mouse or Keyboard connected cannot work?
- Question:How to power USB3.2-Gen1-HUB-4U?
- Question:How to verify USB 3.0 hard flash driver's speed and stability on Raspberry Pi?
- Support