


- sales/support
Google Chat:---
- sales
+86-0755-88291180
- sales01
sales@spotpear.com
- sales02
dragon_manager@163.com
- support
tech-support@spotpear.com
- CEO-Complaints
zhoujie@spotpear.com
- Only Tech-Support
WhatsApp:13246739196
- Purchase/Shipping/Refund
WhatsApp:13424403025
- HOME
- >
- ARTICLES
- >
- Common Moudle
- >
- ESP
ESP32-S3-PhotoPainter User Guide
Overview
Parameters
| Display Size | 160.0mm × 96.0mm |
| Outline Dimensions | 154.0mm × 214.0mm × 32.0mm |
| Screen Pixel Pitch | 0.2mm × 0.2mm |
| Screen Resolution | 800 × 480 |
| Display Color | Black, White, Green, Blue, Red, Yellow |
| Grayscale | 2 |
| Refresh Time | 12s |
| Sleep Current | < 0.01uA (close to 0) |
| Charging Voltage/Operating Voltage | 5V |
- Refresh time: The refresh time is based on experimental test data, and there may be errors in the actual refresh time. The actual results shall prevail. There will be a flickering effect during the global refresh process, which is a normal phenomenon.
User Guide
Function Introduction
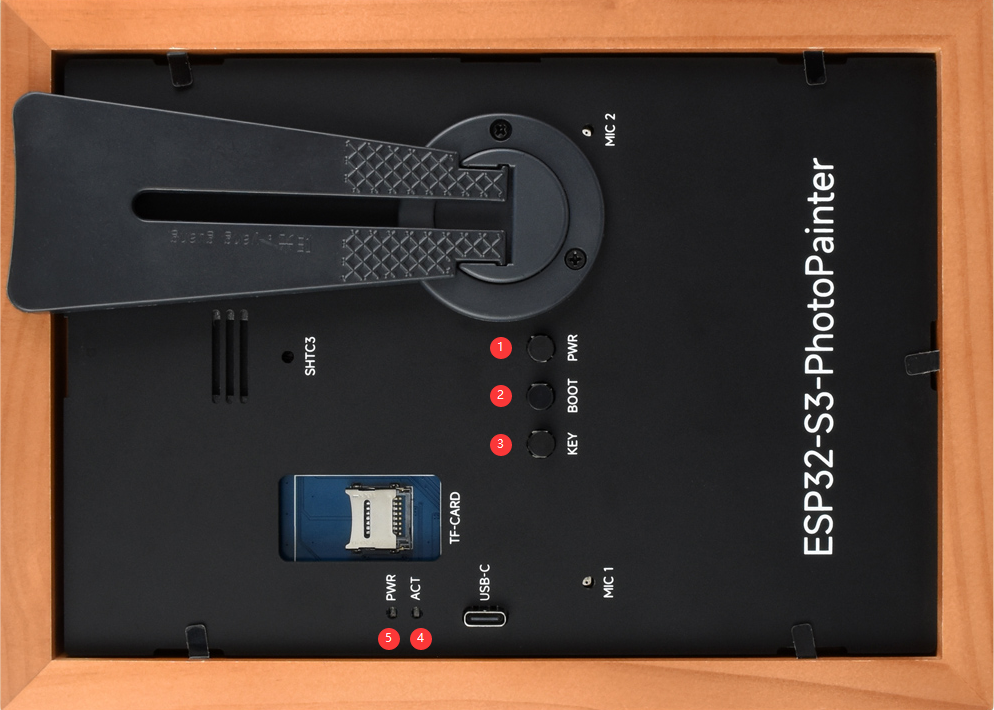
- PWR button: Click this button to turn on the system power, and long press the button to turn off the system power; when the system power is on, click to enter sleep mode.
- BOOT button: Switch images and enter download mode
- KEY: Sleep mode wake-up, mode switching.
- ACT indicator: Screen refresh, flashing
- PWR indicator light: Operable indicator light, lights up to indicate that operation can be performed
Product Usage
1. First download the Demo in your own way, unzip it, and then copy all files from the sdcard directory to the sdcard (it is already set up by default out of the box)
2. Click the PWR button to turn on the device. The first time you turn it on, there will be a network pairing process, and the voice will announce "Enter networking mode." At this time, use your phone to connect to Xiaozhi-xxx (xxx represents a variable)
3. After the networking is successful, go to XiaoZhi Console to add the corresponding device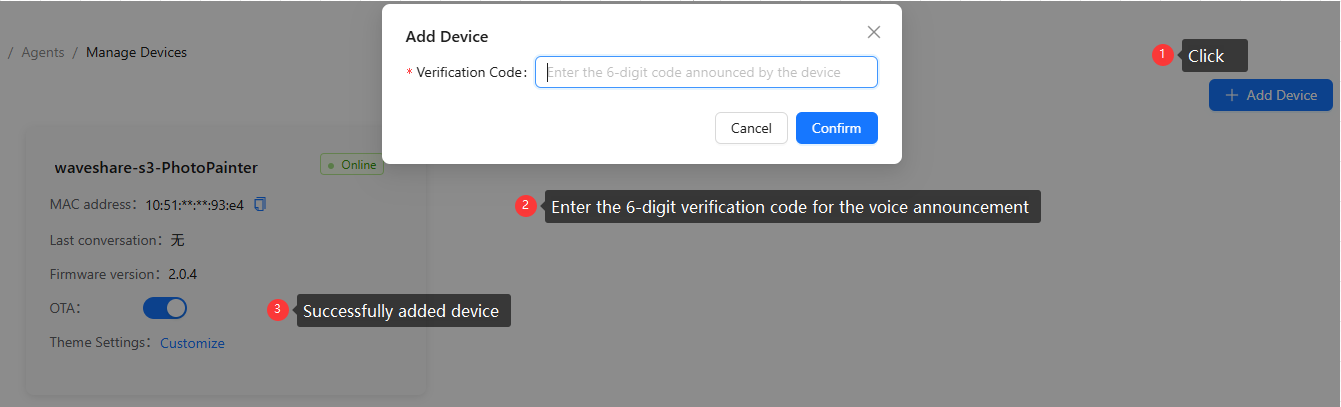
4. This product has three working modes, namely basic mode (Mode 1), LAN server mode (Mode 2), and AI conversation mode (Mode 3). The following will describe in detail how to use these three modes
Mode 1
1. The default mode is AI conversation mode (Mode 3). Press and hold the KEY button to enter mode selection (voice will be broadcasted), then click the KEY button to select basic mode (Mode 1). Press and hold the KEY button again to enter this mode
2. You can add the photos you want to display to the 06_user_Foundation_img directory on the TF card. It only accepts 800x480 or 480x800, 24-bit depth BMP format images. The images need to be dithered; for details, see Image Creation. If you're interested, you can also check out the code we provide, which also includes a dithering algorithm. Users can modify and use it as needed, as shown in the figure below: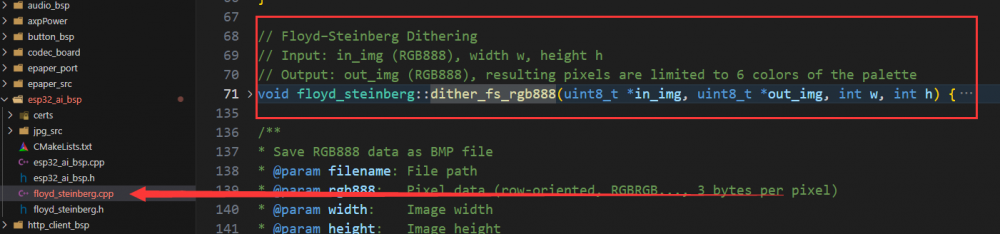
3. Click the BOOT button to display images under the 06_user_Foundation_img directory. After displaying the images, it will automatically enter sleep mode.
4. You can wake up and switch images through the BOOT button, or you can click the KEY button to wake up without switching images.
5. When in sleep mode, there is a scheduled wake-up, which can be set through the config.txt file under the 06_user_Foundation_img directory. The specific code segment and file location are as follows: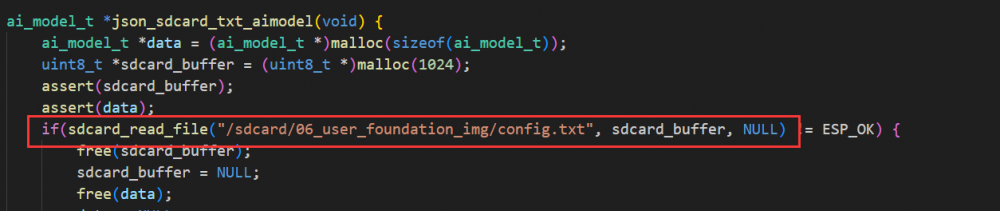
Mode 2
1. If the product is in low-power mode, first press the KEY button to wake it up, then long press the KEY button to enter mode selection; double-click the KEY button, then long press again to enter this mode
2. Connect your phone or computer to Wi-Fi: esp_network, password: 1234567890. After a successful connection, go to the image selection interface, as shown in the figure: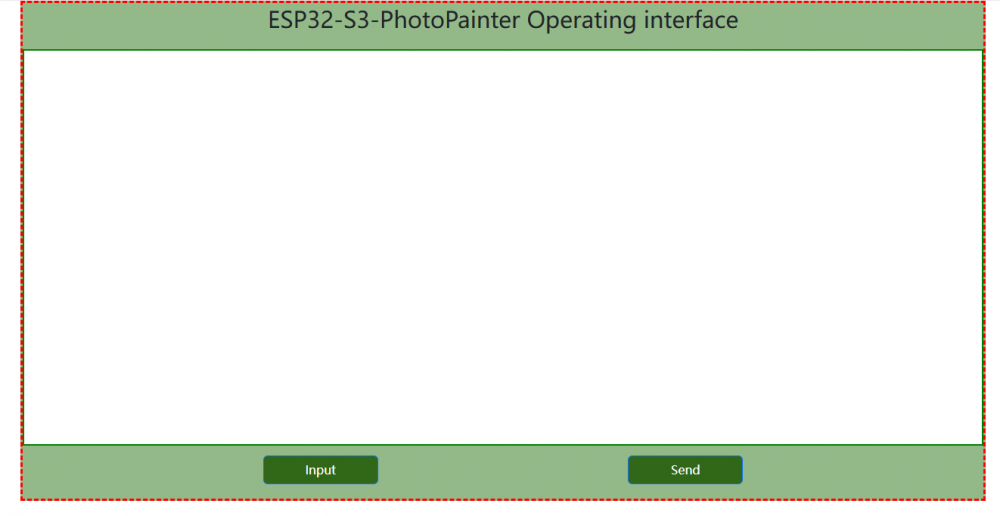
3. Click the Input to select the corresponding image (the image must be a 24-bit deep 800x480 or 480x800 image, and it must be dithered). For more details, see Image Creation. Click Send to send the corresponding image to the frame
4. If you need to enter low power mode, you can directly disconnect the WIFI connection, and the product will wake up every 30 seconds. The specific code snippet is as follows, users can modify it themselves. After successfully connecting to WIFI, sleep mode is prohibited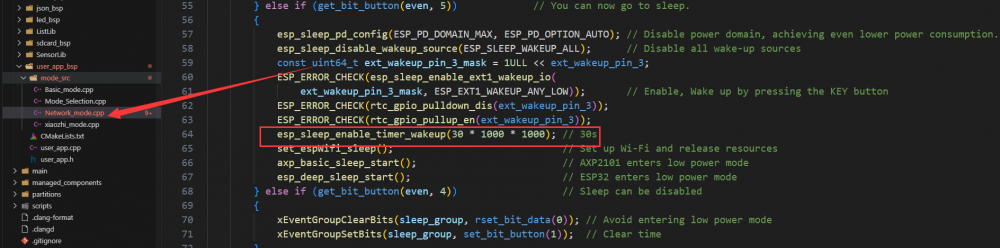
Mode 3
Press and hold the KEY button to enter the mode selection, click the KEY button three times, and then press and hold the KEY button again to enter the mode
2. After initialization is complete, it will automatically obtain the weather forecast for the next 4 days
3. Wait until the screen display is complete to start the conversation. The wake-up word is "Hello, XiaoZhi".
4. After waking up, you can have a normal conversation
5. MCP can be used to display images of the 05_user_ai_img directory in the TF card through MCP, obtain the number of images in the 05_user_ai_img directory in the TF card and provide image ratings. The specific MCP service code is as follows, and users can DIY their own MCP service: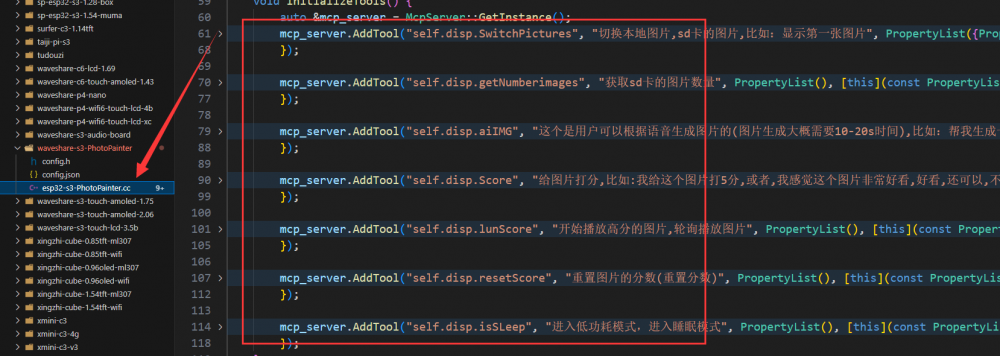
6. Regarding the use of AI-generated images, for example, you can say "help me generate an image of the moon". If you need to use this feature, you need to configure Volcano Engine. For specific configuration details, refer to Volcano Engine Text-to-Image Configuration
7. After rating the images, they will be rotated every 30 minutes with the corresponding code as follows. The rating can be reset through voice commands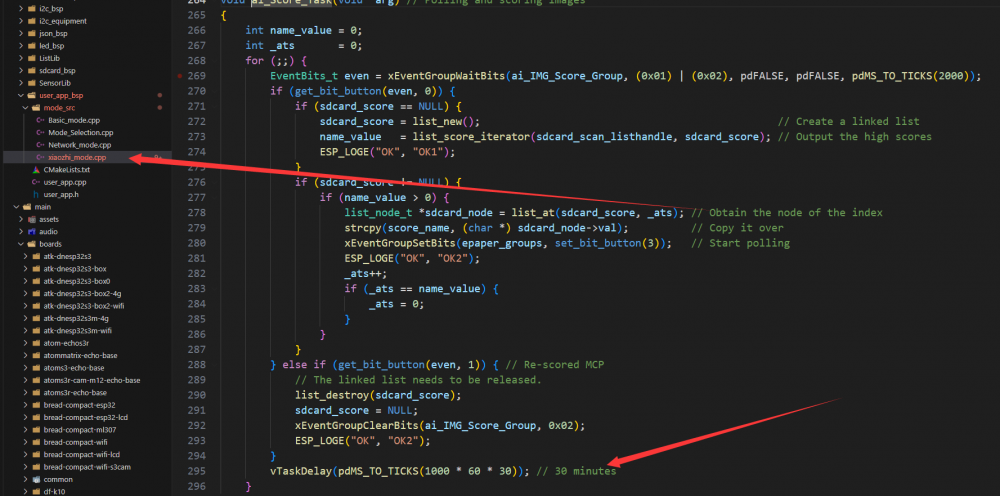
Volcano Engine Text-to-Image Configuration
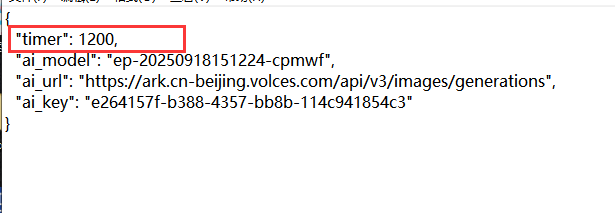
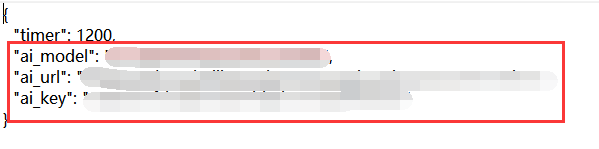
1. Firstly, you need to obtain the key, model name, and URL. Currently, a test model is being used, which will be discontinued. Users will need to configure the model themselves. The relevant code segments and configurations in the config.txt file are as follows:
2. Go to the Volcano Engine Console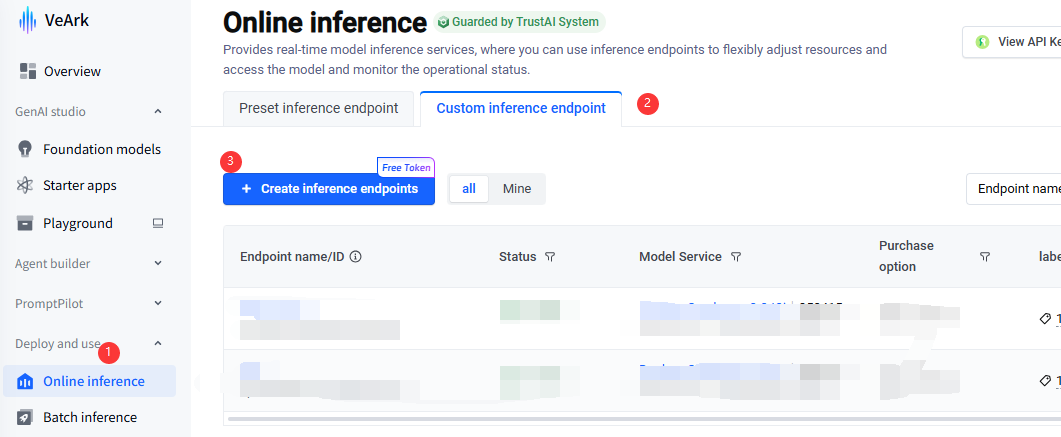
3. Create the corresponding model, remember not to select the wrong model, as shown in the figure: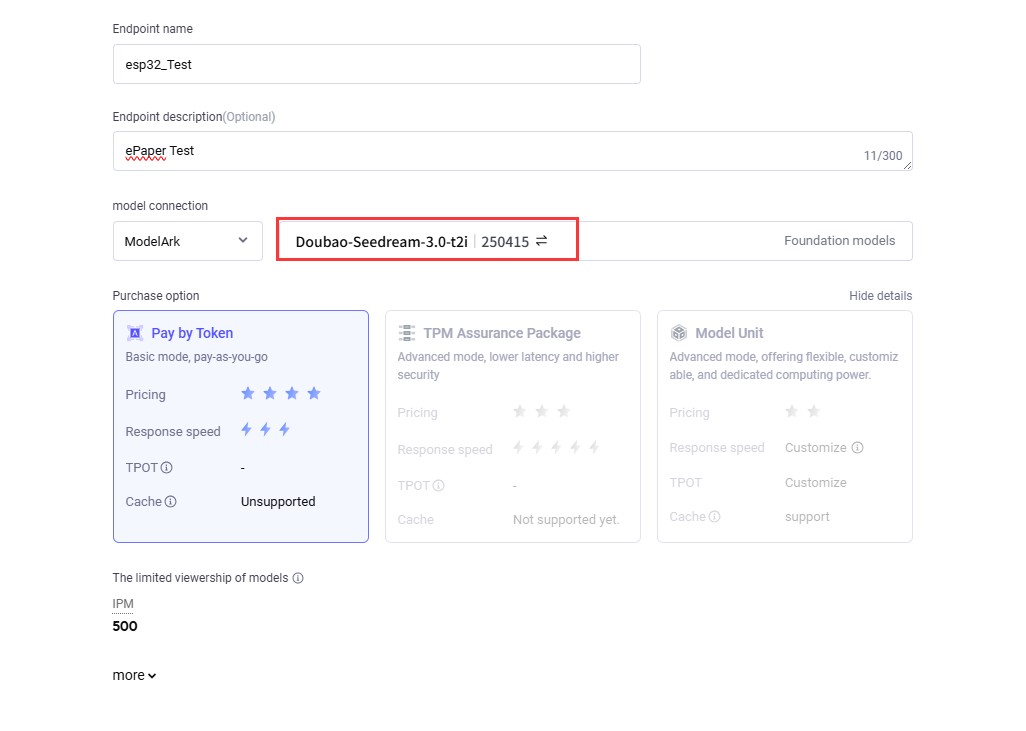
4. Copy the corresponding key, model, and URL, as shown in the figure: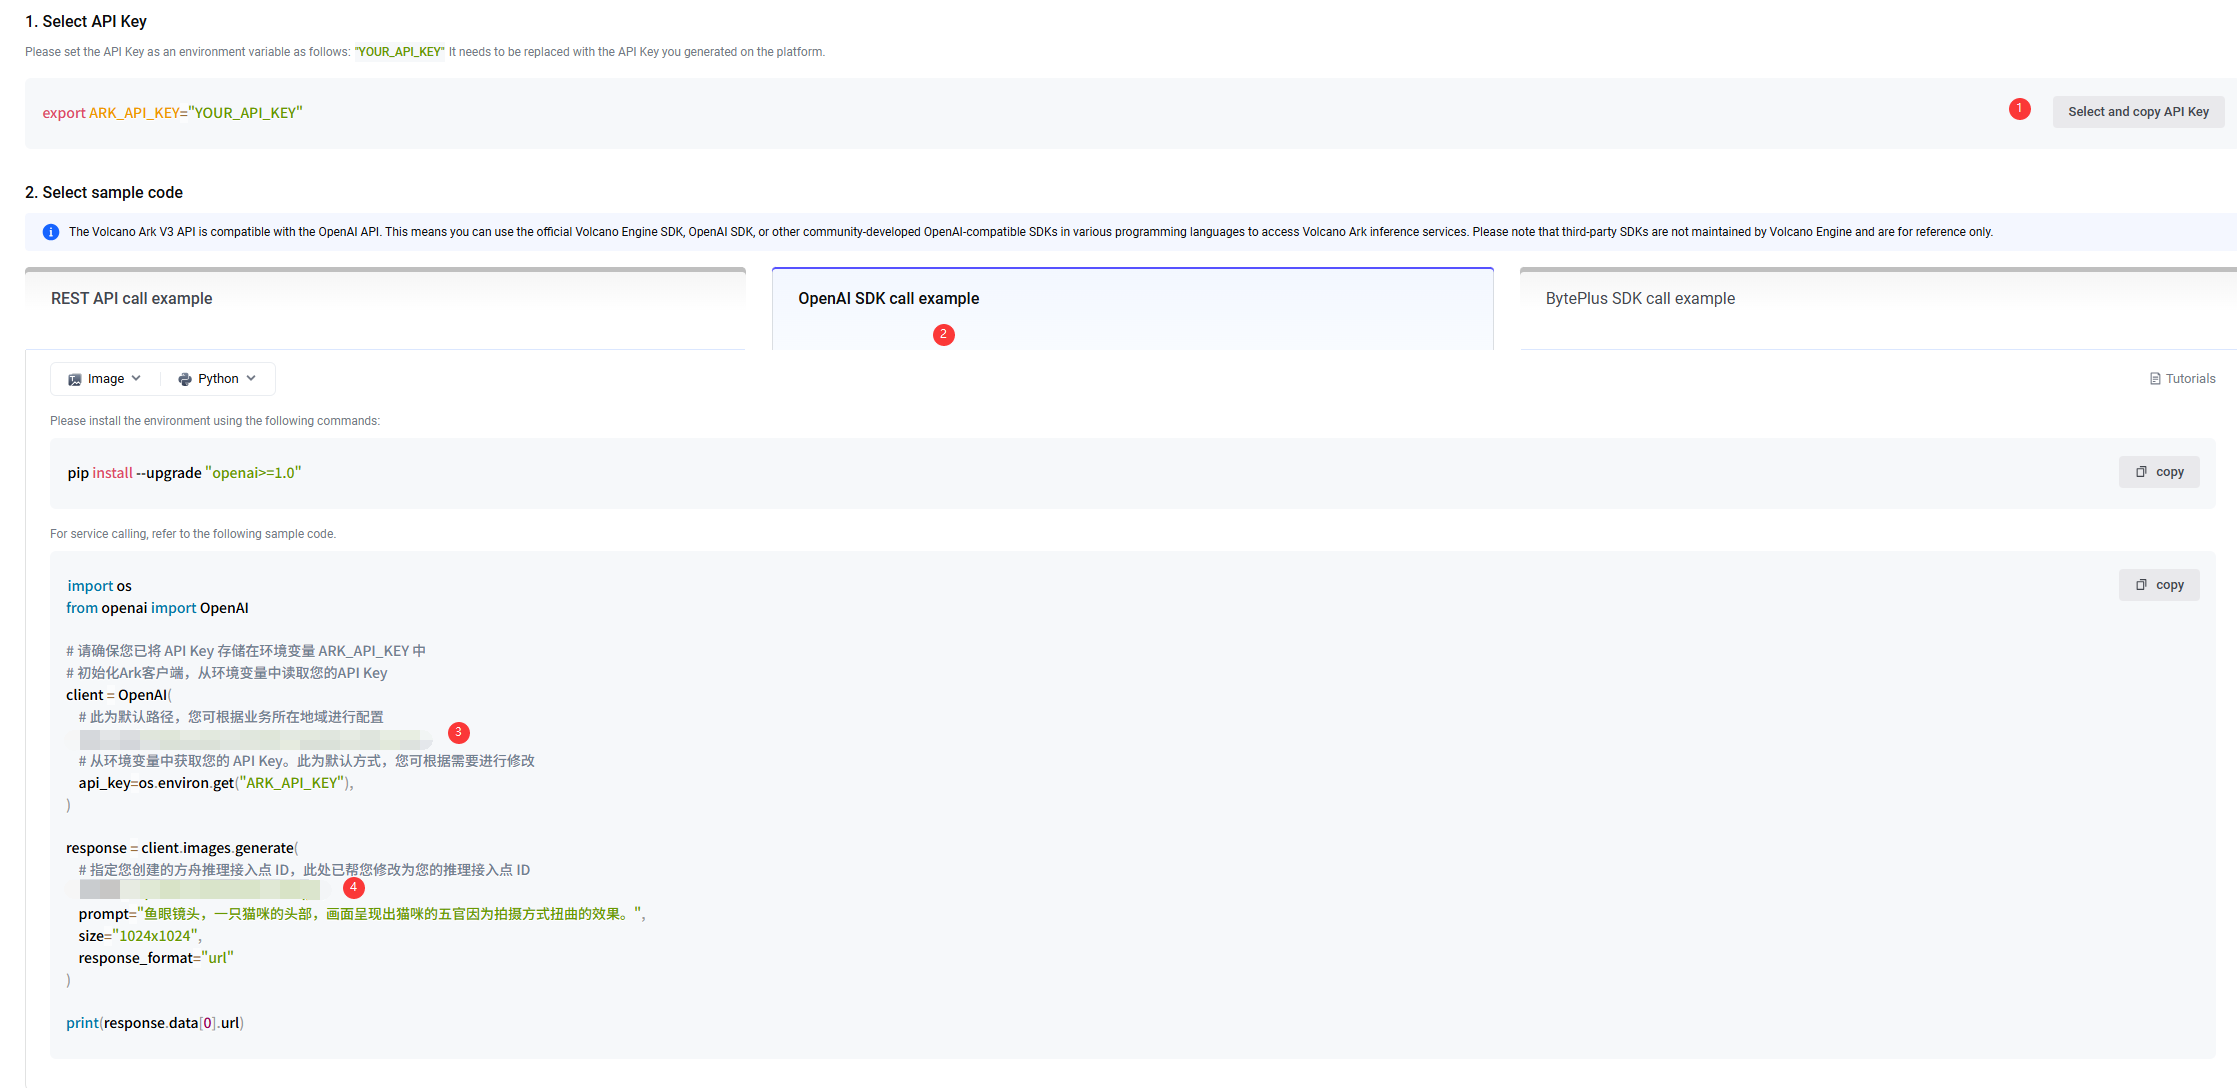
5. Paste the copied URL, model, and key into the corresponding key-value pairs in the config.txt file under the sdcard->06_user_Foundation_img directory (Step 1, Figure 2) (New users can get Tokens for free)
Picture Production
- To make a scatter plot with PS and other tools, please refer to: E-Paper Floyd-Steinberg
- Use the tools we have written to convert images, applications and source codes: Six-color dithering image conversion tool
- The program converts images to appropriate resolutions and optimizes them using dithering algorithms, supports most formats of images, recognizes the orientation of images and automatically stretches and crops them
- How to use: Drag and drop the picture directly onto "convert.exe" to convert a single image, or put all the images into a folder and then double-click "converterTo6color_all.cmd" for batch conversion
- Note: This program is developed and open source for the convenience of customers only, and we do not provide technical support for it
Tools for Windows
- Conversion of a single image
Drag the image onto convert.exe
- Batch conversion of images
Put the images, convert.exe, and converterTo6color_all.cmd in a folder, and then double-click converterTo6color_all.cmd
Tools for MAC
Put the images, convert, and converterTo6color_all in a folder
Open the terminal and enter the corresponding folder
cd xxxx/xxx/xxx/
- Conversion of a single image
Enter the command to grant the convert executable permission
sudo chmod +x convert
Image conversion
./convert image name
- Batch conversion of images
You need to perform permission operations on the convert file first
Enter a command to give converterTo6color_all.sh executable permissions
sudo chmod +x converterTo6color_all.sh
Image conversion
./converterTo6color_all.sh
Development Description
- Note: This program is open source and does not provide technical support (please feel free to provide feedback if there are any bugs).
- The program is written in C/C++ SDK based on ESP-IDF, compiled using CMAKE, and theoretically supports multiple platforms. Please set up the relevant environment yourself.
ESP-IDF Environment Setup
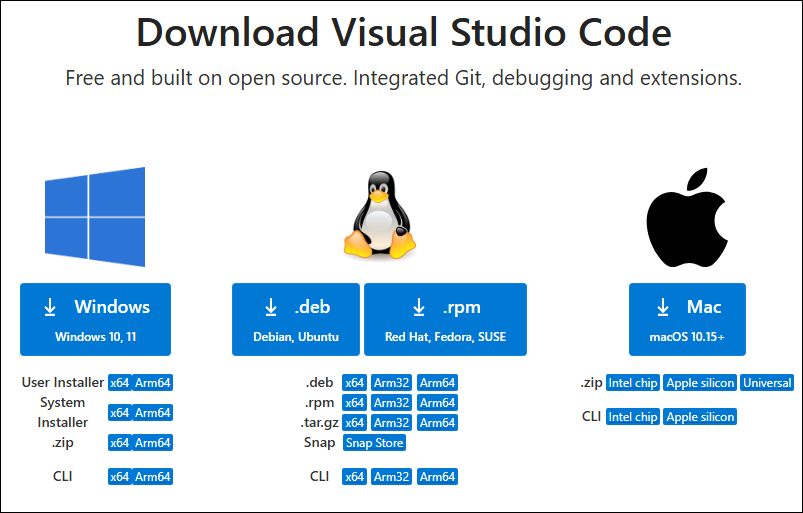
Download and Install Visual Studio
- Open the download page of VScode official website, choose the corresponding system and system bit to download
- After running the installation package, the rest can be installed by default, but here for the subsequent experience, it is recommended to check boxes 1, 2, and 3
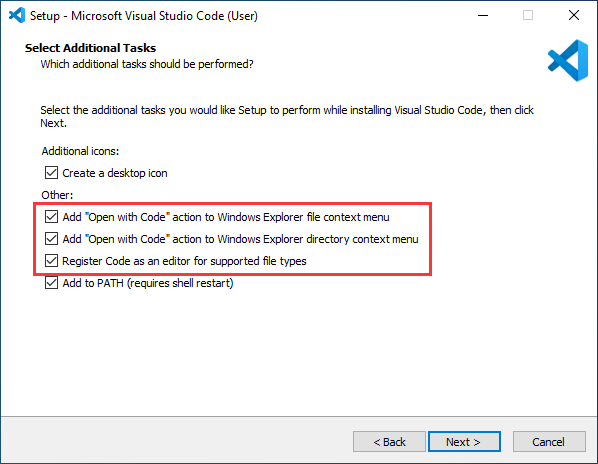
- After the first two items are enabled, you can open VSCode directly by right-clicking files or directories, which can improve the subsequent user experience.
- After the third item is enabled, you can select VSCode directly when you choose how to open it
Install Espressif IDF Plugin
- It is generally recommended to use Install Online. If online installation fails due to network factor, use Install Offline.
- For more information about how to install the Espressif IDF plugin, see Install Espressif IDF Plugin
Run the First ESP-IDF Demo
New Project
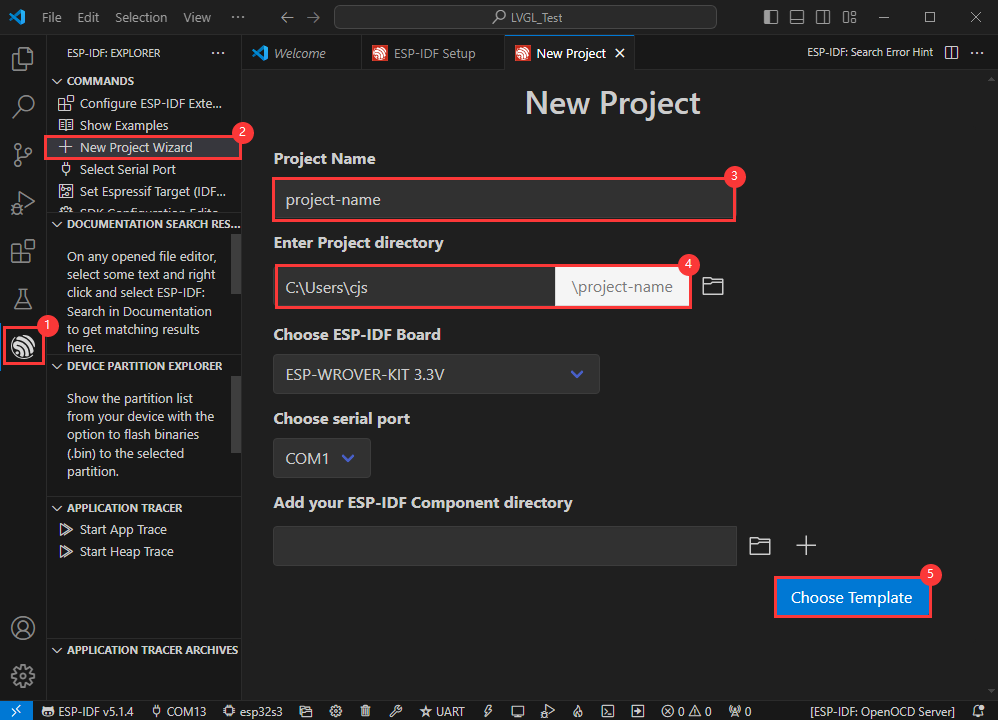
Create Demo
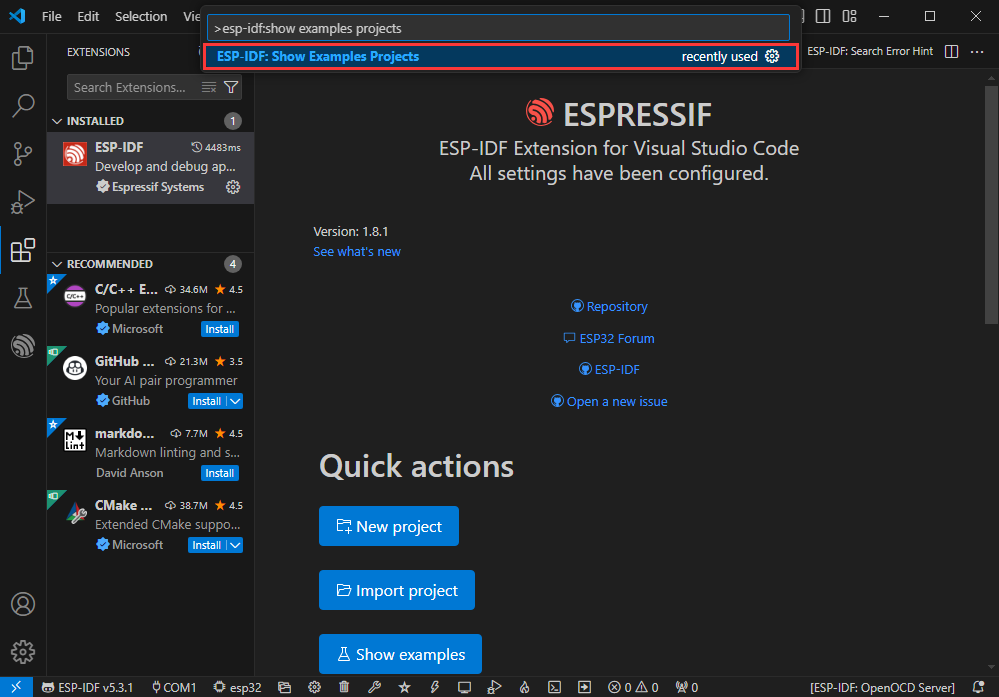
- Using the shortcut F1, enter esp-idf:show examples projects
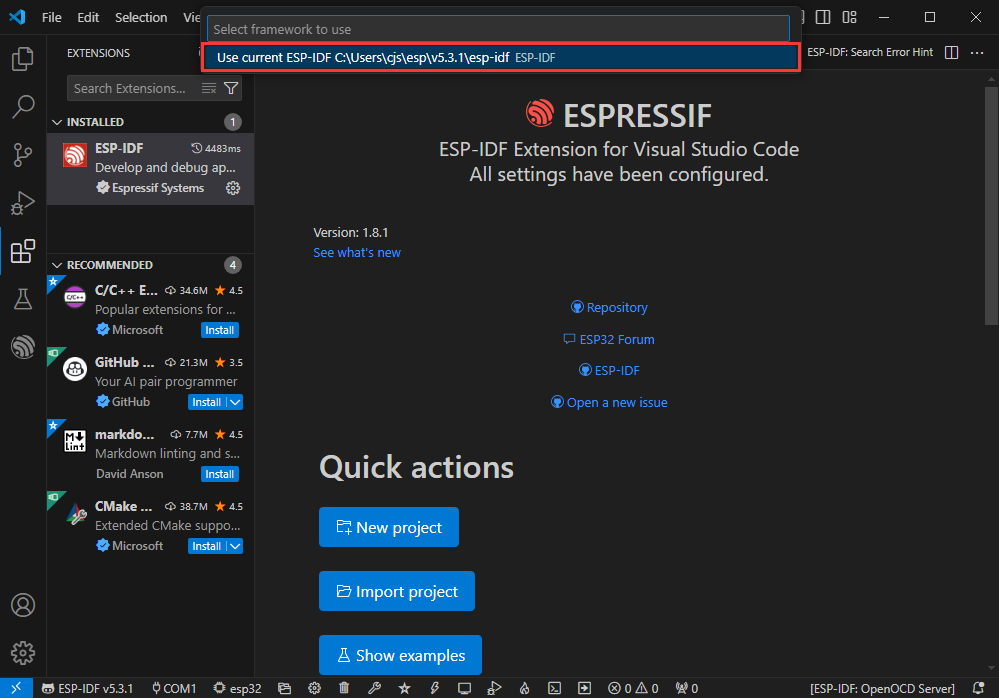
- Select your current IDF version
- Take the Hello world demo as an example
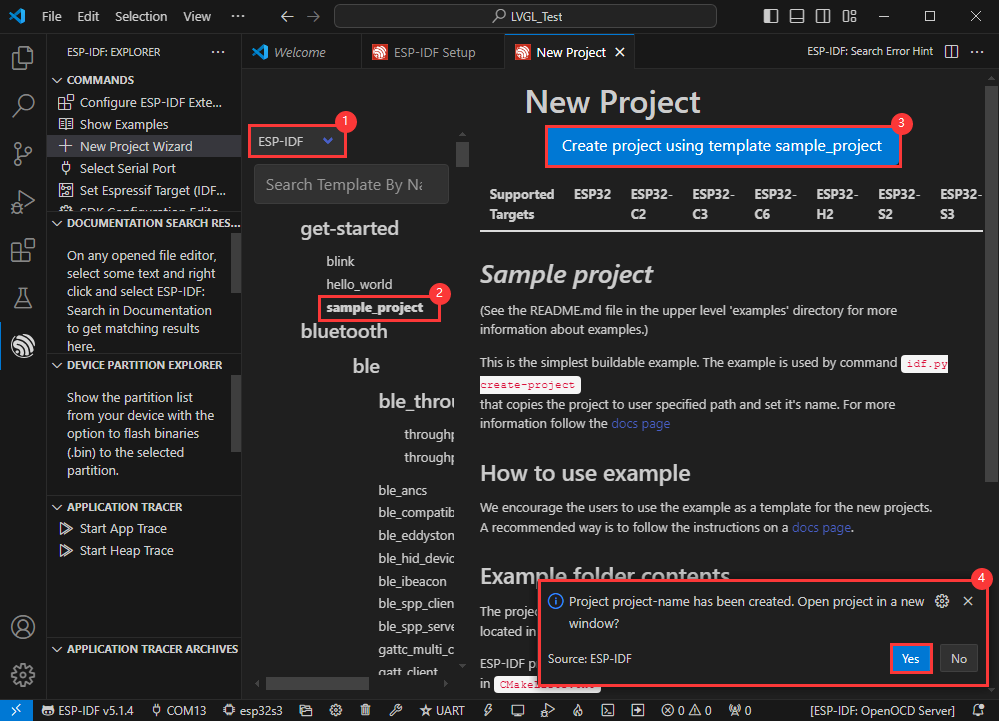
①Select the corresponding demo
②Its readme will state what chip the demo applies to (how to use the demo and the file structure are described below, omitted here)
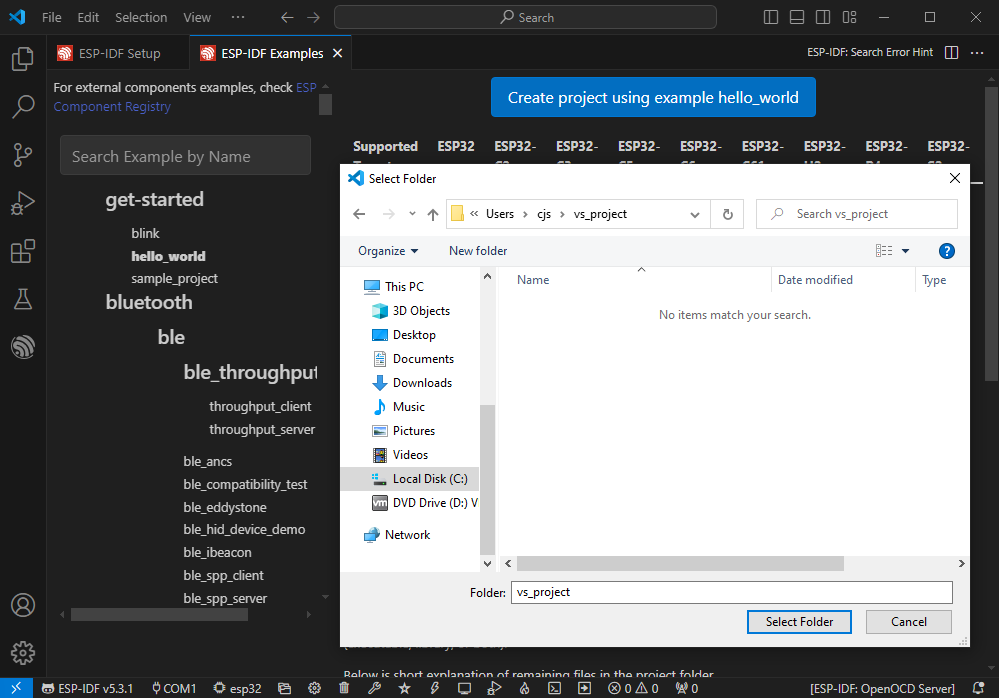
③Click to create the demo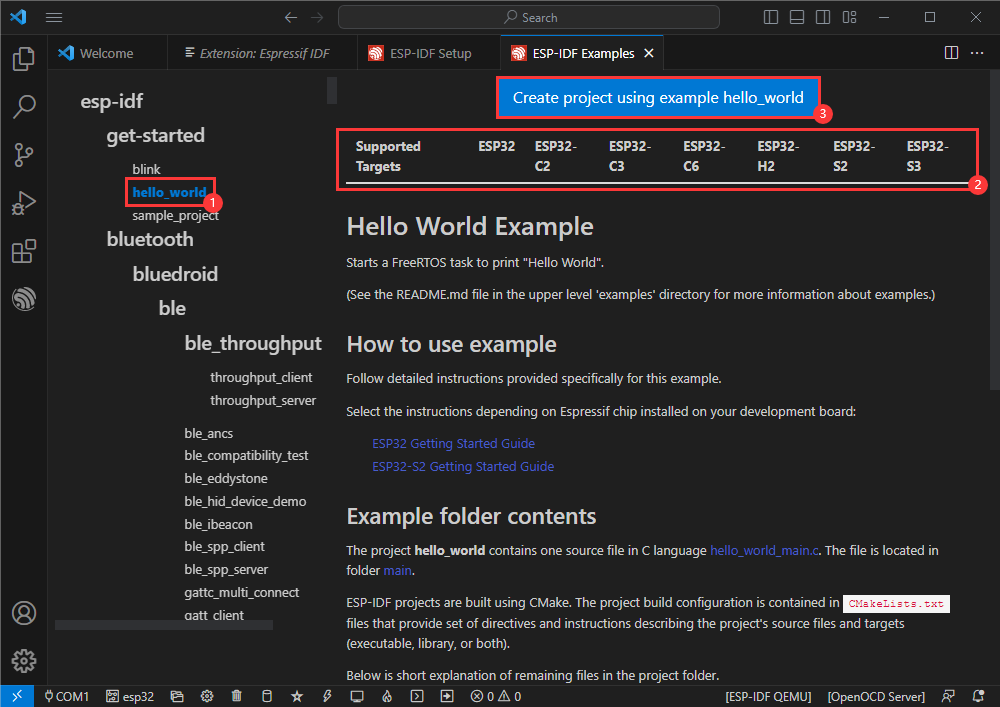
- Select the path to save the demo, and require that the demos cannot use folders with the same name
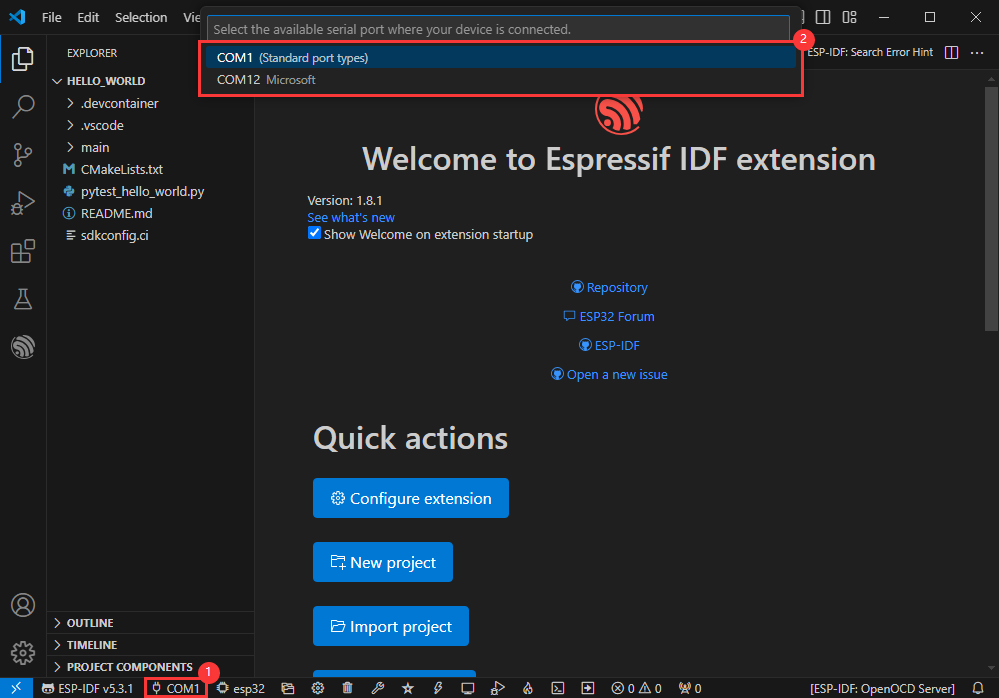
Modify COM Port
- The corresponding COM ports are shown here, click to modify them
- Please select the COM ports according to your device (You can view it from the device manager)
- In case of a download failure, please press the Reset button for more than 1 second or enter download mode, and wait for the PC to recognize the device again before downloading once more
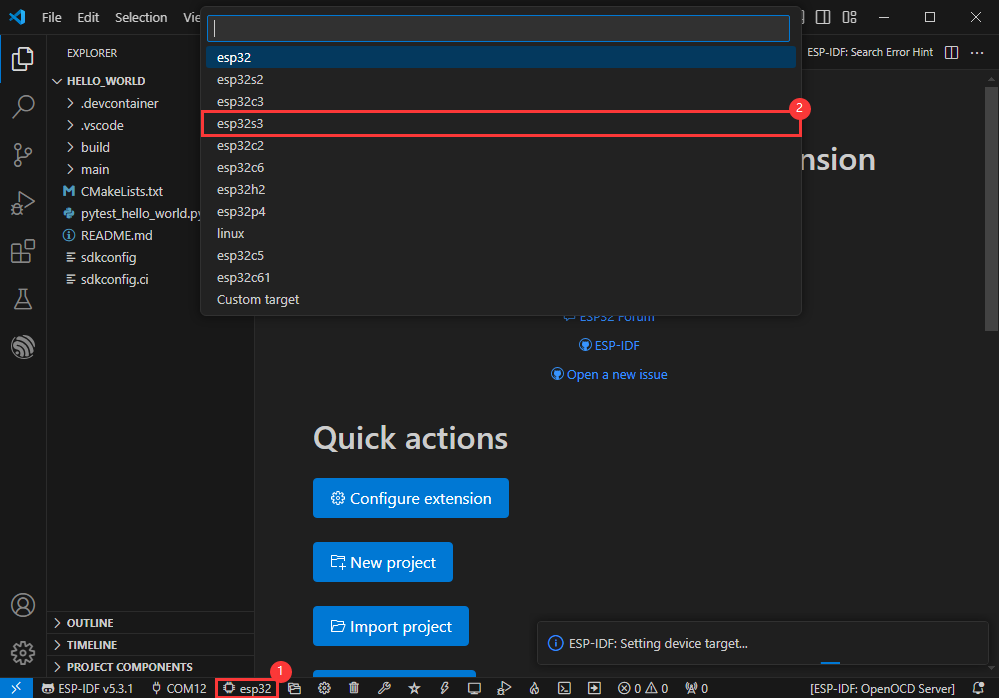
Modify Driver Object
- Select the object we need to drive, which is our main chip ESP32S3
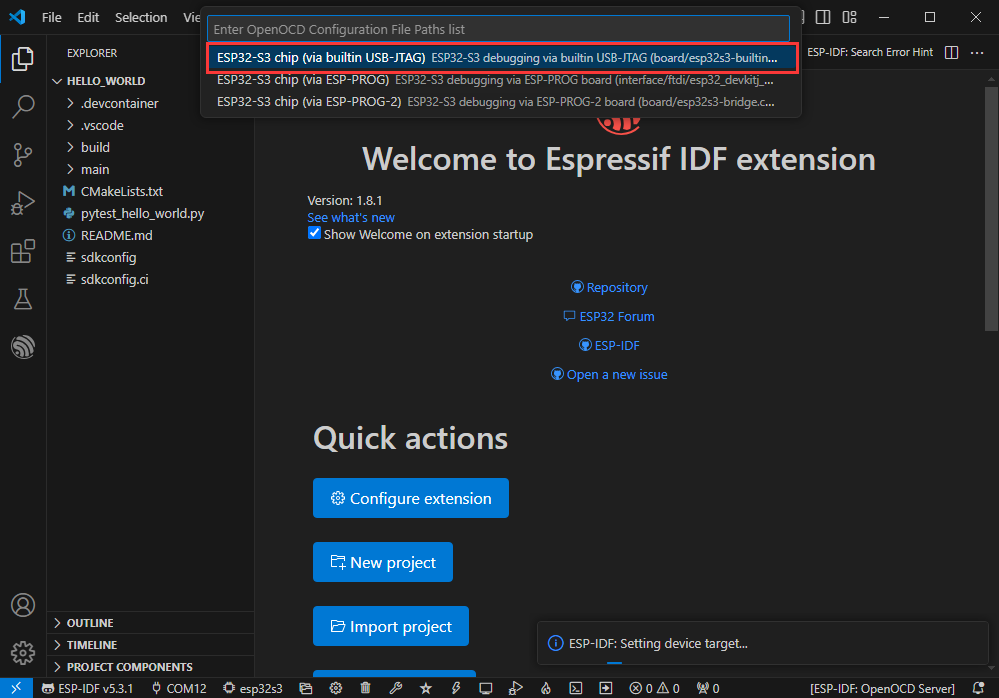
- Choose the openocd path, it doesn't affect us here, so let's just choose one
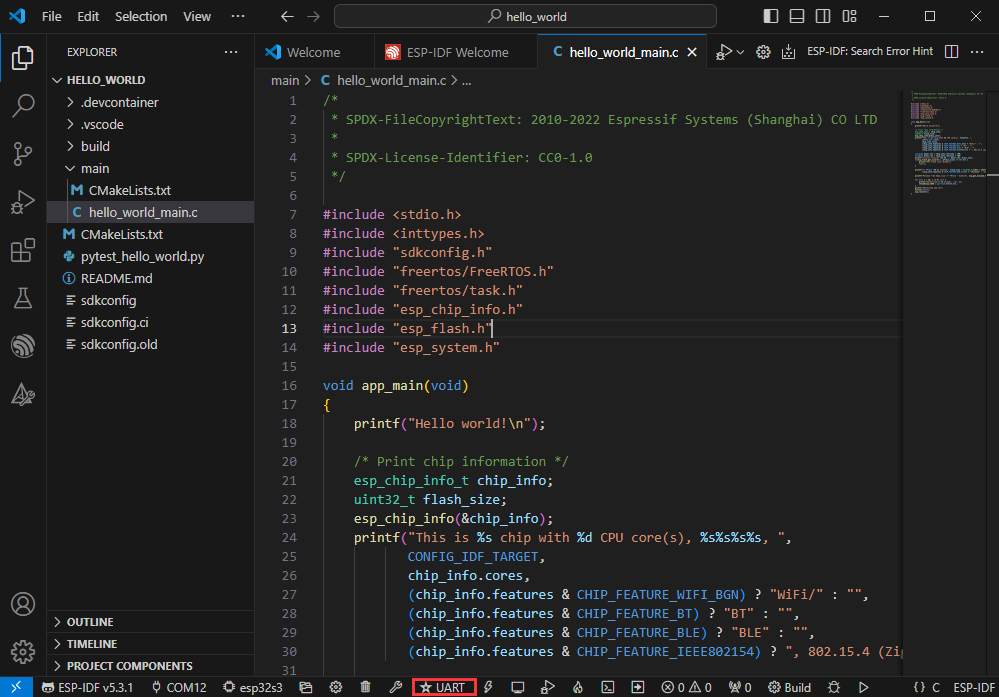
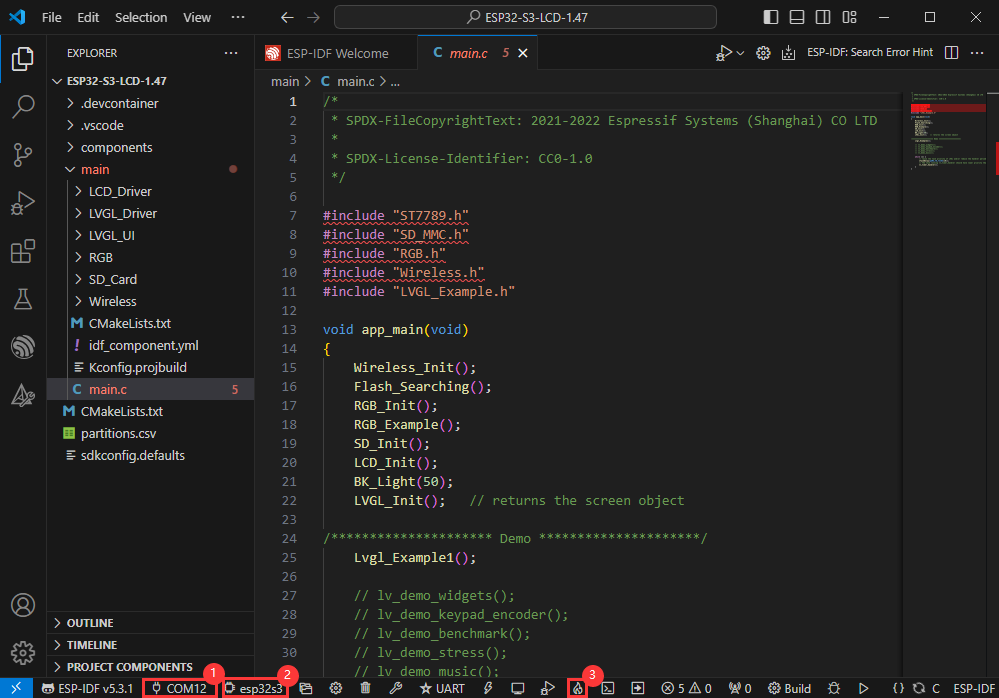
Other Status Bar Functions
①.ESP-IDF Development Environment Version Manager, when our project requires differentiation of development environment versions, it can be managed by installing different versions of ESP-IDF. When the project uses a specific version, it can be switched to by utilizing it
②.Device flashing COM port, select to flash the compiled program into the chip
③.Select set-target chip model, select the corresponding chip model, for example, ESP32-P4-NANO needs to choose esp32p4 as the target chip
④.menuconfig, click it to modify sdkconfig configuration file, please refer to project configuration details
⑤.fullclean button, when the project compilation error or other operations pollute the compiled content, you can clean up all the compiled content by clicking it
⑥.Build project, when a project satisfies the build, click this button to compile
⑦.Current download mode, the default is UART
⑧.flash button, when a project build is completed, select the COM port of the corresponding development board, and click this button to flash the compiled firmware to the chip
⑨.monitor enable flashing port monitoring, when a project passes through Build --> Flash, click this button to view the log of output from flashing port and debugging port, so as to observe whether the application works normally
⑩.Debug
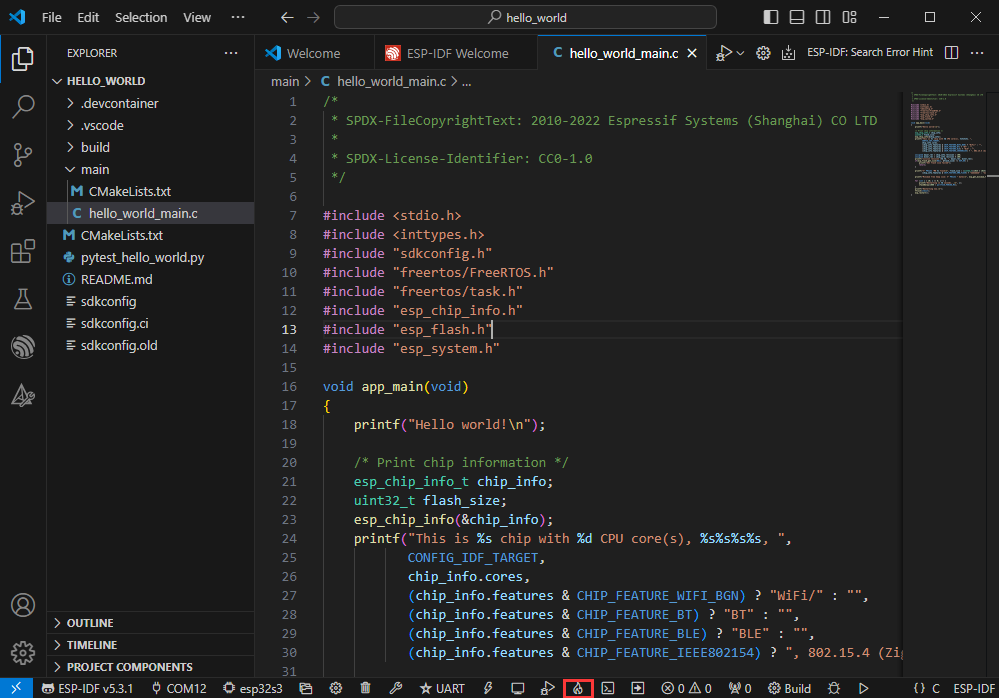
⑪.Build Flash Monitor one-click button, which is used to continuously execute Build --> Flash --> Monitor, often referred to as "little flame"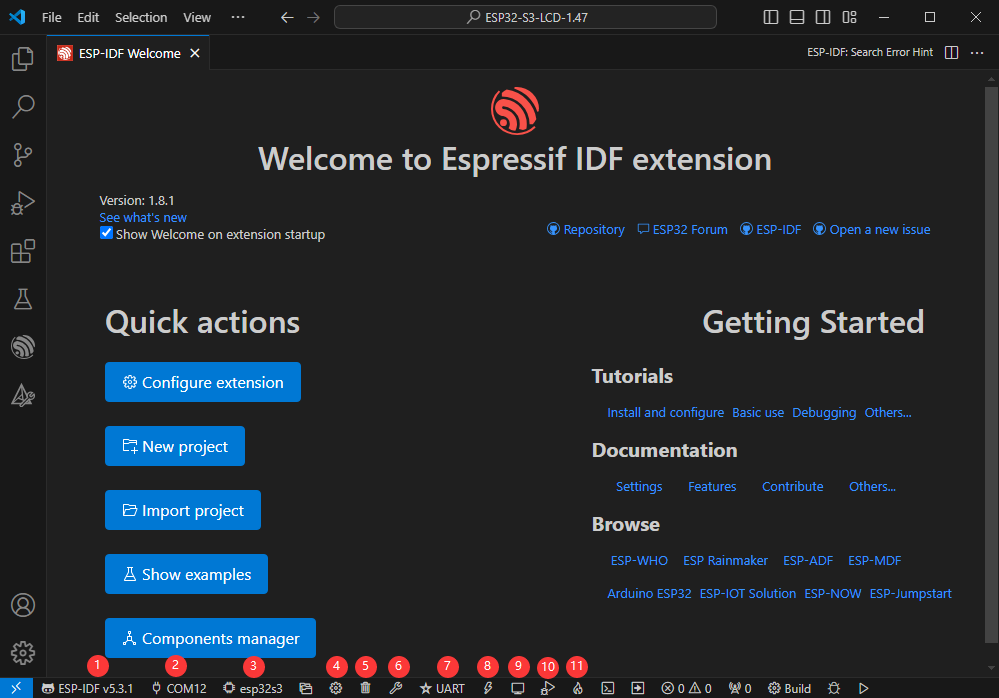
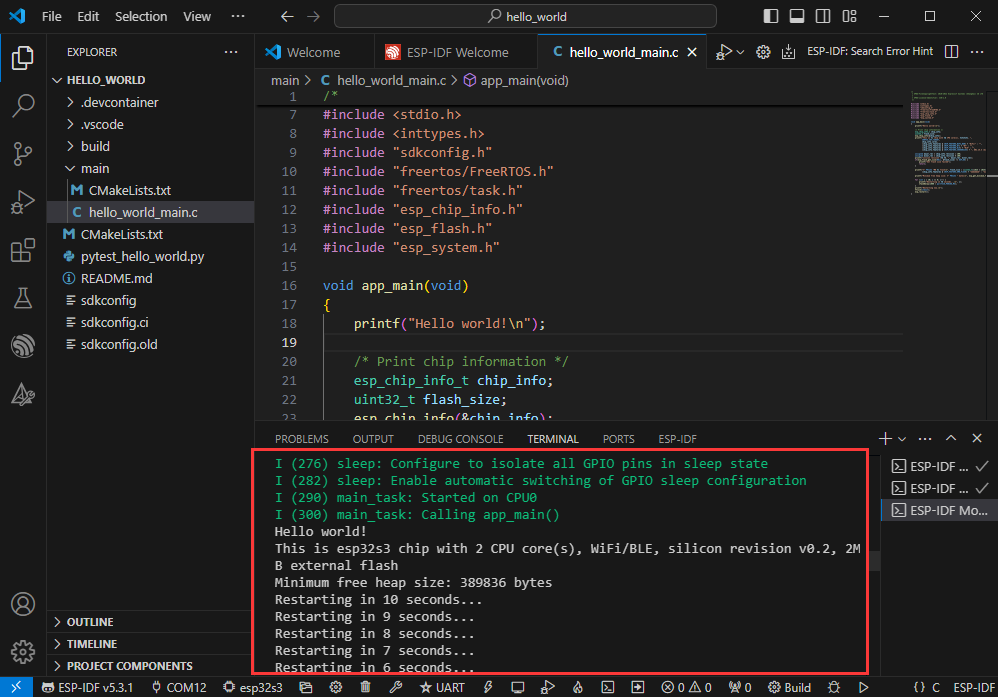
Compile, Flash and Serial Port Monitor
- Click on the all-in-one button we described before to compile, flash and open the serial port monitor
- It may take a long time to compile especially for the first time
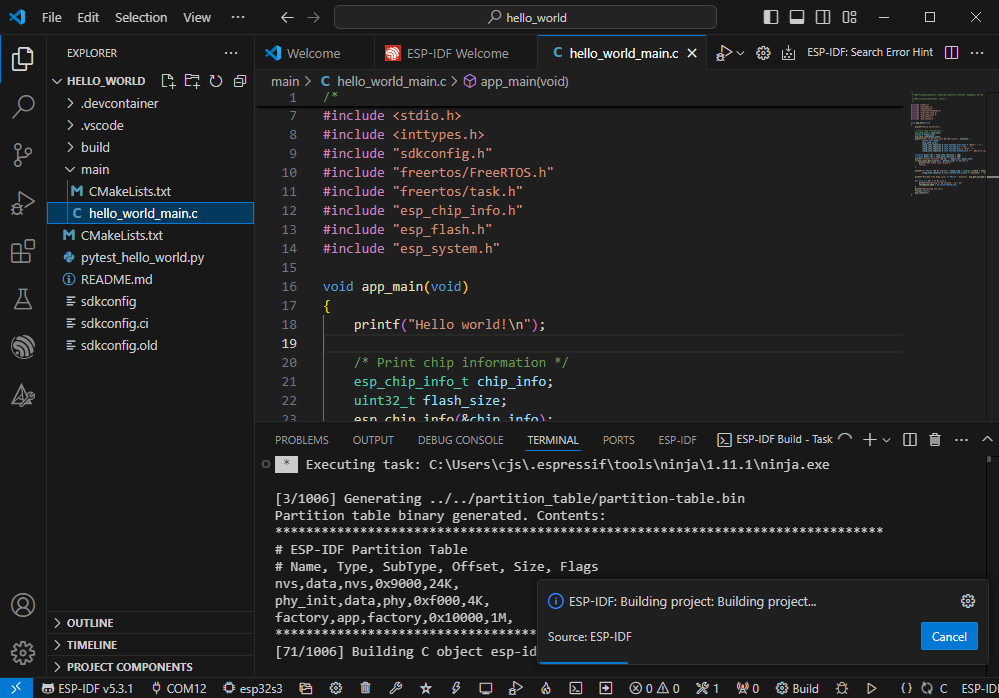
- During this process, the ESP-IDF may take up a lot of CPU resources, so it may cause the system to lag
- If it is the first time to flash the program for a new project, you will need to select the download method, and select UART
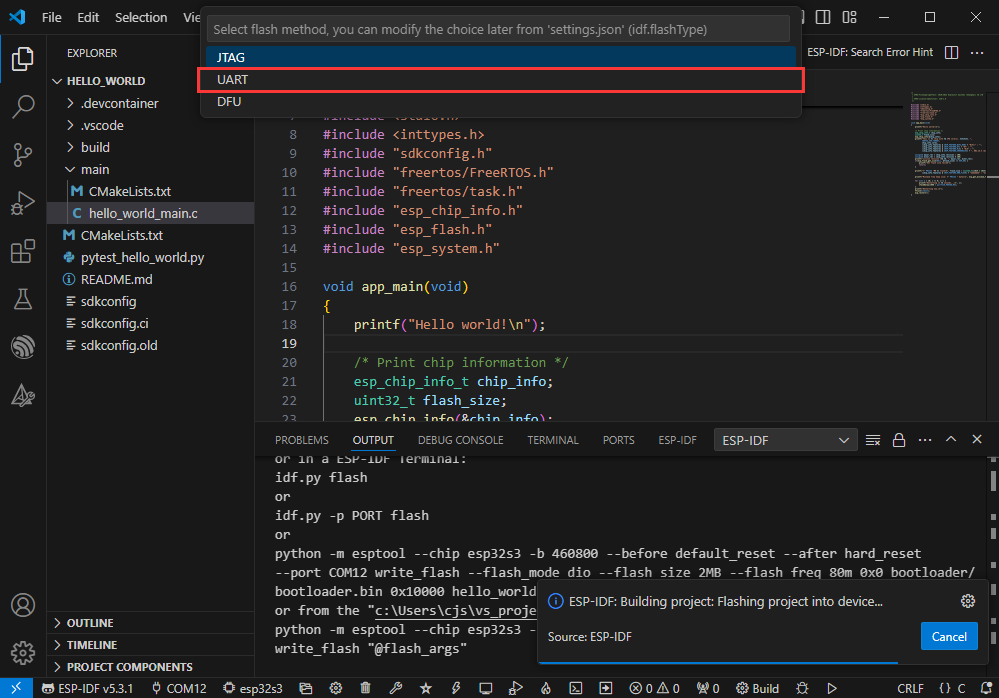
- This can also be changed later in the Download methods section (click on it to pop up the options)
- As it comes with the onboard automatic download circuit, it can be downloaded automatically without manual operation
- After successful download, it will automatically enter the serial monitor, you can see the chip output the corresponding information and be prompted to restart after 10S
Use the IDF Demos
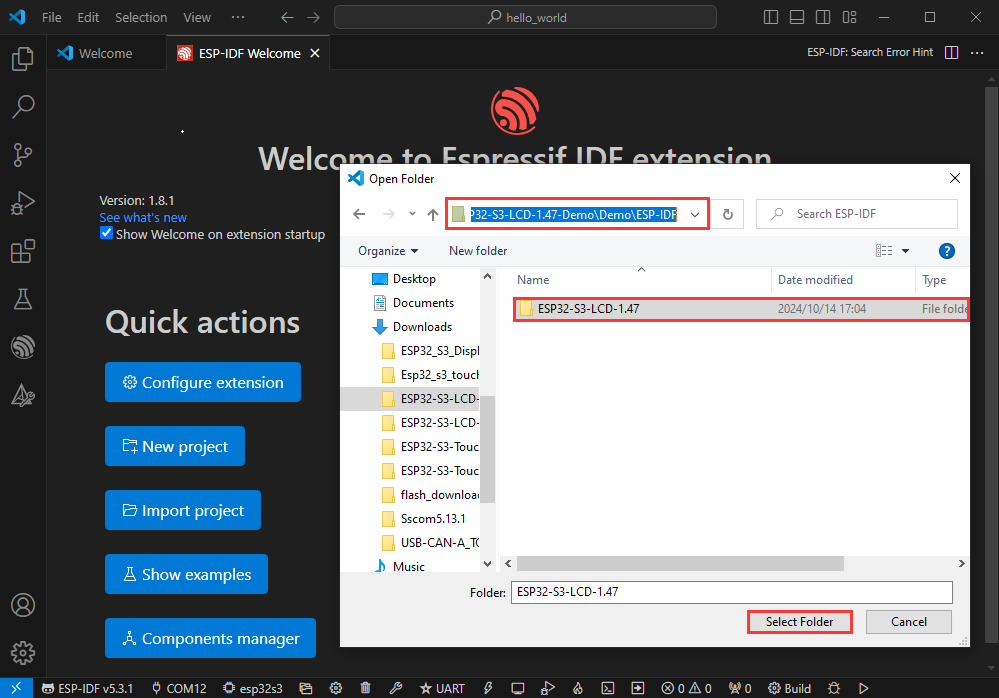
Open In the Software
- Open VScode software and select the folder to open the demo

- Select the provided ESP-IDF example and click to select the file (located in the /Demo/ESP-IDF path under demo)
Open from Outside the Software
- Select the project directory correctly and open the project, otherwise it will affect the compilation and flashing of subsequent programs
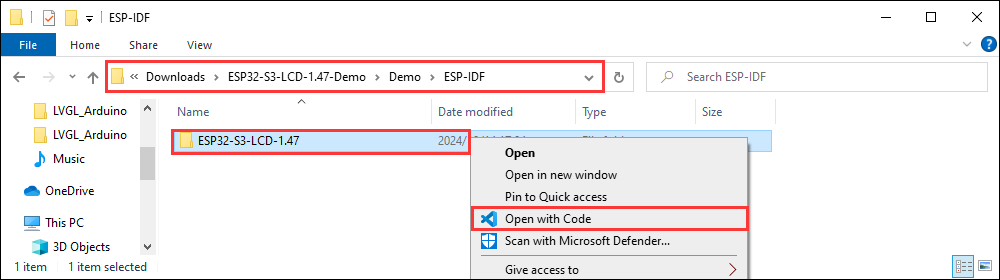
- After connecting the device, select the COM port and model, click below to compile and flash to achieve program control
ESP-IDF Project Details
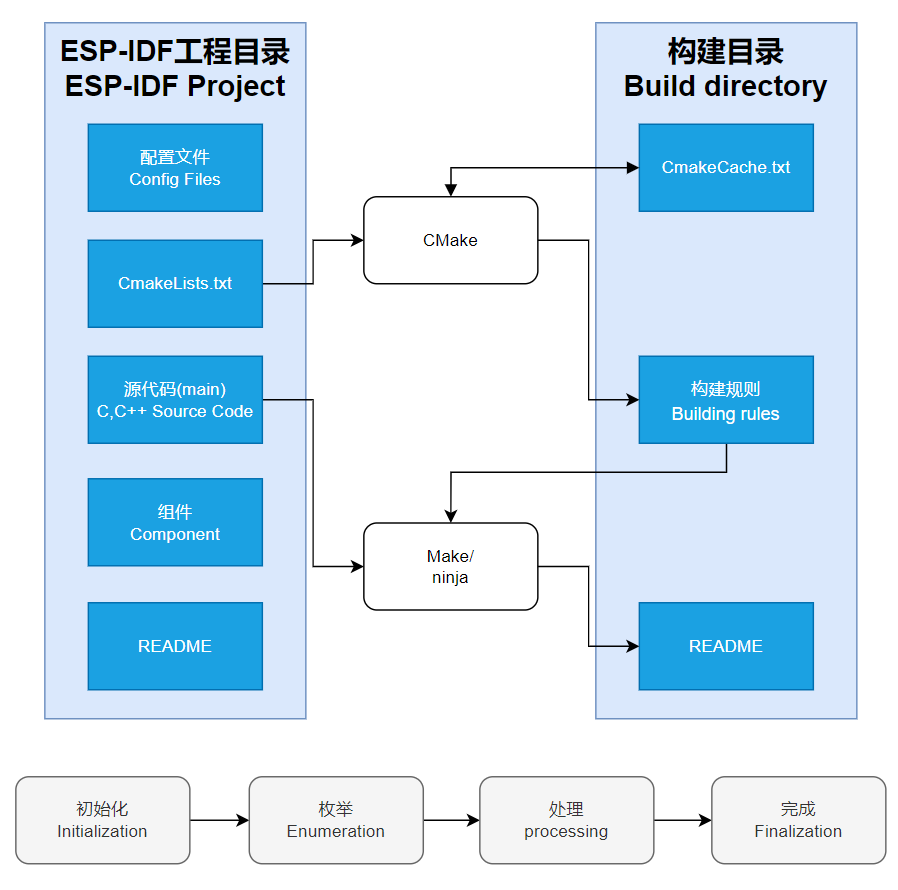
- Component: The components in ESP-IDF are the basic modules for building applications, each component is usually a relatively independent code base or library, which can implement specific functions or services, and can be reused by applications or other components, similar to the definition of libraries in Python development.
- Component reference: The import of libraries in the Python development environment only requires to "import library name or path", while ESP-IDF is based on the C language, and the importing of libraries is configured and defined through
CMakeLists.txt. - The purpose of CmakeLists.txt: When compiling ESP-IDF, the build tool
CMakefirst reads the content of the top-levelCMakeLists.txtin the project directory to read the build rules and identify the content to be compiled. When the required components and demos are imported into theCMakeLists.txt, the compilation toolCMakewill import each content that needs to be compiled according to the index. The compilation process is as follows:
- Component reference: The import of libraries in the Python development environment only requires to "import library name or path", while ESP-IDF is based on the C language, and the importing of libraries is configured and defined through
Resources
Schematic Diagram
Documents
- Display datasheet
- ESP32-S3 Series Datasheet
- ESP32-S3 Technical Reference Manual
- PCF85063 Datasheet
- ES8311 Datasheet
- ES8311 User guide
- ES7210 Datasheet
- SHTC3 Datasheet
Demo
Related Documents
Development Resources
Software Tools
Arduino
- Arduino IDE Official download link
- ESP32-Arduino official documentation
- Arduino-ESP32 offline component package
VScode
Firmware Flashing Tool
FAQ
Question: TF card removal and installation
1. For safety reasons, it is necessary to disconnect the USB, and press and hold the PWR button (5s) to shut down before replacing it
Question: Can the Type-C interface provide supply power?
It can supply power to lithium batteries.
Question: Unable to download firmware?
Press and hold the PWR button for 5 seconds, then hold down the BOOT button and click the PWR button to enter download mode.
Support
Monday-Friday (9:30-6:30) Saturday (9:30-5:30)
Email: services01@spotpear.com

[Tutorial Navigation]
- Overview
- User Guide
- Function Introduction
- Product Usage
- Picture Production
- Development Description
- ESP-IDF Environment Setup
- Run the First ESP-IDF Demo
- Resources
- FAQ
- Question: TF card removal and installation
- Question: Can the Type-C interface provide supply power?
- Question: Unable to download firmware?
- Support