


- sales/support
Google Chat:---
- sales
+86-0755-88291180
- sales01
sales@spotpear.com
- sales02
dragon_manager@163.com
- support
tech-support@spotpear.com
- CEO-Complaints
zhoujie@spotpear.com
- Only Tech-Support
WhatsApp:13246739196
- Purchase/Shipping/Refund
WhatsApp:13424403025
- HOME
- >
- ARTICLES
- >
- Common Moudle
- >
- Camera
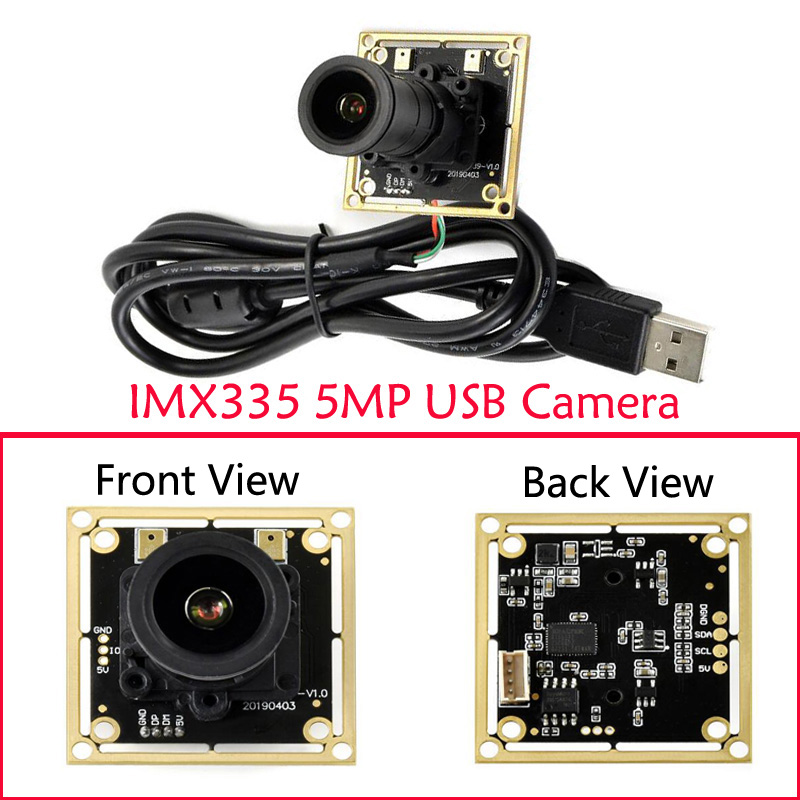
IMX335 5MP USB Camera (A) User Guide
Introduction
USB Camera, IMX335 sensor. 5 megapixel. Supports UVC protocol.
Specification
- Pixel: 5MP
- Resolution: 2592 × 1944
- Sensor: IMX335
- DSP: Automatic white balance(AWB)\Automatic exposure(AEC)\Automatic gain control(AGC)
- Camera Specification:
- CCD Size: 1/2.8 inch
- Aperture (F): 1.08
- Focus Length (EFL): 3.91 mm
- Field of View (FOV): 106°(D) 92.6°(H) 48.6°(V)
- Focus Type: MF
- Interface: USB1.0
- Image:
- Image Format: MJPG, YVY2
- Image resolution: 2592 × 1944
- Video:
- 25 FPS 2592 × 1944 (Full)
- 30 FPS 1920 × 1080 (HD)
- 30 FPS 1280 × 720 (720P)
- Working Voltage: 5V ± 5%
- Working Temperature: 0°C ~ 50°C
- Lens Size: 23.50 × 19.50 × 36.94 mm
- Dimension: 38.00 × 38.00 mm
- Support OS: Windows, Linux, MacOS
Working with Windows PC
Test Software
Most of the Windows 10 PC has pre-install Camera software, you can use it to test the USB camera.
If your PC doesn't have Camera software, you can also download the AMCap test software from Resouce->Software and test.
Testing
- Use Camera software of Windows
- Search "Camera" and open the software.
- Click the setting icon of the top-left to configure the image/video.
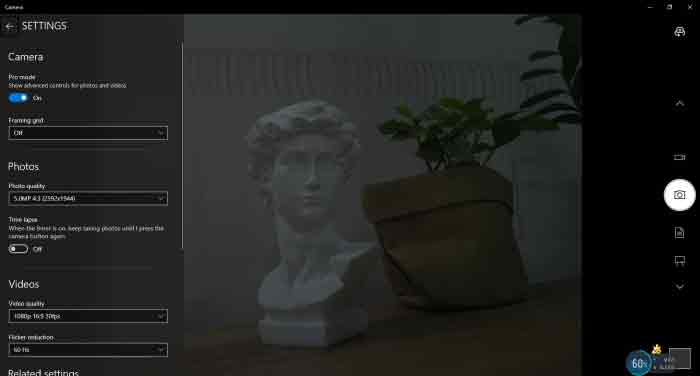
- You can click the icons on the right to switch between Image Capture or Video Recording.
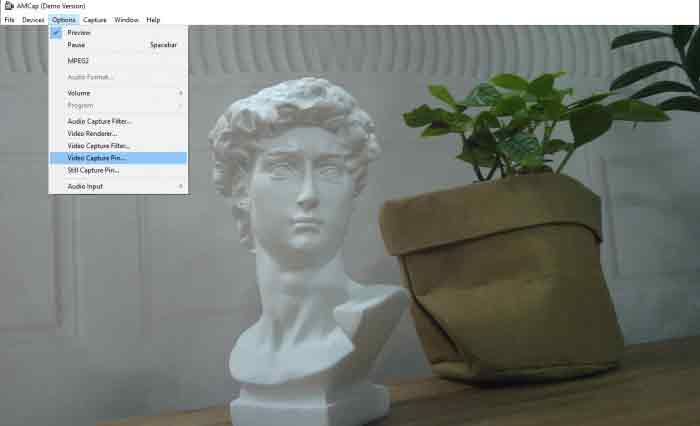
- AMCap Software
- Download and install the AMCap software.
- You can click the Options option, choose Video Capture Pin... or Still Capture Pin... to configure image/video.
Working with Raspberry Pi
- Open a terminal of Raspberry Pi (You can use Ctrl+Alt+T shortcut)
- Edit the modules file:
sudo nano /etc/modules
- Add the following command in the document and save:
bcm2835-v4l2
- Ues command sudo raspi-config to open the configuration
- Choose Interface Option -> Camera -> Yes to enable camera and reboot.
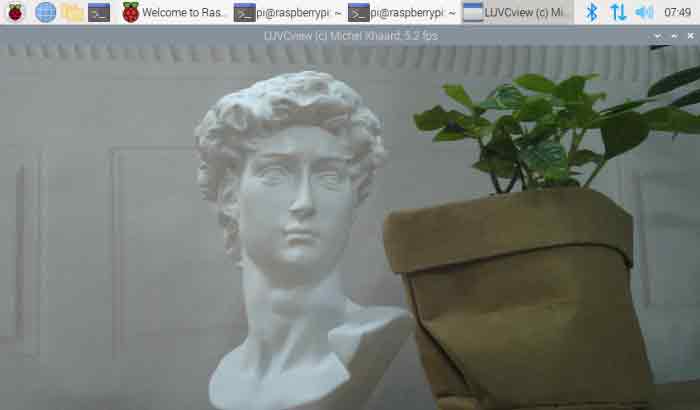
- Open a Terminal of Pi and install luvcview tool with the following command
- sudo apt-get install luvcview -y
- After installing, use the following command to test the USB camera.
- sudo luvcview -s 1920 x 1080
Working with Jetson Nano Developer Kit
- Open a terminal of Jetson Nano Developer Kit (You can use the Ctrl+Alt+T shortcut or open it by Mouse)
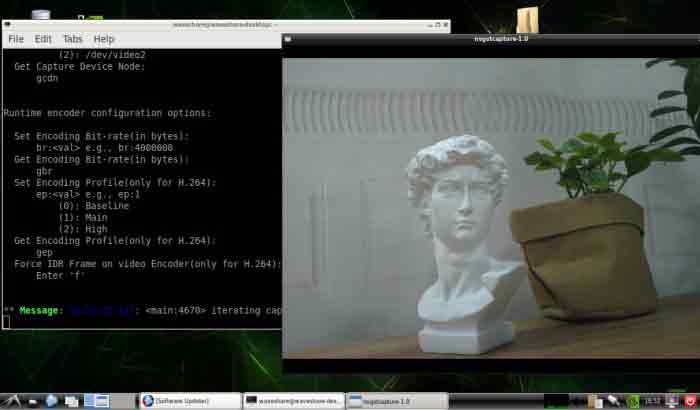
- Use the following command for previewing:
- nvgstcapture-1.0 --camsrc=0
- With the command, a preview window is opened
【Notice】You may need to use the camera by script/codes, in this case, you can refer to tools/libraries like Opencv yourself.
TAG:
ESP32-S3 AI Voice Dialogue Robot Mechanical Dog Development Board Toy Tabletop Pet Deepseek
Raspberry Pi Transparent Screen
Raspberry Pi Mini TV
Raspberry Pi 5 RTC charge configuration
ESP32 S3 R8 MP3 Board 2.8inch LCD TouchScreen Display Speaker/SD-Card/Battery/QMI8658-6-Axis-Sensor
Raspberry Pi 5 USB Audio
RV1106
4.26inch-e-Paper
Milk-V Duo Tutorial
Raspberry Pi 5
Bus servo driver board
Arducam
Raspberry Pi Pico 2 RP2350B 1.46 inch Round LCD Touch Display 412x412 HMI LVGL QMI8658 6-axis 65K Colors
ESP32-S3 LCD Driver Board RGB/SPI N8R8 For 2.1/2.8/4inch Captive TouchScreen Display Round
Mini TV
Raspberry Pi 13.3 inch FHD AMOLED 1080P Capacitive TouchScreen Display Type-C/HDMI For Computer PC
SpotPear
ISX031C GMSL Camera H100 Image Sensor IP67 protection rating For Jetson Orin And MAX9296 GMSL camera
Luckfox Pico ST7789
Serial UART Bus Servo ST3020 TTL 25KG.CM Magnetic-Encoder High precision and Large torque
TAG:
High Precision 360°Metal Servo Motor 45KG.CM 24V RS485 Closed-Loop Feedback Real-Time Protection
Knob screen
D-Robotics RDK X3
ESP32-P4-ETH RJ45 POE DSI/MIPI 10.1 inch LCD Display Touchscreen/CSI Camera/Audio Speaker AI Deepseek
Raspberry Pi Zero Pi0 2W Digital Photo Frame 7.3 inch E6 Full Color E Paper Ink Calendar Art Poster
Raspberry Pi 5 DSI
SpotPear
LuckFox Pico
Pi5 Fan
Arduino MEGA2560 R3
Sipeed Lichee Tang Nano 4K FPGA W1NSR-LV4C GOAI Gowin
Raspberry Pi HQ High Quality Camera 12.3MP IMX477 Sensor M12 Lenses
ESP32-S3 Display
Raspberry Pi Long Bar Screen
Linux Board
Raspberry Pi 15.6 inch QLED Quantum Dot Display 1920x1080 Capacitive Touchscreen Computer PC Jetson Game
Raspberry Pi Camera 1.6MP IMX296 Global Shutter Ideal for Fast Motion Photography
Raspberry Pi 5 PCIe to USB3 HUB Double 2.5G ETH RJ45 and M.2 NVMe SSD PI5 Expansion board HAT+
ReSpeaker Lite Voice Assistant Kit AI For SeeedStudio XIAO ESP32 S3/S3 Sense For Arduino
XIAO RP2040 Tiny SuperMini Arduino MicroPython/CircuitPython SeeedStudio Raspberry-Pi-Pico