


- sales/support
Google Chat:---
- sales
+86-0755-88291180
- sales01
sales@spotpear.com
- sales02
dragon_manager@163.com
- support
tech-support@spotpear.com
- CEO-Complaints
zhoujie@spotpear.com
- Only Tech-Support
WhatsApp:13246739196
- Purchase/Shipping/Refund
WhatsApp:13424403025
Banana pi ------ Quick Start Banana pi SBC
what you need
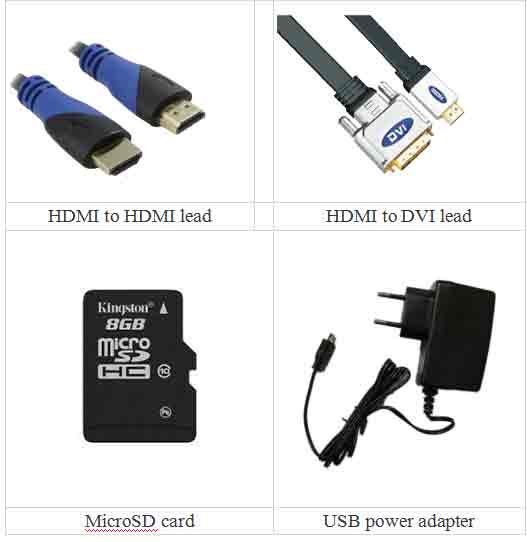
First time to enjoy your Banana Pi, you need at least the accessories in the table below.
| what you need to begin with banana pi | |||
| No. | Item | Minimum recommended specification & notes | |
| 1 | MicroSD card | SD card is optional. If need to boot form SD card, Minimum size 8GB, class 10 \(the class indicates how fast the card is\). We recommend using branded SD cards as they are more reliable. | |
| 2 | HDMI\(Full sized\) to HDMI / DVI lead | HDMI to HDMI lead \(for HD TVs and monitors with HDMI input\).OR HDMI to DVI lead \(for monitors with DVI input\). | |
| 3 | Keyboard and mouse | Any standard USB keyboard and mouse should work. keyboards or mice that take a lot of power from the USB ports, however, may need a powered USB hub. This may include some wireless devices. | |
| 4 | Ethernet cable | Networking is optional, although it makes updating and getting new software for your Banana Pi much easier. | |
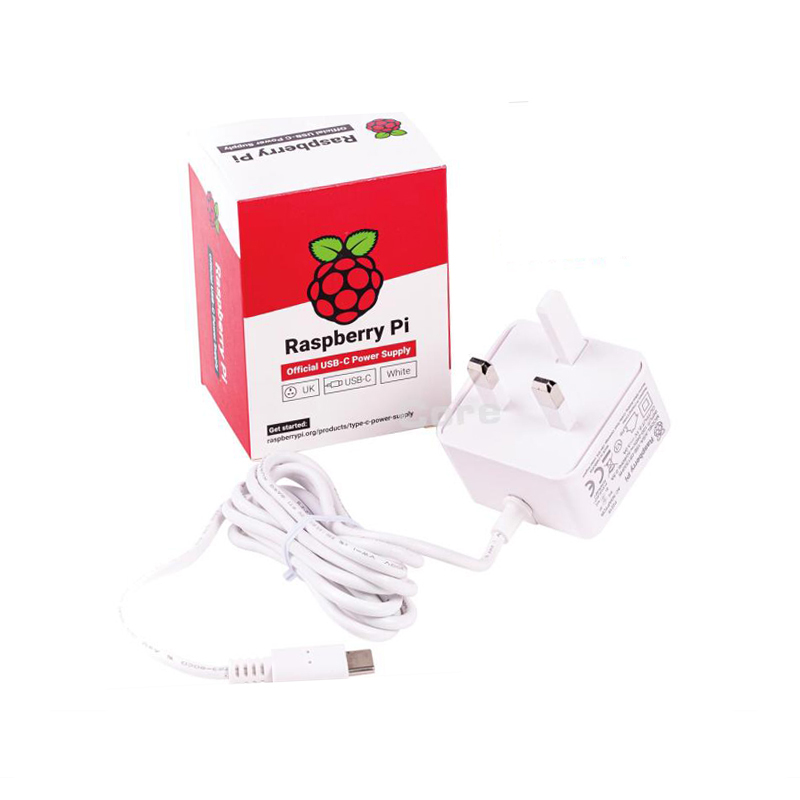
| 5 | Micro USB power adapter | A good quality, USB Power supply that can provide at least 5V/2A is essential.OTG also can power the board, but it is not recommended. | |
| 6 | Audio lead \(Optional\) | You can choose a 3.5mm jack audio led to connect to audio port to get stereo audio. | |
| 7 | Mobile Hard disk \(Optional\) | You can choose to connect a mobile hard disk to USB port to store more files. | |
Base you need below:
- Banana pi SBC
- microSD Card/TFCard: Class 10 or Above, minimum 8GB SDHC
- power adapter via micro USB or DC port. A 5V/2A power is a must
- A Host computer running Ubuntu 16.04 64 bit system
- a serial communication board
Prepare your SD card for the Banana Pi
In order to enjoy your Banana Pi, you will need to install an Operating System \(OS\) onto an SD card or eMMC Flash. Instructions below will teach you how to write an OS image to your SD card or eMMC Flash under Windows and Linux.
1.Insert your SD card into your computer. The size of SD should be larger than the OS image size, generally 8 GB or greater.
2.Format the SD card.
Format your SD under Windows os
Download the a SD card format tool such as SD Formatter from: SD Formatter
Unzip the download file and run the setup.exe to install the tool on your machine.
In the "Options" menu, set "FORMAT TYPE" option to QUICK, "FORMAT SIZE ADJUSTMENT" option to "ON".

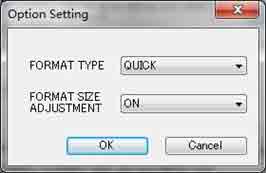
- Check that the SD card you inserted matches the one selected by the Tool.
- Click the “Format” button.
Format your SD under Linux os
- Run fdisk –l command to check the SD card node.
- Run sudo fdisk /dev/sdx command to delete all partition of SD card.
- Run mkfs –t vfat /dev/sdx command to format the entire SD card as FAT. \(x should be replaced according to your SD card node\)
Download the OS image from Download district
Unzip the download file to get the OS image.
*Windows: Right click on the file and choose “Extract all”.
*Linux: Run unzip [downloaded filename] command.
Write the image file to the SD card
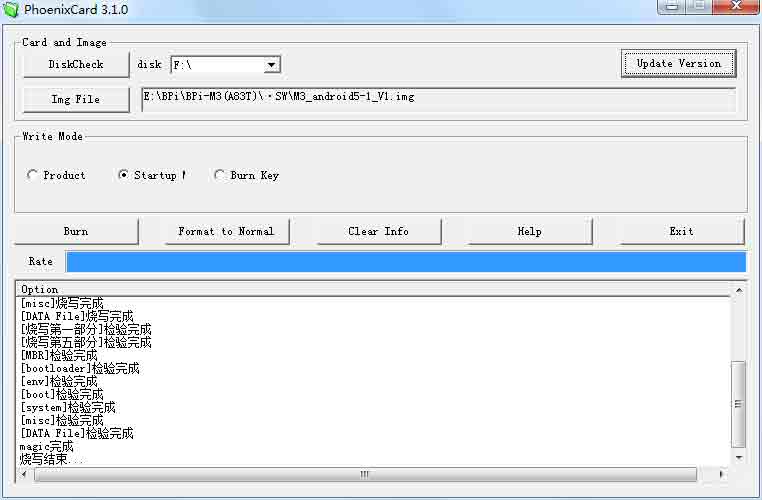
how to write Android image
You need to use Phoenix Card to make the SD card.
Download the Phoenix Card : Phoenix Card
Run PhoenixCard.exe, Press “Disk Check” and select disk of SD Card.
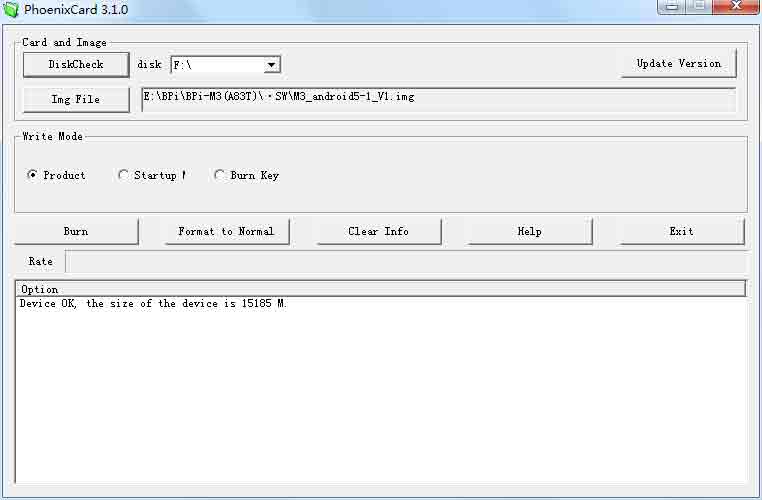
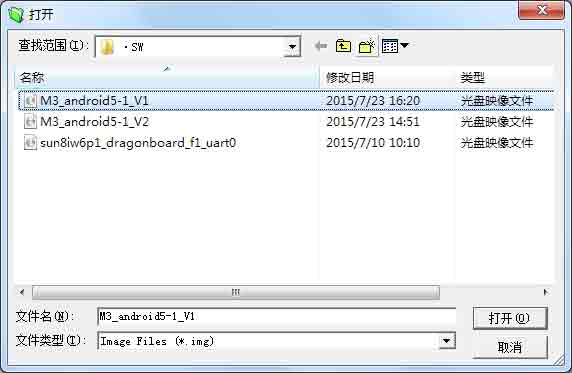
Press “Image File” and Select system.img.
Press “Burn” to start upgrading, Upgraded complete, Press “Exit”.
how to write Linux image
burun Linux image under Windows os:
Download a tool that can wirte image to SD card, such as Win32 Diskimager from: Win32 Diskimager
Open the unzipped image file
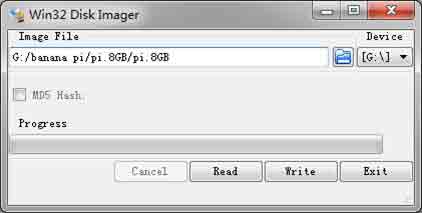
Click Write button. Wait patiently to successfully complete writing.
burun Linux image under Linux os:
Run fdisk –l command to check the SD card node.
Run dd if=\[imagename\] of=/dev/sdx command to write image file to SD card. Wait patiently to successfully complete writing.
Set up your Banana Pi
According to the set up diagram below, you can easily set up your Banana Pi.
- Insert the written-image SD card that to the SD card spot on the left side edge of the underside of the board.
- 2.On the bottom "edge" in the middle of the board is the HDMI Type A \(Full sized\) port. Just connect any HDMI cable from the board to your TV or HDMI Monitor.
- Plug a USB keyboard and mouse into the USB slots located on the right edge.
- Just under the USB ports on the right edge is the Ethernet connector for anyone who wants to plug the Banana Pi into a wired network.
- Finally, at the very left of the bottom edge is the USB power connector. Plug in a regulated power supply that is rated at 5V ±5% / 2000mA \(or 2A\). Any number bigger than 700 mA will also work. Avoid using the smaller chargers used for small GSM phones, as these are often unregulated, even if they claim "5V 1A", they may do "5V" and may do "1A", but not at the same time!
If all goes well, the Banana Pi will boot in a few minutes. The screen will display the OS GUI.
Shut down your Banana Pi
You can use the GUI to shut down the Banana Pi safely.
Also you can run the command in the terminal:
sudo halt`or `sudo shutdown –h
This will shut down the PI safely, \(just use the power key to turn off might damage the SD-cards file system\). After that you can press the power key for 5 seconds to turn it off.