- sales/support
Google Chat:---
- sales
+86-0755-88291180
- sales01
sales@spotpear.com
- sales02
dragon_manager@163.com
- support
tech-support@spotpear.com
- CEO-Complaints
zhoujie@spotpear.com
- Only Tech-Support
WhatsApp:13246739196
- Purchase/Shipping/Refund
WhatsApp:13424403025
Raspberry Pi Camera Scheduler User Guide
Instruction
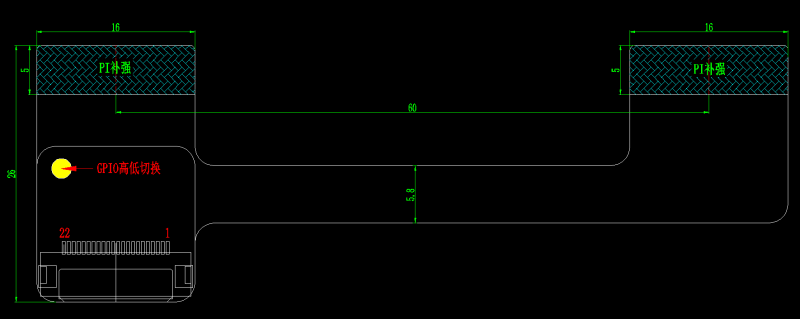
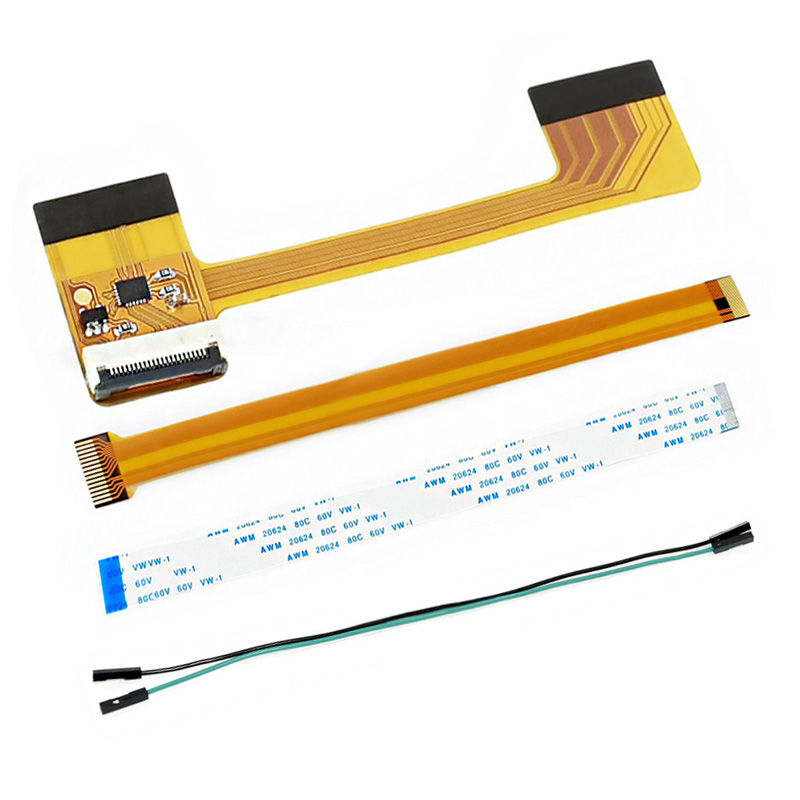
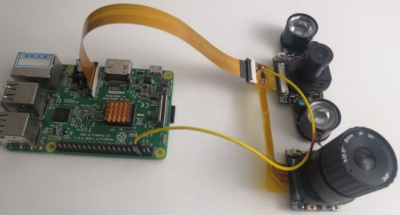
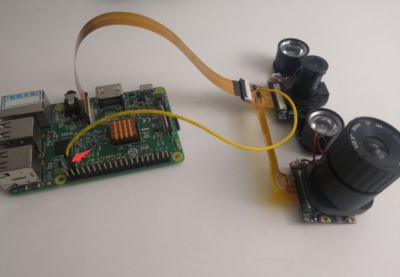
This scheduler is designed for Raspberry Pi, the specific FFC used allows the Rspberry Pi to connect two cameras. You can switch the cameras by controlling the GPIO.
How to use
Configuration
- 1. Hardware connection
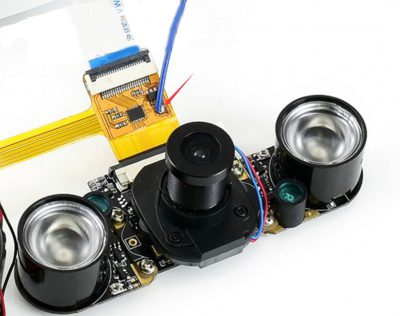
Connect FFC cable of Raspberry Pi to CSI interface of Raspberry PI. The CSI interface of Pi 2B, 3B, 3B+ located between LAN port and HDMI port. The CSI interface of Pi 4 is placed between HDMI1 interface and the audio jack. If you use Pi zero, the CSI interface is besided the Power port. Here is the diagram of Pi 4.
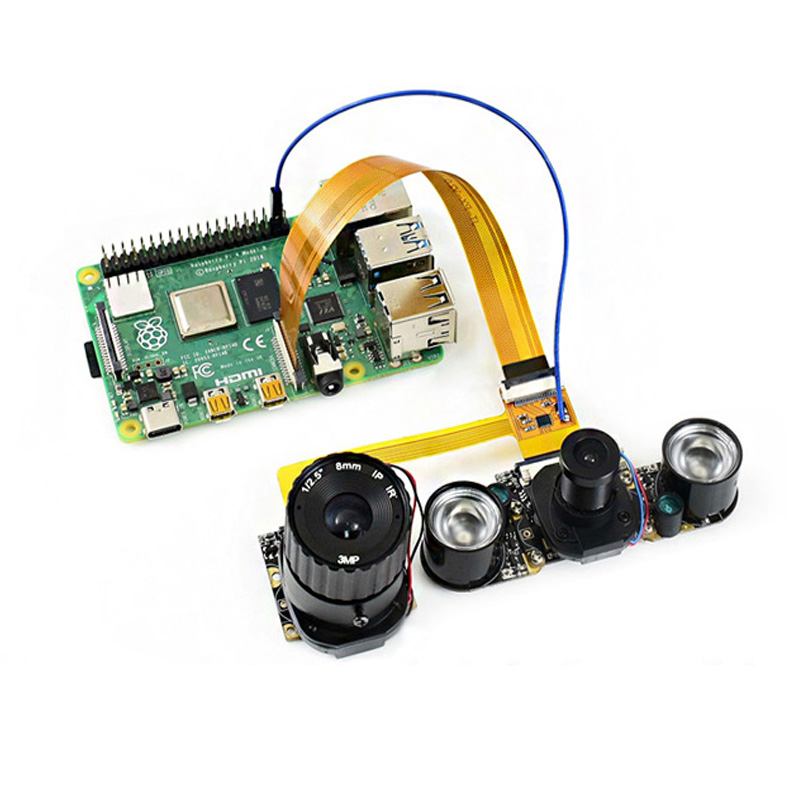
Note that the silver side (metal side) should toward to the HDMI interface. Release the black buckle, align the FFC cable and insert it tightly, then close the black buckle.
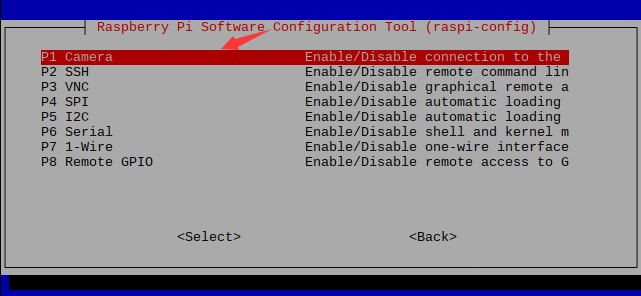
- 2. Enable camera
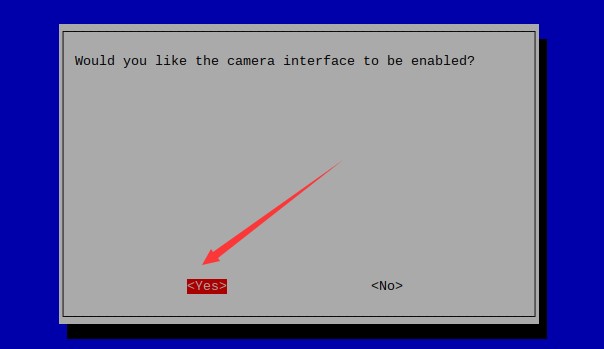
The camera interface of Raspberry Pi is default disabled. Before you use camera, you should enable it.
Open Raspberry Pi terminal and excute command sudo raspi-config, then choose Interfacing Options -> Camera -> Yes


- Reboot Raspberry Pi
sudo reboot
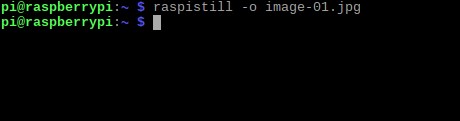
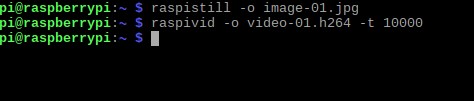
- 3. Test camera
- Open terminal and test camera
- Capture picture:sudo raspistill -o image-01.jpg
- Snapshot:sudo raspivid -o video-01.h264 -t 10000
- 4. Swtich camera
- Solder a wire to pad of FFC cable
- Manually switch: Pull-down the pad, that is connect the wire to GND
- Switch the camera, run camera command to test if cameras are switched. If it failed to switch, please check the soldering.
- Python switch camera: Connect the wire to one GPIO, here we connect it to PIN 37. Download demo codes from wiki.
- Download demo codes from Resources and copy it to your Raspberry Pi.
- Enter the directory of demo codes, run the codes to auto snapshot. This script will switch camera and take picture every 5s, and save pictures to /home/pi/Pictures.
cd /boot/Camera-Scheduler/
sudo python switch-photo.py

- Enter the directory of demo codes, run the codes to auto recoding. This scrip will switch camera and take a 10s long video every 15s. Videos will be saved in /hoem/pi/Videos.
cd /boot/Camera-Scheduler/
sudo python switch-video.py