- sales/support
Google Chat:---
- sales
+86-0755-88291180
- sales01
sales@spotpear.com
- sales02
dragon_manager@163.com
- support
tech-support@spotpear.com
- CEO-Complaints
zhoujie@spotpear.com
- sales/support
WhatsApp:13246739196
- HOME
- >
- ARTICLES
- >
- Common Moudle
- >
- LCD
13.3inch Magic Mirror User Guide
Introduction
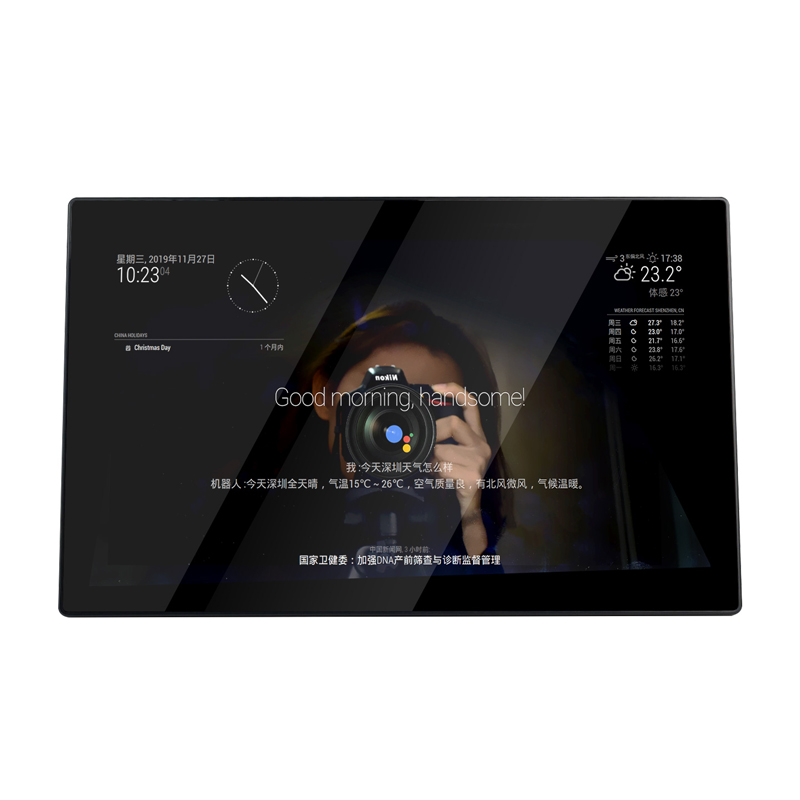
13.3inch Magic Mirror, Voice Assistant, Touch Control, Raspberry Pi 3A+ Inside
Features
- 13.3inch IPS screen,1920x1080 high resolution
- Embed Raspberry Pi 3A+ as controller
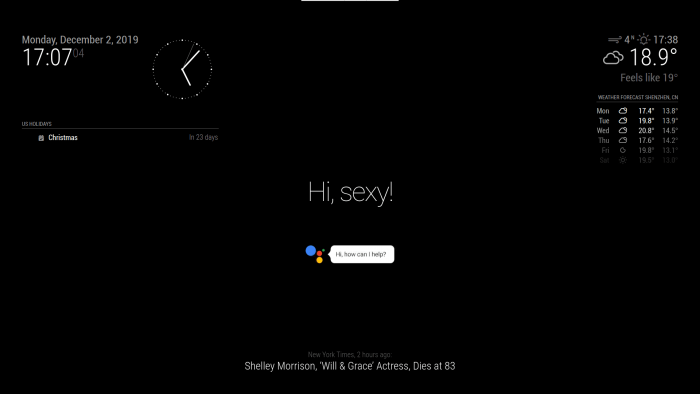
- One-way mirror, can display news, weather and time.
- Toughened glass capacitive touch panel, 6H hardness, supports up to 10-points touch
- Embedded ferrite Hi-Fi speaker
- Embedded Microphone And Speaker, Adopts Snowboy Hotword Detection Engine
- 75x75mm spacing mounting holes (M4 screw hole) for general wall mount
- Comes with 75° tilt angle stand
User Guide
To use the Magic mirror, you can use the pre-configured image which we provide or configure it yourself with the original Raspbian image.
Method 1. Pre-configured image
- 1. Download the pre-configured image and write it to your SD card
- 2. Add the following lines to wpa_supplicat.conf files in the BOOT directory. (if you didn't find the files, create it)
ctrl_interface=DIR=/var/run/wpa_supplicant GROUP=netdev
update_config=1
country=US

network={
        ssid="your_real_wifi_ssid"
        psk="your_real_password"
}
Note: you need to change your_real_wifi_ssid and your_real_password" to the real ssid and password
- 3. Inset the card to Raspberry Pi and power on it
Method 2. Configure image manually
- 1. Write Raspbian image
- Download the lasted Raspbian image from the Rasberry Pi website and write it to an empty micro SD card.
- Create a new txt file under the BOOT directory of micro SD card and name it as SSH.
- Modify config.txt file which is located at BOOT directory, add the following lines to config.txt file
hdmi_group=2
hdmi_mode=82
hdmi_cvt 1920 1080 60 6 0 0 0
- Save and insert the micro SD card to Raspberry Pi.
- Connect the Magic mirror to network and power on Raspberry Pi.
- After booting, you can access Raspberry Pi via SSH, or directly connect keyboard and mouse.
- 2. Install WM8960 sound card driver
- Open the terminal and use the following commands to install
git clone https://github.com/waveshare/WM8960-Audio-HAT
cd WM8960-Audio-HAT
sudo ./install.sh
- Modify config.txt file, remove the following line from the file or comment it.
#dtparam=audio=on
- Then reboot Raspberry Pi
sudo reboot
- After rebooting, check the driver by the following command
sudo dkms status
- If you can get the information as below, it means that the driver was installed successfully.
wm8960-soundcard, 1.0, 4.19.58-v7l+, armv7l: installed
- Test the sound card
- Test playing: aplay -l
pi@raspberrypi:~ $ aplay -l
**** List of PLAYBACK Hardware Devices ****
card 0: wm8960soundcard [wm8960-soundcard], device 0: bcm2835-i2s-wm8960-hifi wm8960-hifi-0 []
  Subdevices: 1/1
  Subdevice #0: subdevice #0
- Test recording: arecord -l
pi@raspberrypi:~ $ arecord -l
**** List of CAPTURE Hardware Devices ****
card 0: wm8960soundcard [wm8960-soundcard], device 0: bcm2835-i2s-wm8960-hifi wm8960-hifi-0 []
  Subdevices: 1/1
  Subdevice #0: subdevice #0
- 3. Install Magic Mirror driver
- Open terminal and type the following commands
curl -sL https://deb.nodesource.com/setup_10.x | sudo -E bash -
sudo apt install -y nodejs
git clone https://github.com/MichMich/MagicMirror
cd MagicMirror/
npm install
- After installing, run the command to display
DISPLAY=:0 npm start
cd ~/MagicMirror/modules
git clone https://github.com/waveshare/MMM-VoiceAssistant.git
cd MMM-VoiceAssistant
cp config/config.js.en ~/MagicMirror/config/config.js  #显示英文
#cp config/config.js.cn ~/MagicMirror/config/config.js  #显示中文
cd ~/MagicMirror
DISPLAY=:0 npm star
sudo apt-get update
sudo apt-get install python3-dev python3-venv
python3 -m venv env
env/bin/python -m pip install --upgrade pip setuptools wheel
source env/bin/activate
- Note: The following steps should be take in the virtual environment, if you close the terminal and restart it, you should use the command below to enter the environment again firstly
source ~/env/bin/activate
- 5. Install snowboy
- Install libraries
sudo apt-get install swig
sudo apt-get install libatlas-base-dev
sudo apt-get install portaudio19-dev
sudo apt-get install flac
pip3 install PyAudio
pip3 install SpeechRecognition
- Download snowboy
git clone https://github.com/Kitt-AI/snowboy.git
cd snowboy/swig/Python3
make
cd ../../examples/Python3
- Modify snowbiydecoder.py file. Change from.import snowboydetect to import snowboydetect. Save and enable snowboy
cd ~/snowboy/examples/Python3
python3 demo.py resources/models/smart_mirror.umdl
- Try to say smart mirror, you will hear ding and the information below are printed on the mirror
INFO:snowboy:Keyword 1 detected at time: 2019-12-03 11:30:16
- 6. Install Google Assistant Service
- Create .asoundrc file in /home/pi directory (the user directory)
nano .asoundrc
- Add the following lines to the .asoundrc file
pcm.!default {
  type asym
  capture.pcm "mic"
  playback.pcm "speaker"
}
pcm.mic {
  type plug
  slave {
    pcm "hw:0,0"
  }
}
pcm.speaker {
  type plug
  slave {
    pcm "hw:0,0"
  }
}
- Accoding to the official guide to install Google Assistant Service
- Please follow the third step of the official guide to configure and create OAuth Client ID JSON file. Don't forget to copy the JSON file to your Raspberry Pi.
- Following the fourth step of the guide to register device model
- Install Google Assistant SDK
(env) $ sudo apt-get install portaudio19-dev libffi-dev libssl-dev
(env) $ python -m pip install --upgrade google-assistant-sdk[samples]
- Authorize model
(env) $ python -m pip install --upgrade google-auth-oauthlib[tool]
- Genegrate credential
(env) $ google-oauthlib-tool --scope https://www.googleapis.com/auth/assistant-sdk-prototype \
      --save --headless --client-secrets /path/to/client_secret_ client-id .json
- Then you will get an URL, please copy it and open it on browser of your PC.
Please visit this URL to authorize this application: https://...
- Go to the URL, you are asked to log in your Google Account and get the authorization code by following guides, Copy the code to the terminal
Please go to this URL: https://...
Enter the authorization code:
- If the authorization process is done successfully, you will get the information as below.
credentials saved: /path/to/.config/google-oauthlib-tool/credentials.json
- Use the following commandto test.
googlesamples-assistant-pushtotalk --project-id my-dev-project --device-model-id my-model
- Note: my-dev-project is the Google Could Platform ID of Actions Console porject you created. You need to find the project ID in Actions Console. my-model is the device model name you create
- Press Enter, and try to ask something.
- 7. Set auto-run
- Install PM2
sudo npm install -g pm2
- Setup pm2
pm2 startup
- You will get informatin below, please copy the command and run it on terminal
[PM2] To setup the Startup Script, copy/paste the following command:
sudo env PATH=$PATH:/usr/bin /usr/lib/node_modules/pm2/bin/pm2 startup systemd -u pi --hp /home/pi
- Run Magic mirror by PM2
cd MagicMirror/modules/MMM-VoiceAssistant/pi
pm2 start mm.sh
- Run snowbiy by PM2
cd MagicMirror/modules/MMM-VoiceAssistant/pi
pm2 start snowboy.sh
- Set auto-run
pm2 save
- If you want to disable the sevices, you can aslo use the following command
pm2 stop mm
pm2 stop snowboy
- 8. kepp display lighting all the time
- Modify lightdm.conf
sudo nano /etc/lightdm/lightdm.conf
- Find the line "Xserver-command" below [SeatDefaults] section and change it from
#xserver-command=X
to
xserver-command=X -s 0 -dpms
- Then save and reboot
sudo reboot
TAG:
spotpear
WiFi Wireless ESP32 DDSM Motor Driver HAT For Direct Drive Servo Hub Motors For Raspberry Pi
ESP32 S3 Development Board 1.75 inch AMOLED Display TouchScreen SD slot 6-axis sensor Xiaozhi AI Deepseek
SpotPear
Raspberry-Pi-Game-1.54inch-LCD-touchscreen-display-ST7789
Raspberry Pi 5 PCIe to M.2 5G/4G/3G HAT With RM520N-GL
Raspberry Pi LCD display screen 1.3inch ST7789 with Game Button A
Jetson Nano Expansion Board
UART
ESP32-S3 1.28inch Round LCD
Raspberry Pi 1.54inch LCD Bookworm-Desktop Display and Touch
Raspberry Pi Pico 2 W RP2350 Pico2W ARM Cortex-M33 And RISC-V Hazard3 Wi-Fi4 Bluetooth5.2 CYW43439
0.96inch RGB OLED
SpotPear
Jetson Orin 5G/4G/3G expansion board GNSS GPS RM520N-GL
Raspberry Pi display
Core1121 LoRa LR1121 HF LF SPI For Sub-GHz and 2.4GHz
Raspberry Pi 5 Serial
Metal Case
2.13Inch E-Paper
TAG:
Raspberry Pi 8 inch DSI LCD Display MIPI 800×480 Capacitive TouchScreen 5MP Front Camera
Desktop
RP2040
Raspberry Pi Long Bar Screen
Raspberry Pi 18.5inchFHD LCD 1920x1080 Capacitive TouchScreen Display
DeepSeek Chat Robot ESP32-S3 1.54 inch LCD N16R8 MUMA Development Board Display Screen Wifi Weather Station TimeClock
ESP32 GamePad Retro Game MP3 Player FC NES
X1202 Raspberry Pi 5 UPS
ESP32-S3 AI RLCD Total Reflection Screen 4.2 inch Development Board Deepseek
Pi5
Raspberry Pi LCD display screen 1.3inch ST7789 with
Raspberry Pi 5 ABS Case
ESP32 S3 LCD Development Board 1.3 inch Display
Horizon Sunrise 5 D-Robotics RDK X5
Raspberry Pi 5
Milk-V Duo RISC V
ESP32 S3 Development Board 1.64 inch AMOLED Display 1.64inch TouchScreen For Arduino LVGL With SD-Port/ QMI8658C 6-Axis Sensor
Raspberry Pi 5 case
LCD1602 I2C Arduino Raspberry Pi Pico Jetson Nano ESP32
Chip RP2350A RP2350B RP2354A RP2354B Raspberry Pi Pico 2


