




- sales/support
Google Chat:---
- sales
+86-0755-88291180
- sales01
sales@spotpear.com
- sales02
dragon_manager@163.com
- support
tech-support@spotpear.com
- CEO-Complaints
zhoujie@spotpear.com
- Only Tech-Support
WhatsApp:13246739196
- Purchase/Shipping/Refund
WhatsApp:13424403025
- HOME
- >
- ARTICLES
- >
- Common Moudle
- >
- Power
Waveshare Cloud Control
Create Device
- Register user on Waveshare Cloud
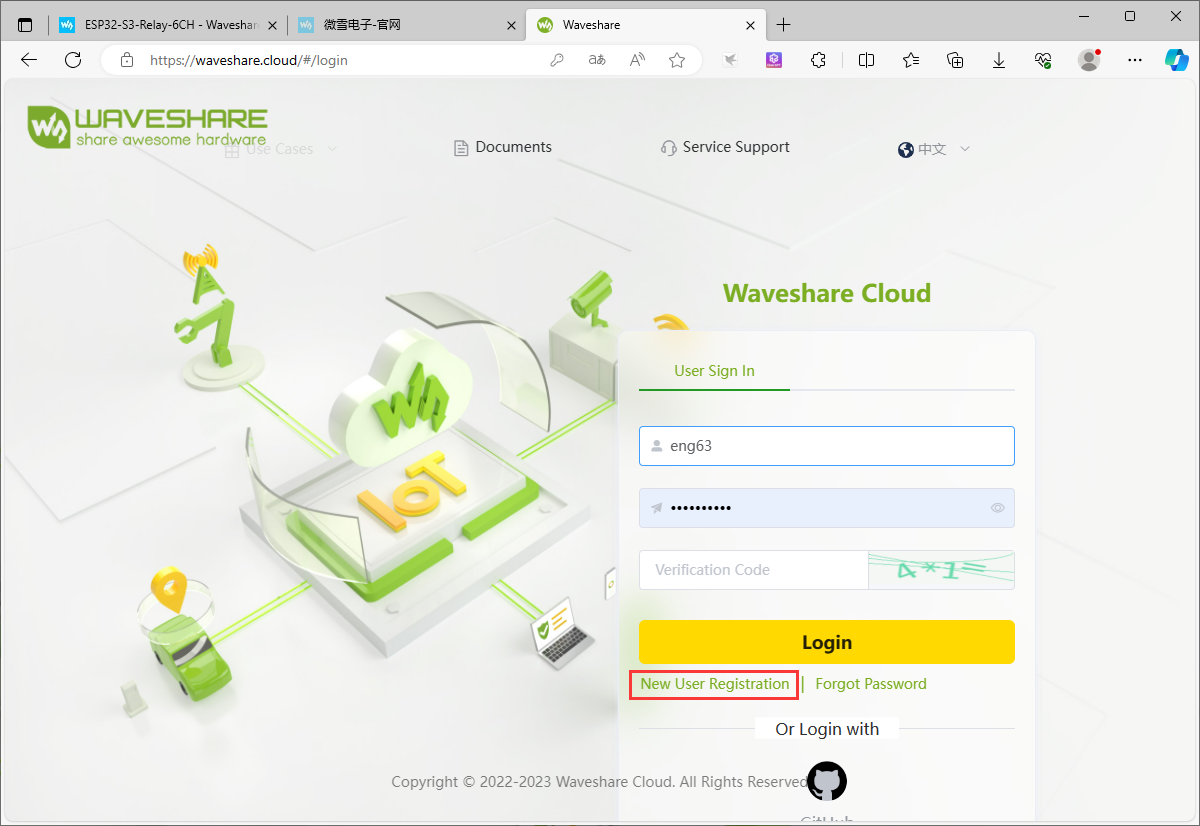
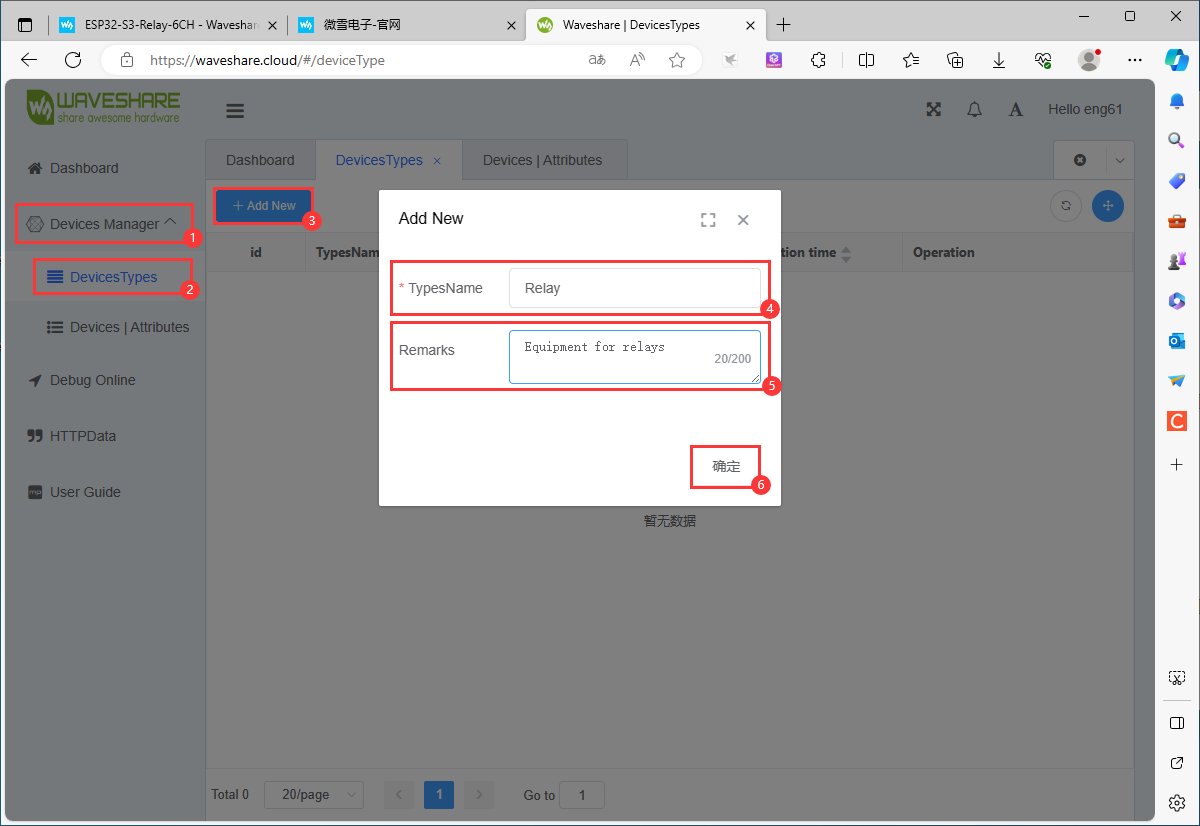
- After successful registration, go to the Devices Manager option to create a device class and fill in the name of the category
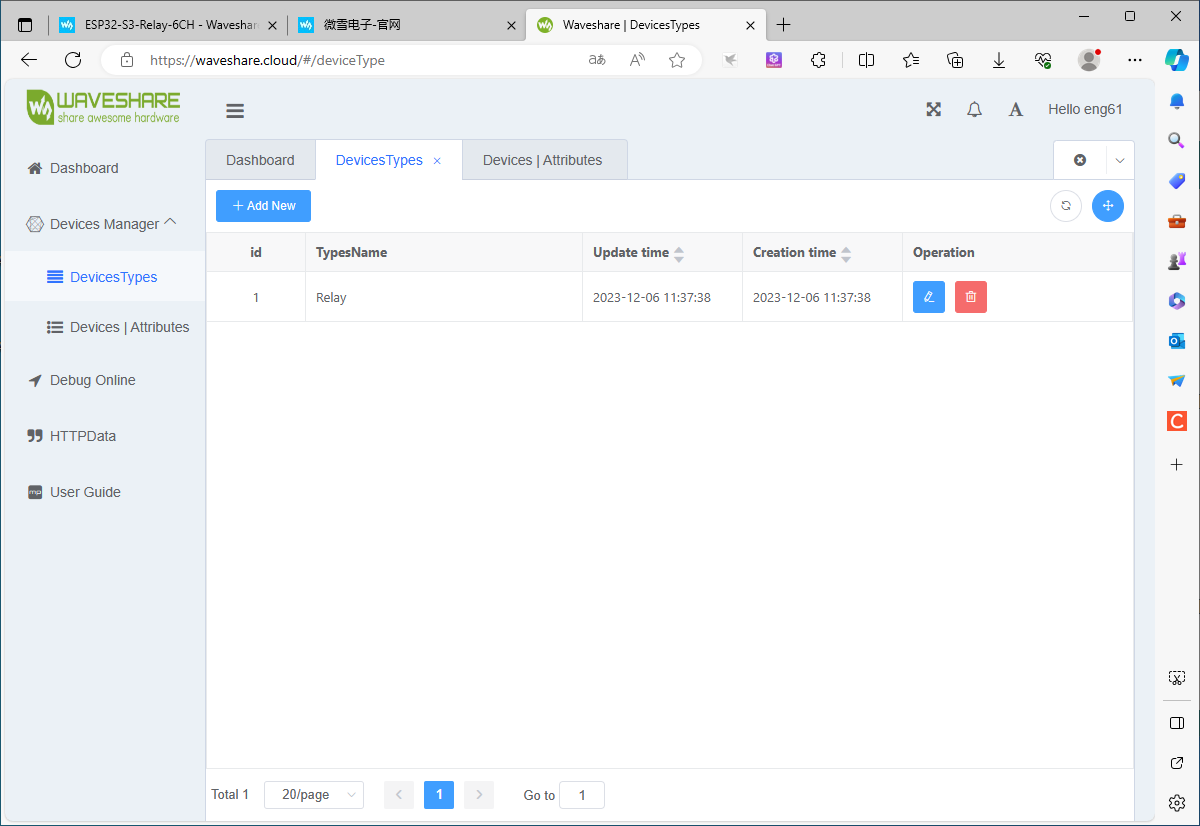
- Successfully created device class
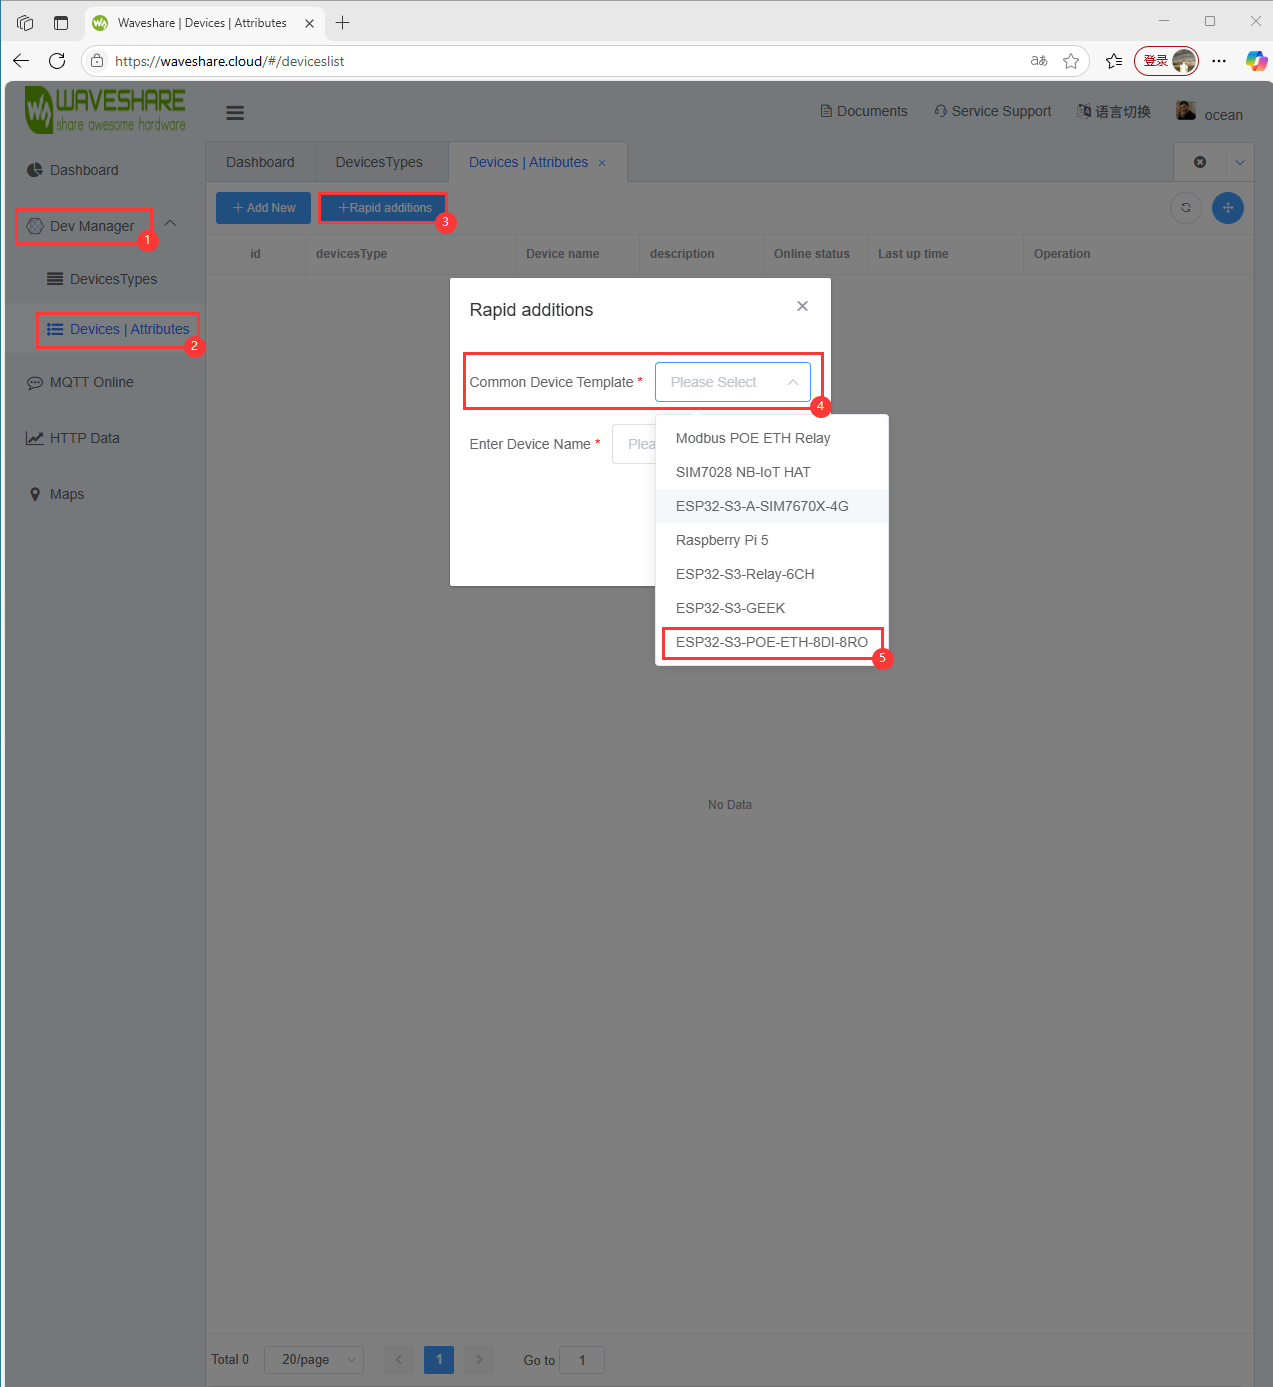
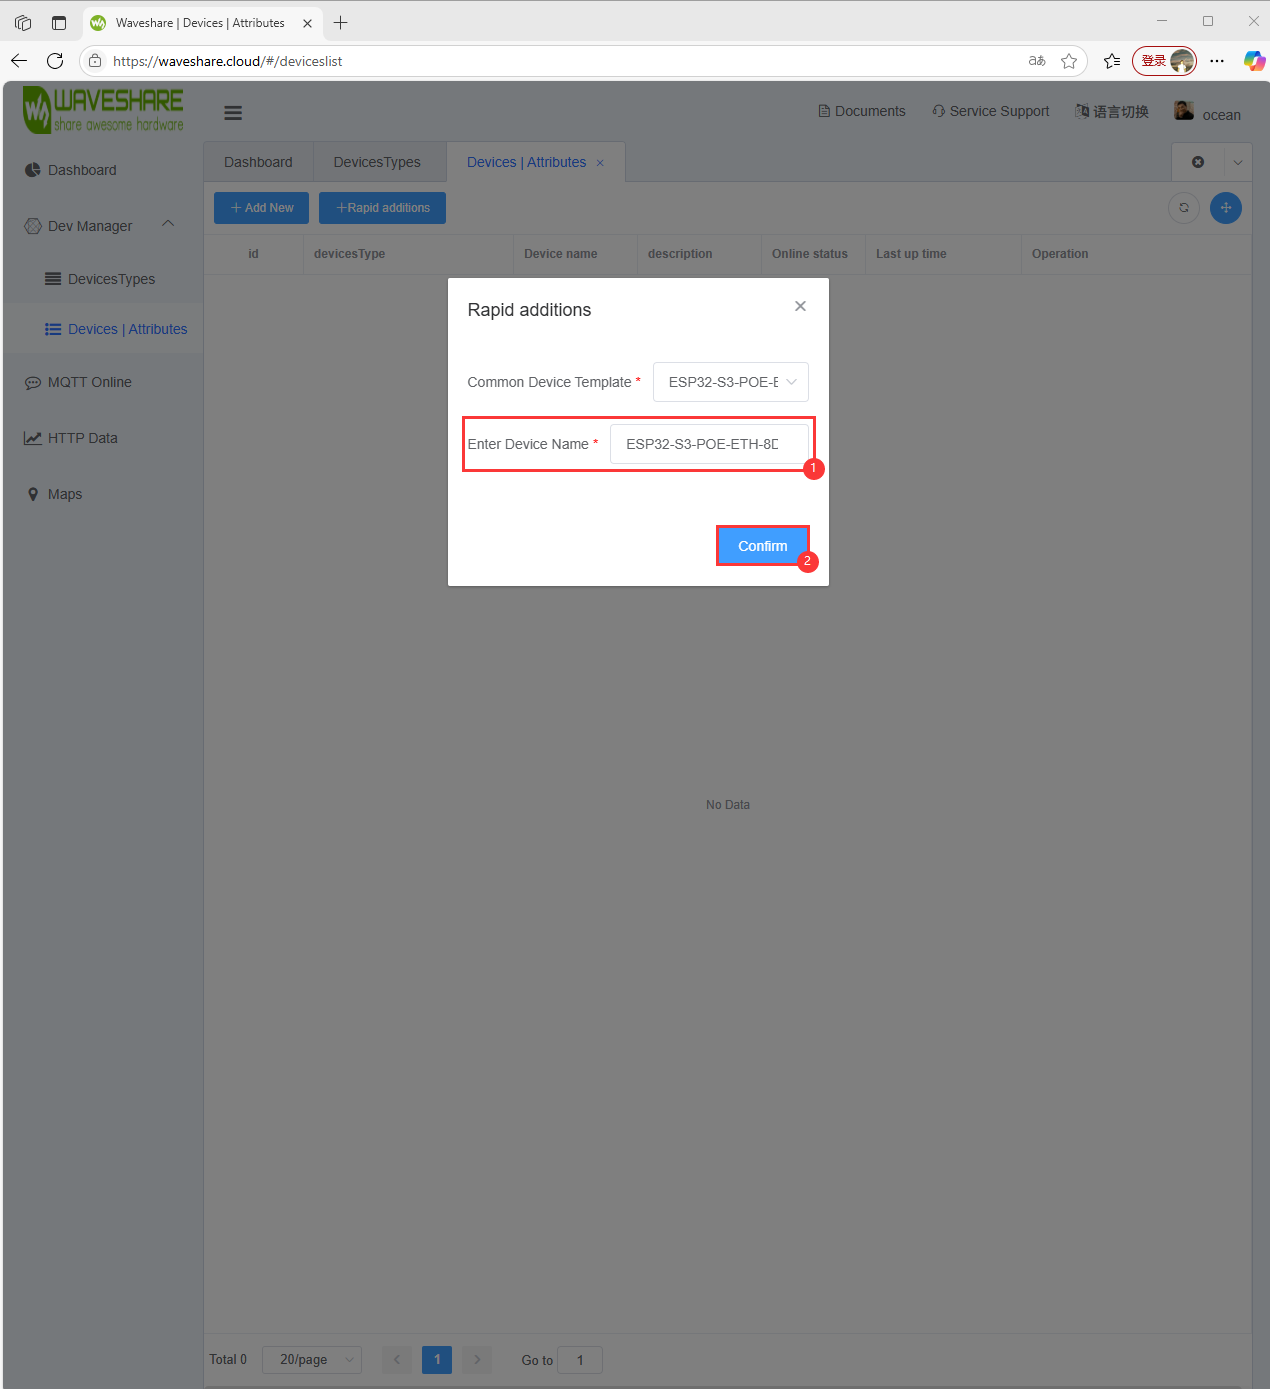
- Create a single device using a template
- Name the created device
- Associate devices to device categories
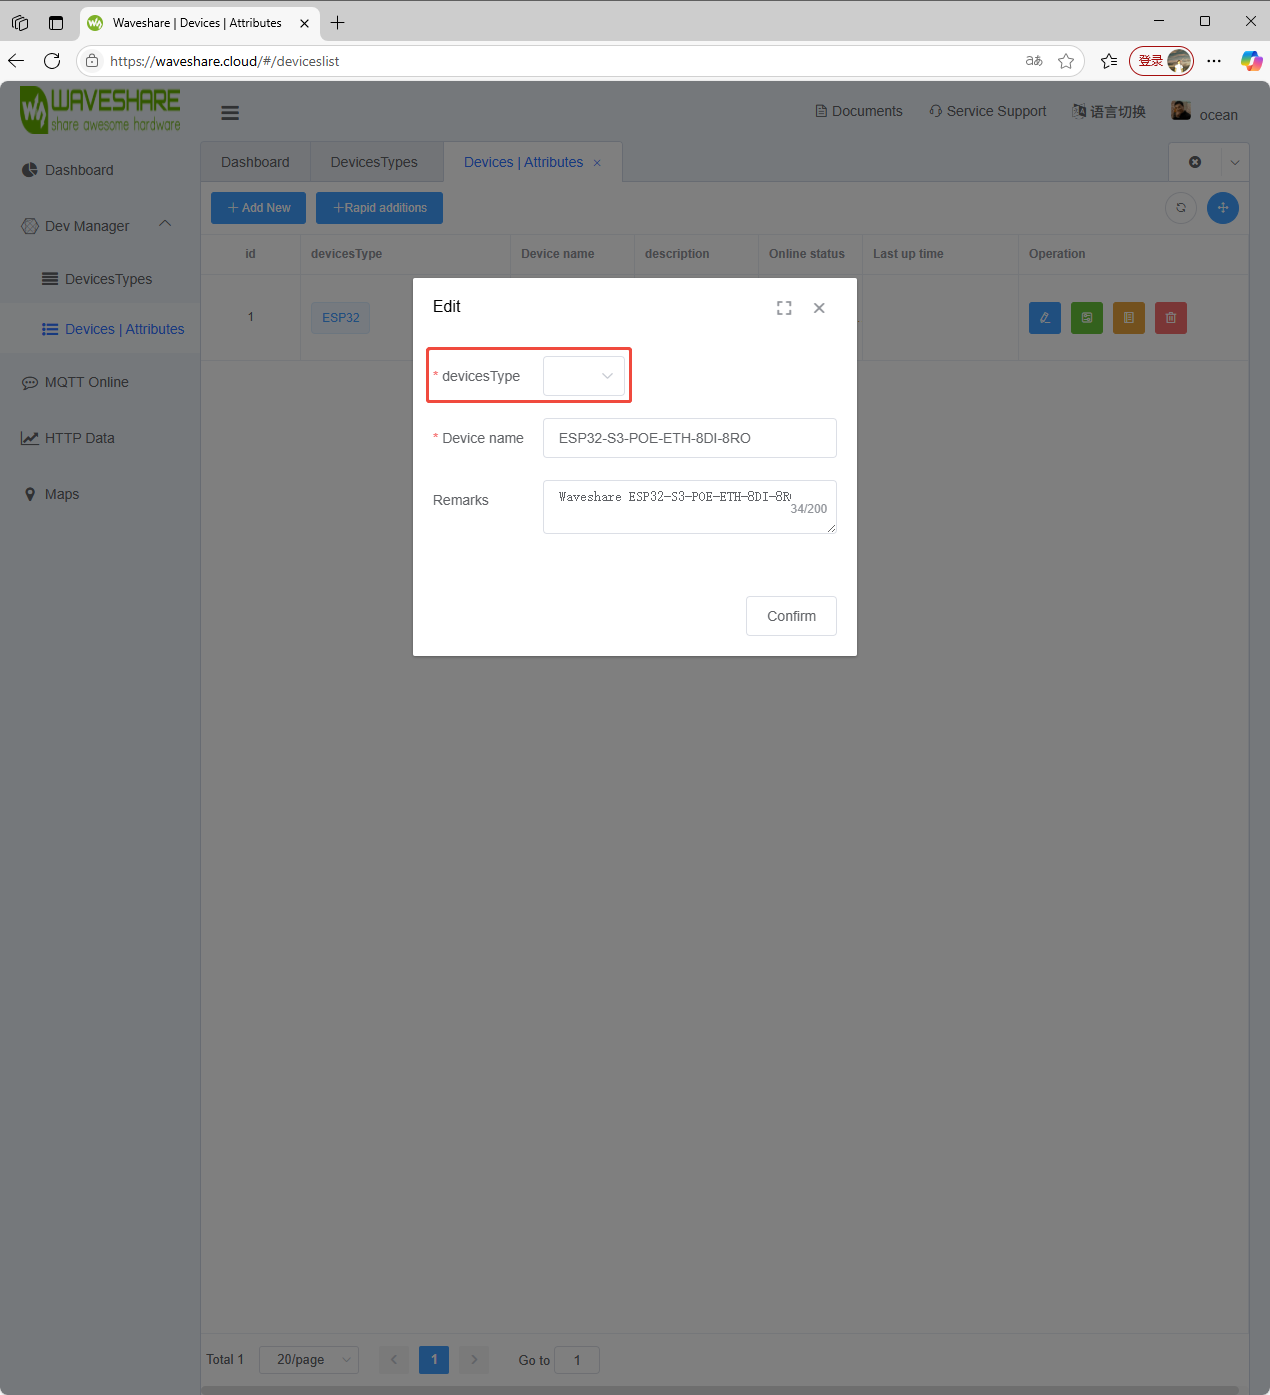
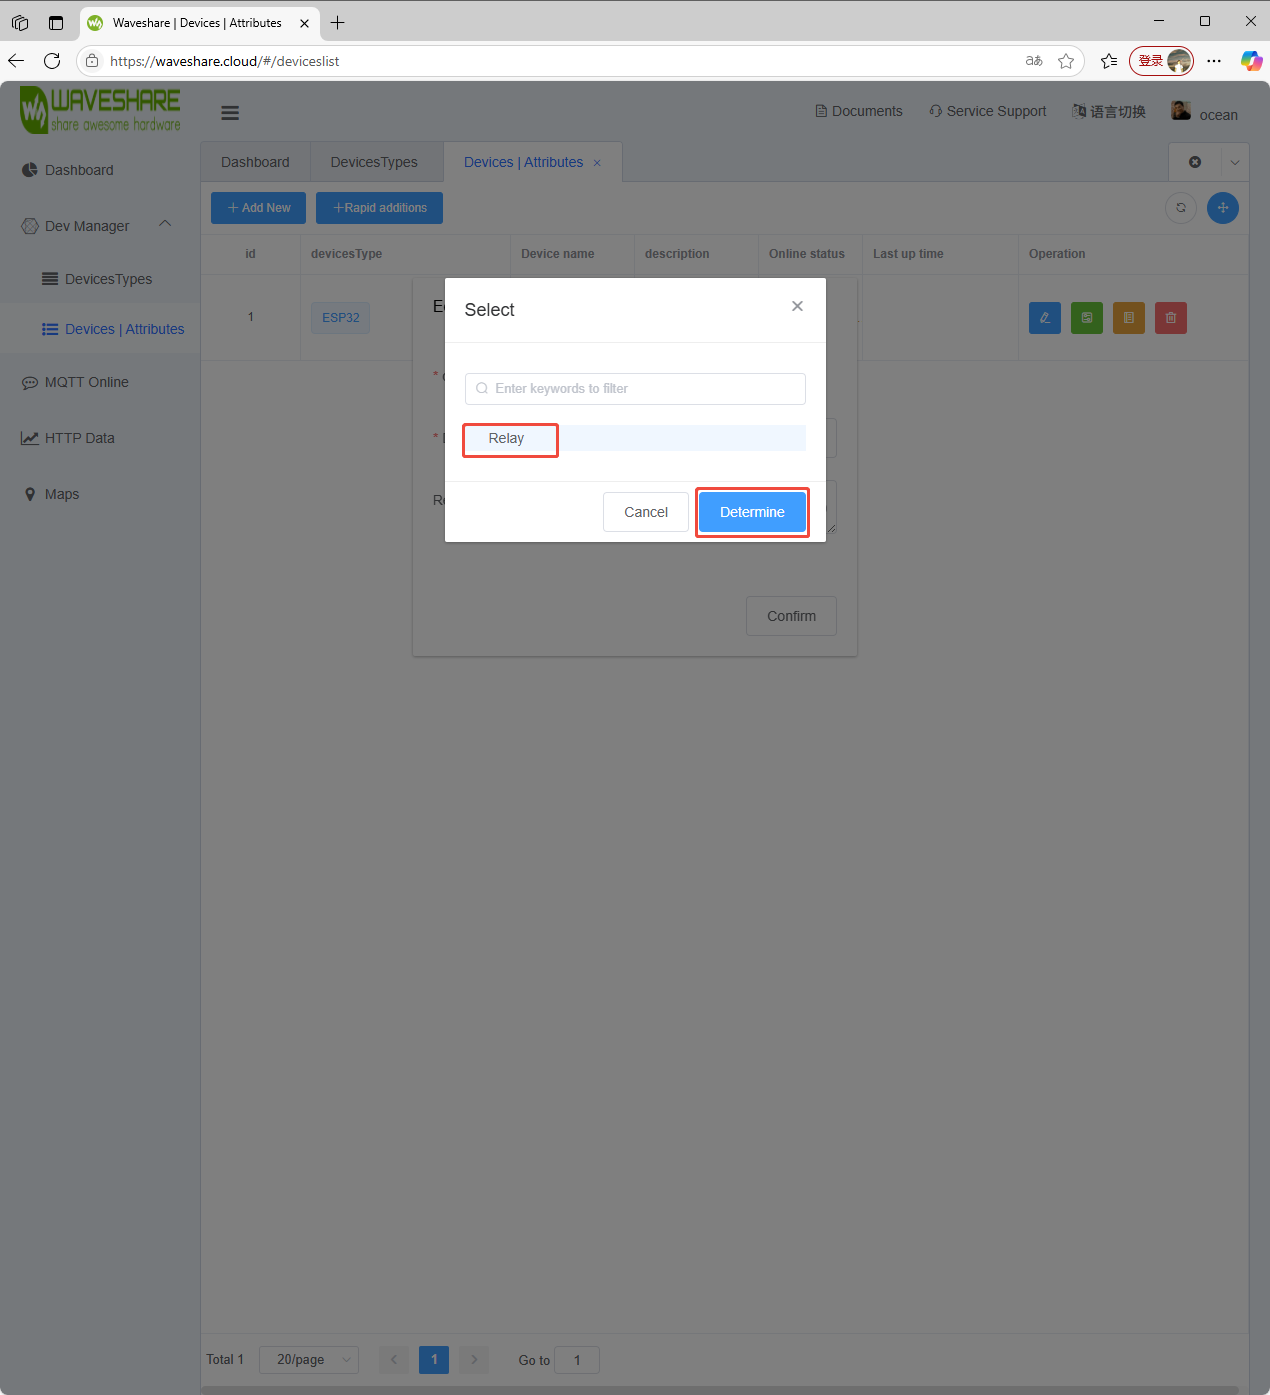
- Save operation
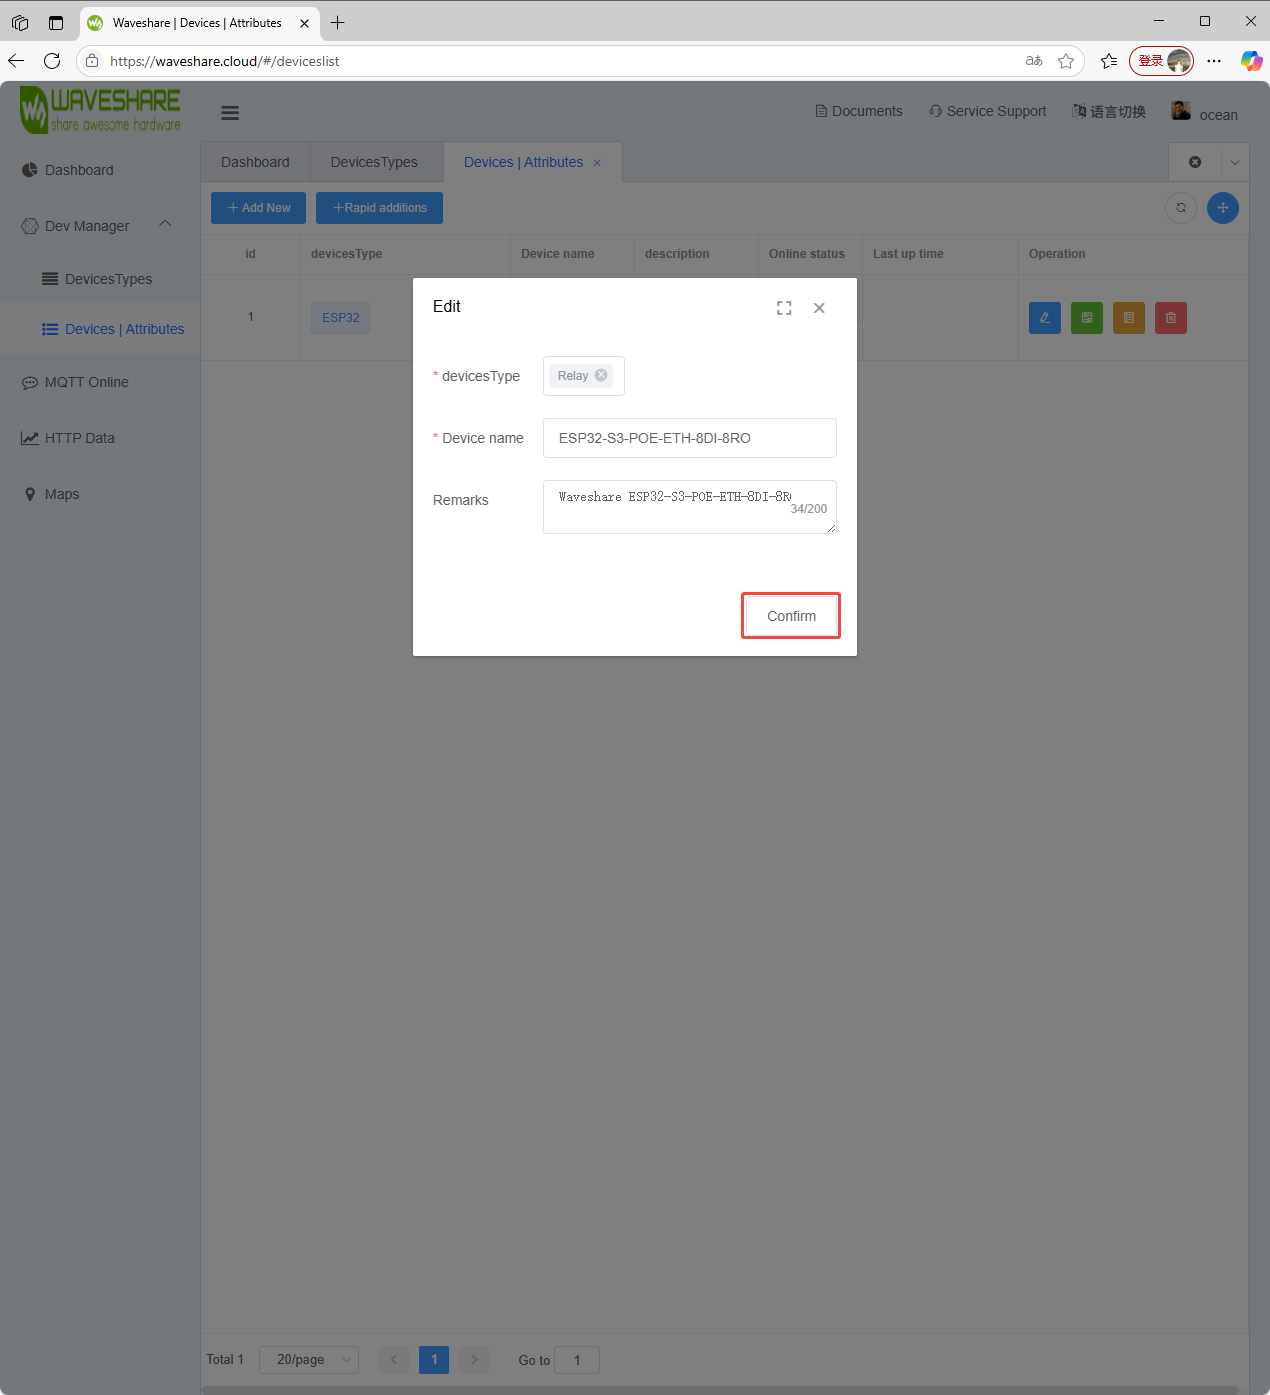
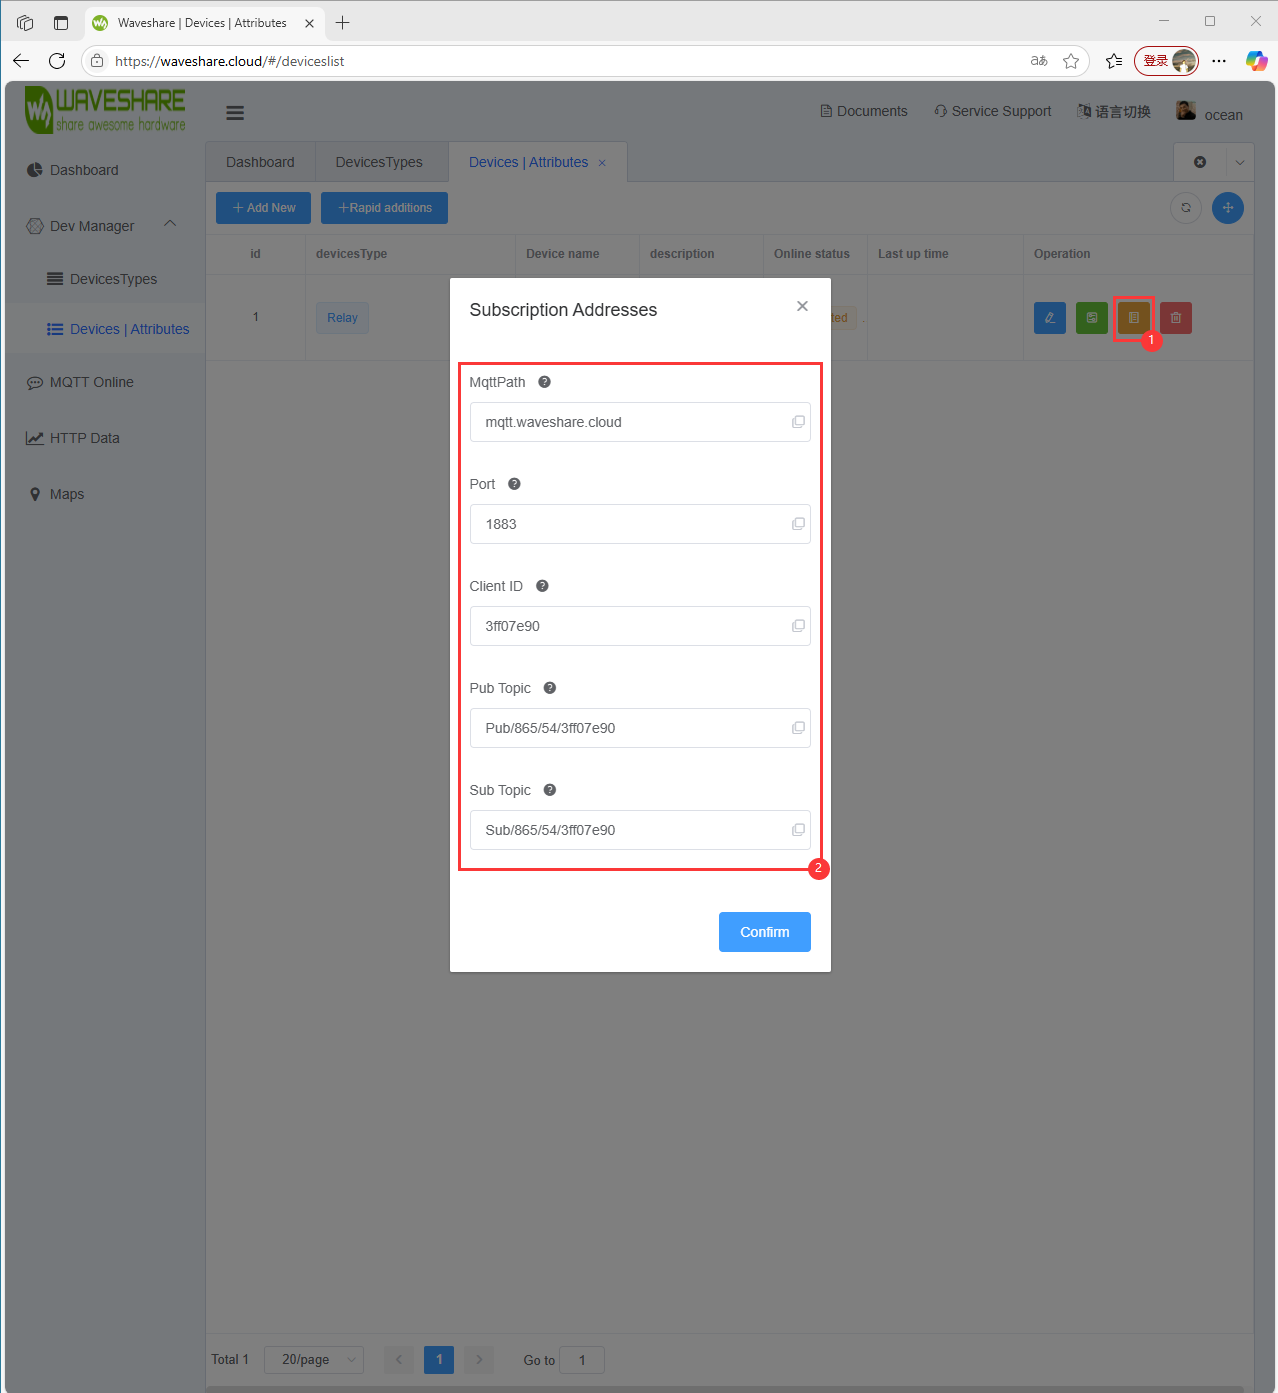
- Once created successfully, you can view the device details. Refer to this link to modify WS_Information.h file of the demo and then flash it to use the device
Software Operation
- Go to the official website of Waveshare and enter Waveshare Cloud
- Complete registration and Create Device
- Modify the MQTT and WIFI information corresponding to the demo
- Flash demo
- Enter the Dashboard in the Waveshare Cloud
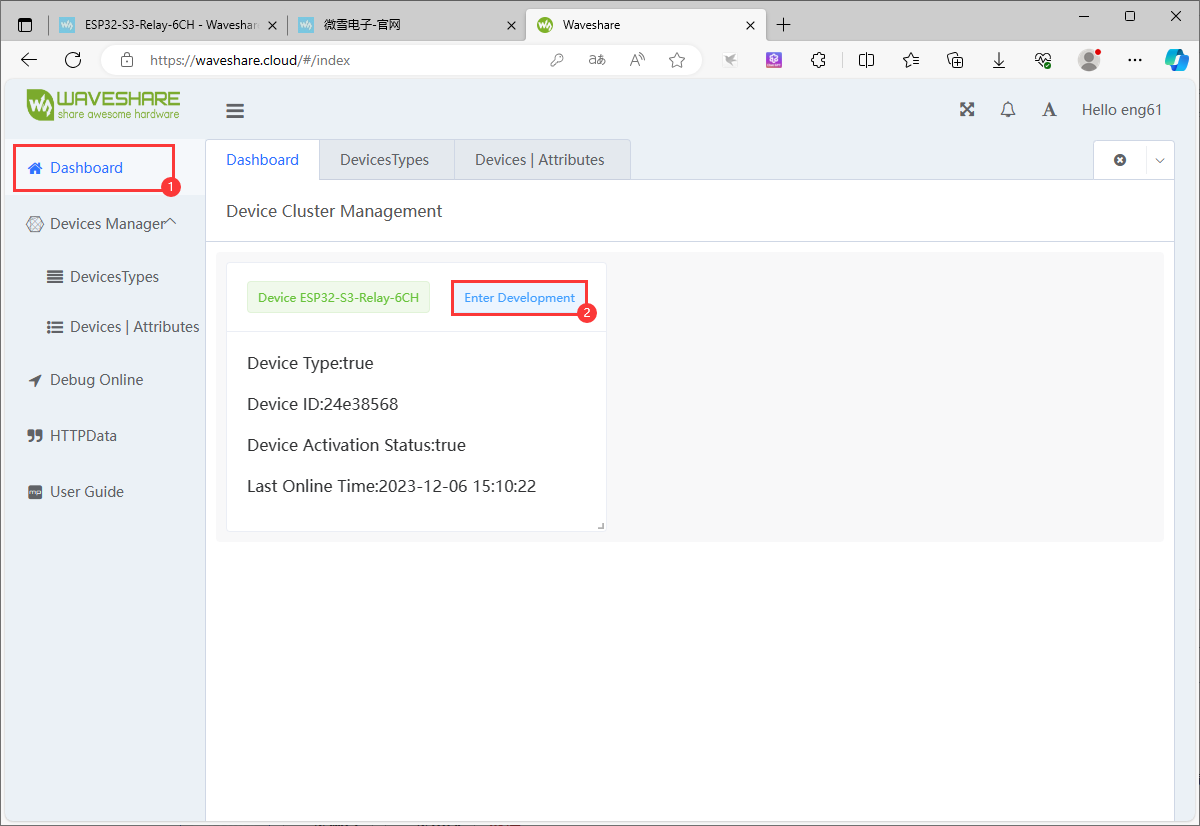
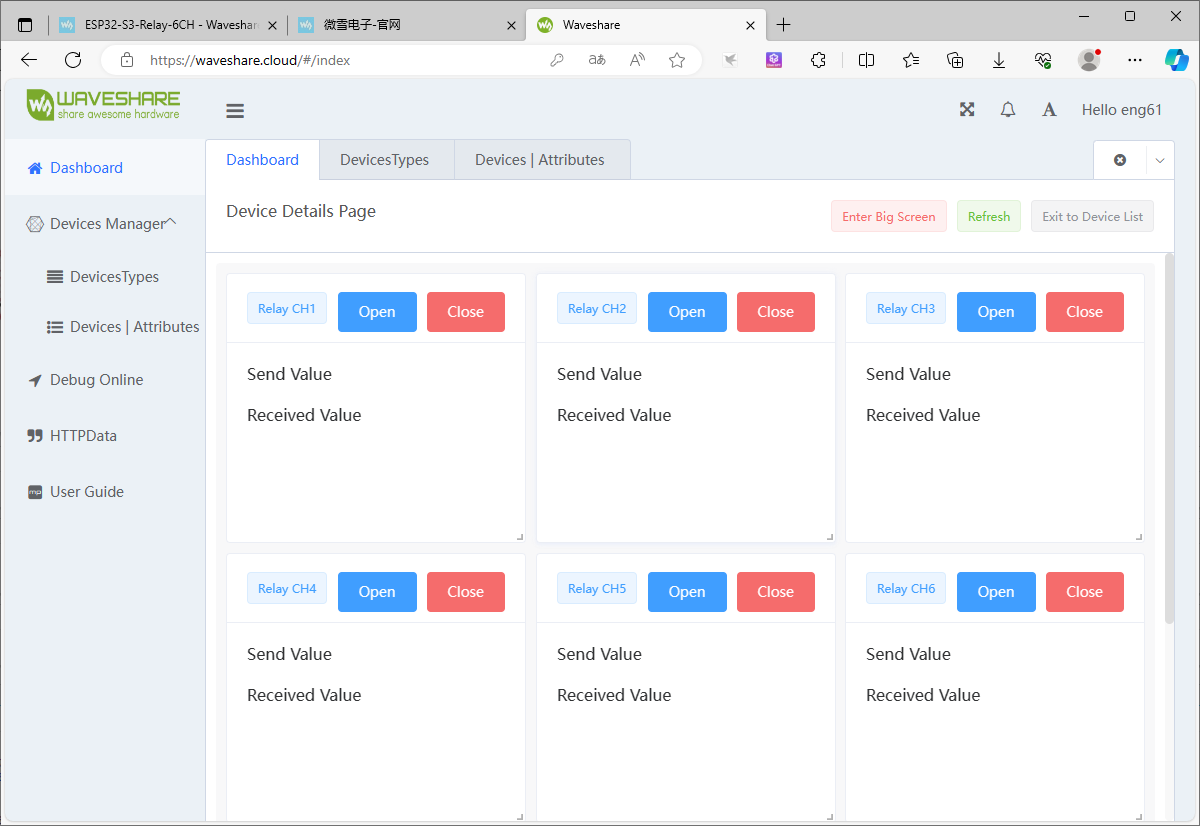
- Select the device option corresponding to this device and enter development
TAG:
Arduino Thermal imaging camera
Raspberry Pi Secondary Screen
SpotPear
Solar Charge Module
CV1800B
ESP32-S3 Industrial 8-CH Relay IOT LAN WiFi /Bluetooth /CAN /RJ45 Ethernet /POE
USB-CAN-B
ESP32-S3 3.49-inch Development Board DeepSeek AI Chat Box 3.49inch LCD Capacitive TouchScreen Display 172×640 N16R8
SpotPear
RV1106 SC3336
Allwinner H618
Raspberry Pi USB Camera 5MP OS05A10 Distortion-Free USB 2.0 For Jeston RDK
WiFi Wireless ESP32 DDSM Motor Driver HAT For Direct Drive Servo Hub Motors For Raspberry Pi
ESP32 C6 Development Board 1.28 inch LCD Display Screen 240x240 GC9A01A SD card slot
Industrial USB TO RS485 2CH Converter FT2232HL Grade Isolated
Raspberry Pi 14 inch LCD 2K HDMI /Type C Display Capacitive TouchScreen 2160x1440 For Jetson Nano/mini Computer PC
Jetson Nano 5G module
Raspberry Pi 3 display HAT
Raspberry Pi 5 PCIe to M.2 NVMe SSD Adapter Board C HAT Pi5-PCIe-2280-2242-2230
Raspberry Pi Pico 2 RP2350 CAN Onboard XL2515 CAN Controller RP2350A
TAG:
ESP32-S3 Relay 6-Channel IOT WiFi Bluetooth RS485 Pico Protection Circuits
ESP32-S3 Industrial 8-Channel Controller with WiFi Bluetooth CAN IoT RS485 and RJ45 ETH POE
SpotPear
CM5 Cooling Fan 5V 3007 Raspberry Pi Compute Module 5
Raspberry Pi 1.5inch LCD
Industrial Modbus RS485 RTU 8-ch Magnetic Latching Relay Module (C) With Digital Input
Luckfox Lyra PLC RK3506B Programmable Logic Controller 1.9inch LCD Touchscreen Dual 100Mbps Ethernet Ports
Xbox/PS4/Switch
Microchip Official PICkit 5 Debugger Programmer Android MPLAB
Raspberry Pi 7inch HDMI LCD C Display 1024x600 Capacitive TouchScreen
Raspberry Pi 5 Active Cooler CN
MPS2280D Raspberry Pi 5 PCIe M.2 NVMe Dual SSD Pi5 Double 2280
Raspberry Pi 5
5V/3A Regulated Output
DAPLINK
Raspberry Pi USB Camera 4MP OV4689 Distortion-Free For Jeston RDK
ESP32-C6 LCD Development Board 1.3 inch Display 1.3inch Screen ST7789 240x240 Mini TV SD-Port QST LVGL For Arduino
SpotPear
Raspberry Pi 3.6 inch e-Paper HAT+ (E) E-Ink E6 Full color 600x400 Screen Display For Arduino /STM32 /ESP32
Raspberry Pi AF Camera