- sales/support
Google Chat:---
- sales
+86-0755-88291180
- sales01
sales@spotpear.com
- sales02
dragon_manager@163.com
- support
tech-support@spotpear.com
- CEO-Complaints
zhoujie@spotpear.com
- Only Tech-Support
WhatsApp:13246739196
- Purchase/Shipping/Refund
WhatsApp:13424403025
- HOME
- >
- ARTICLES
- >
- Seeed-Studio
- >
- XIAO
XIAO-RA4M1 User Guide
introduce
The XIAO RA4M1 integrates Renesas' RA4M1 chip (32-bit ARM® Cortex®-M4 MCU, up to 48 MHz) into the classic XIAO form factor. The board offers 256KB Flash, 32KB SRAM, 8KB EEPROM, USB 2.0 connector, reset and start buttons, 3 LEDs, 14-bit A/D converter, 12-bit D/A converter, and CAN BUS interface. With onboard charging circuitry and low-power modes (down to 45μA), it's ideal for battery-powered applications. It shares the same 32-bit R7FA4M1AB3CFM microcontroller as the Arduino Uno R4 and is natively compatible with the Arduino IDE and a wide range of XIAO accessories, making it the perfect starting point for electronics projects.
feature
- Popular on-board microcontroller: Features the Renesas RA4M1, a 32-bit ARM® Cortex®-M4 R7FA4M1AB3CFM MCU running at up to 48 MHz with 256 KB Flash and 32 KB SRAM。
- Outstanding onboard resources: Equipped with 14-bit ADC, 12-bit DAC, CAN BUS, USB 2.0 and onboard RGB LED.
- Expanded 8 New IOs: Compared with the previous XIAO board (19 GPIOs in total), 8 new IO pins are added on the back to enable more complex applications.
- Powerful security features: Built-in hardware encryption, secure boot, key storage and other features ensure the security of applications.
- Software Compatibility: Fully compatible with Arduino IDE for seamless project development and prototyping.
- High-efficiency power design: provides 4 working modes, power consumption is as low as 45μA in deep sleep, and supports lithium battery charging management.
- Compact Thumb-Sized Design: Measuring 21 x 17.8 mm, it adopts Seeed Studio's classic XIAO form factor, making it perfect for space-conscious applications.
- Easy to manufacture: Surface mount device (SMD) design with all components on the front side and stamped holes on both sides facilitates efficient mass production.
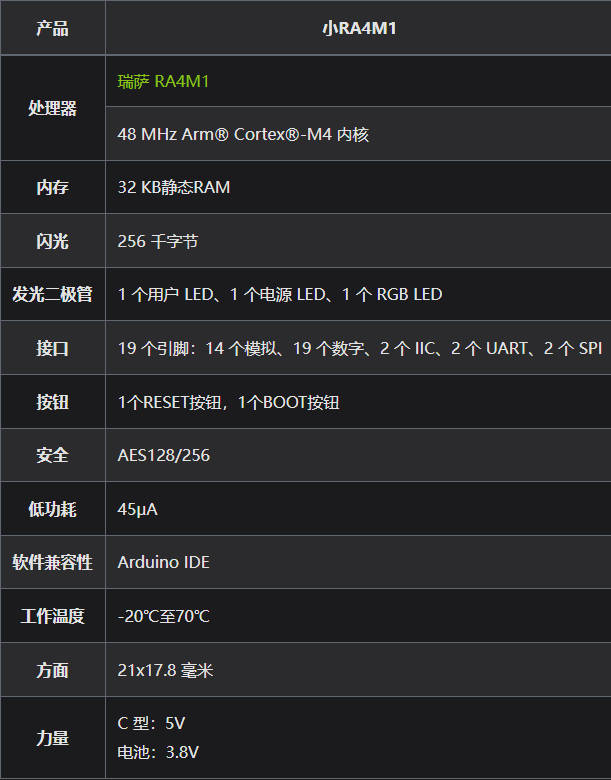
Specification
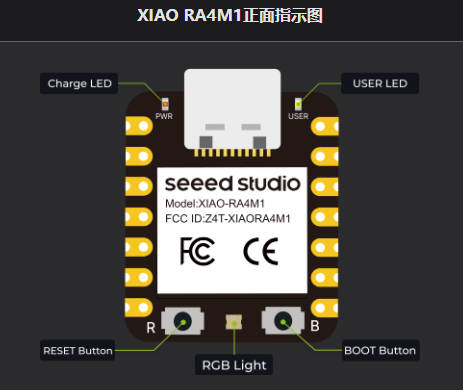
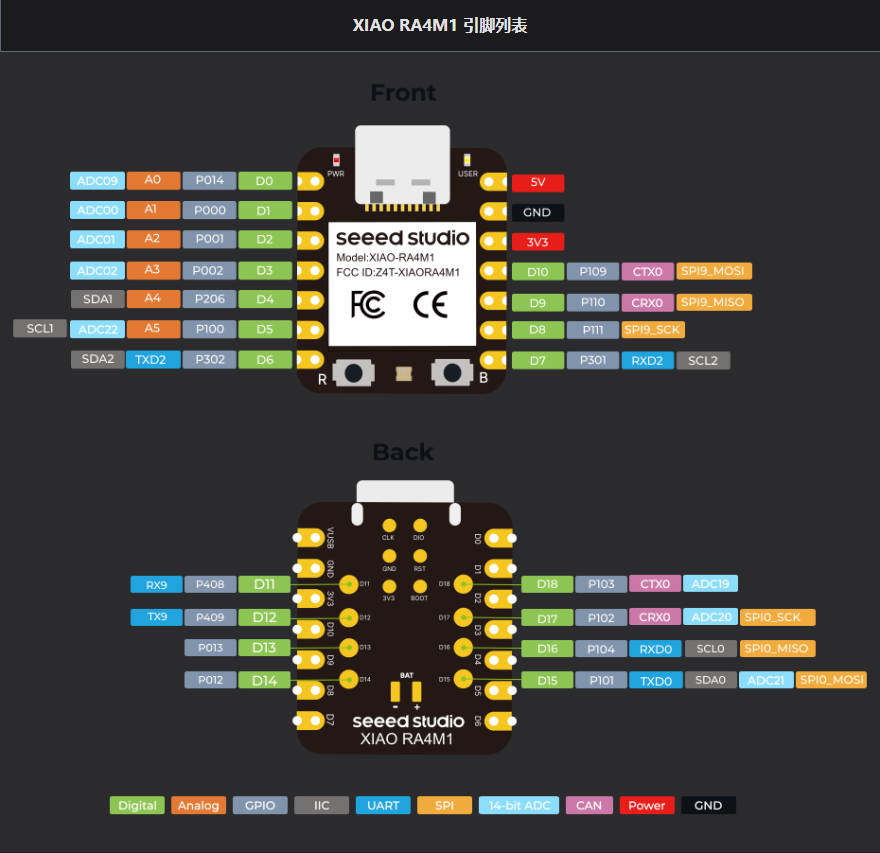
Pinout
getting Started
Hardware Preparation
You will need the following:
- 1 个Seeed-Studio-XIAO-RA4M1
- 1 computer
- 1 USB Type-C cable
Software Preparation
The recommended programming tool for XIAO RA4M1 is Arduino IDE, so as part of software preparation, you need to complete the installation of Arduino.
- Step 1. Download and install a stable version of Arduino IDE according to your operating system.
- Step 2. Launch the Arduino application.
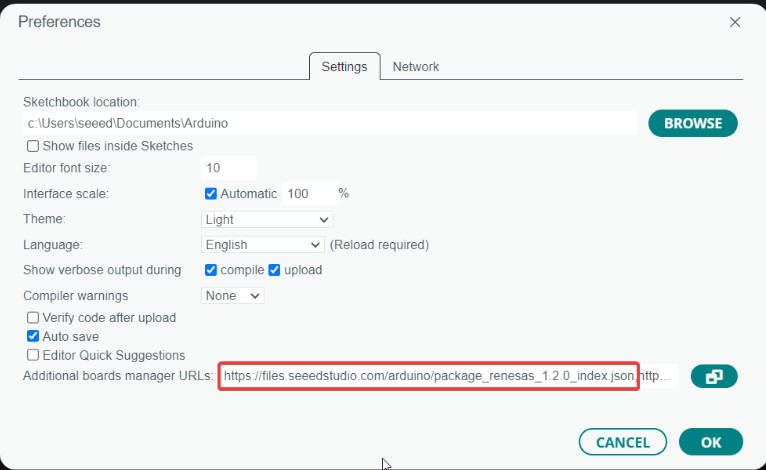
Navigate to File > Preferences and fill in the following in Additional Boards Manager URLs URL:https://files.seeedstudio.com/arduino/package_renesas_1.2.0_index.json
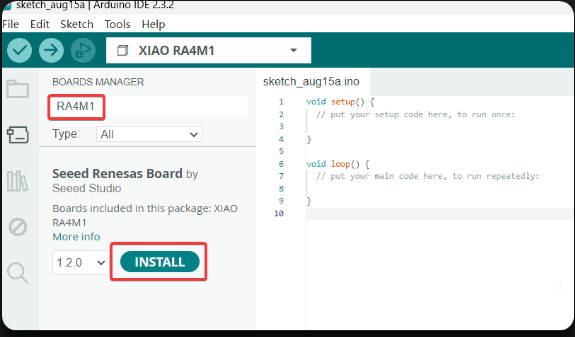
- Step 3. Add the RA4M1 board package to your Arduino IDE.
Navigate to Tools > Board > Board Manager... , enter the keyword RA4M1 in the search box, select the latest version of Seeed Renesas Board, and install it.
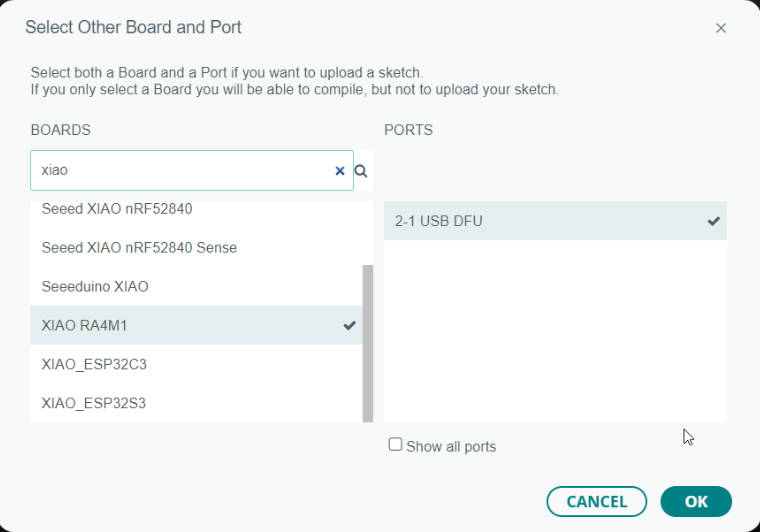
- Step 4. Select your motherboard and port.
On the Arduino IDE, search for xiao in the development board on the left, select XIAO_RA4M1, and then select the port directly.
Bootloader
Sometimes, using the wrong program can cause XIAO to lose ports or not function properly. Common problems include:
- XIAO connected to the computer but the port number was not found.
- XIAO connected and the port number appeared, but the program upload failed.
When encountering the above two situations, you can try to put XIAO into BootLoader mode, which can solve most of the problems of device recognition failure and upload failure. The specific method is:
- Method 1. Press and hold the button on BOOTXIAO RA4M1 without releasing it.
- Method 2: Press and hold the BOOTBOOT button, then connect the computer via a data cable, and release the BOOT button after connecting to the computer.
Reset
When the program runs abnormally, you can press the Reset key once when powering on to let XIAO re-execute the uploaded program; you can also enter the BootLoader mode by holding down the BOOT key when powering on and pressing the Reset key again.
Running your first Blink
By now, I believe you have a good understanding of the functions and hardware of XIAO RA4M1. Next, let's take the simplest Blink program as an example to perform the first flashing for your XIAO RA4M1!
- Step 1: Launch the Arduino Application.
- Step 2: Navigate to File > Examples > 01.Basics > Blink to open the program.
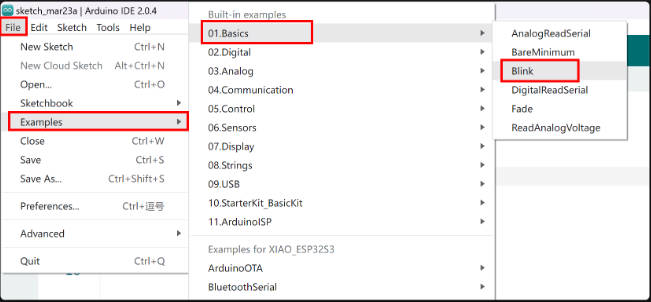
- Step 3: Select the board model as XIAO RA4M1 and select the correct port number to upload the program.
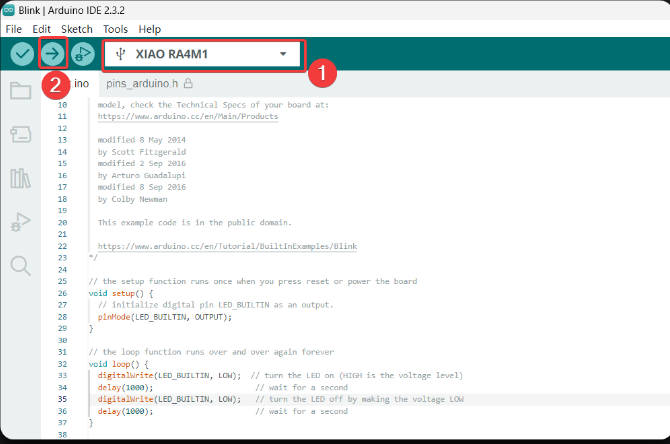
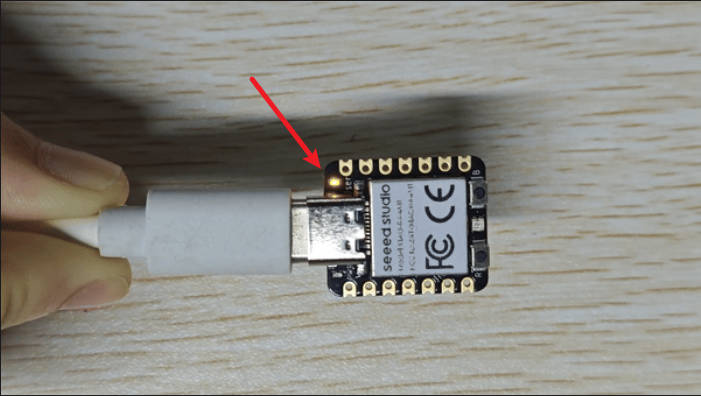
Once the program is uploaded successfully, you will see the following output message and you can observe that the orange LED on the right side of XIAO RA4M1 is blinking.
Congratulations, you have learned how to write and upload programs for XIAO RA4M1!
Note that the LED will only turn off if the user LED pin on the XIAO RA4M1 is set high, and the LED will only turn on if the pin is set low.
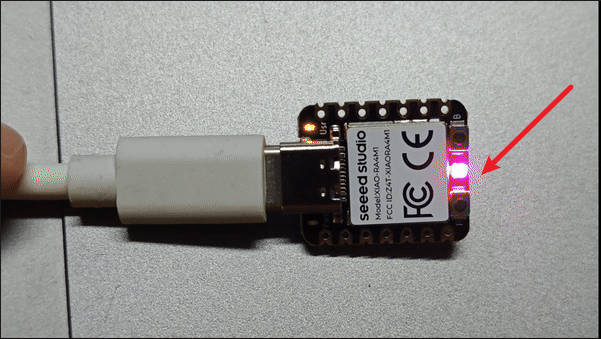
Play with RGB
The XIAO RA4M1 comes with a built-in RGB LED that you can control, below is an example of how to smoothly change the LED color between red, green and blue.
- Step 1. Download the Adafruit_NeoPixel library
Navigate to Sketch > Include Libraries > Manage Libraries... and search for Adafruit_NeoPixel to install the latest version.
- Step 2. Copy the following code to a new sketch:
#include <Adafruit_NeoPixel.h>

#define LED_PIN RGB_BUILTIN  // Define the pin for the built-in RGB LED
#define NUM_PIXELS 1         // Number of WS2812 LEDs

Adafruit_NeoPixel pixels(NUM_PIXELS, LED_PIN, NEO_GRB + NEO_KHZ800);

void setup() {
  pinMode(PIN_RGB_EN, OUTPUT); // Set up the power pin
  digitalWrite(PIN_RGB_EN, HIGH); //Turn on power to the LED
  pixels.begin();  // Initialize the NeoPixel library
}

void loop() {
    // Transition from Red to Green
  for (int i = 0; i <= 255; i++) {
    pixels.setPixelColor(0, pixels.Color(255 - i, i, 0));  // Red decreases, Green increases
    pixels.show();
    delay(10);  // Adjust delay for smoothness
  }

  // Transition from Green to Blue
  for (int i = 0; i <= 255; i++) {
    pixels.setPixelColor(0, pixels.Color(0, 255 - i, i));  // Green decreases, Blue increases
    pixels.show();
    delay(10);  // Adjust delay for smoothness
  }

  // Transition from Blue to Red
  for (int i = 0; i <= 255; i++) {
    pixels.setPixelColor(0, pixels.Color(i, 0, 255 - i));  // Blue decreases, Red increases
    pixels.show();
    delay(10);  // Adjust delay for smoothness
  }
}- Step 3. Select the board model as XIAO RA4M1 and select the correct port number to upload the program.
resource
FAQ
Problem 1: Welding引脚
Due to the small size of XIAO RA4M1, please be careful when soldering the pin header. Do not stick different pins together, and do not stick the solder to the shielding cover or other components. Otherwise, it may cause XIAO to short-circuit or malfunction. The consequences caused by this shall be borne by the user.
Support
Monday-Friday (9:30-6:30) Saturday (9:30-5:30)
Email: services01@spotpear.com