- sales/support
Google Chat:---
- sales
+86-0755-88291180
- sales01
sales@spotpear.com
- sales02
dragon_manager@163.com
- support
tech-support@spotpear.com
- CEO-Complaints
zhoujie@spotpear.com
- sales/support
WhatsApp:13246739196
PoE-M.2-HAT+ User Guide
Overview
Introduction
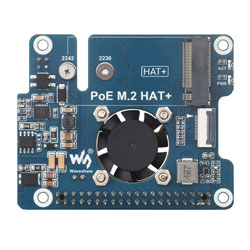
POE M.2 HAT+ is an expansion board that combines Power over Ethernet (PoE) and PCIe to M.2 functions for Raspberry Pi 5, supporting the IEEE 802.3af/at network standard. It also supports M.2 NVME hard drives of 2230 and 2242 sizes, and SSD booting of Raspberry Pi.
Feature
- Based on Raspberry Pi 40pin GPIO interface, suitable for Raspberry Pi 5 (not suitable for PI4B and PI3B)
- Support PoE power over Ethernet and IEEE 802.3af/at PoE network standard
- Adopt fully isolated switch mode power supply (SMPS)
- Onboard high-speed active cooling fan, equipped with metal fins, jointly accelerates heat dissipation
- Support NVMe protocol M.2 interface hard disk protocol, high-speed read and write, high work efficiency
- PCI-E×1 Gen2 or Gen3 modes
- Only support PI5B
- Compatible with M.2 hard drives of 2230/2242/2260/2280 sizes
- Onboard work indicator light, the PWR stays on when powered on, the read/write ACT flashes, and the working status is clear at a glance
POE parameters
- POE input voltage: 37V~57V DC input
- POE GPIO Pin: 5V 4.5A (MAX)
- POE - 2P Pin: 12V 2A (MAX)
- Network standard: Supports IEEE 802.3af/at PoE
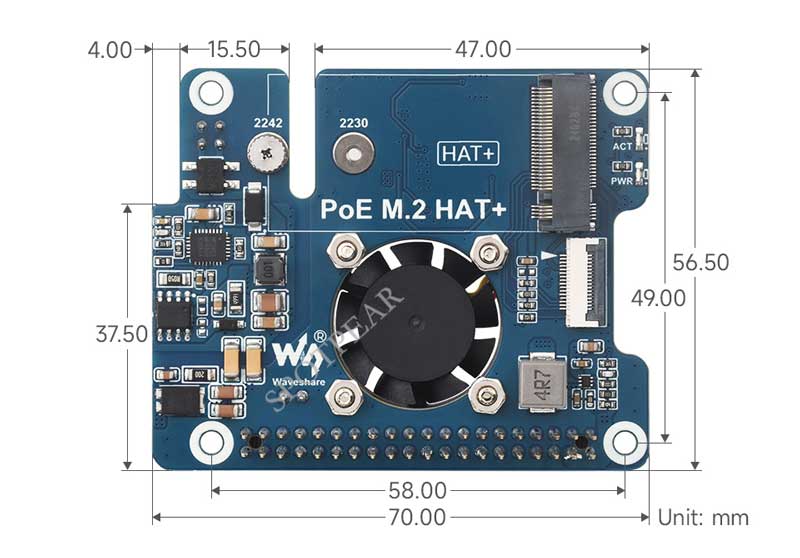
- Product size: 56.5mm × 70.0mm
Raspberry Pi usage
Insert POE M.2 HAT+ into Raspberry Pi 5 as shown in the following.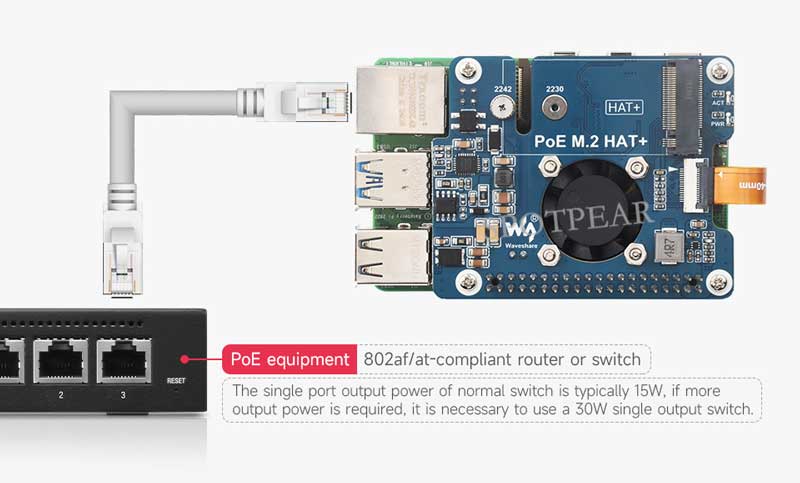
Tip
If a power supply limitation message appears

Add usb_max_current_enable=1 in /boot/firmware/config.txt
Installation
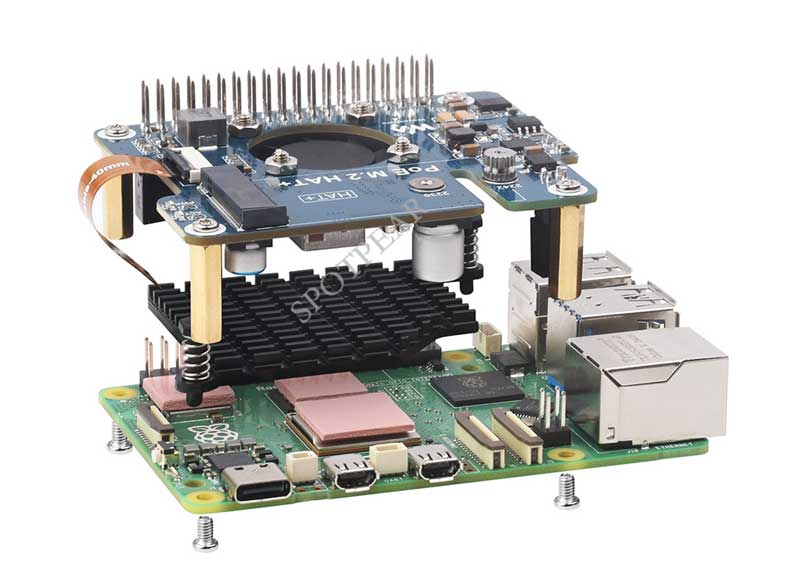
Install the heat sink as shown in the following figure.
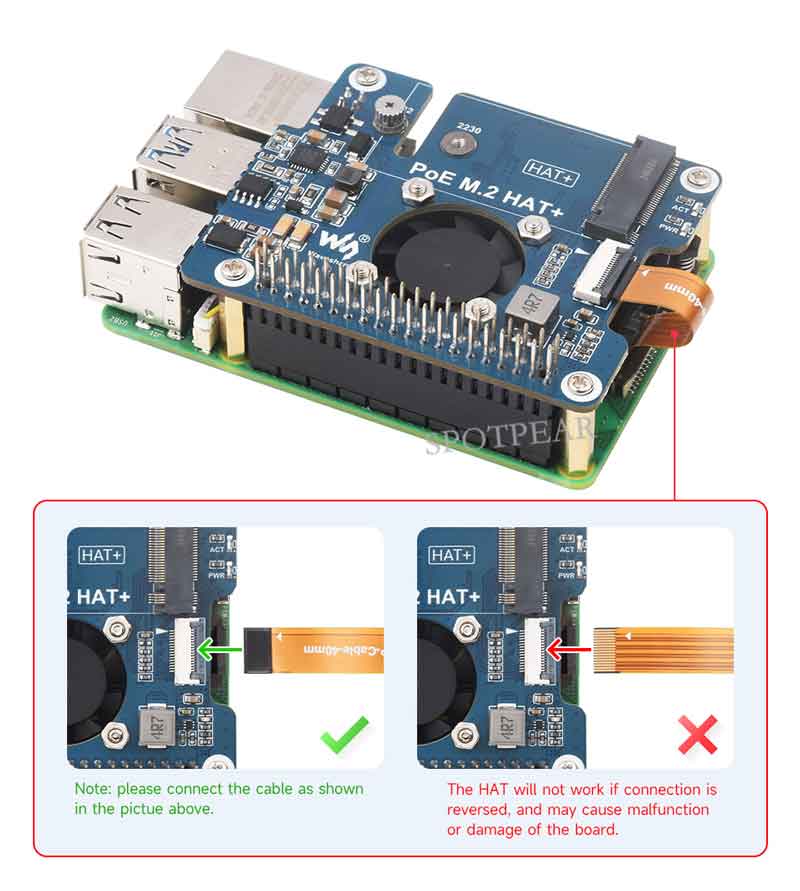
Hard disk mounting
1. Enable PCIE interface
PI5B does not have PCIE interface enabled by default. Add the following in /boot/firmware/config.txt:
dtparam=pciex1
2. PCIE defaults to gen2. If you need to enable PCIE gen3, add the following in/boot/firmware/config.txt:
dtparam=pciex1_gen=3
3. Restart PI5 to recognize the device after modification
As shown in the figure below, it is recognized that SM2263 is my SSD solid state disk, and the other PI5 is an RPI chip
4. Partition the area, if there is partitioning and formatting on other platforms, skip this step. (This action will delete all SSD data. Please handle with caution)
lsblk You can see the disk (if you want to see detailed information, execute sudo fdisk - l)Partition sudo fdisk /dev/nvme0n1 The device number is the total device number, do not add p1, because p1 is just a partition How to use the partition tool fdisk n New partition q Exit without saving p Print partition table m Print selection menu d Delete a partition w Save and exit t Modify ID number Click n to add partition, then click w to save and exit
5. Format
sudo mkfs.   Then by pressing Tab key, you can see many different types of suffixes, each of suffix represents a format that you want to format

If I want to format it as an ext4 file format, then I need to execute:
sudo mkfs.ext4 /dev/nvme0n1p1
Wait for a moment, when done appears, it means the formatting has been completed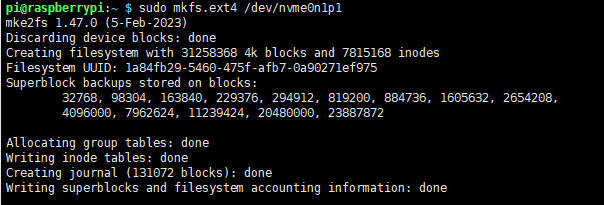
6. Mount
Create mounting directory
sudo mkdir toshiba
Mount device
sudo mount /dev/nvme0n1p1 ./toshiba
Check disk status
df -h
Write/Read Test
Enter the directory where the disk is mounted
cd toshiba
- Release memory
sudo sh -c "sync && echo 3 > /proc/sys/vm/drop_caches"
- Copy Raspberry Pi memory content to hard drive (write)
sudo dd if=/dev/zero of=./test_write count=2000 bs=1024k

- Copy the content of hard drive to Raspberry Pi memory (/etc/fstab read)
sudo dd if=./test_write of=/dev/null count=2000 bs=1024k

- Note: Different cards and environments have different testing effects, and Raspberry Pi is greatly affected. If you want to get accurate performance, use a PC computer for testing
Auto Mount
There is no problem with the test. If it is not needed as a system disk and only needs to be used as an extended disk, set automatic mounting
sudo nano /etc/fstab

#Add at the end
/dev/nvme0n1p1  /home/pi/toshiba  ext4  defaults  0  0
#/dev/nvme0n1p1 Device name, /home/pi/toshiba mounted to directory, ext4 is file system type, defaults uses default mounting options
#Make the changes take effect. (Restart if there are no issues after testing, otherwise it will result in inability to mount and boot)
sudo mount -a

#Restart
Check the device with lsblk
NVMe SSD Boot Start
First use SD card to start Raspberry Pi and mount it for testing to ensure that the hardware can work properly
Choose one of the following two methods
Method 1
1. Execution:
sudo raspi-config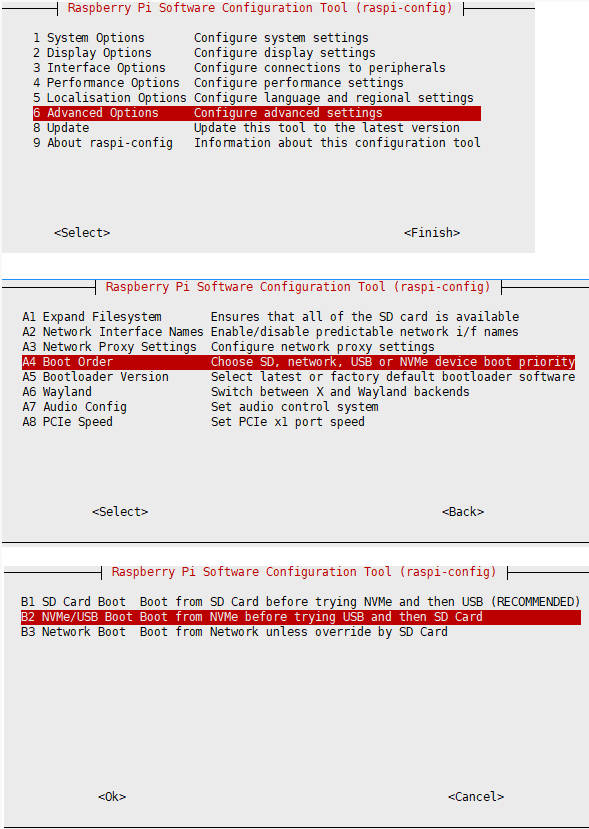
2. Restart Raspberry Pi
If the modifications are unsuccessful multiple times, please connect to the network before making the changes (wait for network self synchronization), or set the correct time before modifying the file
3. Burn the system into NVME, then connect NVME to the expansion board, remove SD card and power it on again
Method 2
1. Modify BOOT_ORDER in the boot loader configuration of Raspberry Pi:
sudo rpi-eeprom-config --edit BOOT_ORDER=0xf41 is changed into BOOT_ORDER=0xf416More information please refer to BOOT_ORDER
2. Restart Raspberry Pi
If the modifications are unsuccessful multiple times, please connect to the network before making the changes (wait for network self synchronization), or set the correct time before modifying the file
3. Burn the system into NVME, then connect NVME to the expansion board, remove SD card and power it on again
Fan control
By default, the PI5 fan only starts running when the temperature control reaches 50 degrees. If you want the fan to starts running when it reachs other temperatures, you can add specific content in/boot/firmware/config.txt, for example:
dtparam=fan_temp0=36000,fan_temp0_hyst=2000,fan_temp0_speed=90
dtparam=fan_temp1=40000,fan_temp1_hyst=3000,fan_temp1_speed=150
dtparam=fan_temp2=52000,fan_temp2_hyst=4000,fan_temp2_speed=200
dtparam=fan_temp3=58000,fan_temp3_hyst=5000,fan_temp3_speed=255
Among them:
fan_temp0/1/2/3       Indicates temperature (360000 represents 36 ℃)

fan_temp0/1/2/3_speed Indicates the corresponding speed (maximum value of 255)

fan_temp0/1/2/3_hyst Indicates hysteresis temperature
More information please refer to here
Note: There are only 4 temperatures in total for 0123, and it is not possible to set other temperatures. The hysteresis temperature should not exceed the step range of two temperatures
Dimensions
FAQ
Support
Monday-Friday (9:30-6:30) Saturday (9:30-5:30)
Mobile: +86 13434470212
Email: services01@spotpear.com


