- sales/support
Google Chat:---
- sales
+86-0755-88291180
- sales01
sales@spotpear.com
- sales02
dragon_manager@163.com
- support
tech-support@spotpear.com
- CEO-Complaints
zhoujie@spotpear.com
- sales/support
WhatsApp:13246739196
Raspberry Pi RPi Zero Relay User Guide
Overview
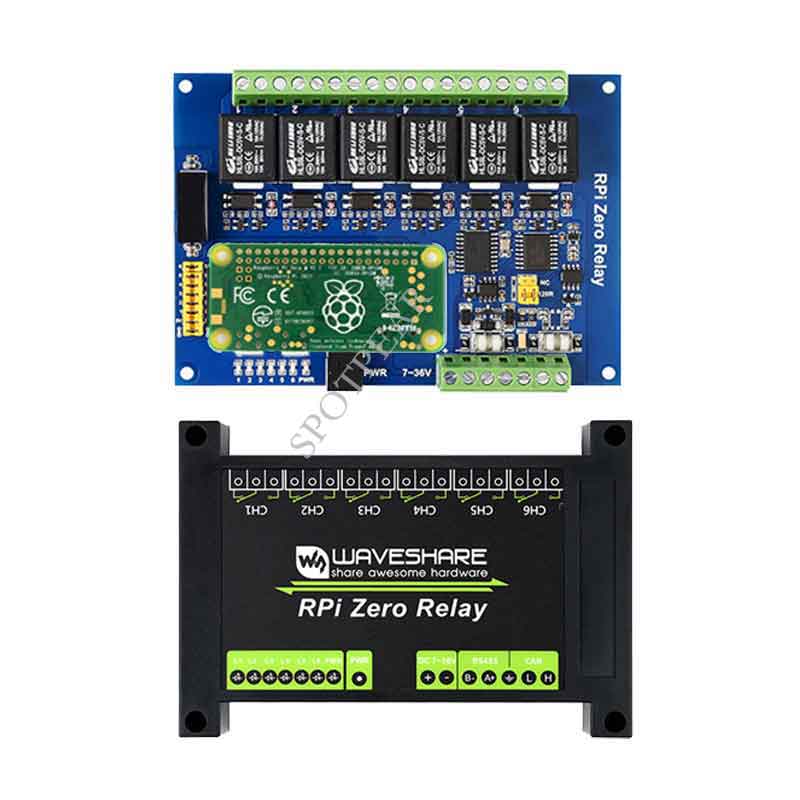
Industrial 6-Channel Relay Module For Raspberry Pi Zero, RS485/CAN Bus, Power Supply Isolation, Photocoupler Isolation
Features
- RS485 half-duplex communication: using SP3485, UART control, auto RX/TX switch
- CAN half-duplex communication: using MCP2515 + SN65HVD230 solution, SPI control
- Onboard unibody power supply isolation, provides stable isolated voltage, needs no extra power supply for the isolated terminal
- Onboard photocoupler isolation, prevent interference from external high-voltage circuit connected to the relay
- Onboard TVS (Transient Voltage Suppressor), effectively suppress surge voltage and transient spike voltage in the circuit, lightningproof & anti-electrostatic
- Onboard resettable fuses and protection diodes, ensuring current/voltage stable output, preventing over current/voltage, better shock-resistance performance
- High quality relay, contact rating: ≤10A 250V AC or ≤10A 30V DC
- ABS protection enclosure with rail-mount support, easy to install, safe to use
Specifications
- Operating voltage: 7V~36V (industrial input voltage compatible)
- Relay channel: 6ch
- Communication Protocol: RS485,CAN
- Contact form: 1NO 1NC
Pinouts
- CAN bus
| PIN | Raspberry Pi (BCM) | Description |
|---|---|---|
| GND | GND | Ground |
| SCK | SCK | SPI clock input |
| MOSI | MOSI | SPI data input |
| MISO | MISP | SPI Data output |
| CS | CE0 | Data/Command Selection |
| INT | 25 | Interrupt output |
- RS485 bus
| PIN | Raspberry Pi (BCM) | Description |
|---|---|---|
| GND | GND | Ground |
| RXD | RXD | UART receive |
| TXD | TXD | UART transimit |
- Relay interfaces
| PIN | Raspberry Pi (BCM) | Description | GND! | GND | Ground |
|---|---|---|---|---|---|
| IN_CH1 | GPIO5 | Relay Channel 1 | |||
| IN_CH2 | GPIO6 | Relay Channel 2 | |||
| IN_CH3 | GPIO13 | Relay Channel 3 | |||
| IN_CH4 | GPIO16 | Relay Channel 4 | |||
| IN_CH5 | GPIO19 | Relay Channel 5 | |||
| IN_CH6 | GPIO20 | Relay Channel 6 |
Install libraries
- BCM2835 libraries
wget http://www.airspayce.com/mikem/bcm2835/bcm2835-1.68.tar.gz
tar zxvf bcm2835-1.68.tar.gz
cd bcm2835-1.68/
sudo ./configure && sudo make && sudo make check && sudo make install
- Install wringPi
sudo apt-get install wiringpi
wget https://project-downloads.drogon.net/wiringpi-latest.deb
sudo dpkg -i wiringpi-latest.deb
gpio -v
- Python
sudo apt-get update
sudo apt-get install python-serial
sudo pip install python-can
Download Examples
Open a terminal and run the following commands to download the demo codes
sudo apt-get install p7zip-full
wget https://www.waveshare.com/w/upload/2/2f/RPi_Zero_Relay_Code.7z
7z x RPi_Zero_Relay_Code.7z  -r -o./RPi_Zero_Relay_Code
sudo chmod 777 -R RPi_Zero_Relay_Code/
CAN Bus
Configuration
- Modify the config.txt file
sudo nano /boot/config.txt
- Add the fololwing lines to the config.txt file and save
dtparam=spi=on
dtoverlay=mcp2515-can0,oscillator=16000000,interrupt=25,spimaxfrequency=3000000
- Reboot
sudo reboot
- Check if the driver is initalized normally
dmesg | grep -i '\(can\|spi\)'
- The result should like the picture:

- If the MCP2515 driver is not initalized normall you need to reboot and check if the devices are connected properly (H to H and L to L).

C examples
- Run the receive example
cd ~/RPi_Zero_Relay_Code/CAN/wiringPi/receive/
make clean
make
sudo ./can_receive
- After running the receive code, the terminal is waiting for data

- Run the Send examples:
cd RPi_Zero_Relay_Code/CAN/wiringPi/send/
make clean
make
sudo ./can_send

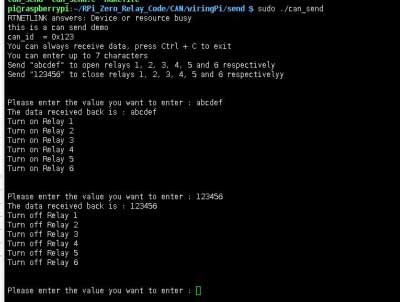
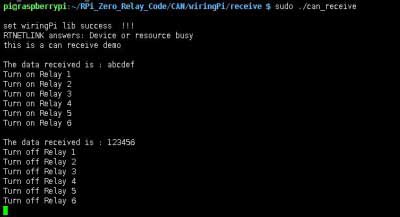
Python examples
- Open a terminal and run the commands
cd RPi_Zero_Relay_Code/CAN/python/
#For receiving:
sudo python can_reveive.py
#For sending:
sudo python can_send.py
Connect to other CAN device
If you need to connect the RPi Zero Relay to other CAN devices, please note that:
- Please check the connection, it should be H to H and L to L
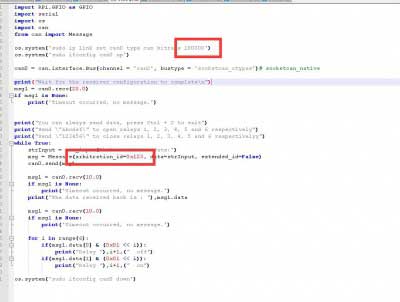
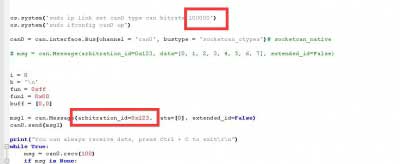
- Make sure that the baud rate of both sides are the same, the default baud rate of examples is 100K
- Check if the CAN ID of both sides are the same
- If data is always lost while transmitting, please decrease the baud rate and test it again.
RS485 Interface
Configuration
- Open a terminal and run the command
sudo raspi-config
- Choose Interfacing Options -> Serial -> No -> Yes
- Disable the login shell function and enable the hardware serial port.
- Reboot
sudo reboot
- Connect the device, A to A and B to B
C examples
- Run the receive example
cd RPi_Zero_Relay_Code/485/WiringPi/send
make clean
make
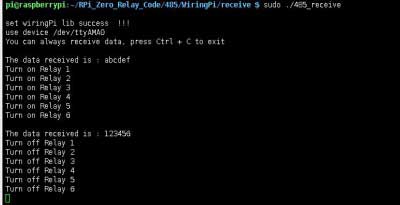
sudo ./485_receive
- After running the receive code, the terminal is waiting for data

- Run the Send example
cd RPi_Zero_Relay_Code/485/WiringPi/send
make clean
make
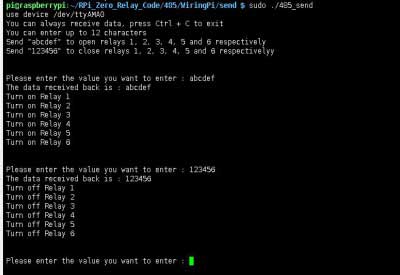
sudo ./485_send

- Input data and send:
- The receive terminal recieve and print:
Python examples
Open a terminal and run the commands:
cd RPi_Zero_Relay_Code/485/python/
#Receive example:
sudo python receive.py
#Send example:
sudo python send.py
Troubleshooting
If the RS485 cannot work normally, please check:
- Please check if you have disabled the login shell function
- Please check the connection, it should be A to A and B to B
- Please test with USB to RS485, make sure that all the settings are correct.
TAG:
Raspberry Pi Triple LCD HAT
JETSON NANO MINI
Industrial USB TO RS232/485 (C) UART FT232RNL 2m For 3.3V / 5V For Switchable RS232/RS485
PCIe M.2 NVMe Dual SSD
ESP32-S3 7inch LCD Display 7 inch TouchScreen 7B 1024×600 N16R8 CAN RS485 Sensor
ESP32 C6 Development board 1.9 inch LCD display 1.9inch Screen 172×320 With SD slot RGB LED QMI8658 6-Axis-Sensor ST7789 CST816
DDSM400 Direct Drive Servo Motor All-In-One Design Hub Serial -LIN Bus Motor
i7-1165G7
Pi5
Milk-V Duo Wiki
X1012 Raspberry Pi 5 POE And PCIe to M.2 NVMe SSD Board Pi5 2280 Power over Ethernet
STM32 0.96inch RGB OLED
ESP32-P4 PICO Development Board with MIPI DSI 10.1-inch Display
EoAT Setting
Black
Laser 450nm 5W high precision module Adjustable focal length For Laser Carving / Laser 3D Printing
Raspberry Pi
Raspberry Pi 3 display HAT
NVIDIA Jetson
Raspberry Pi Pico 2 RP2350 Core2350B Core Board PSRAM
TAG:
7.5 inch Passive NFC e-Paper BW Display E-ink Screen No Need Battery Wireless Powered
Serial UART USB Bus Servo ST SC series bus servos Two Power Supply Methods
voice module
VisionFive2 case
RM530N GL IoT EMBB 5G 4G 3G M.2 LTE-A/NSA SA GNSS DFOTA VoLTE Quectel
Raspberry Pi 5 Camera Cable
Core3566104000
10.1 inch LCD DSI MIPI TouchScreen Display 1280x800 ESP32 P4 Luckfox Titan RK3576 Lyra RK3506
Raspberry Pi Pico 2 RP2350 1.47 inch LCD B Display Development board RP2350A 1.47inch Screen RGB color
Raspberry Pi 5 Display Cable
DTM3202
ESP32 S3 1.46 inch Round LCD Display XiaoZhi DeepSeek AI Voice Chat
Pi5 Active Cooler CN
Raspberry Pi LCD 3D Display Transparent Screen Refractive Prism Game Mini TV For Raspberry Pi Zero
SpotPear
Flexible PVC Jacket
ESP32 P4 Development Board 7-inch LCD Display 1024×600 7inch Touchscreen ESP32-C6 WiFi6 AI Deepseek
Raspberry Pi CM5 Gigabit/2.5G Dual Ethernet Expansion Board with RJ45 GPIO IO Base
Raspberry Pi 4.3 inch DSI QLED Display MIPI 800x480Capacitive TouchScreen
Raspberry Pi 5 Rainbow Acrylic Case Colorful Translucent Acrylic Case Supports Installing Official Active Cooler


