


- sales/support
Google Chat:---
- sales
+86-0755-88291180
- sales01
sales@spotpear.com
- sales02
dragon_manager@163.com
- support
tech-support@spotpear.com
- CEO-Complaints
zhoujie@spotpear.com
- Only Tech-Support
WhatsApp:13246739196
- Purchase/Shipping/Refund
WhatsApp:13424403025
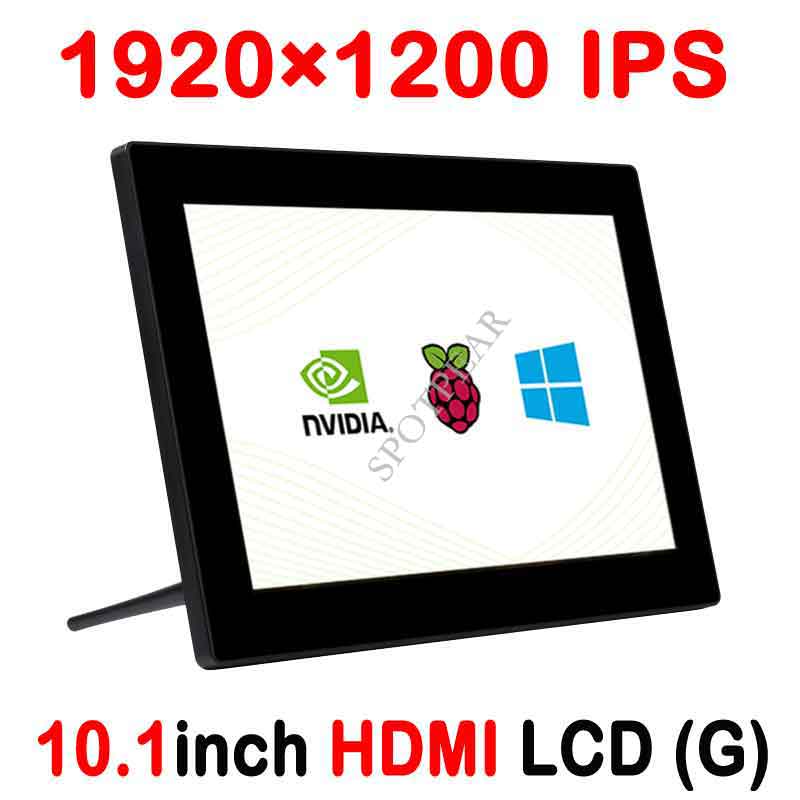
Raspberry Pi 10.1inch HDMI LCD (G) (with case) User Guide
Overview
10.1inch Capacitive Touch Screen LCD (G), 1920x1200, HDMI, IPS, 10-Points Touch, Fully Laminated Screen, Supports Raspberry Pi, Jetson Nano, And PC
Features
- Hardware resolution: 1920×1200
- Toughened glass panel features 6H hardness and 10-Points capacitive touch
- Fully Laminated for batter touching
- When working with Raspberry PI, supports Raspbian/ Ubuntu/ Retropie, driver free.
- When working with PC, supports Windows 10/ 8.1/ 8/ 7, 10-Points touch and driver free
- Multi-languages OSD menu, for power management, brightness/contrast adjustment, etc.
- Features 3.5mm Headphone jack for HDMI audio
- Embedded ferrite Hi-Fi speaker
- 75x75mm spacing mounting holes (M4 screw hole) for general wall mount
- Comes with 75° tilt angle stand
User Guides
Windows PC
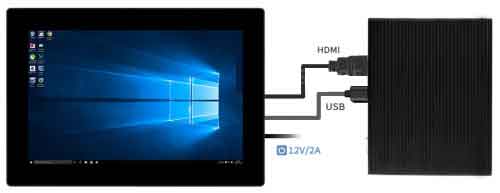
This product supports Windows 10/8.1/8/7 OS.:
- 1) Connect the 12V/2A power adapter to the POWER interface of the display, the backlight turns on after that.
- 2) Connect the TOUCH interface of the LCD to the USB interface of the PC. Waiting for a moment, The touch will be recognized by Windows automatically
- 3) Connect the HDMI interface of LCD to the HDMI port of the PC, if you require audio output, connect an earphone to the 3.5mm jack.
- Note 1: If multi-screen are connected to one PC at the same time, you can only control the cursor by this LCD, so please set the LCD as the main screen.
- For some of the PC, you may need to restart for proper display
Raspberry Pi
Supports Raspbian/Ubuntu mate/Windows 10 IoT Core
When working with Raspberry Pi, you should set the resolution of the LCD by yourself, or else the LCD screen will not work. For more detailed information, please read the following section.
Download the Raspbian image from Raspberry Pi website. Write the image to a TF card and append the following lines to the config.txt file which is located at the root of your TF card:
- 1) Unzip the archive to get the .img file.
- 2) Insert the TF card to PC and format the TF card by File:Panasonic SDFormatter.zip software.
- 3) Open the File:Win32DiskImager.zipsoftware and select the image file unzipped and click write to write it.
- 4) After writing, modify the config.txt file and append the following lines to the config.txt. The file is located in the BOOT directory of the TF card.
hdmi_group=2
hdmi_mode=68
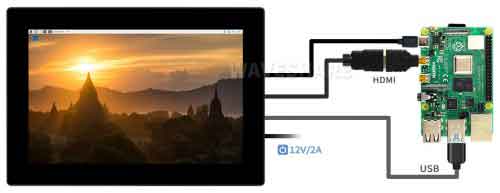
- 5) Connect the Touch interface of the LCD to the USB port of Raspberry Pi.
- 6) Connect the HDMI interface of the LCD to the HDMI port of the RaspberryPi.
- 7) Connect the 5V OUT interface to the POWER IN interface of the Pi
- 8) Connect the 12V/2A power adapter to the POWER interface of the LCD, wait for a moment and the Raspberry Pi starts and works.
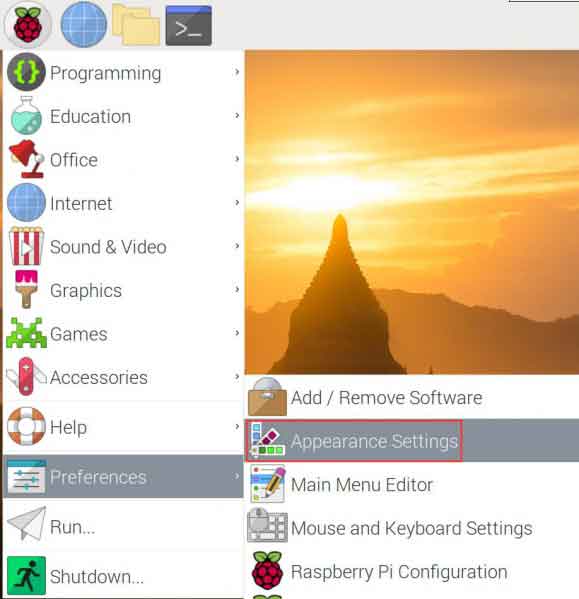
GUI improving
For better display and touching, you can modify the theme setting. Set the icons and text bigger. Here we take Raspbian as an example.
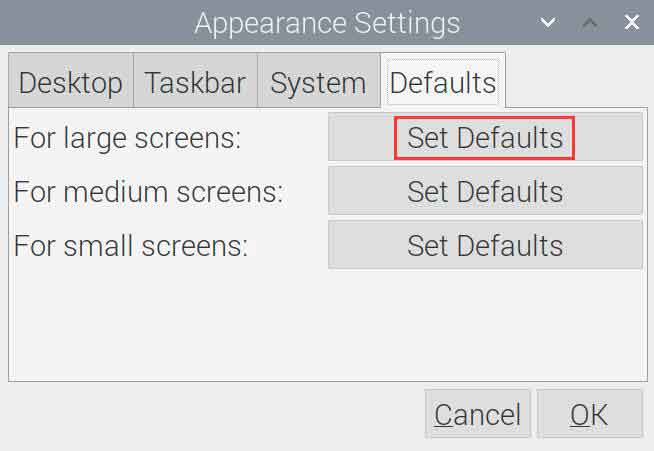
- Select Menu-》Preferences-》Appearance Settings-》Defaults-》For large screens: Set Defaults-》OK.
- Modify the font size of the System

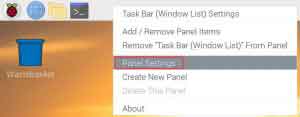
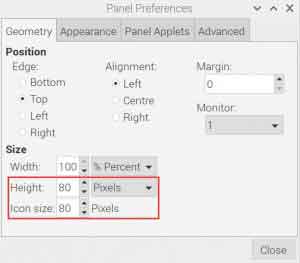
- Right-click the taskbar and select-》Panel Settings -》Set the size of Geometry.
Keys description
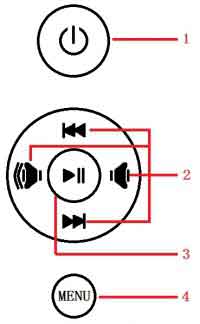
- 1:Open or Close LCD display. If you don't need the LCD for a long time, you can use this button to reduce consumption
- 2:Direction button
- 3: "OK" function
- 4: Open menu and "Return" function