


- sales/support
Google Chat:---
- sales
+86-0755-88291180
- sales01
sales@spotpear.com
- sales02
dragon_manager@163.com
- support
tech-support@spotpear.com
- CEO-Complaints
zhoujie@spotpear.com
- Only Tech-Support
WhatsApp:13246739196
- Purchase/Shipping/Refund
WhatsApp:13424403025
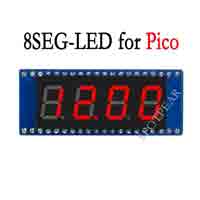
Raspberry Pi Pico-8SEG-LED User Guide
Features
- SPI-compatible, easy to drive
- Onboard high precision RTC chip DS3231, with backup battery holder
- Standard Raspberry Pi Pico header, supports Raspberry Pi Pico series
Specification
- Operating voltage: 5V
- Digits: 4
- Display size:0.4inch
- LED color: red
- Driver: 74HC595
- Display part No.: FJ4401AH
- Dimensions: 52 x 21mm
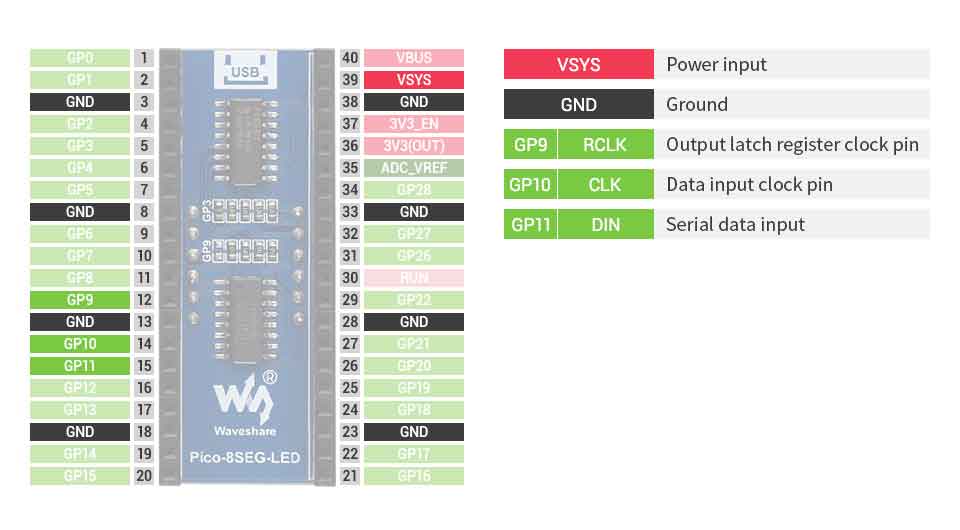
Pinout
Digital tube and controller
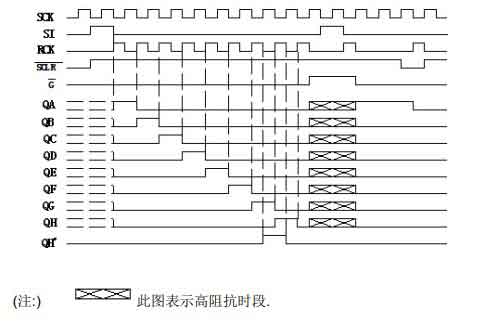
74HC595 is a high-speed CMOS 8-bit 3-state shift register/output latch chip, using CMOS silicon gate technology. The device contains an 8-bit serial input and parallel output shift register and provides an 8-bit D-type storage register with an 8-bit 3-state output. Provide independent clock signals to the shift register and storage register. The shift register has a direct clearing function, serial input and output functions, and cascade applications. (Using standard pins.) Both shift registers and storage registers use a positive Edge clock trigger, if these two clocks are connected together, the shift register is always the previous clock pulse of the storage register. All input ports are equipped with anti-static and instant overvoltage protection circuits
Digits:4
LED color: red
Circuit connection type: Negative
Display size: 0.4inch
Timing
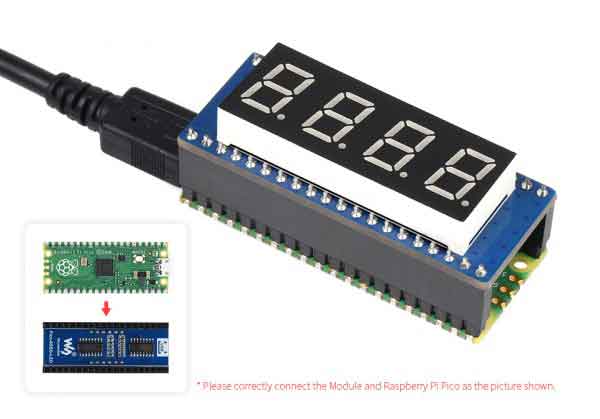
Hardware connection
Please take care of the direction when you connect Pico, an USB port is printed to indicate . You can also check the pin of Pico and the LCD board when connecting.
You can connect display according to the table.
| LCD | Pico | Description |
| VCC | VSYS | Power input |
| GND | GND | GND |
| DIN | GP11 | Serial data input |
| CLK | GP10 | Data input clock pin |
| RCLK | GP9 | Output latch register clock pin |
Connection
Setup environment
Please refer to Raspberry Pi's guide: https://www.raspberrypi.org/documentation/rp2040/getting-started/
Download example
1. Open a terminal of Raspberry Pi
sudo apt-get install p7zip-full
cd ~
sudo wget  https://www.waveshare.net/w/upload/2/28/Pico_code.7z
7z x Pico_code.7z -o./Pico_code
cd ~/Pico_code
cd c/build/
Raspberry Pi
- Open a terminal and got to the C directory
cd ~/Pico_code/c/
- Create build folder and add path of SDK to it, it is ../../pico-sdk by default, however, it may be different for different users, please check the actual path of your pico.
cd build
export PICO_SDK_PATH=../../pico-sdk
- run cmake to generate Makefile, and build it.
cmake ..
make -j9
- A main.uf2 file is generated.
- Hold the BOOTSEL button of Pico, and connect the USB interface of Pico to Raspberry Pi then release the button.
- Copy the main.uf2 file to the RPi-RPI2 drive recognized.
python
1. Refer to Raspberry Pi's guides to setup Micropython firmware for Pico
2. Open the Thonny IDE, and drag the demo to IDE and run on Pico.
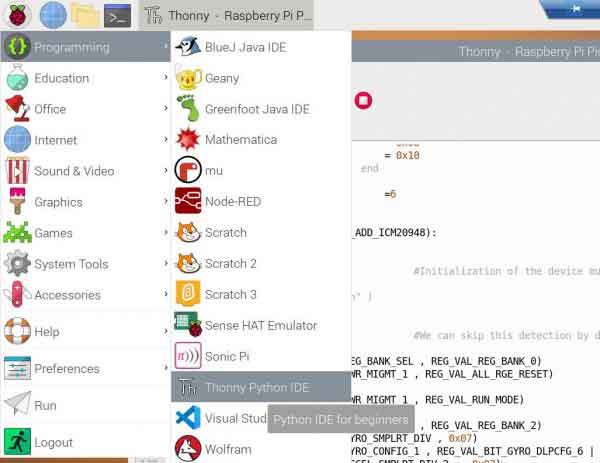
3. Click File -> Open... and choose the Pico-8SEG-LED.py file to run
Windows
- Download and unzip the demo codes to your Windows desktop, refer to Raspberry Pi's guides to set up the Windows software environment settings.
- Press and hold the BOOTSEL button of Pico, connect the USB of Pico to the PC with a MicroUSB cable. Import c or python program into Pico to make it run.
Codes Description
C
Buttom interface
In DEV_Config.c(.h) file (...\c\lib\Config)
- Data type:
#define UBYTE   uint8_t
#define UWORD   uint16_t
#define UDOUBLE uint32_t
- Mpdule initialize and exit:
void DEV_Module_Init(void);
void DEV_Module_Exit(void);
Note:
1.These are functions which are used for handle GPIO:
- GPIO Write/read:
void 	DEV_Digital_Write(UWORD Pin, UBYTE Value);
UBYTE 	DEV_Digital_Read(UWORD Pin);
- SPI write byte
void DEV_SPI_WriteByte(UBYTE Value);