- sales/support
Google Chat:---
- sales
+86-0755-88291180
- sales01
sales@spotpear.com
- sales02
dragon_manager@163.com
- support
tech-support@spotpear.com
- CEO-Complaints
zhoujie@spotpear.com
- Only Tech-Support
WhatsApp:13246739196
- Purchase/Shipping/Refund
WhatsApp:13424403025
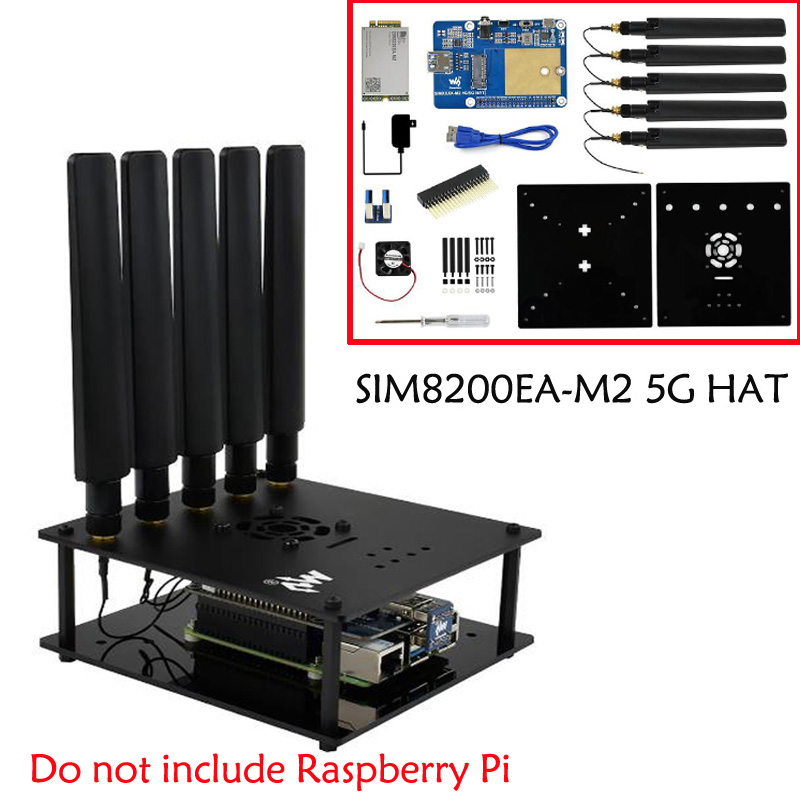
Raspberry Pi SIM8200EA-M2 5G HAT User Guide
Introduction
SIM8200EA-M2 5G HAT With Antennas, 5G/4G/3G Support, Snapdragon X55 Onboard, Multi Mode Multi Band, Applicable For China, Europe, The Middle East, South America, Etc.
Working with Windows PC
Install Driver
Downlaod the SIM8200 Driver from Resources part to your PC and unzip it.
Enter the SIM8200_OS_Driver\Windows directory
Enter the 1_install directory and run the setup.exe file to install.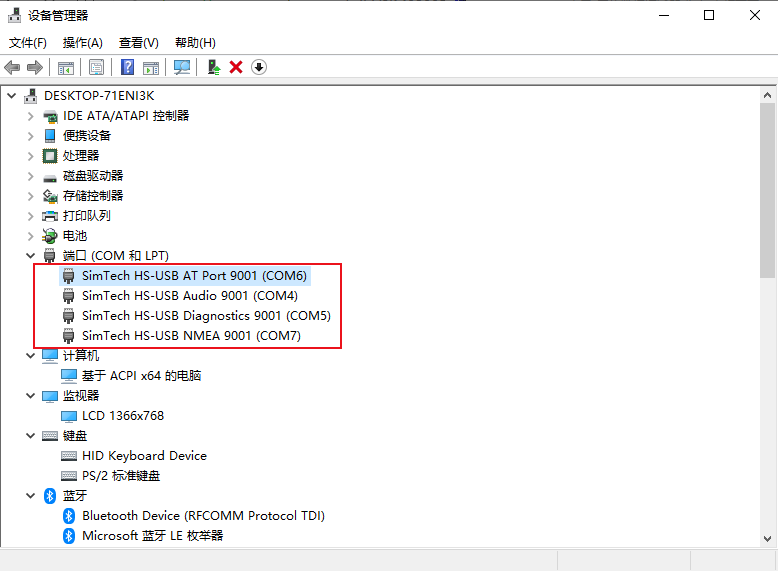
After connecting, a mobile network icon appears, you can disconnect other network and test the mobile network.
Install driver manually
For some of PC, you need to add driver manullay. If your PC doesn't recognized any COM ports in Device Manger, find unkown devices and upate the driver manually:
d Power on the 5G module and set the Switch into ON. four(it may be more than four) unkow devices are recognized by Windows PC.
Right-click the device , update the driver manually, choose SIM8200_OS_Driver\Windows, and then choose thd driver according to the version of your OS. You need to update for all the four/five/six devices.:
Four COM ports: AT is used for AT command controlling, Audio is used for dailing Diagnostics is used for debuggging, and NMEA is used for GPS.;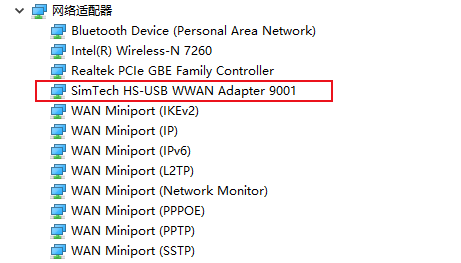

A mobile network will be setup automatically after updating, you can disconnect other network and test it.
Working with Raspberry
Please download the newest Raspberry Pi OS2020-08-20-raspios-buster-armhf, All the settings are based on Kernel 5.4, if you use old version, plase udpate first.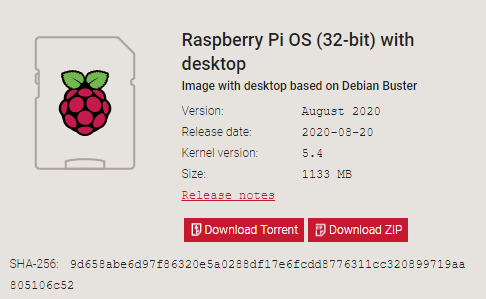
Configuration
This configuration is only needed at the first time.
Open a terminal and run the following commands:
sudo apt-get install p7zip-full
wget https://www.waveshare.com/w/upload/f/fb/SIM8200-M2_5G_HAT_code.7z
7z x SIM8200-M2_5G_HAT_code.7z
sudo chmod 777 -R SIM8200-M2_5G_HAT_code
cd SIM8200-M2_5G_HAT_code
sudo ./install.sh
Please do not modify option, qmi_wwan_simcom, default.script,install.sh files or directorys, otherwise the dirver cannot be installed normally.
If you get error information, please check ifyou use the 2020-08-20-raspios-buster-armhf OS and take screenshot of error information and contact our support team for help.
Run ifconfig -a command to check WWAN0 interface.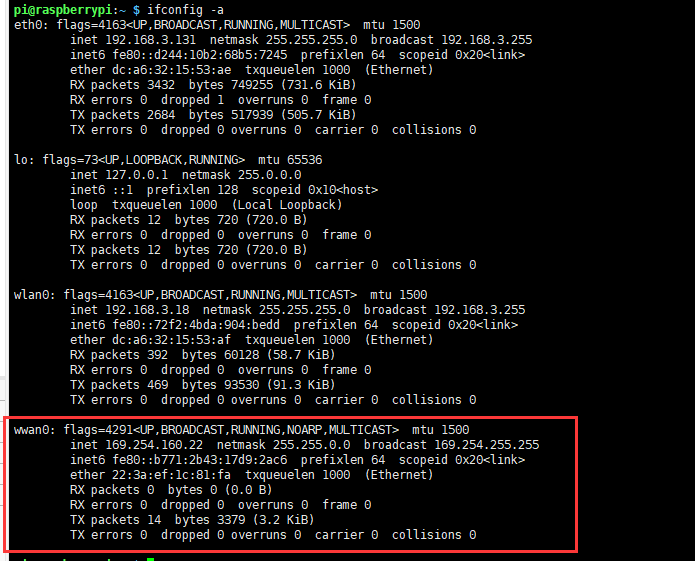
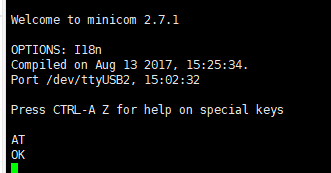
Testing with AT command
sudo apt-get install minicom
sudo minicom -D /dev/ttyUSB2
5G Networking
cd Goonline
make
sudo ./simcom-cm
After running codes, DNS information are shown as figure below: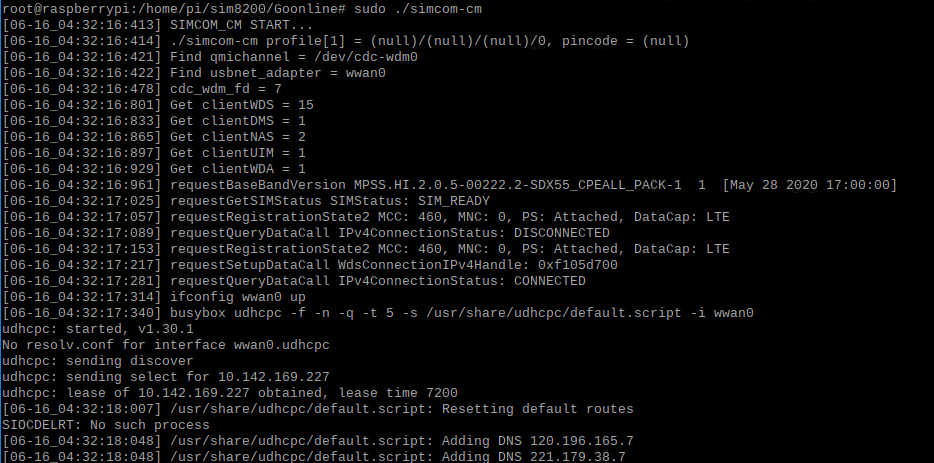
Auto-run
If you want to set the codes auto-run after booting, you can modify rc.local file:
sudo nano /etc/rc.local
Add the line to file as below:
sudo /home/pi/SIM8200-M2_5G_HAT_code/Goonline/simcom-cm &
Note that you have to add "&" to the end of command, make sure that the command can be run in the background, or the Pi may not boot normally.。