- sales/support
Google Chat:---
- sales
+86-0755-88291180
- sales01
sales@spotpear.com
- sales02
dragon_manager@163.com
- support
tech-support@spotpear.com
- CEO-Complaints
zhoujie@spotpear.com
- sales/support
WhatsApp:13246739196
- HOME
- >
- ARTICLES
- >
- Common Moudle
- >
- LCD
EINK-DISP-103
Introduction
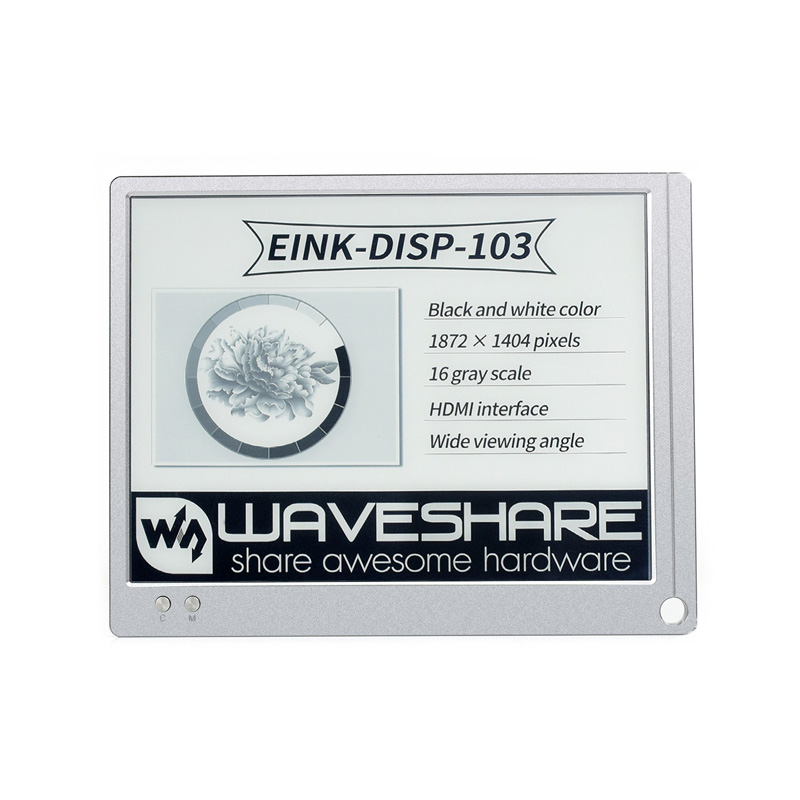
Thiis a 10.3inch e-Paper monitor, it has 1872x1404 resolution, HDMI interface. Supports Raspberry Pi,jetson Nano and Windows PC.
Features
- 10.1inch e-Paper, 1872x1404 resolution (225DPI)
- This paper-like display has no blue light, it is eye care.
- Display type: Passively relfective and require ambient light for reading.
- Supports mode/contrast adjust
- Aluminum alloy CNC enclosure
- Supports Raspberry Pi/Jetson Nano/PC
Hardware desciption
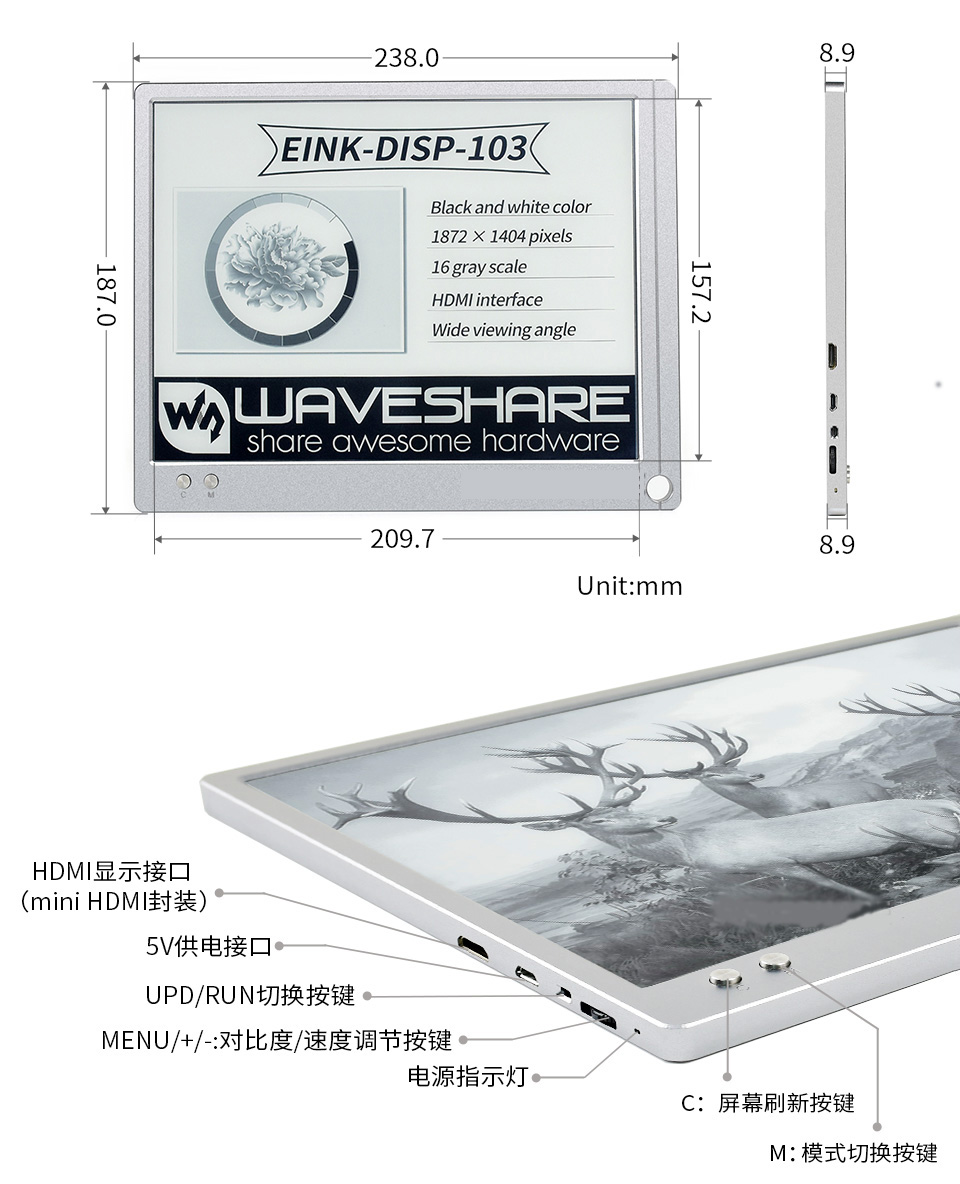
- mini HDMI Port: You can connect the EINK-DISP-103 (called "the display" hereafter) to the master device by HDMI cable. The display can only work with 1872x1404 resolution
- 5V Power supply: The display requires at least 5V/1.5A power input, a 5V/3A power adapter is provided in the package.
- UPD/RUN Switch: By default, you should turn the switch onto the RUN side (close to the power port) for displaying, You can turn it onto the UPD side (close to the contrast adjustment) for firmware update.
- Contrast Adjustment: To adjust the contrast, you should first press the button, then roll the button upward/downward, finally press the button again to confirm. The display will do a full update when you change the contrast to clear the ghost.
- Power Indicator: The indicator is used to indicate the status of the display
- C button: This button is used to clear the display. You can press this button to clear the ghost or wakeup it from sleep mode
- M button: This button is used to change display modes. The display supports three modes (A2+/GC16?A2)
- A2+: This mode uses Floyd-Steinberg dithering algorithms, to let the display simulate gray display. The update speed is fast and it is suitable for daily use. The disadvantage is that its ghost is more than A2
- GC16: Supports 16 grays. In this mode, you can get the best display effect, less ghost, however, slowest the update rate. It is suitable for displaying still pictures.
- A2: A2 mode only supports Black and White color. The update rate of A2 is fastest, you can use it for editing and coding.
You can adjust the mode and contrast according to your user-experience.
Connect to PC
Hardware connection
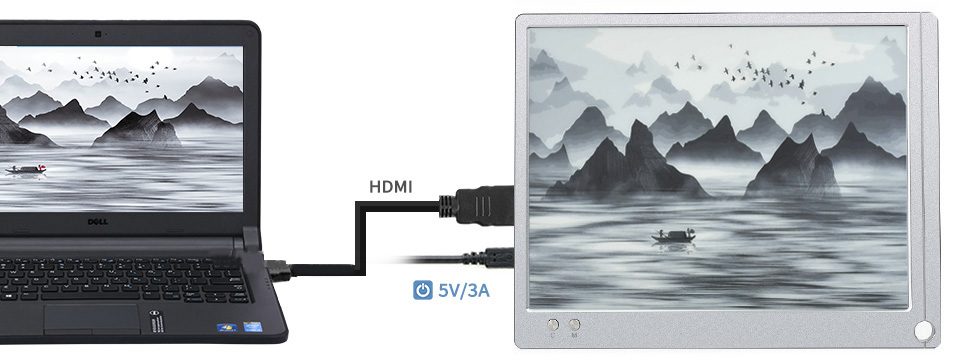
- Connect the 5V/3A power adapter to Power interface of the display
- Connect the HDMI interface of the display to PC

The display will display after connecting.
Note: If your PC only has DP or type C interface, you should connect an adapter firstly. To use the display, we recommend you to first connect the Power adapter for EDID reading.
Resolution setting
To display the full screen, we recommend you to use 4:3 ratio.
In Windows, right-click the desktop and choose Display setting -> 1872x1404 -> save
We recommend you to use extended mode.
Connect to Raspberry Pi
Hardware connection
This display supports Raspbian, Ubuntu mate and Kali. To work with Raspberry Pi, you should set the resolution manually. The setting method is the same for all the three OS, here we take Raspbian as an example.
- Download the newest Raspbian image from the Raspberry Pi website and write it to a micro SD card.
- After writing, modify the config.txt which is located in the BOOT directory of micro SD card, add the following lines to the config.txt file.
max_framebuffer_height=1404
max_usb_current=1
config_hdmi_boost=10
hdmi_group=2
hdmi_force_hotplug=1
hdmi_mode=87
hdmi_timings=1872 1 88 4 44 1404 1 8 2 6 0 0 0 45 0 131685000 13
- Note 1: If you use Pi 4, you should need to remove/comment the lines (dtoverlay=cv4-fkms-V3D) from the config.txt file
- Note 2: The resolution is set during booting, it is normal that the display work abnormally during booting.
Advance
Because of the working protocol of EINK screens, the ghost problem is normal. You can change the setting of Raspberry Pi to improve the display effect.
To reduce ghost, you can set the background to white and the foreground to white
- Choose Menu -> Preferences -> Appearance Settings, In Desktop Option, set layout to No image, and set the Colour to white, set the Text Colour to black and OK.
- Open terminal, choose Edit->Preferences, set Background to white, foreground to black and OK
Disable sleep
To let the display keep lighting on, you can modify lightdm.conf file
sudo nano /etc/lightdm/lightdm.conf
- Change the statement which is in [SeatDefaults] section
#xserver-command=X
- to
xserver-command=X -s 0 -dpms
- Then reboot
sudo reboot>
Photo display
When the display work normally, you can press M button and the C button (you need to first hold the M button, then press the C button) and release, the display will enter the Phone mode and it will display the default photo.
Made the photo
- Please download the convert software from the #Resources and open it.
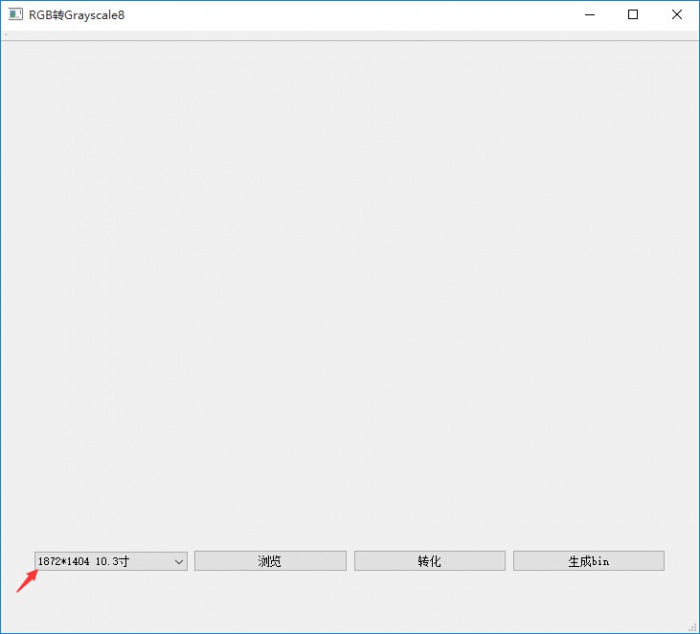
- Choose 1872*1404 10.3寸, Clic 浏览 to choose one photo(the resolution should be 1872*1404)

- Click "转化" to generate a BMP file. Click "生成bin" to generate the FPGA_LOGO_103.bin file under directory of the software
- Set the UPD/RUN switch to UPD side,
- Connect Power interface of the display to PC by micro USB cable, wait for several seconds and the display is recognized as a portable drive
- Drag/copy the FPGA_LOGO_103.bin file to the drive of the display. After copying, the display will cost about 2 minutes to update and if you see the drive is recognized again, it means that the update is finished, now you can disconnect the USB cable.
- Turn the UPD/RUN switch onto RUN side, re-power on the display
- First hold the M button, and press the C button then release, the photo which is copied will be displayed. To back to display mode, you can hold the M and C buttons again.
Note
- The e-Paper display cannot work as common LCD displays, the lifetime of e-Paper display is short and it is related to the update times. You cannot use e-Paper to display video for a long time, which will shorten the lifetime of the e-Paper display.
- The operating temperature (recommend) of the e-Paper display is 15°C ~35°C, storage temperature is -20°C ~ 60°C
- Please use soft cloth when cleaning the screen.


