- sales/support
Google Chat:---
- sales
+86-0755-88291180
- sales01
sales@spotpear.com
- sales02
dragon_manager@163.com
- support
tech-support@spotpear.com
- CEO-Complaints
zhoujie@spotpear.com
- Only Tech-Support
WhatsApp:13246739196
- Purchase/Shipping/Refund
WhatsApp:13424403025
Raspberry Pi 4.3inch DSI QLED User Guide
Feature
- 4.3-inch QLED touch display with a hardware resolution of 800 x 480.
- 5-point touch control, toughened glass panel with up to 6H hardness.
- Support Pi 4B/3B+/3A+/3B/2B/B+/A+, partial CM3/3+/4 adapter boards require DSI-Cable-15cm.
- Drive the LCD directly through the Raspberry Pi's DSI interface with refresh rates up to 60Hz.
- Supports Raspberry Pi OS / Ubuntu / Kali and Retropie when used with Raspberry Pi, drive-free
- Supports software adjustable backlight for more power saving.
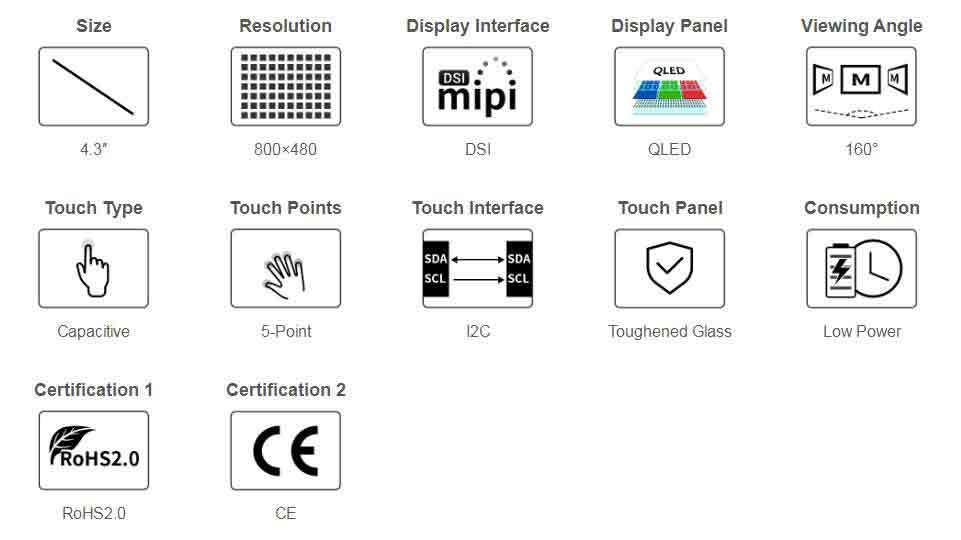
Parameters
| Item | Description | Unit |
|---|---|---|
| Model | 4.3inch DSI QLED | / |
| Dimensions | 4.3 | Inch |
| Viewing Angle | 160 | Deg |
| Resolution | 800(RGB)×480 | Pixels |
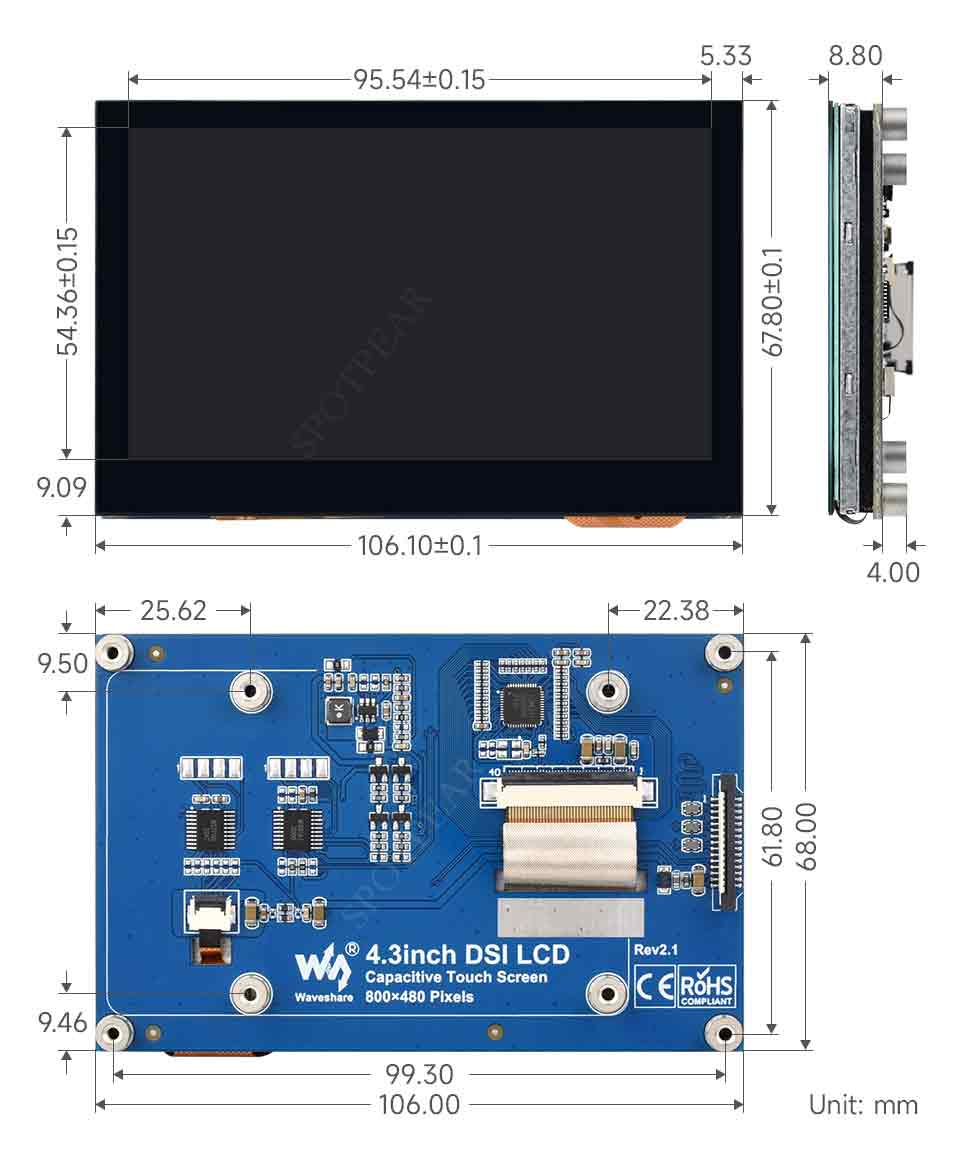
| Touch Screen Dimensions | 106.10(H)×67.80(V)×8.80(D) | mm |
| Display Area | 95.04(W)×53.86(H) | mm |
| QLED Color Gamut | 78%NTSC | |
| Max. Brightness | 300 | |
| Backlight Adjustment | Software | |
| Contrast | 1200:1 | cd/m² |
| Color Depth | 16.7M | |
| Refresh Rate | 60 | Hz |
| Driver Interface | DSI |
Pinout
| PIN | Label |
|---|---|
| 1 | GND |
| 2 | DSI1_DN1 |
| 3 | DSI1_DP1 |
| 4 | GND |
| 5 | DSI1_CN |
| 6 | DSI1_CP |
| 7 | GND |
| 8 | DSI1_DN0 |
| 9 | DSI1_DP0 |
| 10 | GND |
| 11 | SCL0 |
| 12 | SDA0 |
| 13 | GND |
| 14 | 3V3 |
| 15 | 3V3 |
Working with Raspberry Pi
Hardware Connection
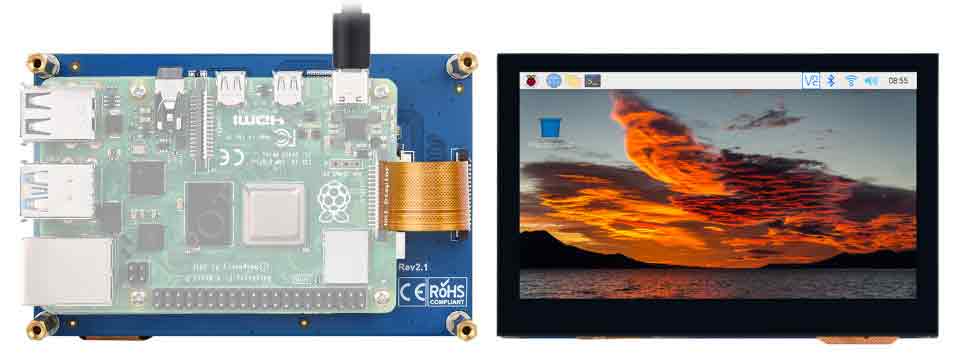
Connect the 4.3inch DSI QLED to the DSI port of the Raspberry Pi with a FFC cable, as shown below:
Software Setting
This setting is for Raspberry Pi OS / Ubuntu / Kali and Retropie systems.
1. Please download the newest image from the Official Raspberry Pi website.
2. Download the compressed file on the PC and unzip it to get the .img file.
3. Connect the TF card to the PC and use SDFormatter to format the TF card.
4. Open Win32DiskImager, choose the image prepared in the first step, and click "Write" to program the system image.
5. After programming, open the config.txt file in the root directory of the TF card and enter the following codes at the end of config.txt. Then, save and safely eject the TF card.
dtoverlay=vc4-kms-v3d
dtoverlay=vc4-kms-dsi-7inch
6. Insert the TF card into the Raspberry Pi, power up the Raspberry Pi, wait for a few seconds normally and then it will display normally.
Backlight Control
The backlight brightness can be controlled by entering the following command in the terminal:
echo X > /sys/class/backlight/10-0045/brightness
Where X indicates any number from 0 to 255. 0 means the darkest, and 255 means the brightest. For example:
echo 100 > /sys/class/backlight/10-0045/brightness
echo 0 > /sys/class/backlight/10-0045/brightness
echo 255 > /sys/class/backlight/10-0045/brightness
In addition, Waveshare provides a corresponding application (which is only available for the Raspberry Pi OS system), which users can download and install to use in the following way:
wget https://www.waveshare.com/w/upload/f/f4/Brightness.zip
unzip Brightness.zip
cd Brightness
sudo chmod +x install.sh
./install.sh
After installing, you can click the Start menu -> Accessories -> Brightness to open the program, as shown below
Sleep Mode
The screen can be put to sleep by running the following command in the Raspberry Pi terminal:
xset dpms force off
Disable Touch
At the end of the config.txt file, add the following command corresponding to disable touch (the config file is located in the root directory of the TF card and can also be accessed via the command: sudo nano /boot/config.txt):
disable_touchscreen=1
Note: Rebooting is required to take effect after adding the command.