- sales/support
Google Chat:---
- sales
+86-0755-88291180
- sales01
sales@spotpear.com
- sales02
dragon_manager@163.com
- support
tech-support@spotpear.com
- CEO-Complaints
zhoujie@spotpear.com
- Only Tech-Support
WhatsApp:13246739196
- Purchase/Shipping/Refund
WhatsApp:13424403025
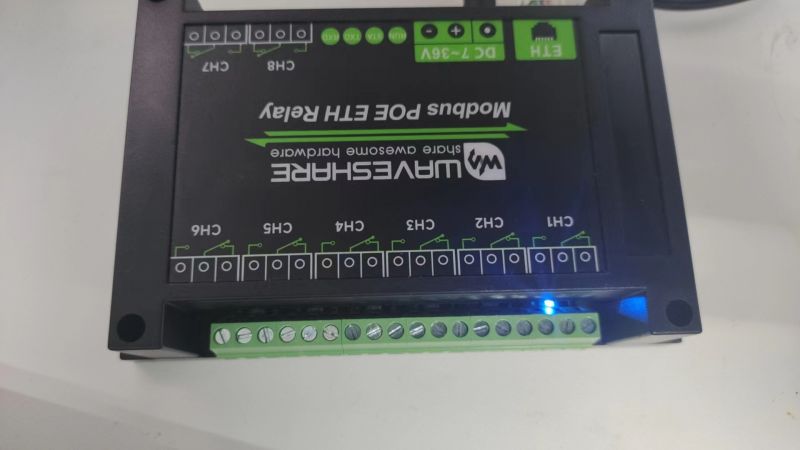
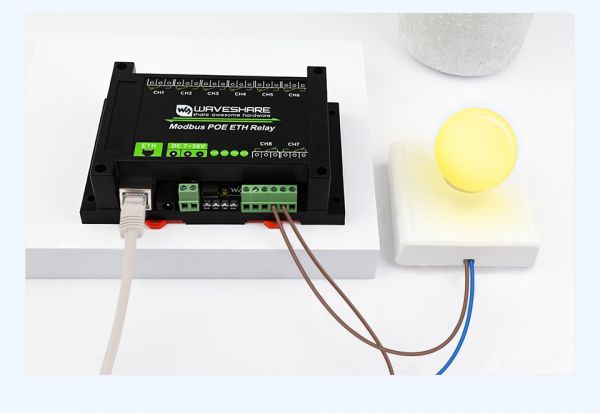
Modbus POE ETH Relay Waveshare User Guide
Hardware Connection
- Connect the Modbus POE ETH Relay to the LAN via a network cable, and supply power through the power port or the POE.
Software Preparation
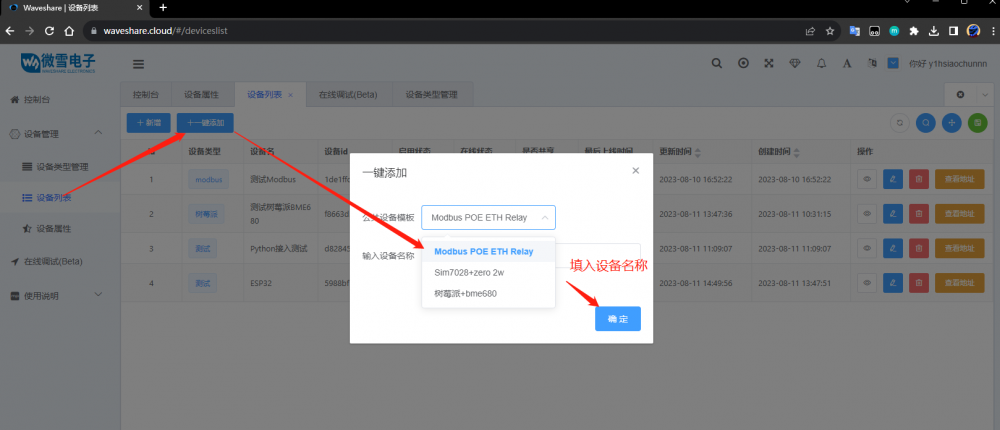
Create Device
Waveshare Cloud provides exclusive device control examples for Modbus POE ETH Relay, and you can start by quickly creating devices.
Quick Start
The platform supports one-click quick start, go to Device Management ->Device List ->One-click Add:
Detailed Steps (Skip to Device Settings for Quick Start)
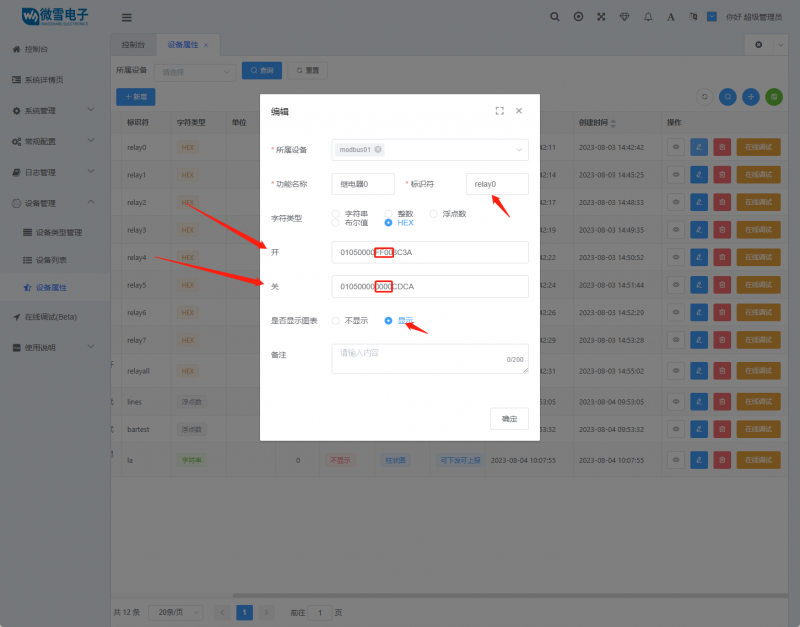
When creating device properties, you can choose the HEX character type, enter the hex value of the corresponding switch, and select to display the chart
Device Settings
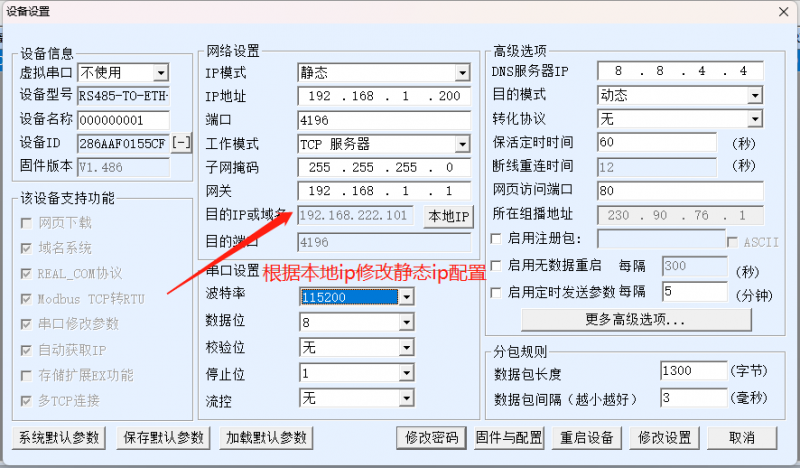
Open VirCom to configure device MQTT connection properties. Please note that if the device has already been configured with some information, it is recommended to load default parameters and restart the device before configuring, for example:

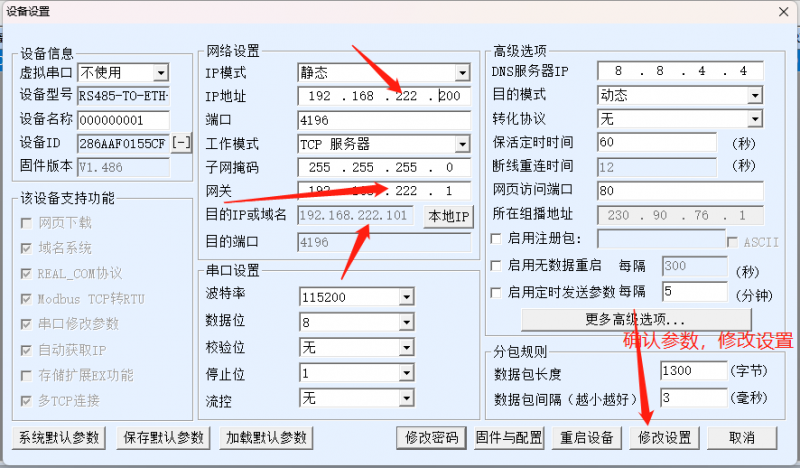
For the modified device, go to Firmware and Configuration
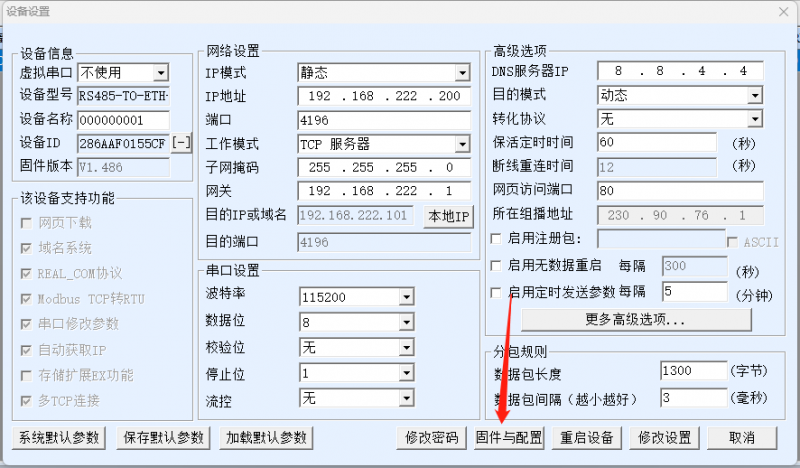
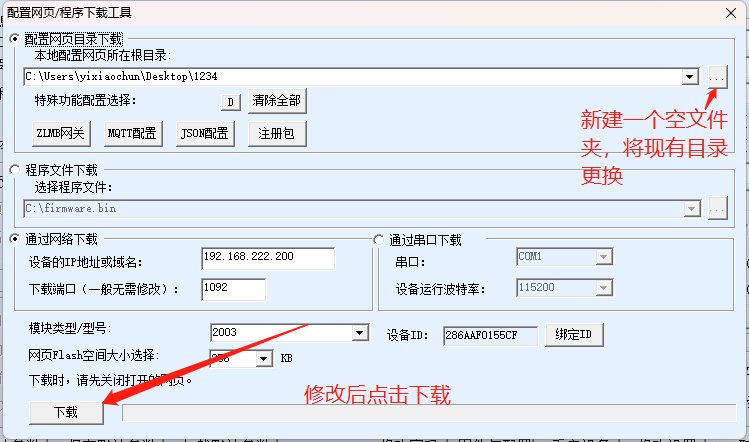
Copy the device subscription address parameters of Waveshare IoT and fill them into the settings, save and download, and wait for a prompt indicating successful transmission
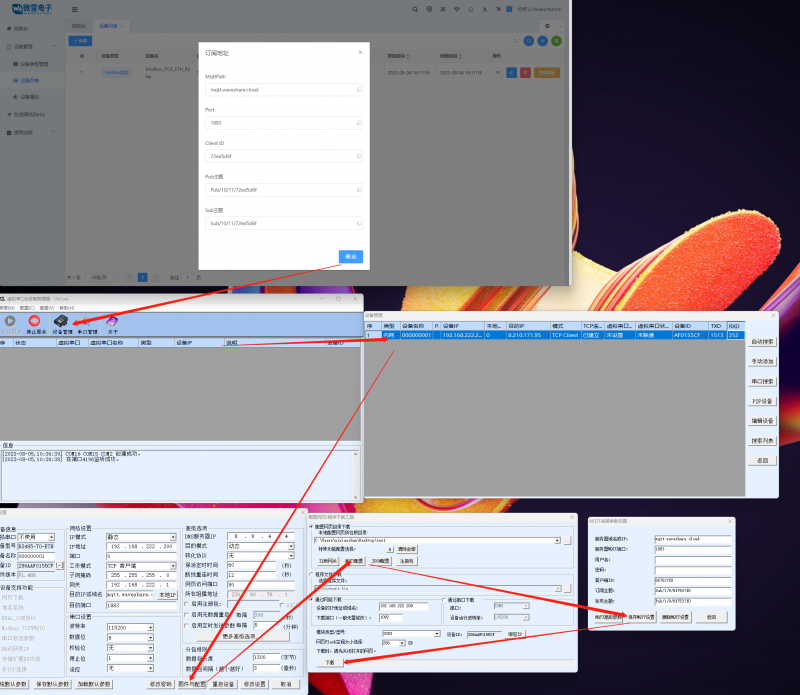
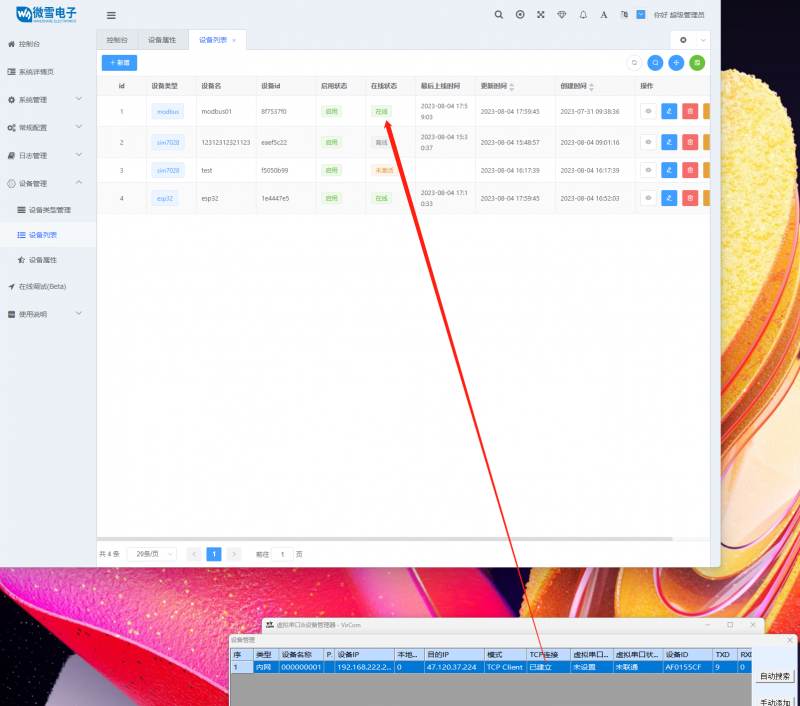
View the TCP connection in Device Management to see if the cloud device is online by displaying established connections
Device Control
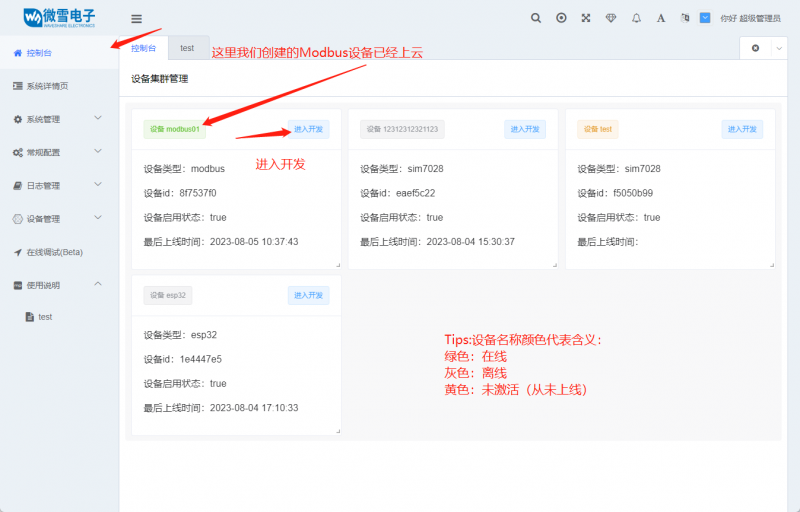
Go to the console, view the device, and enter development
Enter the device details page to view the switch-type devices, click the button to set the status of the terminal hardware device
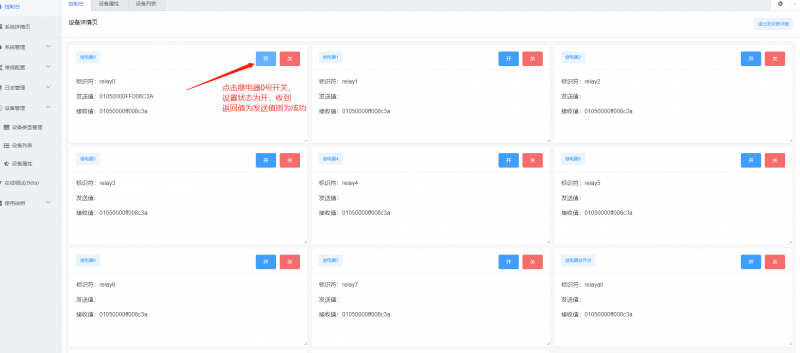
At this time, we check the trigger status of the Modbus PoE ETH Relay relay. Here, CH1 corresponds to relay 0, which is the relay set in the cloud