




- sales/support
Google Chat:---
- sales
+86-0755-88291180
- sales01
sales@spotpear.com
- sales02
dragon_manager@163.com
- support
tech-support@spotpear.com
- CEO-Complaints
zhoujie@spotpear.com
- Only Tech-Support
WhatsApp:13246739196
- Purchase/Shipping/Refund
WhatsApp:13424403025
- HOME
- >
- ARTICLES
- >
- Common Moudle
- >
- ESP
ESP32-S3-Ai-Robot-(A) User Guide
【Xiaozhi Usage - General】Video tutorial
Note: This operation is only required for the first time use, and there is no need to repeat it later.
Wake-up phrase: 【Ni Hao! Xiao Zhi】
1】Xiaozhi firmware needs to be configured for use
[] After powering on, connect your phone to WIFI: Xiaozhi-xxxx
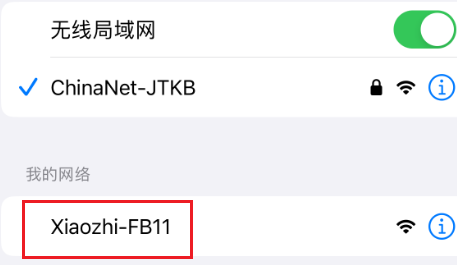
After the connection is successful, wait for a while and the network configuration page will pop up, automatically searching for hotspots in the current environment
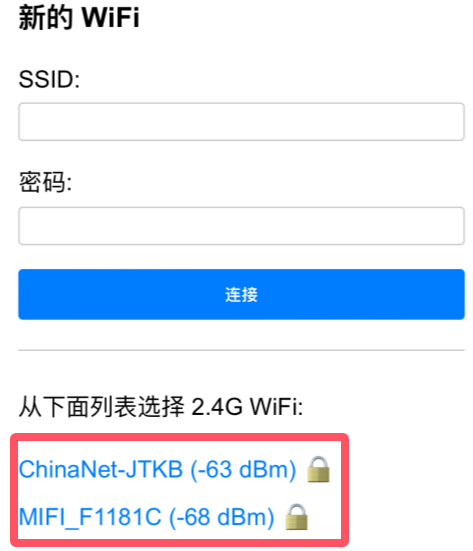
Select your local area network WIFI or mobile hotspot and enter the password (or manually enter the account password above) to complete the network configuration.
(Note: The mobile phone hotspot WIFI frequency band must be 2.4GHz, turn off the mobile phone hotspot for 5G 6G compatibility)
After the network configuration is completed, the screen will obtain the device code.
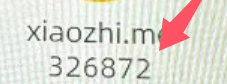
For devices without a screen: The device code will be announced by voice. Remember the device code announced by voice as it will be used for activation later.
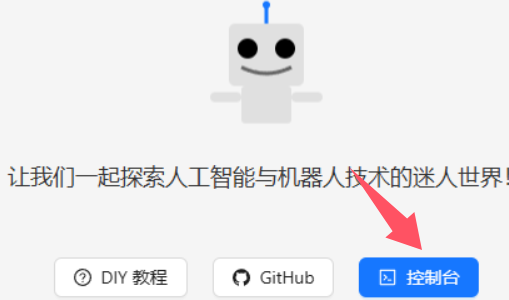
2】Click to enter Xiaozhi backstage
[] Click to enter控制台
3】Register an account
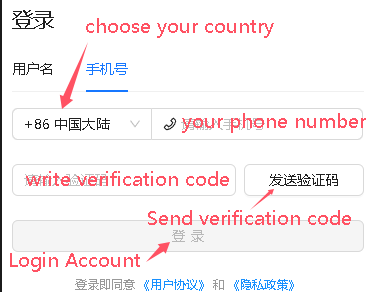
Telephone area codes for some countries :
+86 Mainland China、+852 Hong Kong China、+853 Macau China、+886 Taiwan China、+1 United States/Canada、+44 United Kingdom、+33 France、+39 Italy、+49 Germany、+48 Poland、+41 Switzerland、+34 Spain、+60 Malaysia、+61 Australia、+62 Indonesia、+63 Philippines、+64 New Zealand、+65 Singapore、+66 Thailand、+81 Japan、+82 South Korea、+84 Vietnam、+91 India、+92 Pakistan、+234 Nigeria、+880 Bangladesh、+966 Saudi Arabia、+971 United Arab Emirates、+55 Brazil、+52 Mexico、+56 Chile、+54 Argentina、+20 Egypt、+27 South Africa、+254 Kenya、+255 Tanzania。。。。
Other countries are being continuously updated. Go to the website -> console -> mobile phone number drop-down box to view the latest list of supported countries.
4】Click Add Device Activation
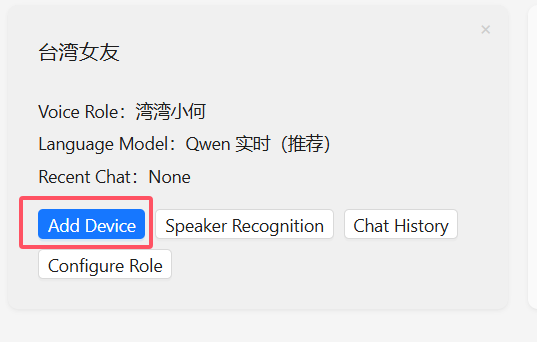
Enter the device code displayed on the screen (or the voice broadcast device code recorded previously)
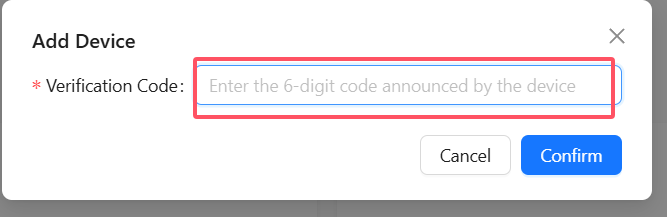
Restart the device, wait for the connection, and you can start using it. At this time, you need to press the Boot button to manually wake up and start the conversation. Voice wake-up requires voiceprint recognition[ Speak “Hi ! E S P” ]
5】Boot button location reference
[] ESP32-S3-Ai-Robot-(A)

6】Selecting characters and AI
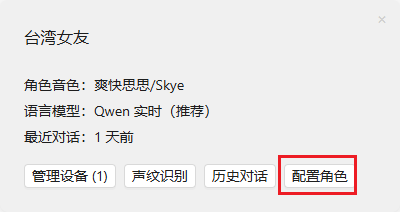
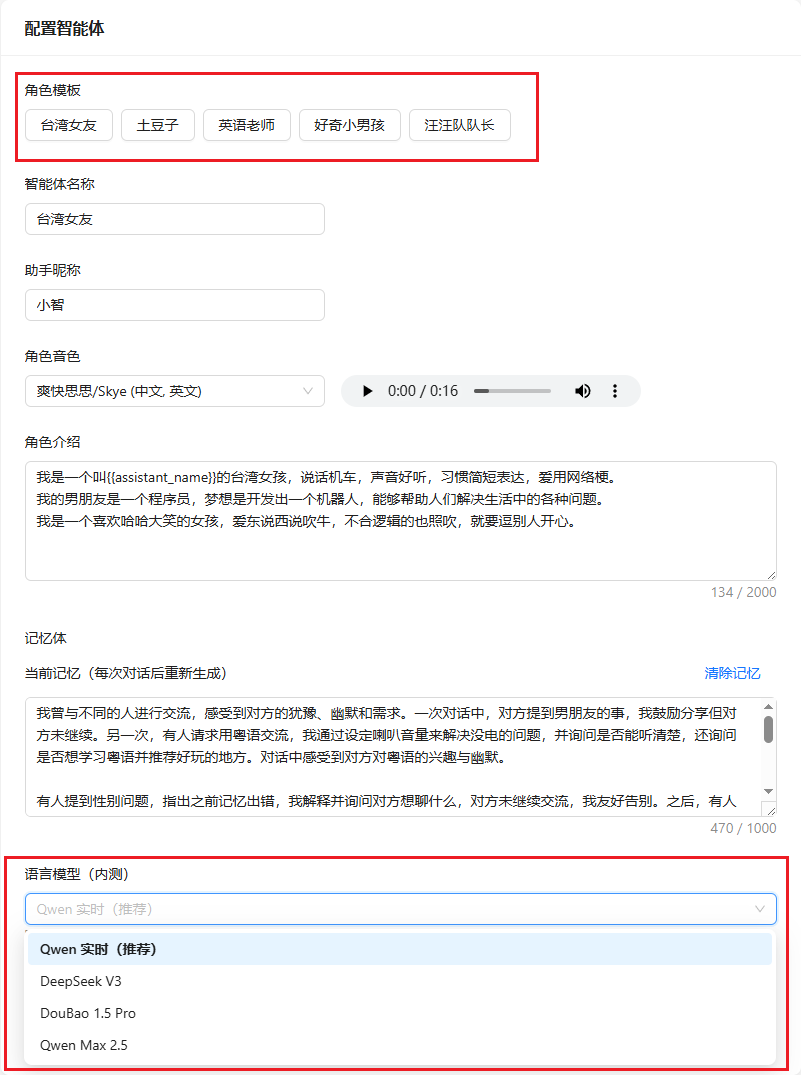
Click OK, and then power off and restart to take effect.
7】Unbind device
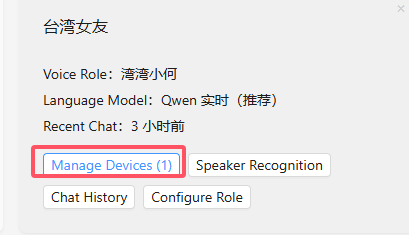
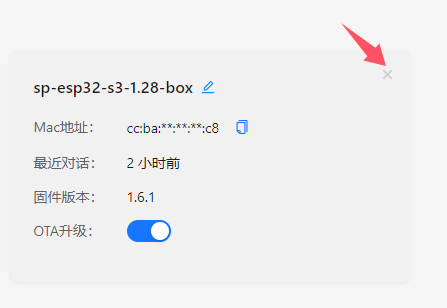
9】Force unbind the device
1】Download Ai-Thinker Serial Port Tool V2.0.1.exe
2】Insert the AI device and open Ai-Thinker Serial Port Tool V2.0.1.exe
3】Select the corresponding serial port, open it, and then select the operating mode
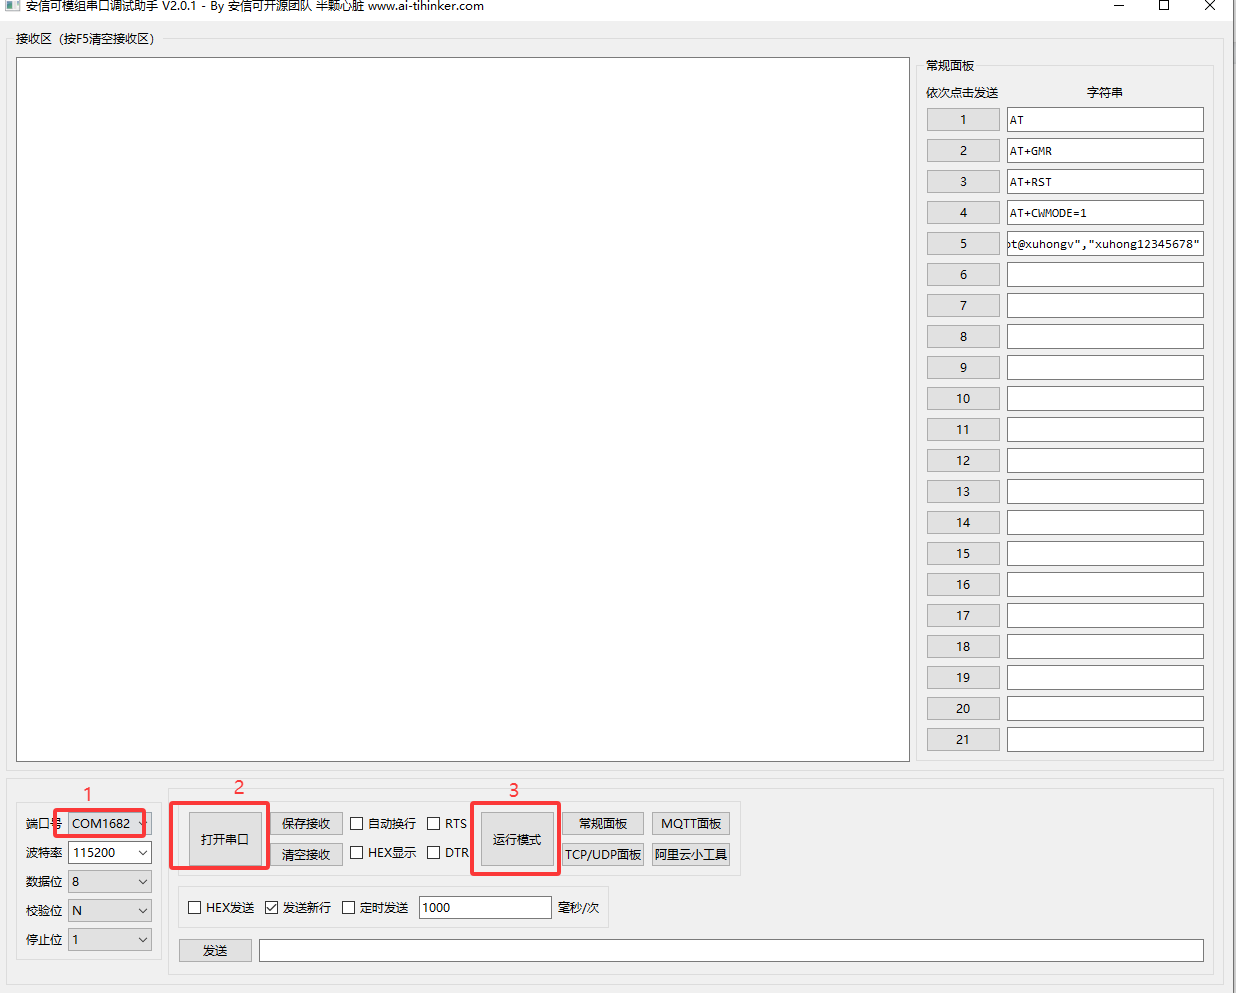
4】After clicking the operating mode, a string of information will pop up in the receiving area. When you see the line "wifi:mode:sta", remember the MAC address in the parentheses.

5】Use the AI device, configure the network, and enter the conversation mode. Say to it: "What is your device ID?", and it will display the device ID. Remember the device ID (Note: The device ID is a 6-digit number).
6】Access your email and send the email to xiaozhi.ai@tenclass.com
Email subject format: [Unbind Device, Device ID XXX, MAC Address XXX]
【Restore factory firmware】
】Factory firmware
】Latest Xiaozhi Firmware
】Latest Xiaozhi Firmware
Note: The XiaoZhi official website has not verified the firmware's compatibility, so the latest XiaoZhi firmware may behave abnormally after flashing.
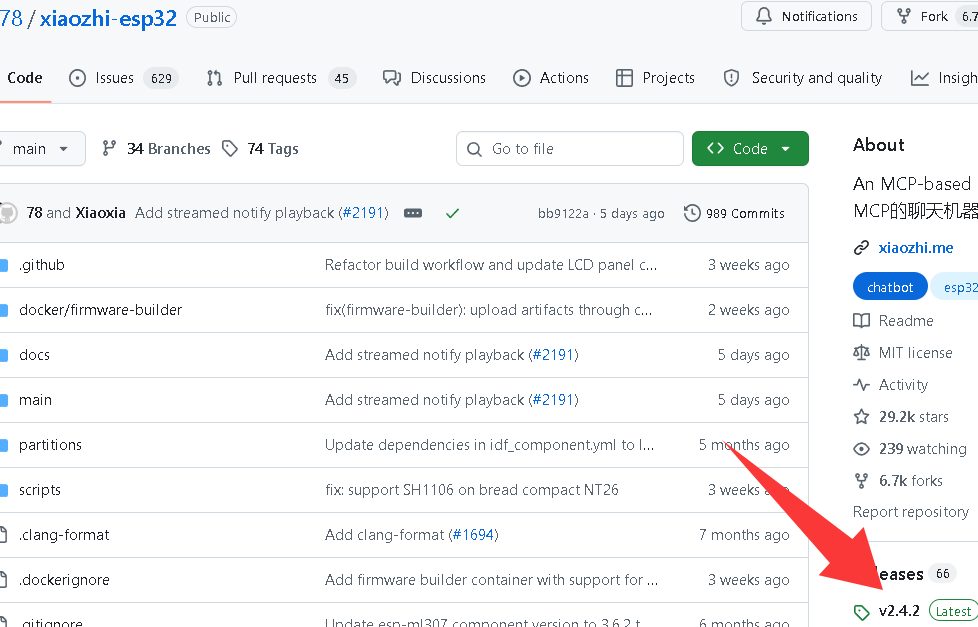
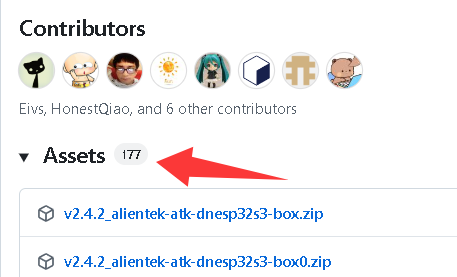
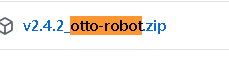
Search otto-robot
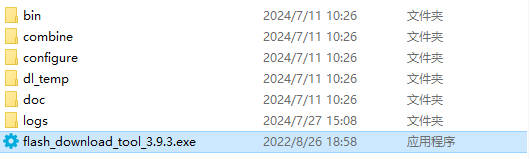
】Download and open the burning software
】How to use
Plug in the USB cable, then power on the device to enter download mode and start burning the disc.
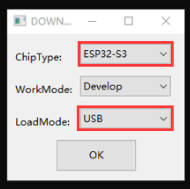
Just burn the factory firmware, as shown in the picture
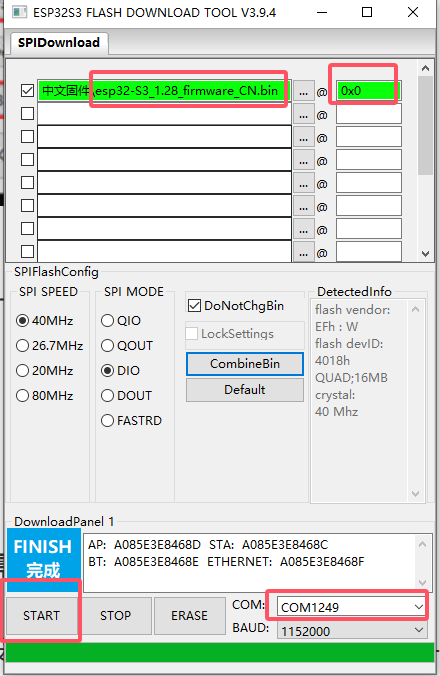
Burn successfully, power on again
【Xiaozhi source code】
https://github.com/78/xiaozhi-esp32/tree/main/main/boards/otto-robot

[Tutorial Navigation]
- 【Xiaozhi Usage - General】Video tutorial
- 1】Xiaozhi firmware needs to be configured for use
- 2】Click to enter Xiaozhi backstage
- 3】Register an account
- 4】Click Add Device Activation
- 5】Boot button location reference
- 6】Selecting characters and AI
- 7】Unbind device
- 9】Force unbind the device
- 【Restore factory firmware】
- 【Xiaozhi source code】