- sales/support
Google Chat:---
- sales
+86-0755-88291180
- sales01
sales@spotpear.com
- sales02
dragon_manager@163.com
- support
tech-support@spotpear.com
- CEO-Complaints
zhoujie@spotpear.com
- sales/support
WhatsApp:13246739196
Raspberry Pi 3.5inch HDMI LCD (E) User Guide
Feature
- 3.5inch IPS screen, hardware resolution is 640 × 480.
- 5-point capacitive touch, tempered glass panel, hardness up to 6H.
- When used with Raspberry Pi, supports Raspberry Pi OS / Ubuntu / Kali and Retropie.
- When used with Tinker Board 2, it supports Android / Debian.
- Ubuntu is supported when used with Jetson Nano.
- When used as a computer monitor, supports Windows 11/10/8.1/8/7.
- Onboard dual touch circuit, optional USB Type-C or I2C touch, more application scenarios.
- With 3.5mm audio and speaker interface, support HDMI audio output.
Featured Design
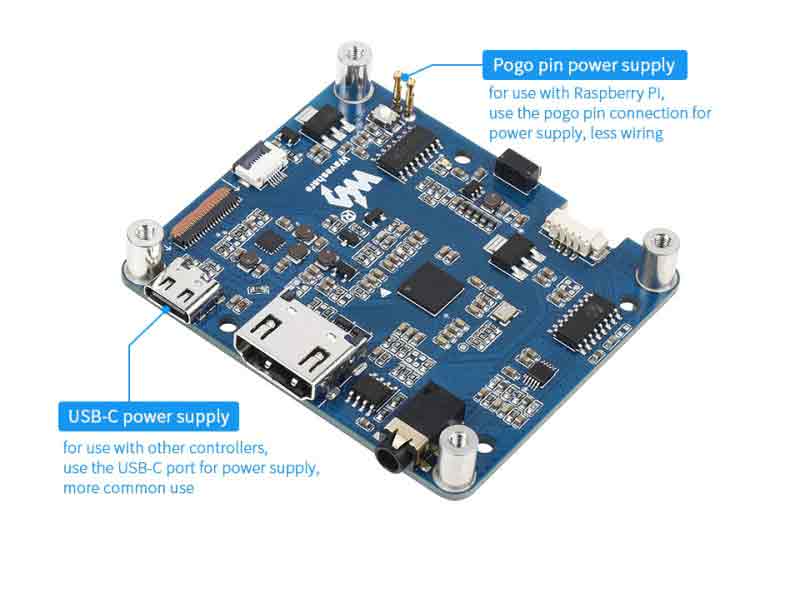
Use with Raspberry Pi
Hardware connection
1. Set the touch interface selector switch on the back of the screen to "I2C".
2. Fix the Raspberry Pi to the screen through the copper posts, and pay attention to aligning the position of the pogo pins.
3. Connect the HDMI port. Connect the HDMI connector to the screen and the HDMI port of the Raspberry Pi.
Note: Raspberry Pi Zero / Zero 2 W needs an additional HDMI cable for connection.
The hardware connection is as follows: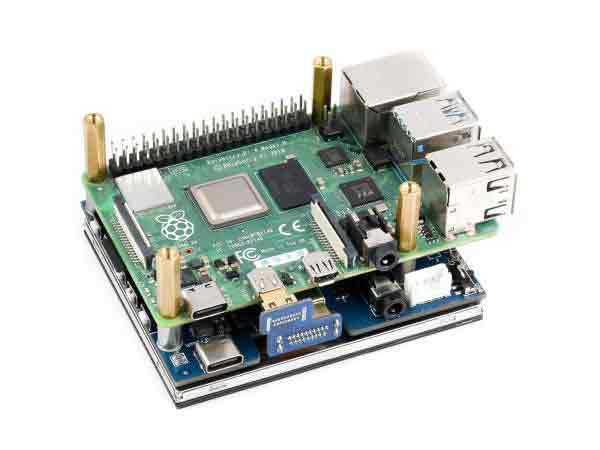
Software settings
To use the display with the Raspberry Pi, this LCD can support Raspberry Pi OS / Ubuntu / Kali and Retropie systems, you need to configure the resolution manually, otherwise it will cause a display exception. When the LCD works on the PC version of the Windows system, there is no such problem.
- Download the newest image from Raspberry Pi website.
- Unzip the image archive and get the .img file.
- Format the SD card by the SDFormatter software
- User the Win32DiskImager software, and write the .img file to the SD card.
- After writing, modify the config.txt file:
hdmi_group=2
hdmi_mode=87
hdmi_cvt 640 480 75 6 0 0 0
hdmi_drive=2
dtparam=i2c_arm=on
dtoverlay=waveshare-35dpi-3b
dtoverlay=waveshare-35dpi-4b- Download the 3.5inch HDMI LCD (E) file and extract 2 dtbo files. Copy these three files to the overlays directory (/boot/overlays/)
- Save and quit the TF card safely, and insert the TF card into the Raspberry Pi.
- Power on the Raspberry Pi and wait for more than ten seconds to display normally.
Use with PC
The LCD can work on PC version Windows 11 /10 / 8.1 / 8 / 7 system.
Instructions:
1) Switch the touch interface selector switch to "USB".
2) Connect the Power&Touch interface of the LCD to the USB interface of the PC.
3) Connect the Display port of the LCD to the HDMI port of the PC.
Hardware connection as shown: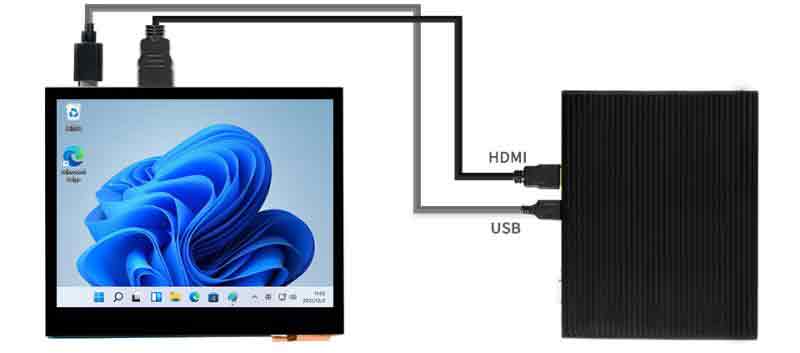
Use with Jetson Nano
1) Switch the touch interface selector switch to "USB".
2) Connect the Power&Touch interface of the LCD to the USB interface of the Jetson Nano.
3) Connect the Display port of the LCD to the HDMI port of the Jetson Nano.
Hardware connection as shown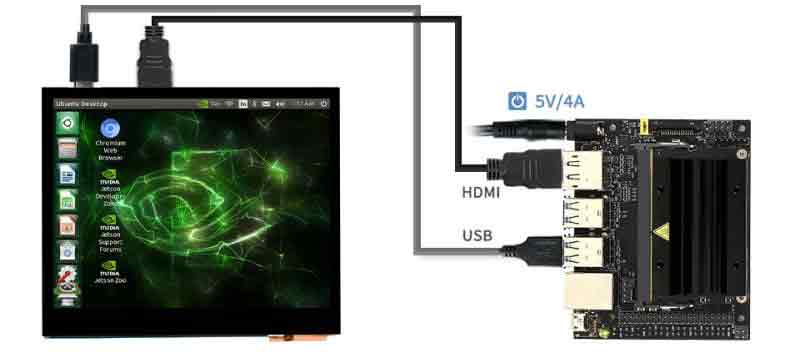
Use with Tinker Board 2
Hardware connection
1) Switch the touch interface selector switch to "USB".
2) Connect the Power&Touch interface of the LCD to the USB interface of the Tinker Board 2.
3) Connect the Display port of the LCD to the HDMI port of the Tinker Board 2.
Hardware connection as shown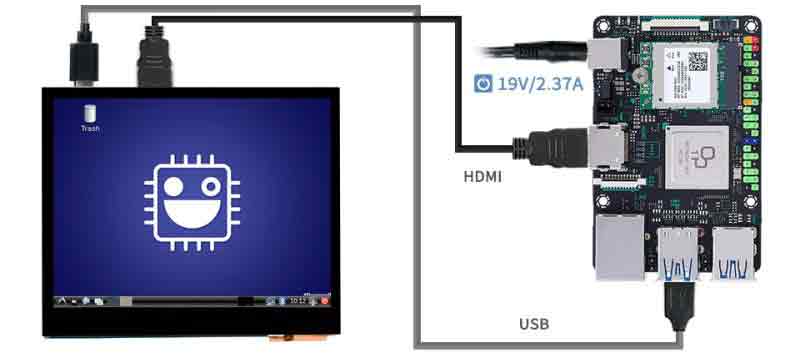
Software setting
Android and Debian systems for Tinker Board 2.
- Download the newest image from Tinker Board website.
- Unzip the image archive and get the .img file.
- Format the SD card by the SDFormatter software
- User the Win32DiskImager software, and write the .img file to the SD card.
- Save and quit the TF card safely, and insert the TF card into the Tinker Board 2.
- Power on the Tinker Board 2 and wait for more than ten seconds to display normally.


