- sales/support
Google Chat:---
- sales
+86-0755-88291180
- sales01
sales@spotpear.com
- sales02
dragon_manager@163.com
- support
tech-support@spotpear.com
- CEO-Complaints
zhoujie@spotpear.com
- sales/support
WhatsApp:13246739196
Raspberry Pi Pi Sensor Board User Guide
ADS1115
Test image version: 2021-12-02-raspios-buster-armhf.img Raspberry Pi 4B
Prepare
Enable I2C
sudo nano /boot/config.txt

Make sure I2C is turned on, then reboot the system
sudo reboot
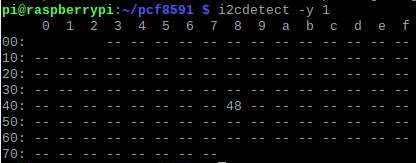
After reboot. 48 address can be detected using I2C address detection command
i2cdetect -y 1
Need to switch to python 3 (if you are already using python3.x, you don't need to switch, ignore the following steps)
python -V

sudo rm /usr/bin/python
sudo ln -s /usr/bin/python3.7 /usr/bin/python
python -V

library installation
git clone https://github.com/adafruit/Adafruit_Python_ADS1x15.git
cd Adafruit_Python_ADS1x15
sudo python setup.py install
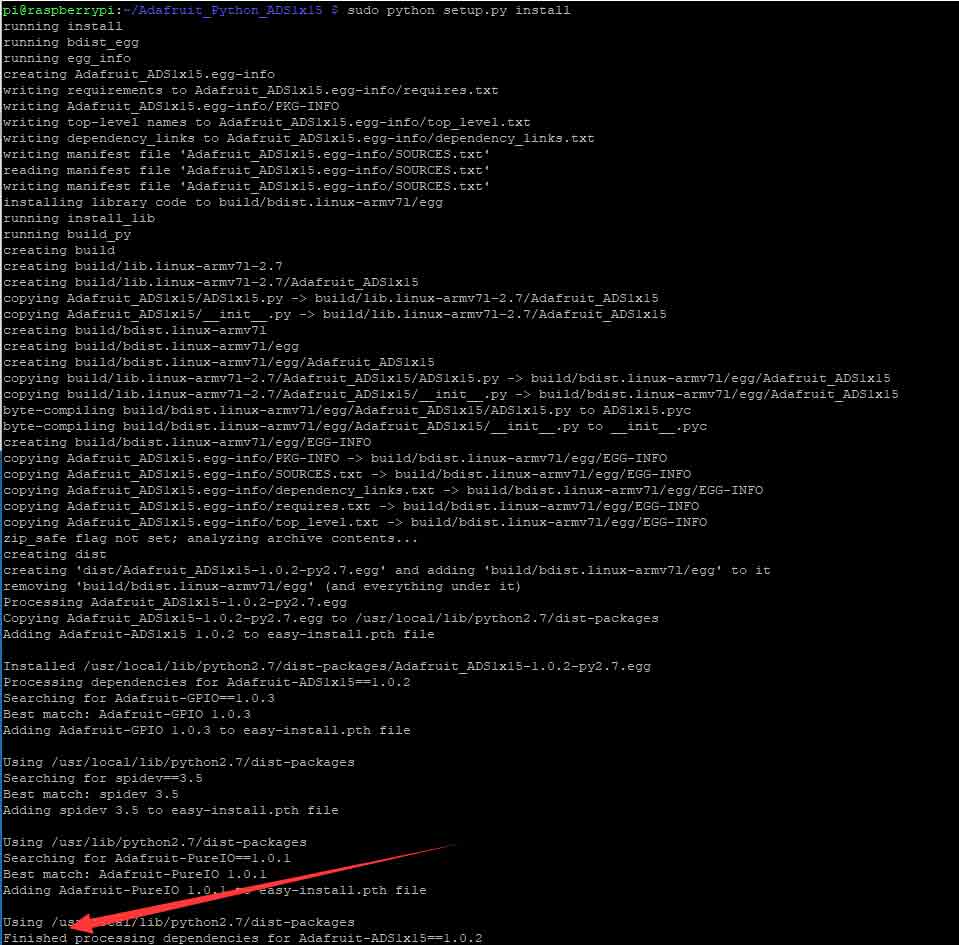
The installation is complete
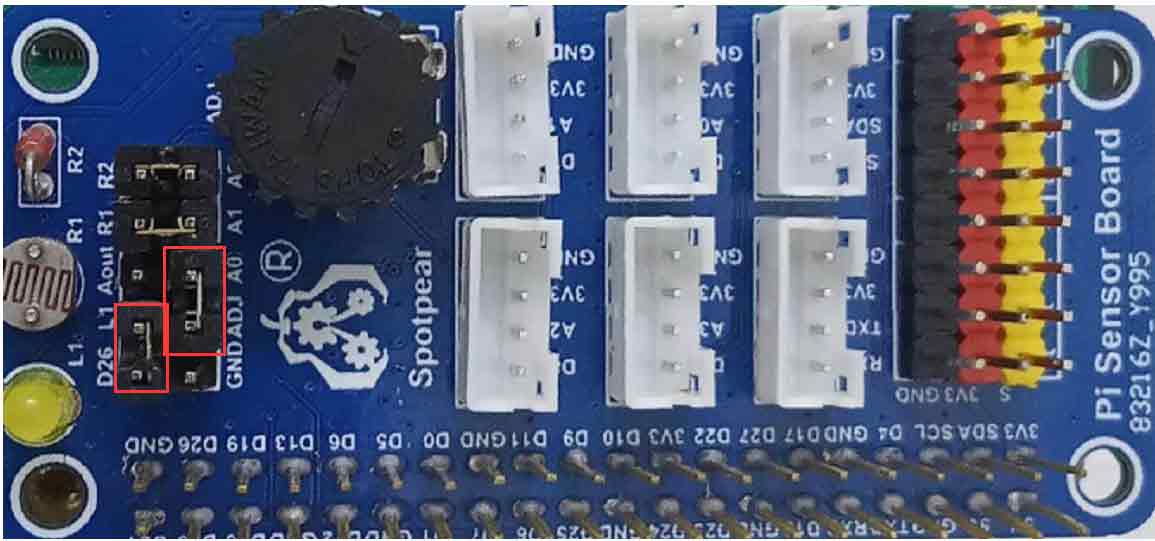
A0-ADJ sliding rheostat
Connection
Make sure ADJ is connected to A0 D26 to L1
Run the code
cd ads1115/examples/
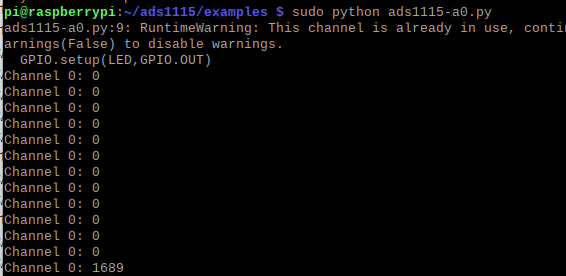
sudo python ads1115-a0.py
Phenomenon
Twist the potentiometer. The printed AD value changes. The brightness of LEDs, etc. changes as the AD value changes
Principle explanation
When the potentiometer is twisted, the voltage division value will change. The Raspberry Pi reads the voltage division value of the potentiometer through PCF8591. Then write the voltage division value to the PWM output to control the LED light
Video
A1-R1 Photoresistor
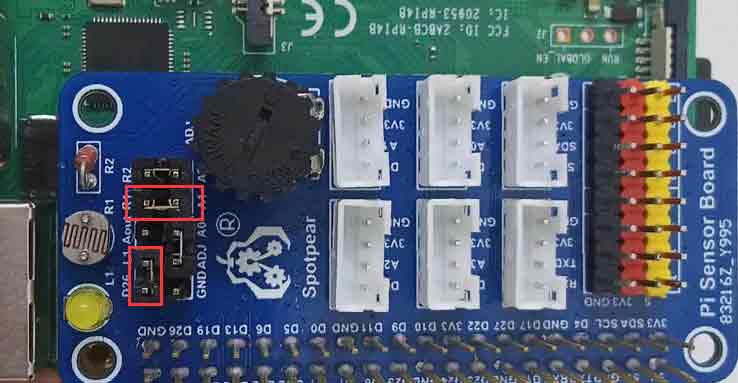
Connection
Make sure R1 is connected to A1 D 26 to L1
Run the code
cd ads1115/examples/
sudo python ads1115-a1.py
Phenomenon
Cover the photoresistor. AD value changes. LED light off
Principle explanation
When the photoresistor receives different light intensity, the partial pressure value will be different. Read the AD value change through the Raspberry Pi to judge the light intensity
Video
A1-R2 Thermistor
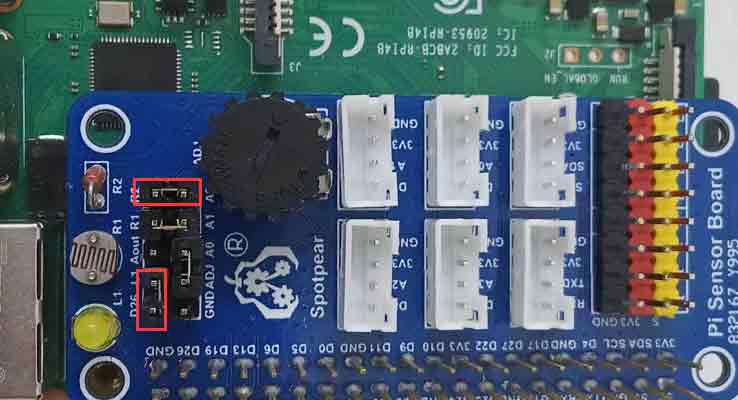
Connection
Make sure R2 is connected to A2 D26 to L1
Run the code
cd ads1115/examples/
sudo python ads1115-a2.py

Phenomenon
Thermistor touches different heat sources. AD value changes. LED light changes on and off
Note: In this experiment, hand touch is used. The temperature change is relatively small. You can use a cup with warm water to contact the thermistor. The AD value will change more. By observing the AD value change interval. LED light display In addition, the temperature environment of the experiment is different. It may cause different experimental results. It is necessary to observe the AD value change range. Select the appropriate AD value to turn off the LED light display
Principle explanation
When the thermistor receives different heat sources, the partial pressure value will be different. Read the AD value change through the Raspberry Pi to judge the temperature change
Video
ADC - 4 channels
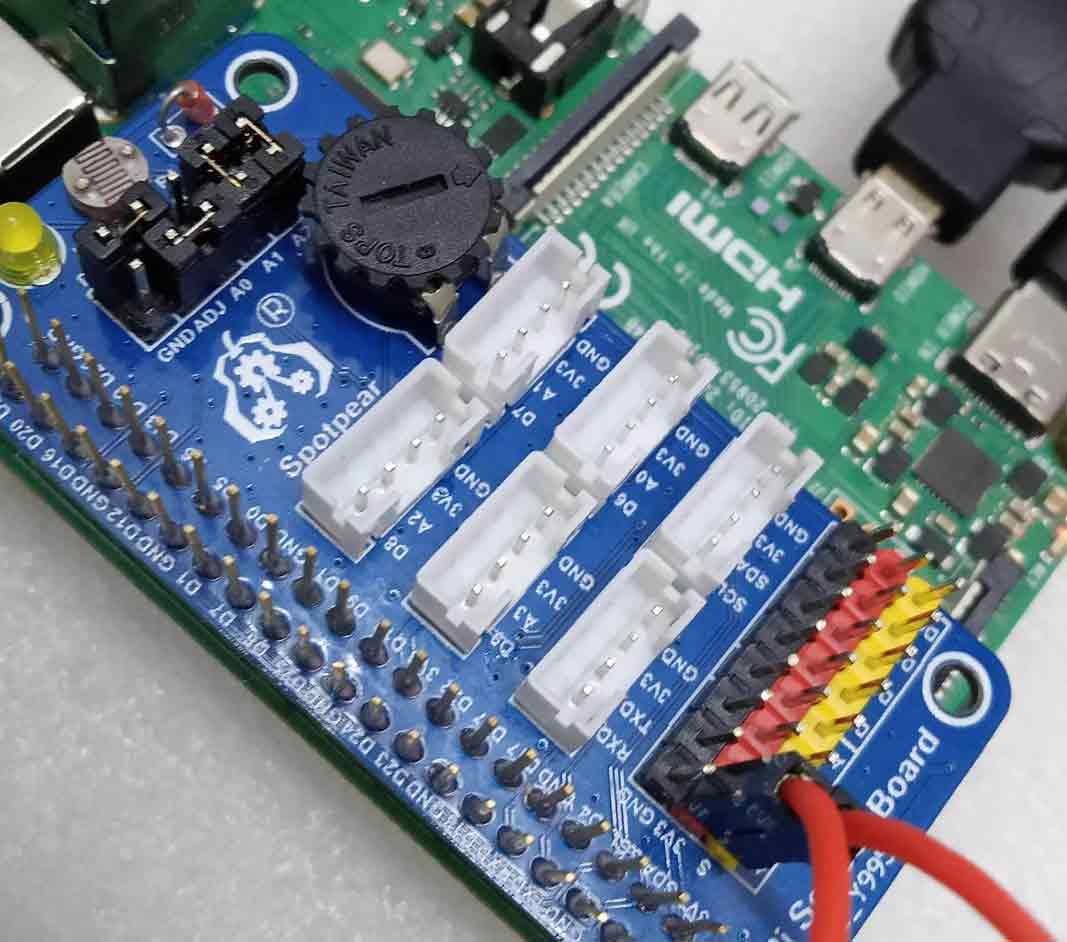
Connection
Run the code
cd ads1115/examples/
sudo python ads1115-4.py
Phenomenon
4 channels print AD value

Principle explanation
The Raspberry Pi communicates with the AD acquisition chip through I2C. The AD value of each channel can be read
Video
PCF8591
Test image version: 2022-04-04-raspios-bullseye-armhf.img Raspberry Pi 4B
Prepare
Enable I2C
sudo nano /boot/config.txt

Make sure I2C is turned on, then reboot the system
sudo reboot
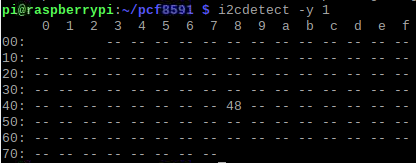
After reboot. 48 address can be detected using I2C address detection command
i2cdetect -y 1
A0-ADJ sliding rheostat
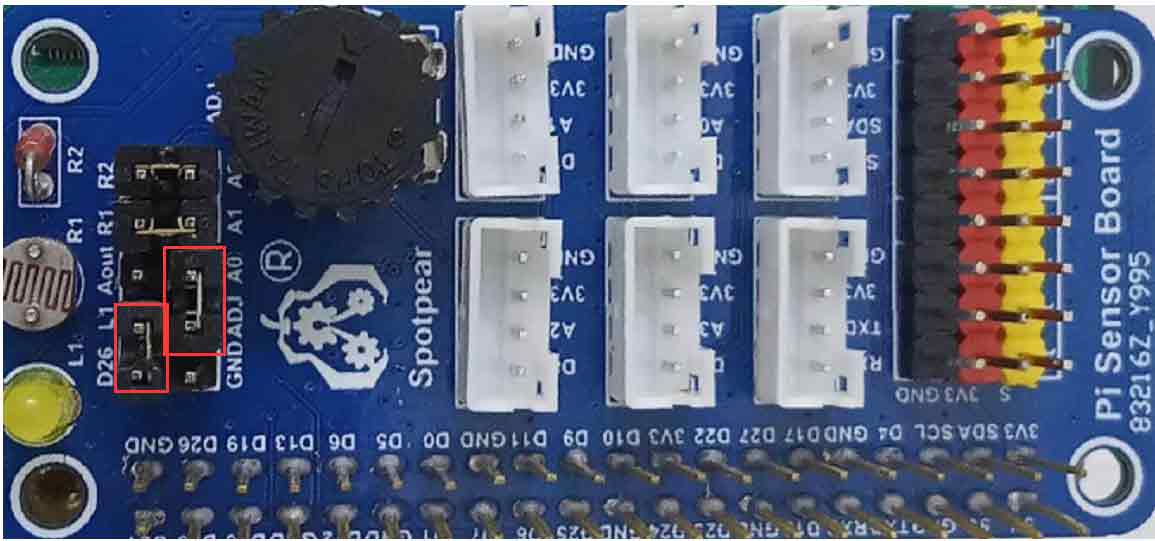
Connection
Make sure ADJ is connected to A0 D26 to L1
Run the code
cd pcf8591/
sudo python pcf8591_a0-adj.py

Phenomenon
Twist the potentiometer. The printed AD value changes. The brightness of LEDs, etc. changes as the AD value changes
Principle explanation
When the potentiometer is twisted, the voltage division value will change. The Raspberry Pi reads the voltage division value of the potentiometer through PCF8591. Then write the voltage division value to the PWM output to control the LED light
Video
A1-R1 Photoresistor
Connection
Make sure R1 is connected to A1 D26 to L1
Run the code
cd pcf8591/
sudo python pcf8591_a1.py

Phenomenon
Cover the photoresistor. AD value changes. LED light off
Principle explanation
When the photoresistor receives different light intensity, the partial pressure value will be different. Read the AD value change through the Raspberry Pi to judge the light intensity
Video
A1-R2 Thermistor
Connection
Make sure R2 is connected to A2 D26 to L1

Run the code
cd pcf8591/
sudo python pcf8591_a2.py

Phenomenon
Thermistor touches different heat sources. AD value changes. LED light changes on and off
Note: In this experiment, hand touch is used. The temperature change is relatively small. You can use a cup with warm water to contact the thermistor. The AD value will change more. By observing the AD value change interval. LED light display In addition, the temperature environment of the experiment is different. It may cause different experimental results. It is necessary to observe the AD value change range. Select the appropriate AD value to turn off the LED light display
Principle explanation
When the thermistor receives different heat sources, the partial pressure value will be different. Read the AD value change through the Raspberry Pi to judge the temperature change
Video
ADC - 4 channels
Connection

Run the code
cd pcf8591/
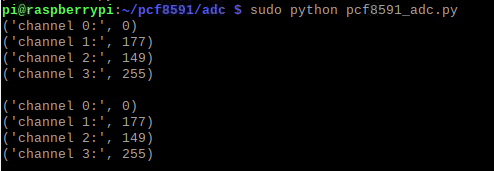
sudo python pcf8591_adc.py
Phenomenon
4 channels print AD value
Principle explanation
PCF8591 is a single-supply, low-power 8-bit CMOS data acquisition device with 4 analog inputs, one output and a serial I2C bus interface, the Raspberry Pi communicates through I2C. Can read the AD value of each channel
Video
DAC
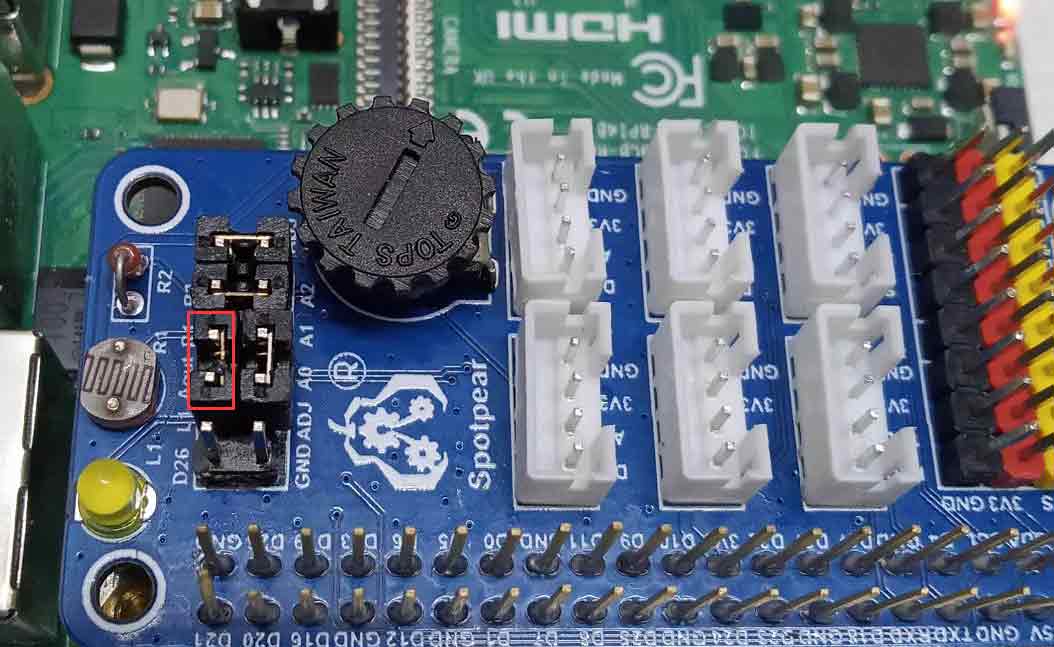
Connection
L1 jumper to Aout
Run the code
cd pcf8591/
sudo python pcf8591_dac.py

Phenomenon
The LED light changes with the output value of the DAC. The brightness changes
Principle explanation
The value written to the DAC register by the Raspberry Pi is different. The output voltage value of the Aout pin changes accordingly. . So as to control the brightness of the LED
Video
PCF8591+ sensor
Prepare
Enable I2C
sudo nano /boot/config.txt

Make sure I2C is turned on, then reboot the system
sudo reboot
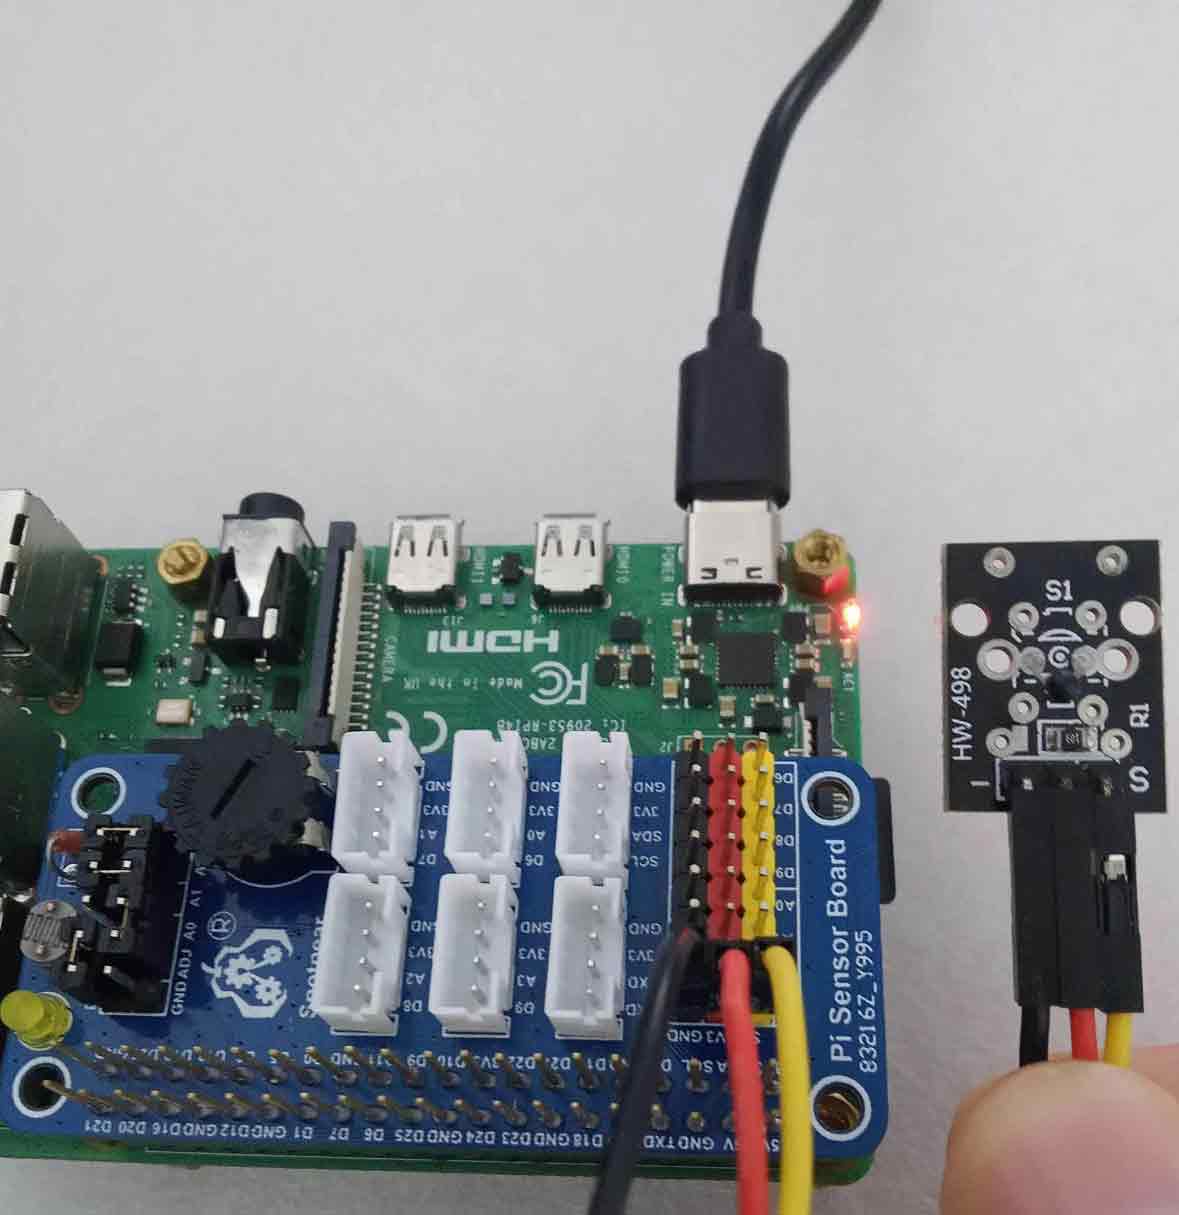
498 - temperature sensitive
Connection
Run the code
cd sensor/
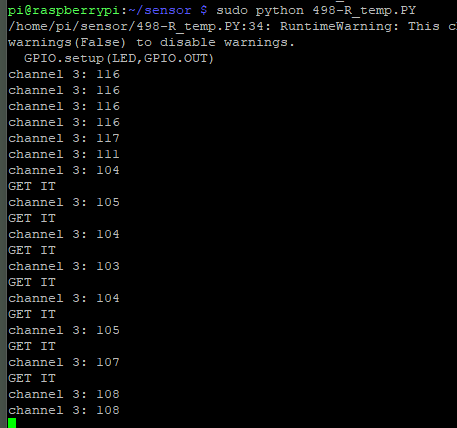
sudo python 498-R_temp.py
Phenomenon
Touch thermistor.AD value conversion
Principle explanation
The resistance value of the thermistor will change with the change of temperature. By dividing the voltage, the AD value of the thermistor with different resistance values at different temperatures can be obtained. Through the AD acquisition interface, the AD value change is collected.
Video
512 - Buzzer
Connection
First tear off the sticker on the buzzer. The sound will be louder
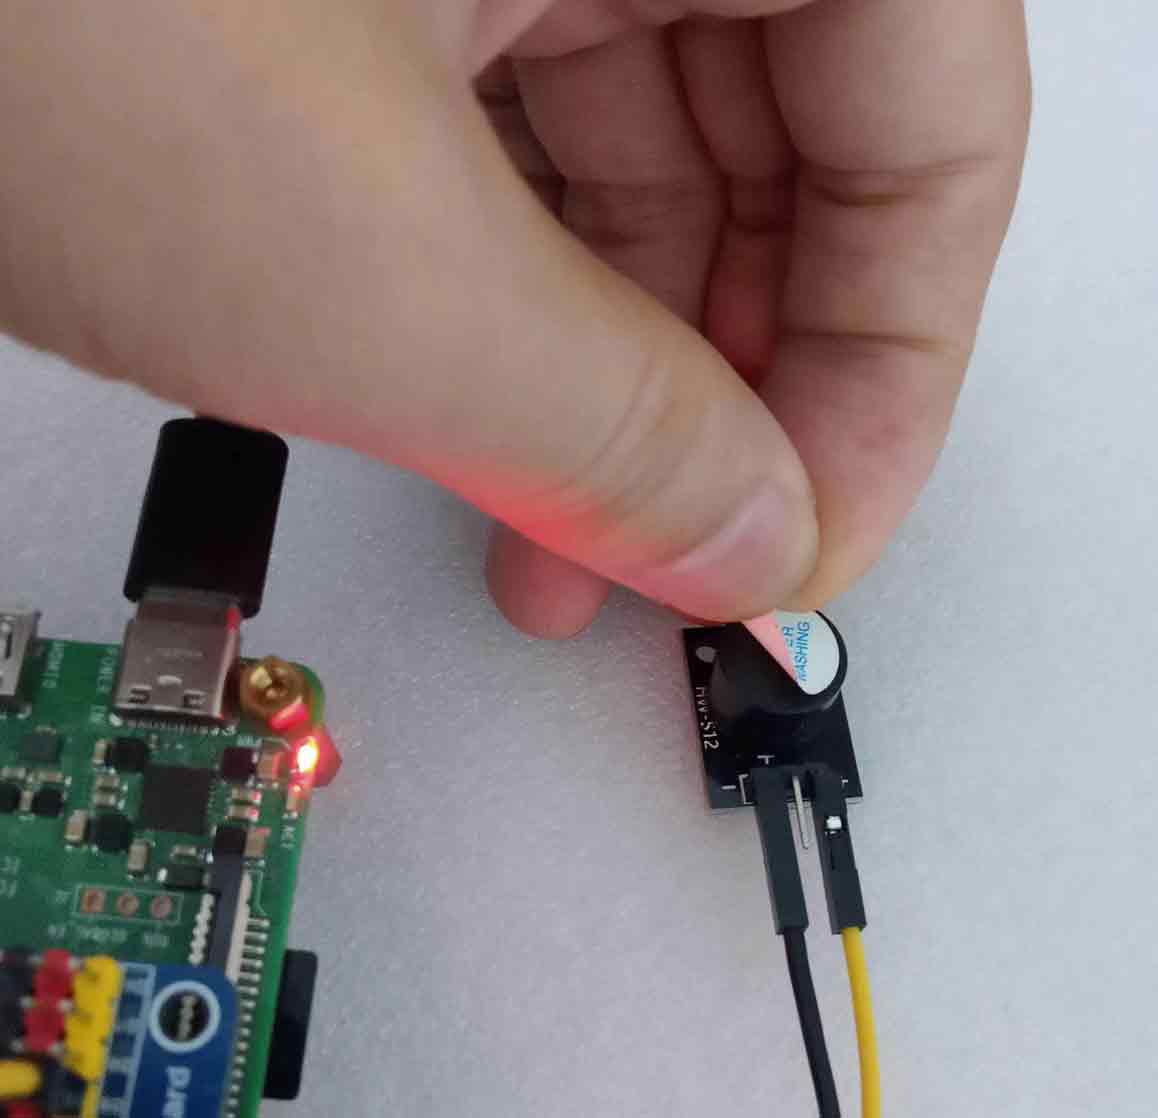
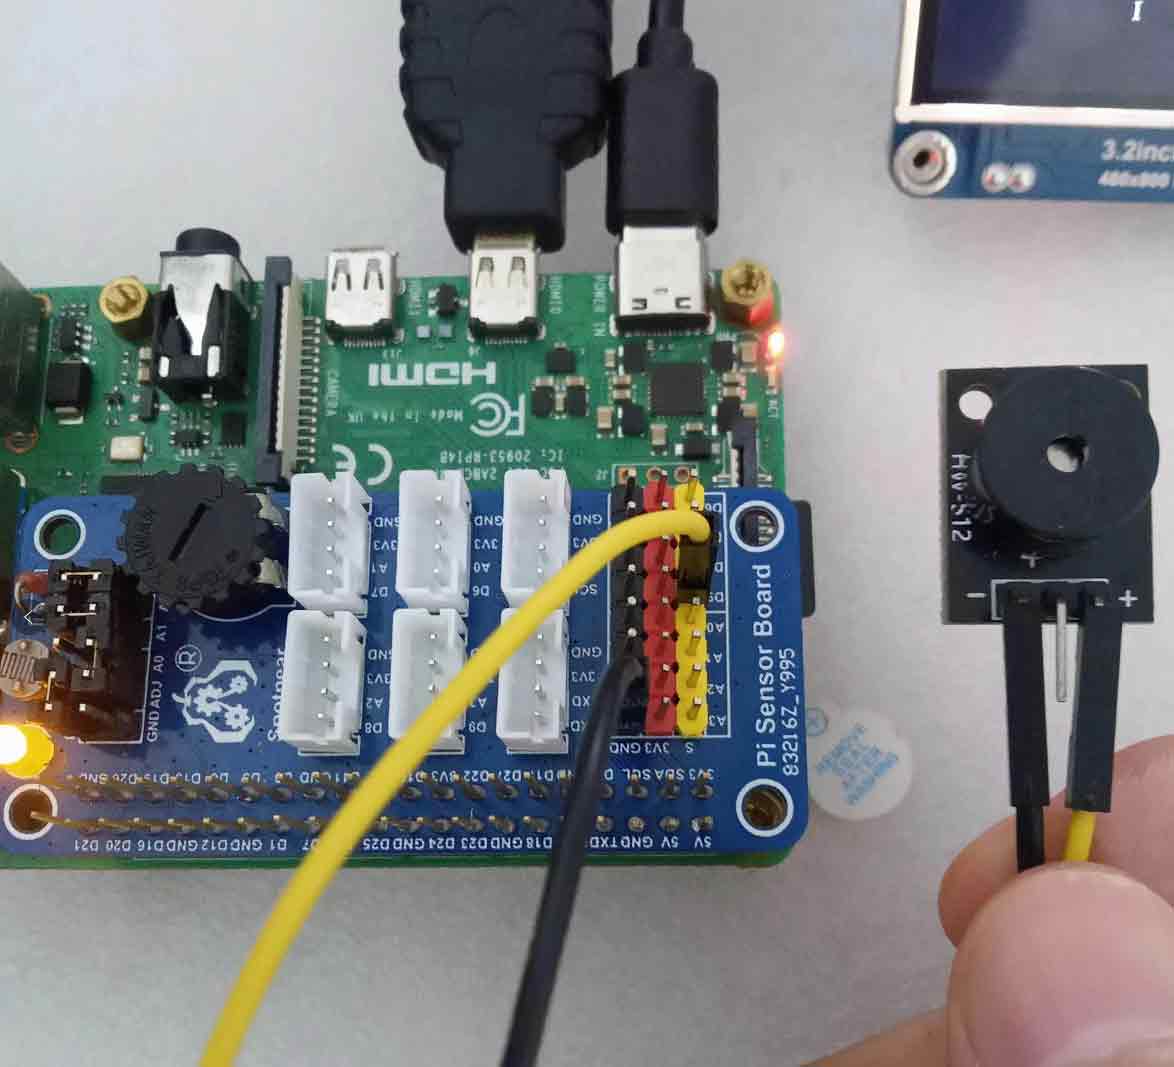
Run the code
cd sensor/
sudo python 512-buz.py

Phenomenon
The sound of the speaker varies from loud to small, and then from small to large.
Onboard LED light. Brightness changes
Principle explanation
The GPIO pins of the Raspberry Pi output PWM with different duty cycles. This controls the sound of the buzzer
Video
490-Infrared Receiver Remote Control
Connection
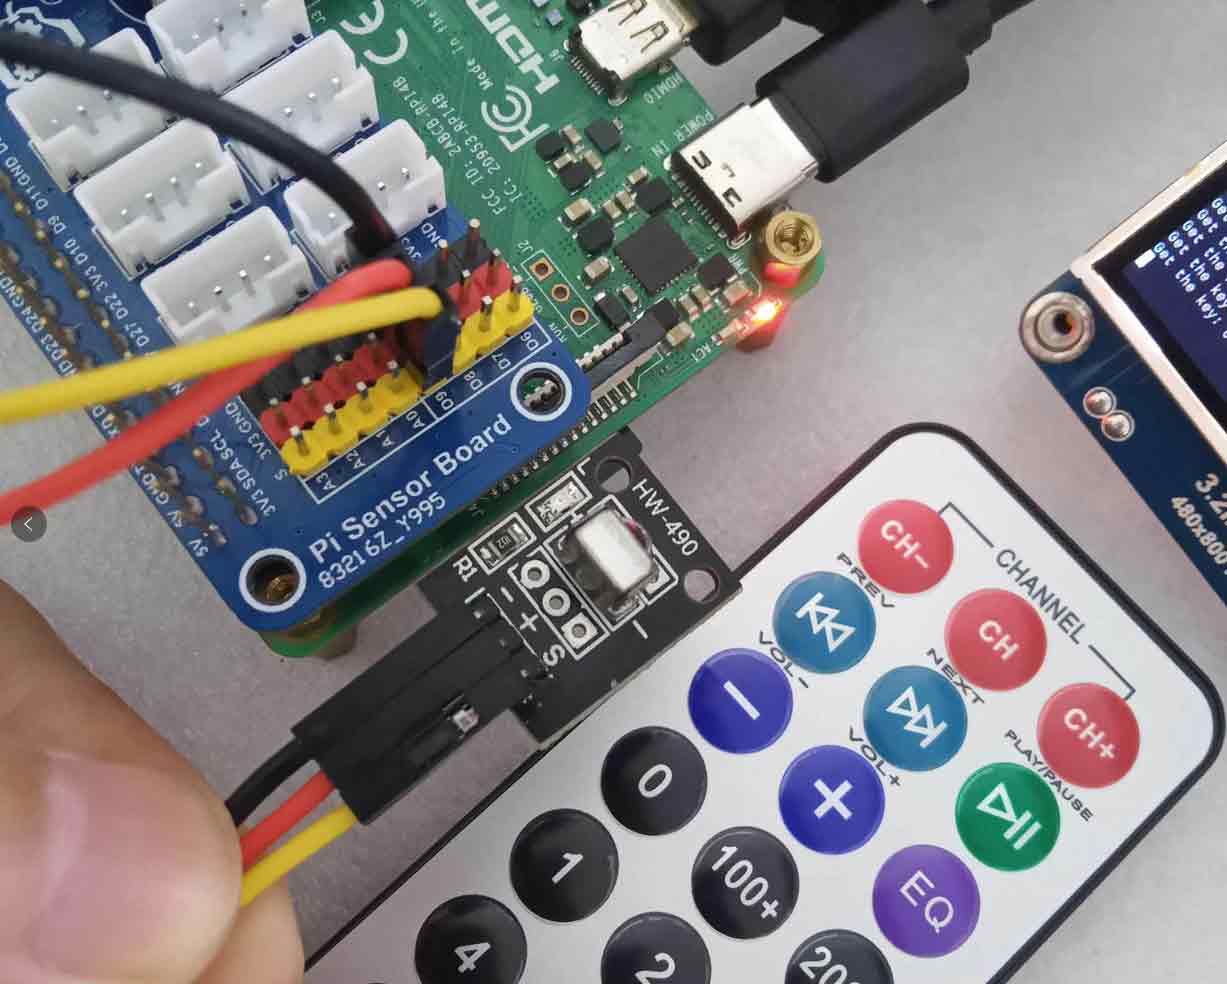
To be used with the remote control
Run the code
cd sensor/
sudo python 490-ir.py

Phenomenon
Press the remote control to identify different key ID codes
Principle explanation
After the infrared receiver receives infrared light of a certain frequency, it will output a low level. Through this principle, we read the high and low level data of the infrared receiving tube through the GPIO pin of the Raspberry Pi to print out the key value of the infrared remote control
Video
506-ds18b20 high precision temperature sensor
Connection method: Note that the sensor S pin is connected to the D4 pin of the Raspberry Pi
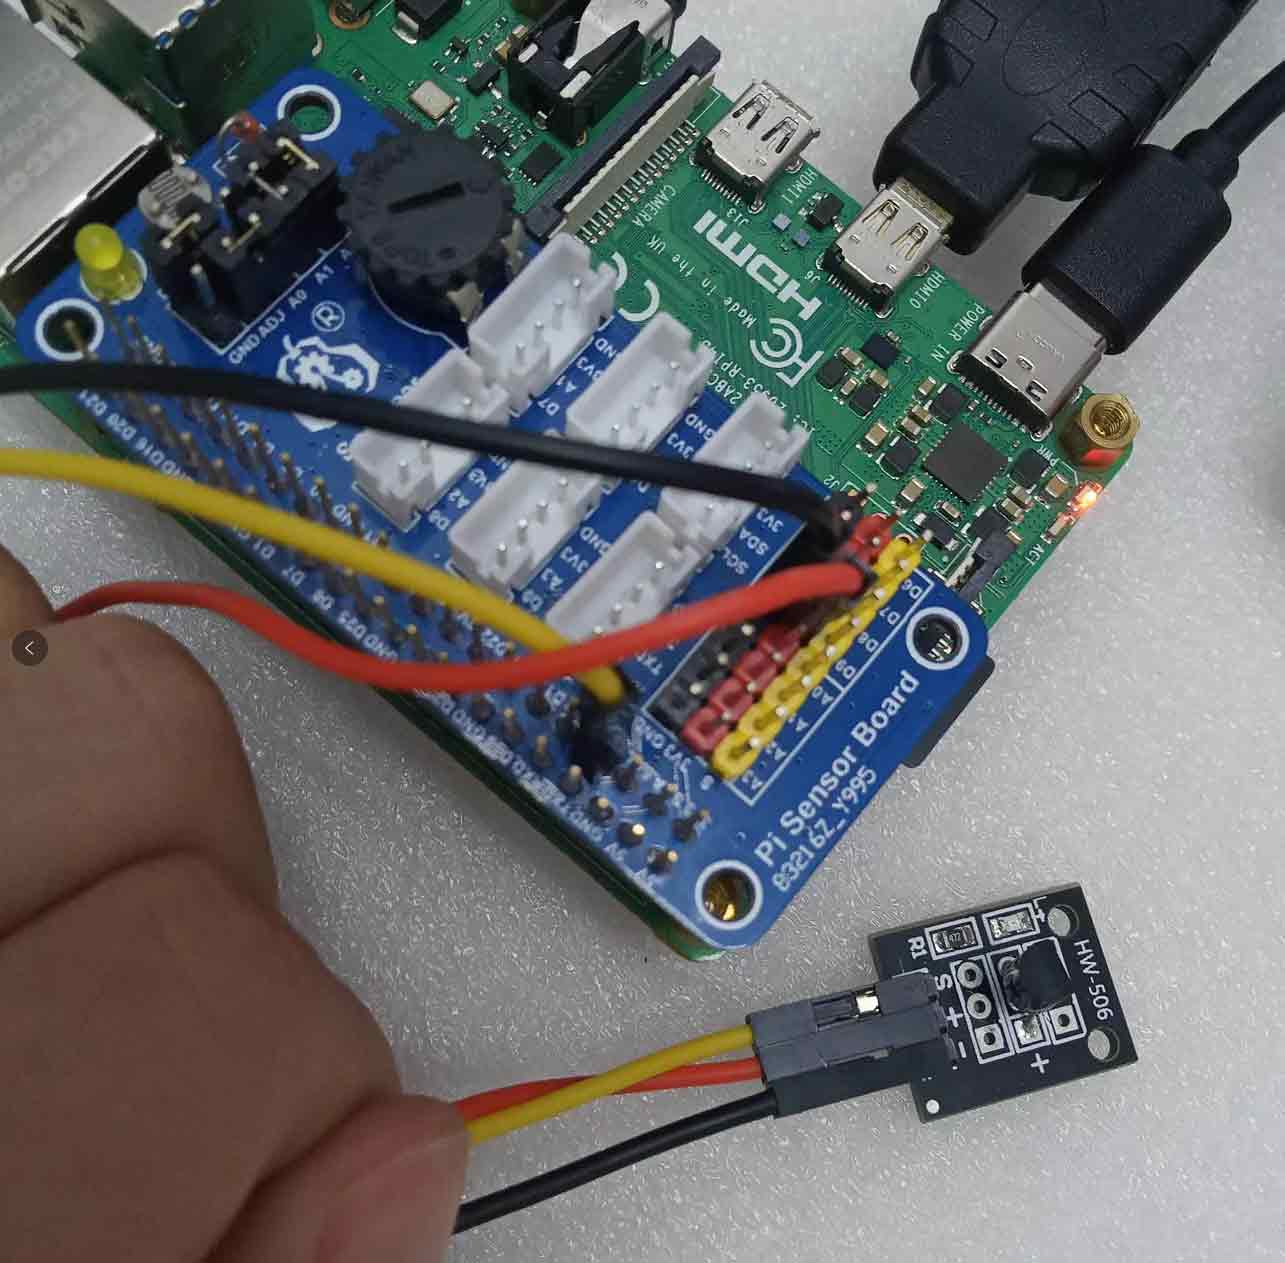
Run the code
The DS18B20 program needs to add the sentence dtoverlay=w1-gpio-pullup at the end of the Raspberry Pi /boot/config.txt file, and it can be used after the restart takes effect.
sudo nano /boot/config.txt
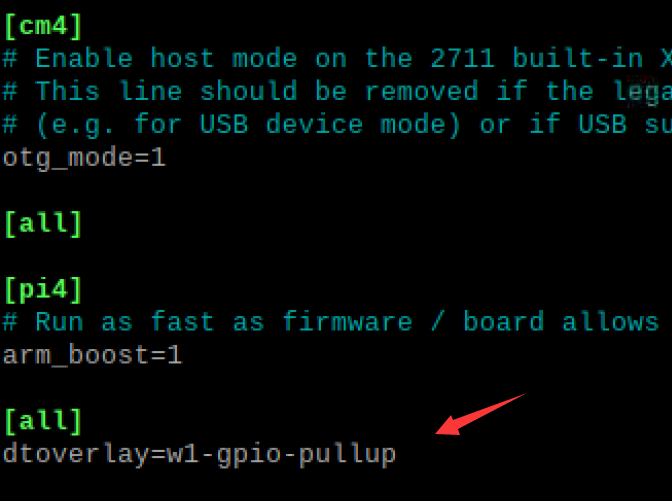
cd sensor/
sudo python 506-ds18b20.py

Phenomenon
Real-time measurement of the current ambient temperature
Principle explanation
Using a single bus communication protocol, the Raspberry Pi communicates with the DS18B20 to read the DS18B20 temperature register. To get the real-time temperature
Video
483-key key sensor
Connection
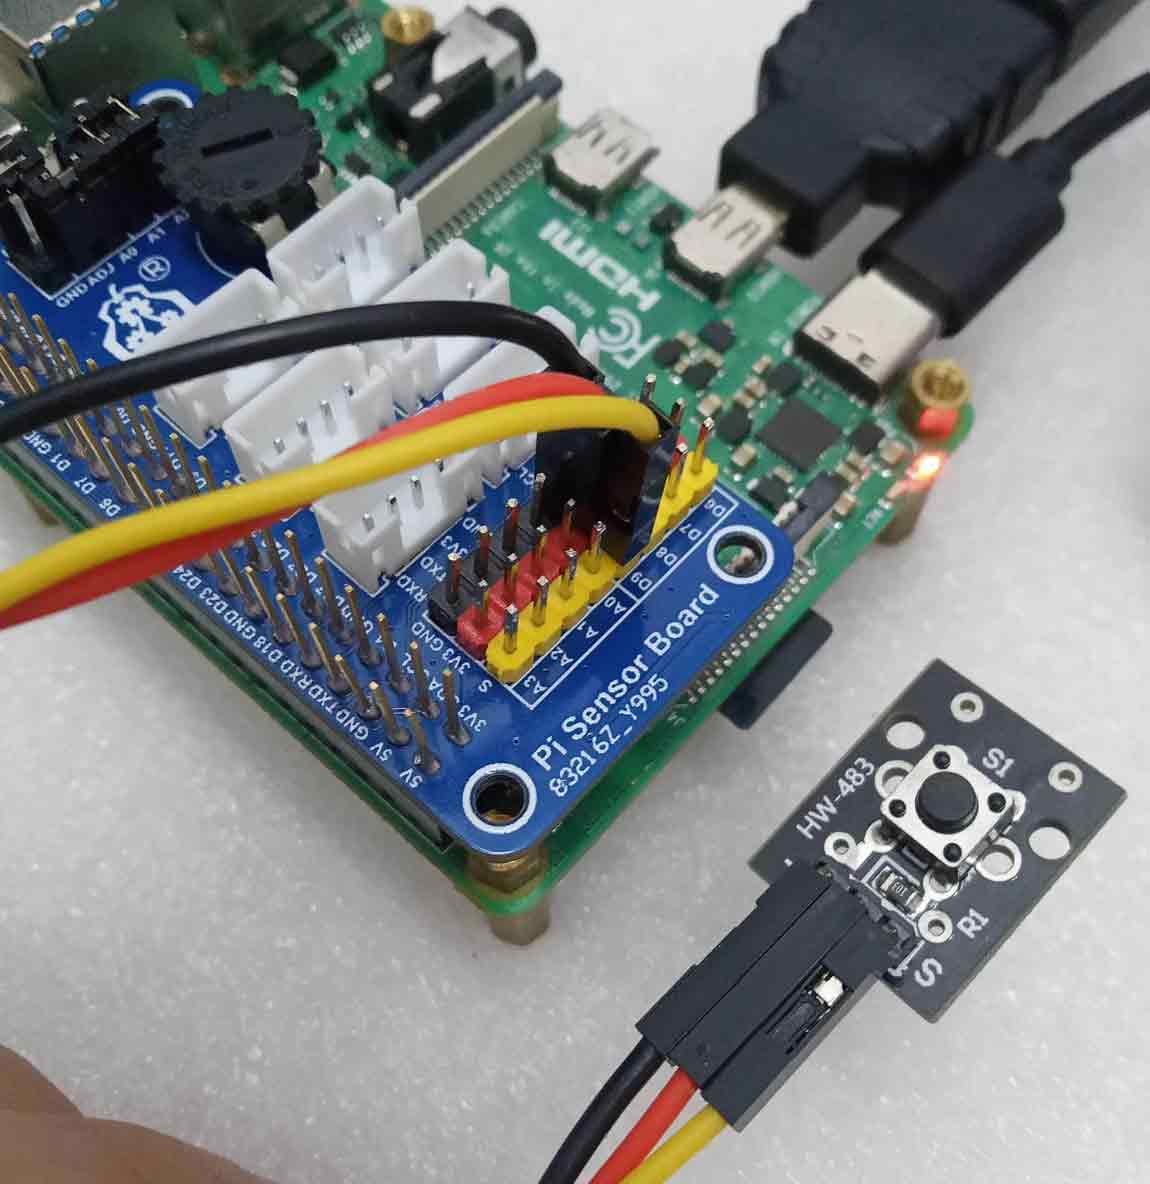
Run the code
cd sensor/
sudo python 483-key.py

Phenomenon
Press the button, you can print out the recognized button
Principle explanation
The Raspberry Pi pins are set to the input state. When it is recognized that the key is pressed as a low level. The output key is recognized
Video
501 - Tilt Sensor
Connection
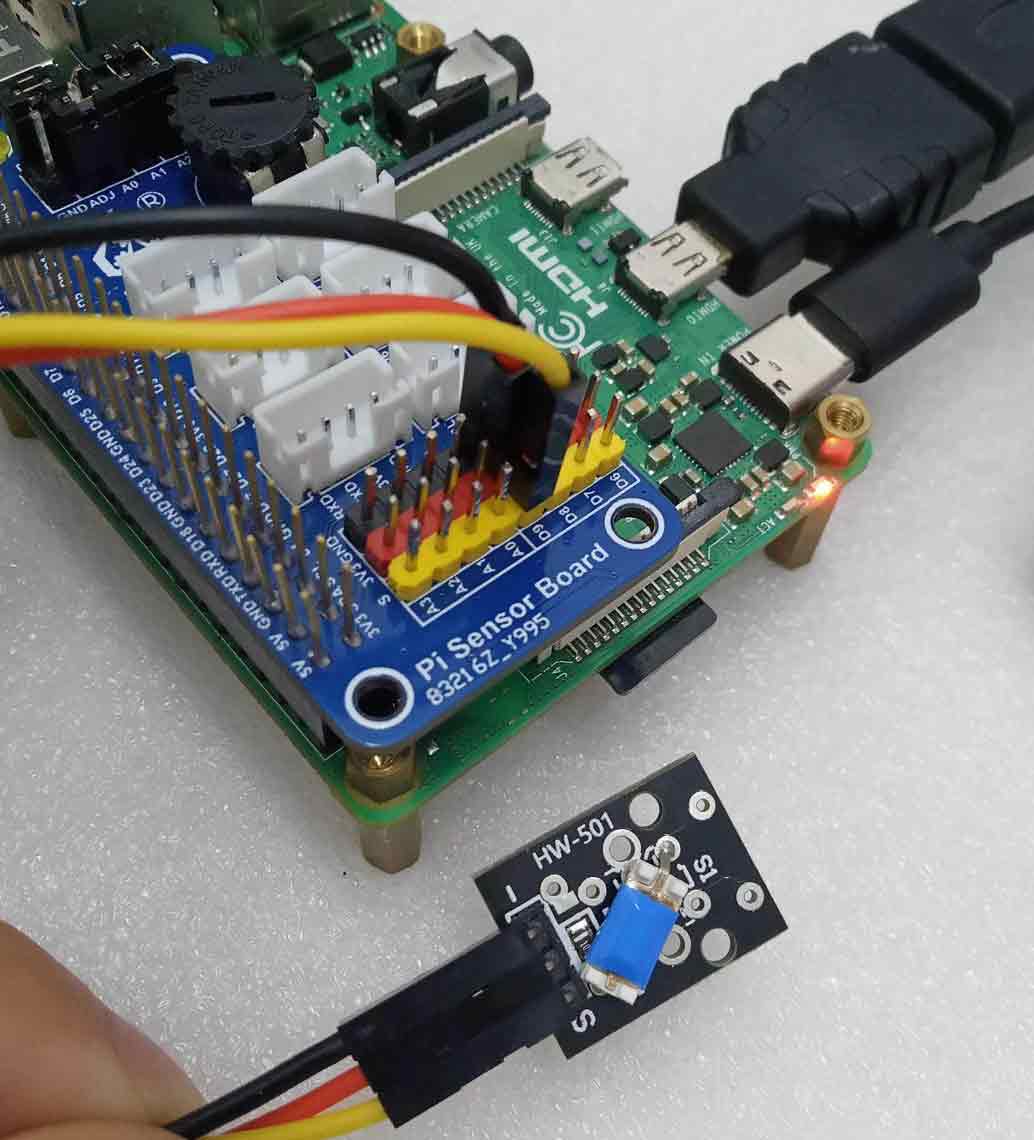
Run the code
cd sensor/
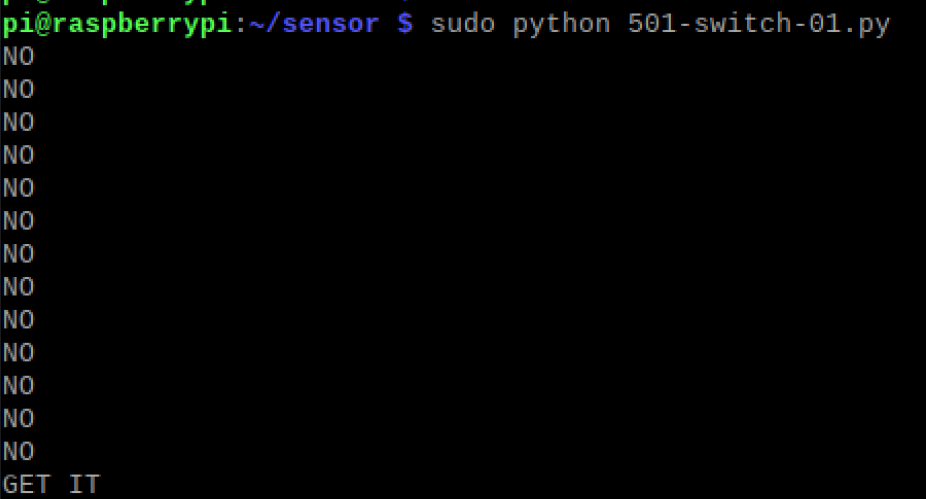
sudo python 501-switch-01.py
Phenomenon
Tilt switch Switch tilt can be detected
Principle explanation
When the internal switch of the tilt switch is tilted, it will output a low level. The Raspberry Pi pin input detects a low level to identify whether it is tilted
Video
505-mercury switch
Connection
Run the code
cd sensor/
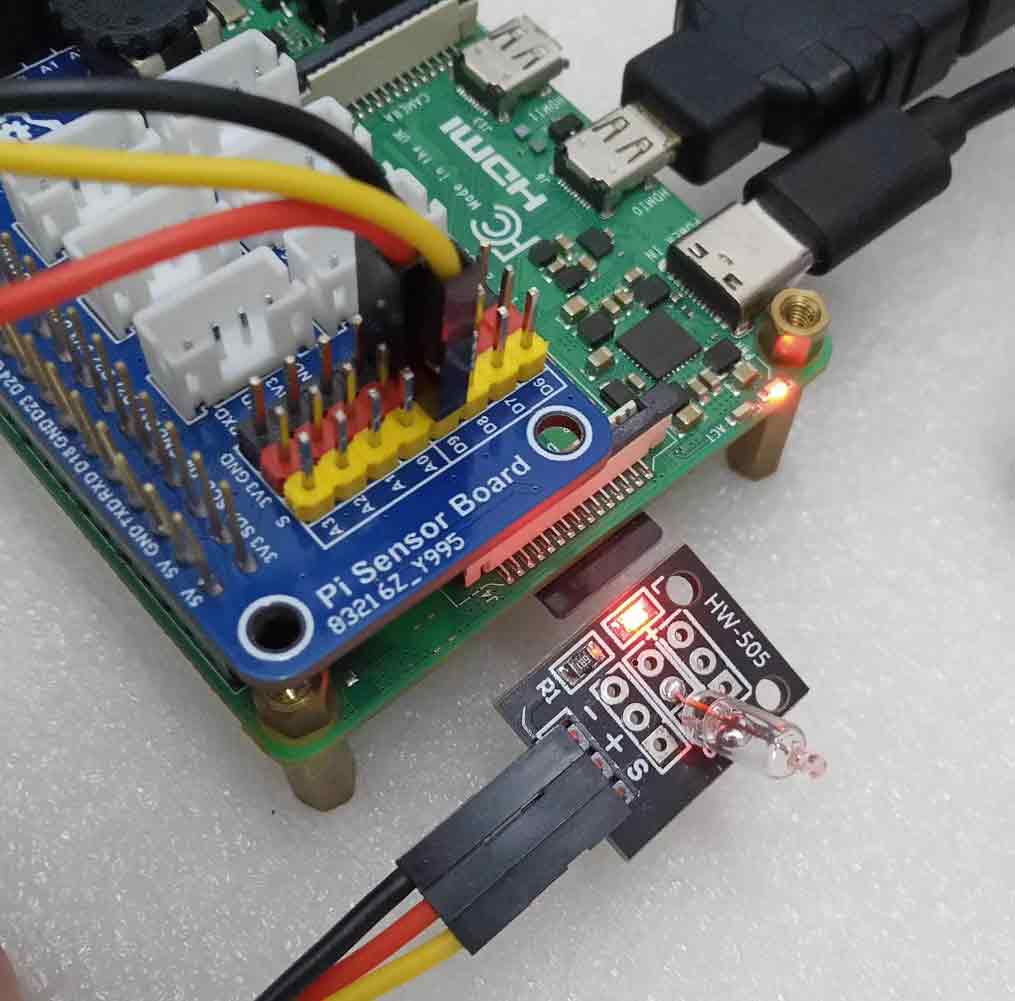
sudo python 505-switch-quicksilver.py

Phenomenon
Tilt the module. Let the mercury move. Can print the switch status
Principle explanation
The mercury inside the mercury switch can control whether the mercury short-circuits the internal 2 iron wires with the movement of the module, thereby outputting a low level. The Raspberry Pi pin input detects a low level to identify it
Video
487-light light blocking sensor
Connection
Run the code
cd sensor/
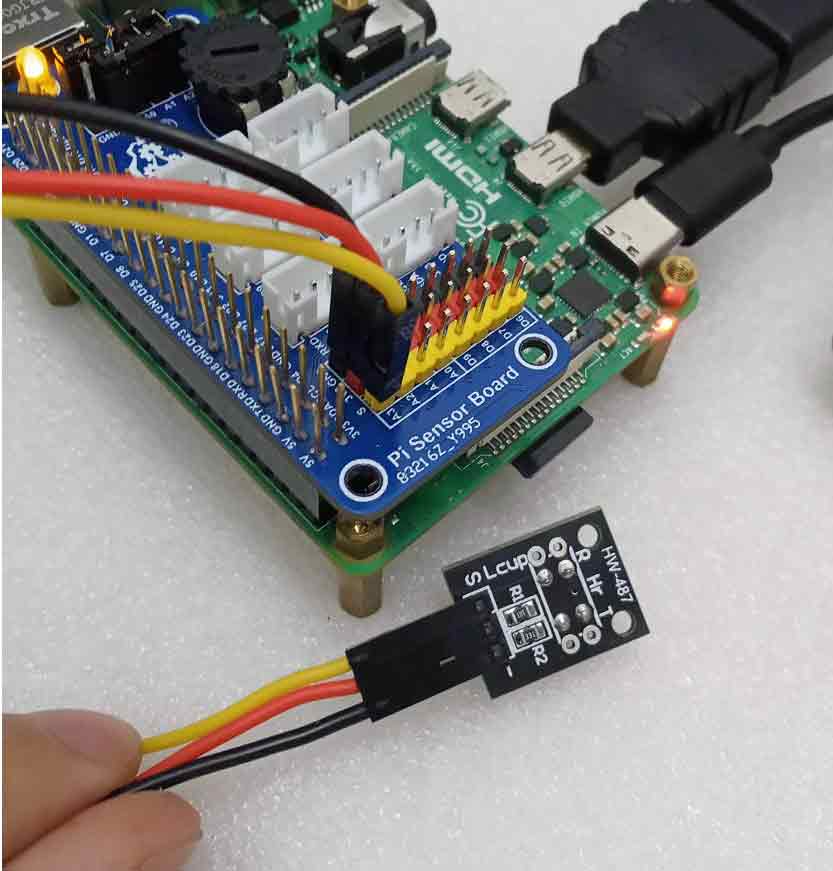
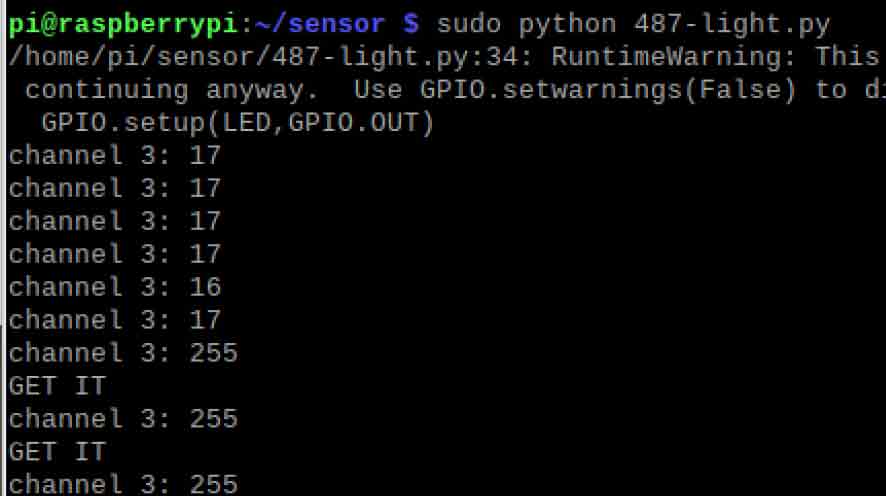
sudo python 487-light.py
Phenomenon
Use a piece of paper, etc. in the middle of the blocking sensor. It will recognize
Principle explanation
When a material is inserted into the gap of the light blocking detector, the blocker will initially be at a high level. Using AD or GPIO can identify the discipline status. Thus, it can identify whether there is an object blocking it. It can be used in the trolley gear test
Video
500 - Knock Sensor
Connection
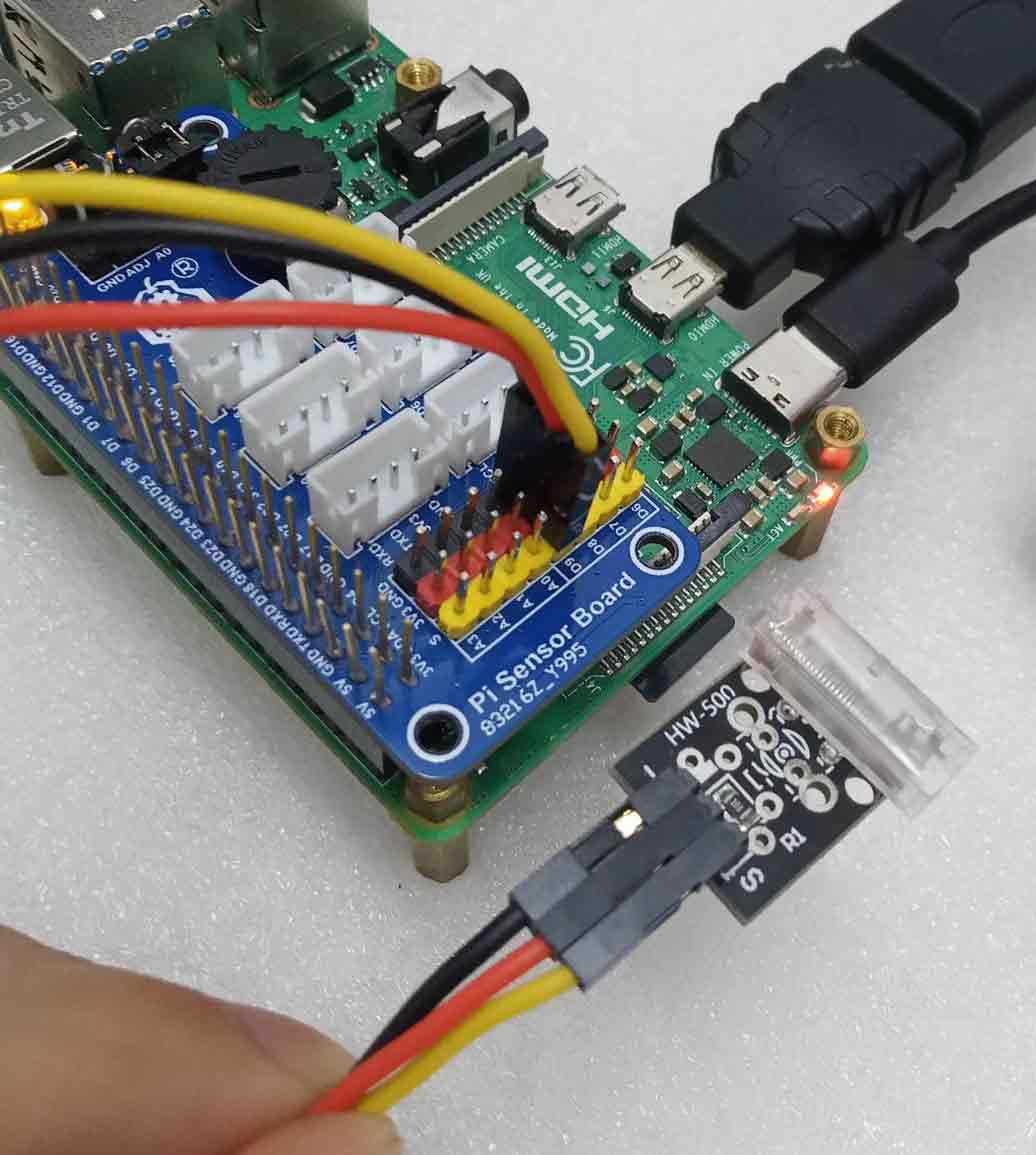
Run the code
cd sensor/
sudo python 500-tap.py

Phenomenon
Knock module, can recognize the knock
Principle explanation
When the knock module receives a knock, it will send out a low-level pulse. Use the Raspberry Pi GPIO to identify the low level to identify the knock signal
Video
513-Shock sensor
Connection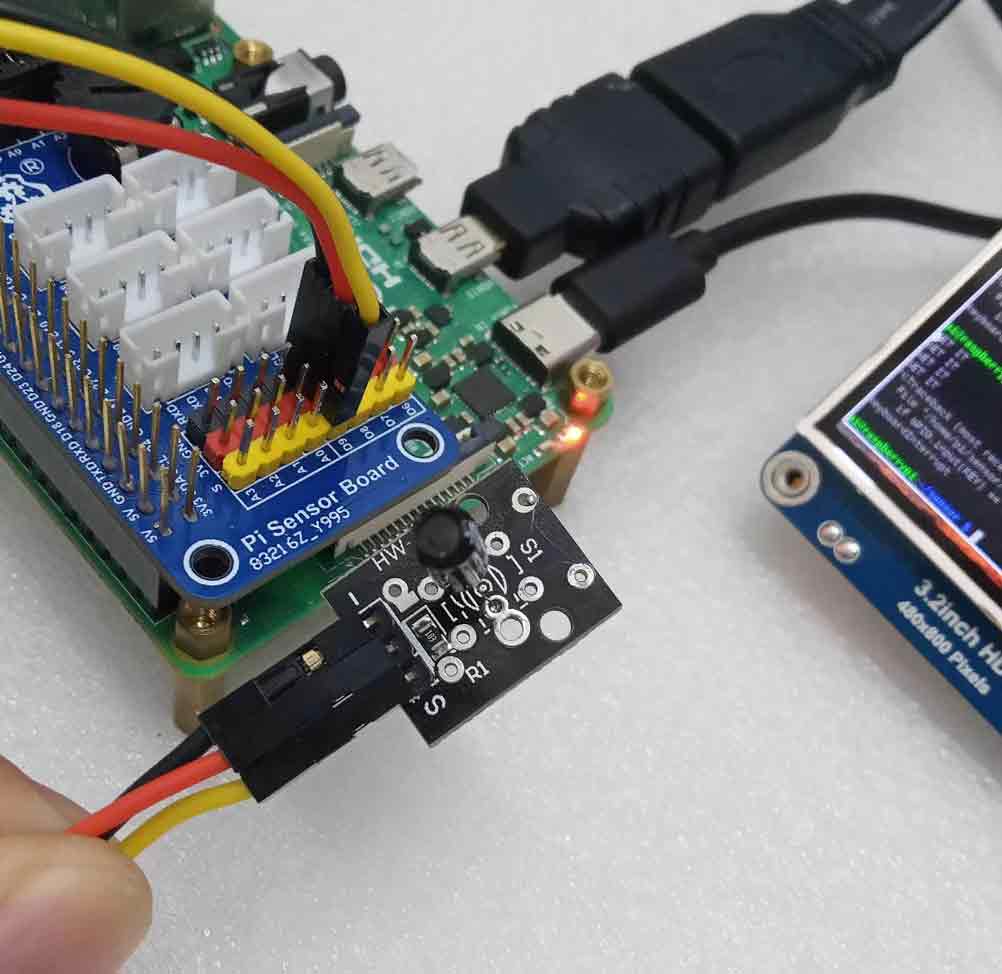
Run the code
cd sensor/
sudo python 513-shock.py

Phenomenon
Vibration module, can recognize the tap
Principle explanation
When vibrating the vibration module, the module will send a low-level pulse. Use the Raspberry Pi GPIO to identify the low level to identify the vibration signal
Video
495-Hall Magnetic Sensor
Connection
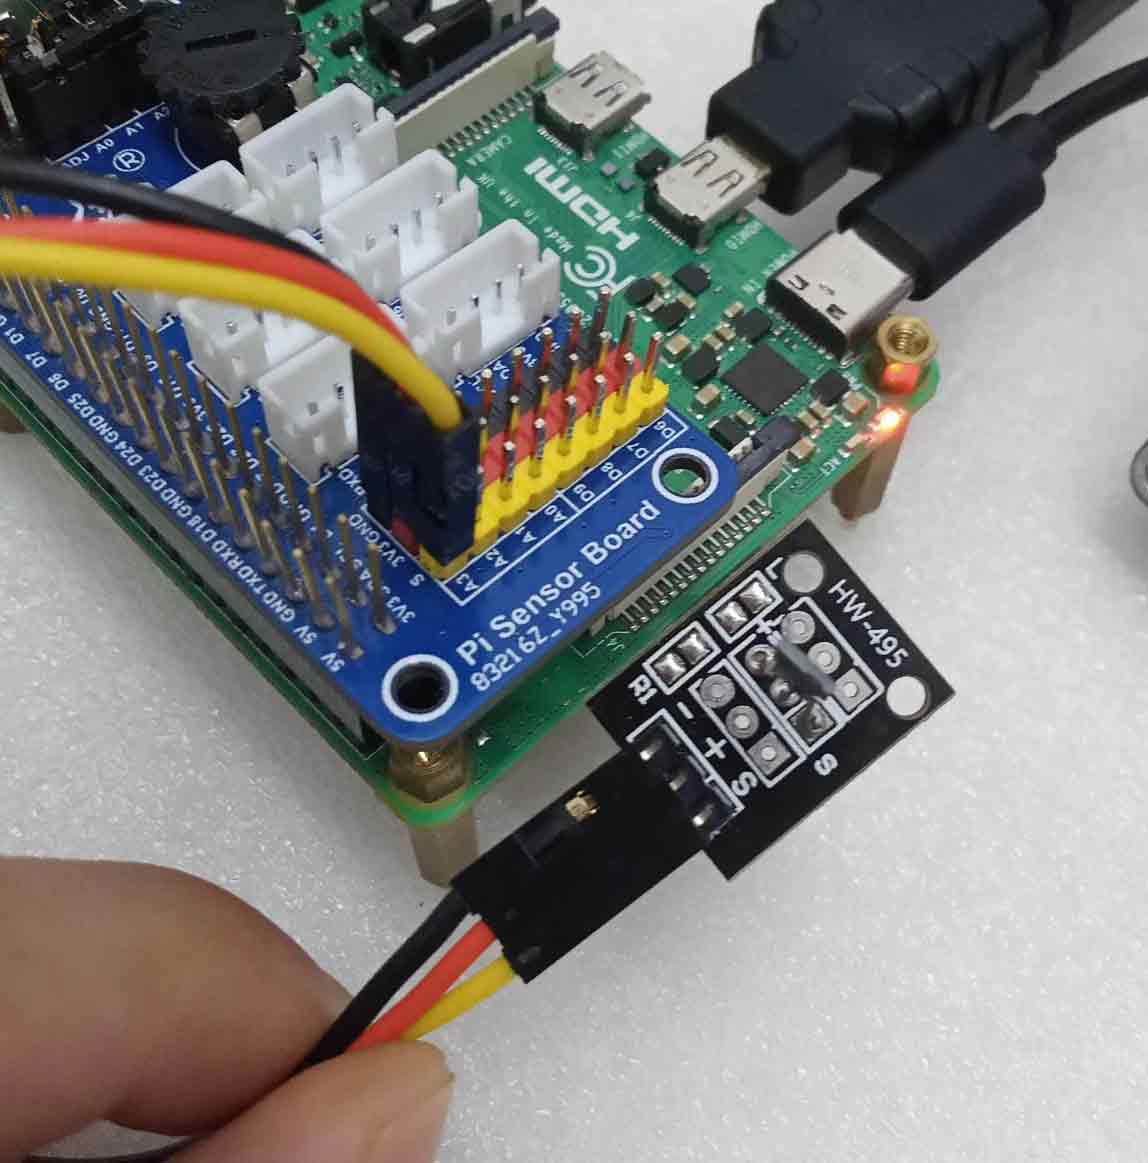
Run the code
cd sensor/
sudo python 495-hall-01.py
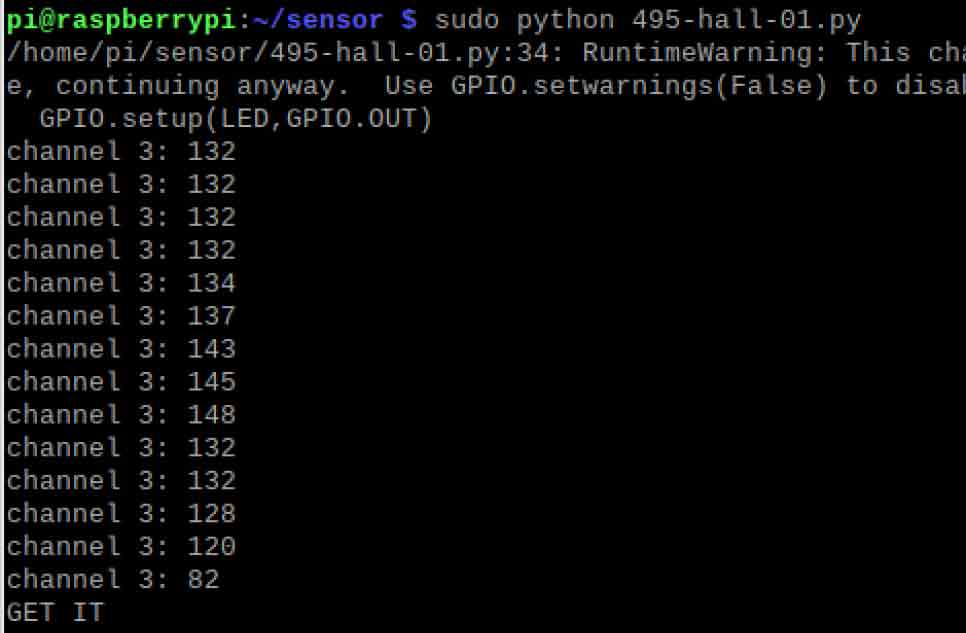
Phenomenon
The proximity of the magnet to the sensor and the polarity of the magnet will affect the value of the Hall magnetic sensor
Principle explanation
The Hall element inside the Hall magnetic sensor can identify the magnitude of the magnetic force. When the magnet is close to the sensor, the sensor will produce different AD value outputs
Video
497 - Mini Magnetic Spring Sensor
Connection
Experiment with magnets
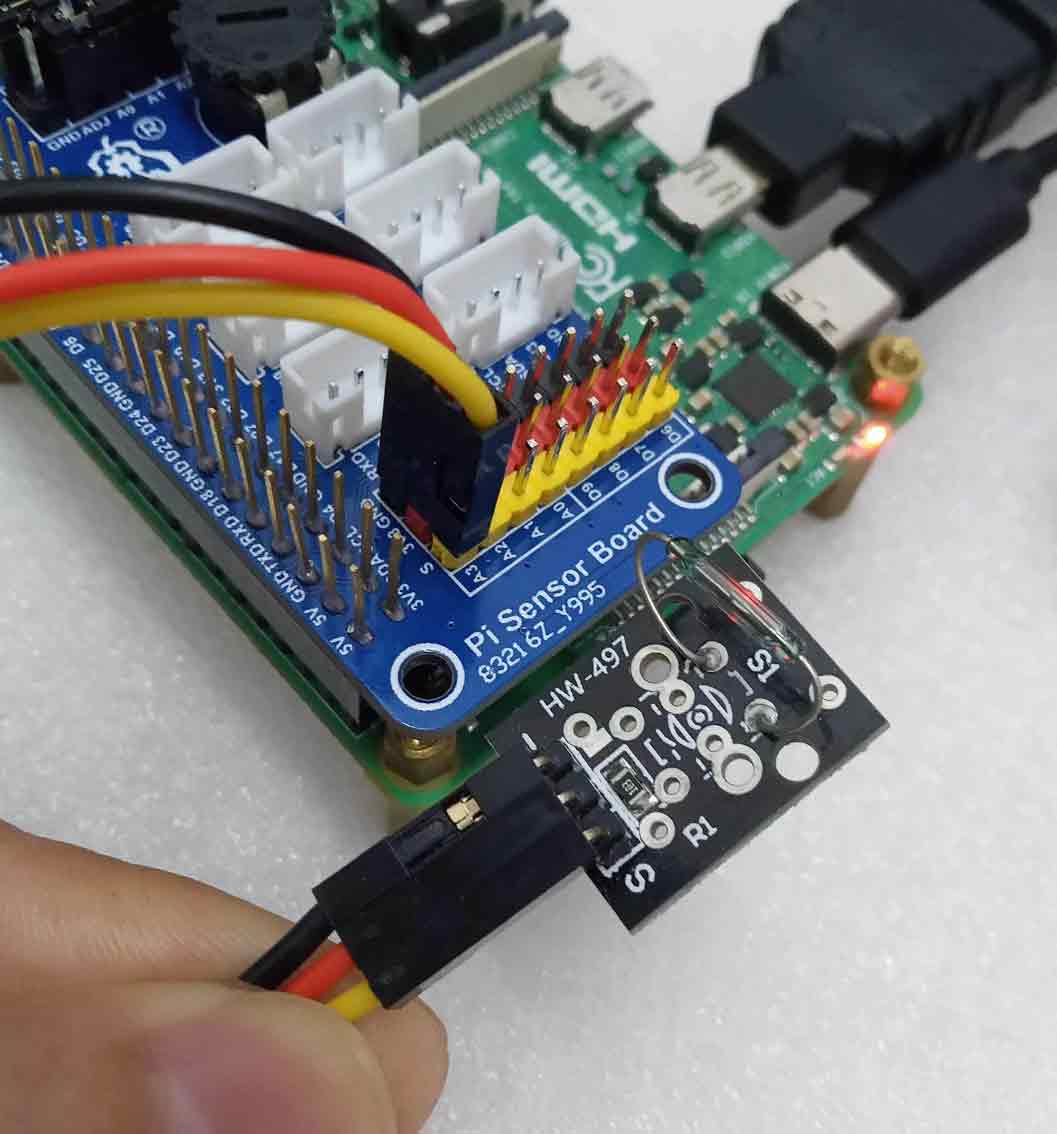
Run the code
cd sensor/
sudo python 497-magnet-spring.py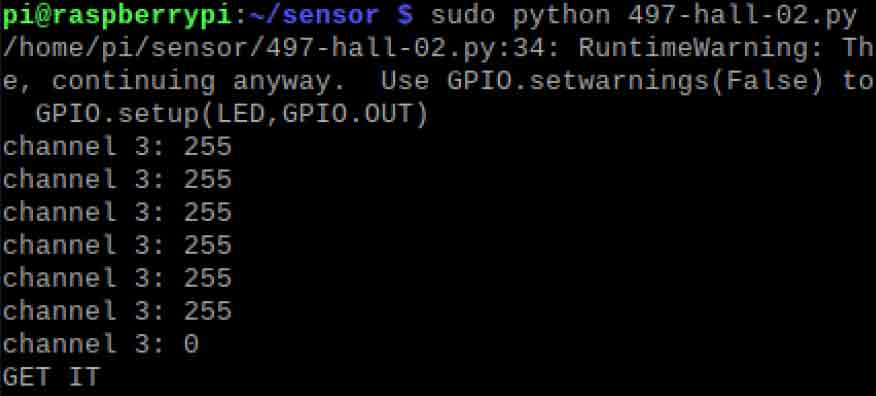
Phenomenon
When the magnet is close to the sensor, the magnetic spring will connect. This will output a low level Note: When the magnet is close to the sensor, there is no response. Change the polarity of the magnet and try again
Principle explanation
The iron force attracts the internal magnetic spring, which will short-circuit the internal spring and output a low level. Use AD or GPIO to identify the low level to identify the signal.
Video
keyesir-infrared transmitting and receiving_obstacle avoidance sensor
Connection
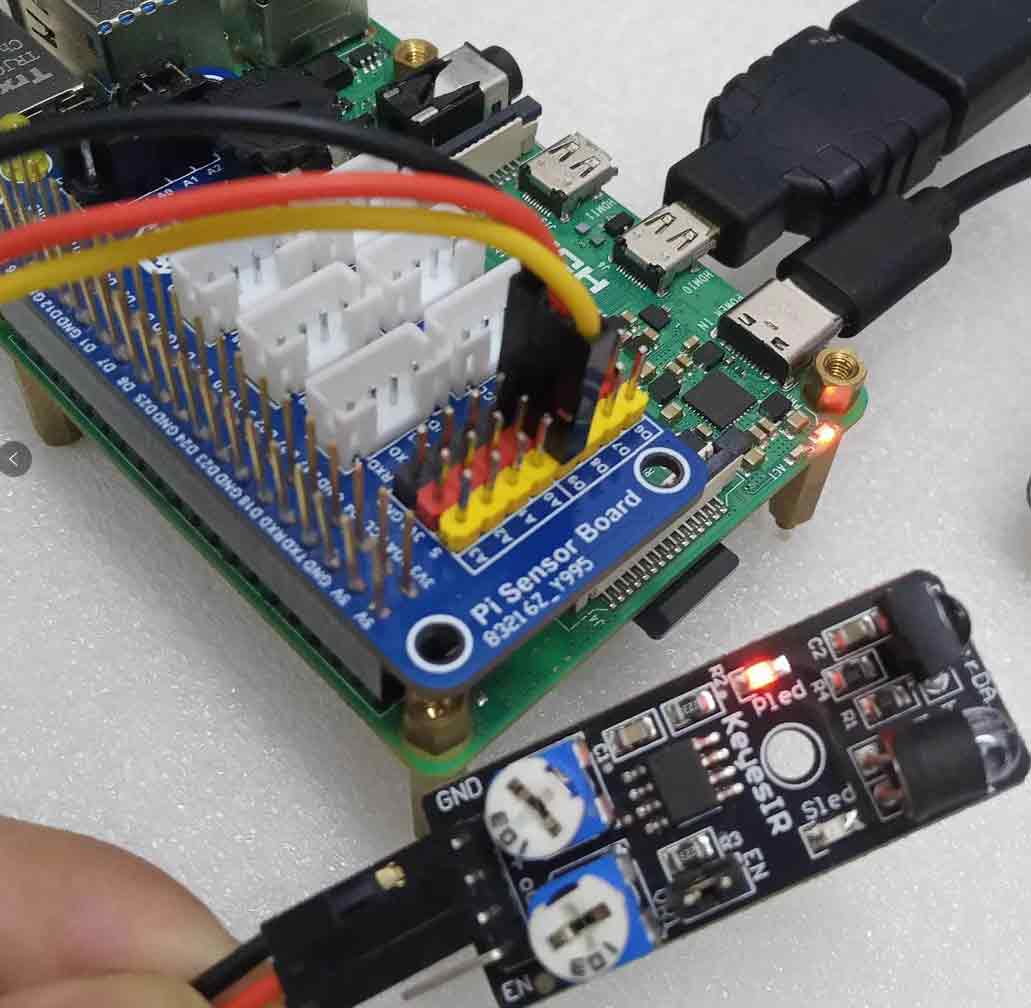
Run the code
cd sensor/
sudo python keyesir.py

Phenomenon
When the module is close to an obstacle, it recognizes the obstacle Note: Do not interfere with other too strong infrared light
Principle explanation
The infrared light emitted by infrared will be reflected to the infrared receiving tube if it encounters an obstruction. After the infrared receiving tube receives the infrared signal, it will output a low level through the voltage comparator
Video
511-ir-line-Infrared transmitter and receiver_Infrared line patrol sensor
Connection
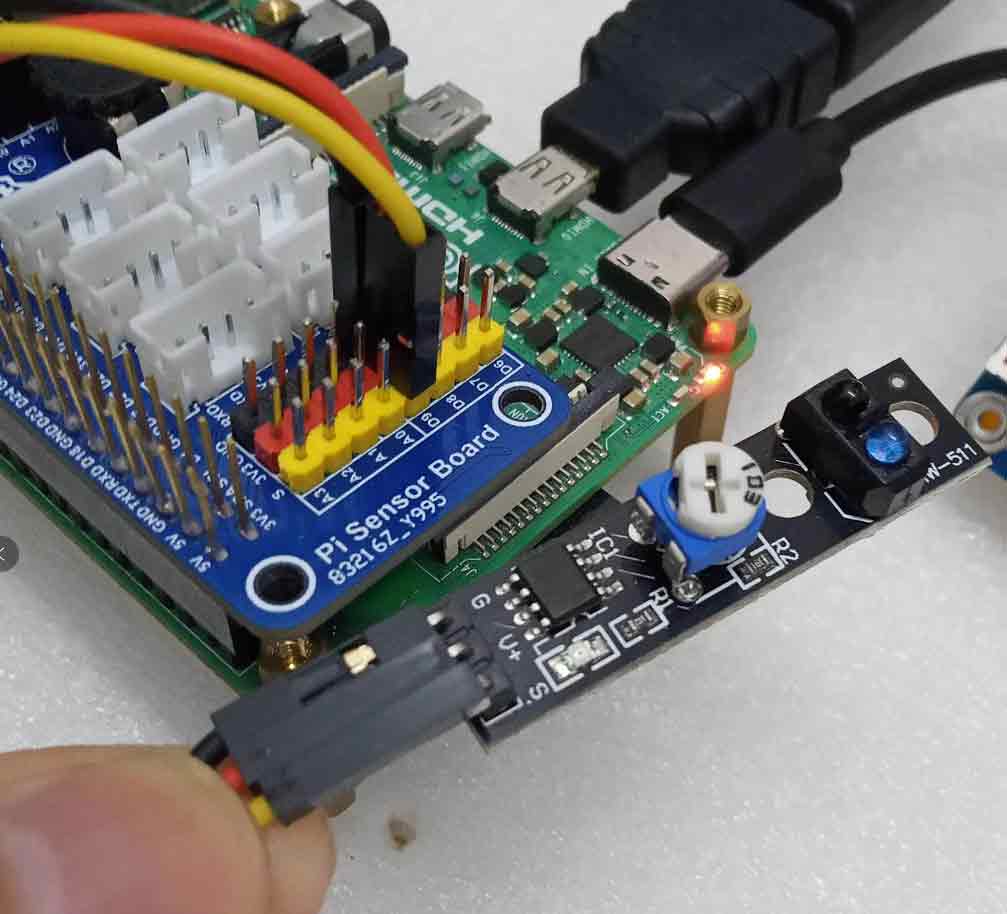
Run the code
cd sensor/
sudo python 511-ir-line.py

Phenomenon
The distances required for infrared reflective recognition are different between black and pure white occlusions
Note: The recognition distance and sensitivity can be adjusted by the following potentiometers
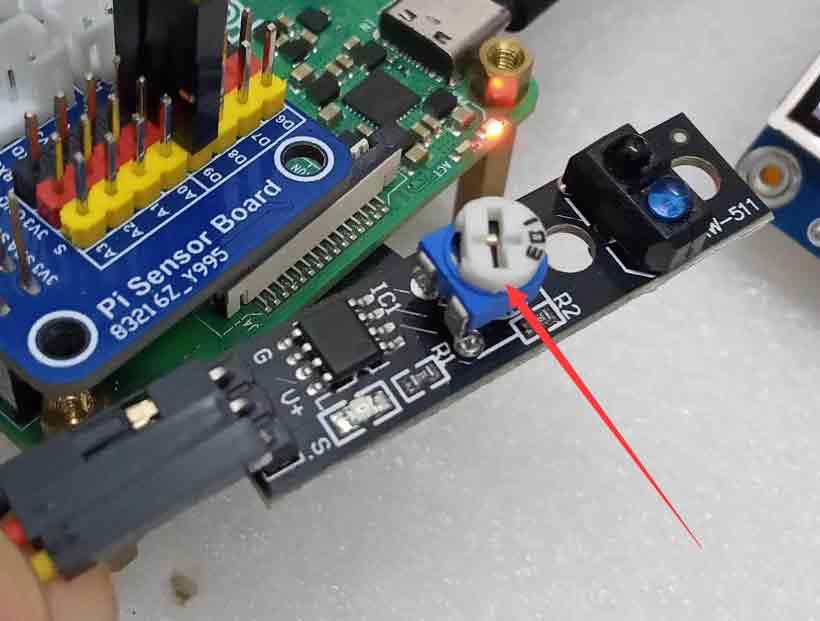
Principle explanation
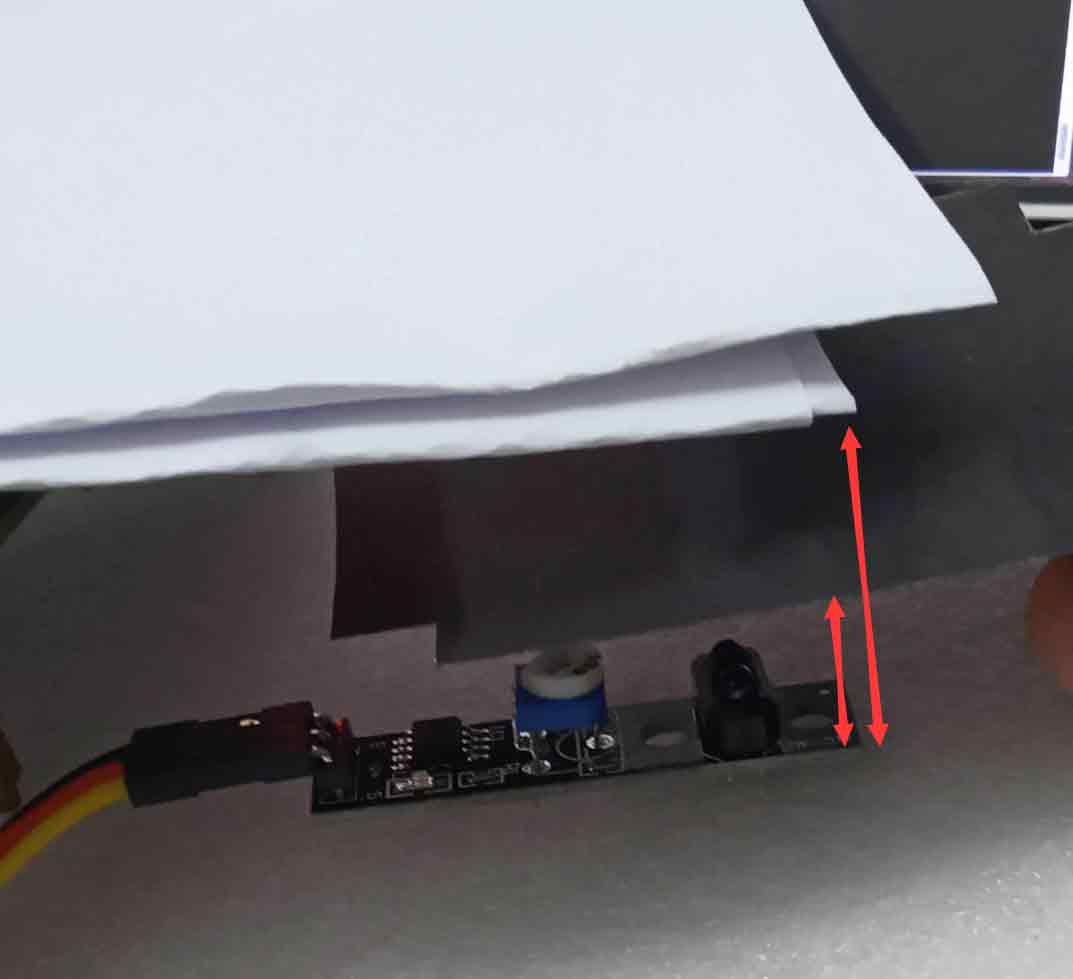
White is more reflective to infrared light, so you can install the module at a suitable distance. The module can only recognize the black line or the white line, so as to achieve the effect of car line tracking
Video
504-joystick-joystick module
Connection
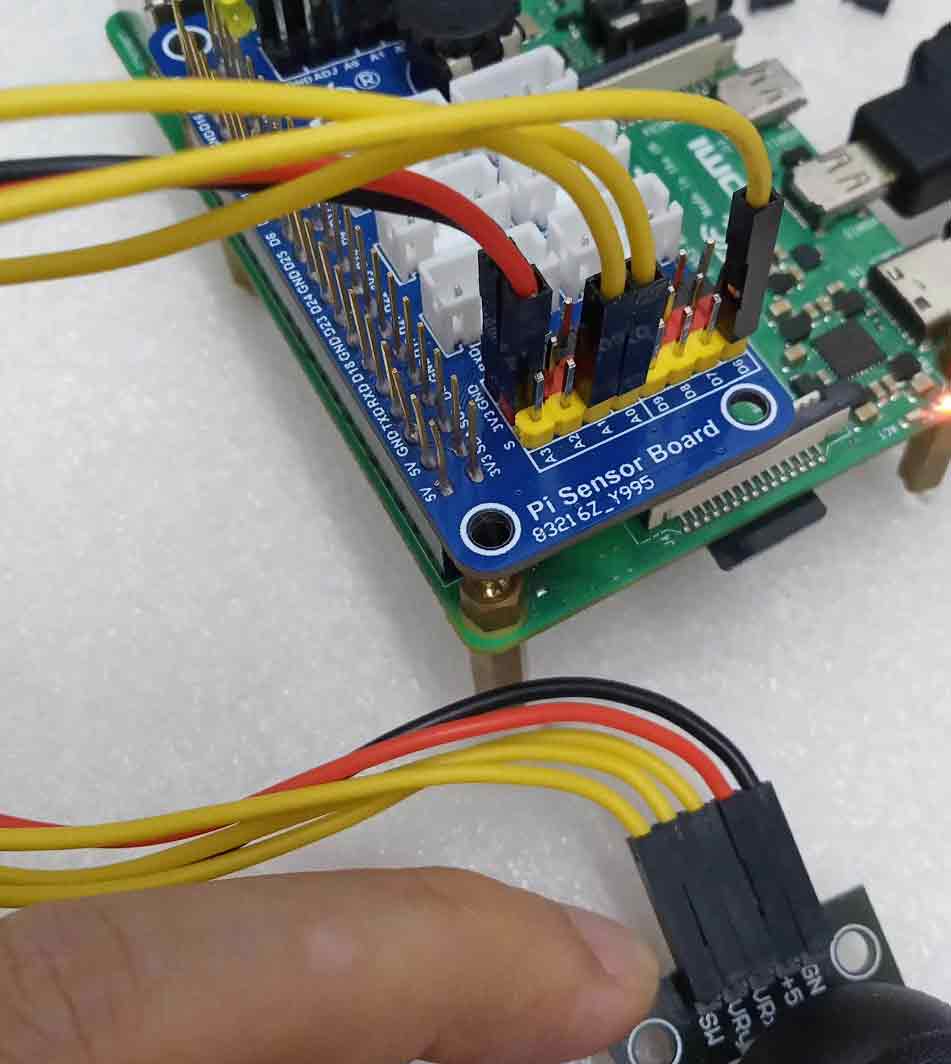
Note: The 5V of the joystick needs to be connected to the 3V3 of the driver board, because the AD acquisition here is the maximum acquisition voltage of 3V3
VRx connection -> A1
VRy connection -> A0
At the same time, the following jumper caps at A0 A1 should be unplugged to prevent interference
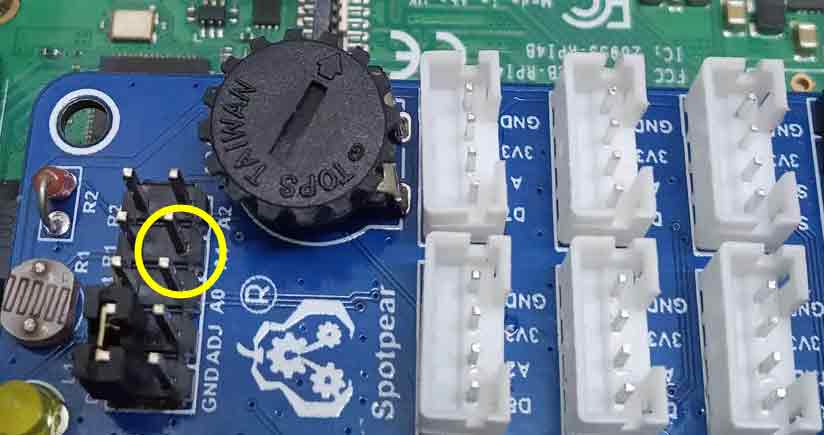
Run the code
cd sensor/ sudo python 504-joystick.py
Phenomenon
Rotate the joystick AD0 and AD1 to print different values. Press the joystick. The pressed state can be proofed.
Principle explanation
The X and Y axes of the joystick can print out different AD values according to the state of the joystick. The AD output of X and Y is collected through AD. The state of the joystick can be judged. At the same time, the joystick has a press button. The button can be triggered when the joystick is pressed. . Raspberry Pi GPIO can read key state
Video
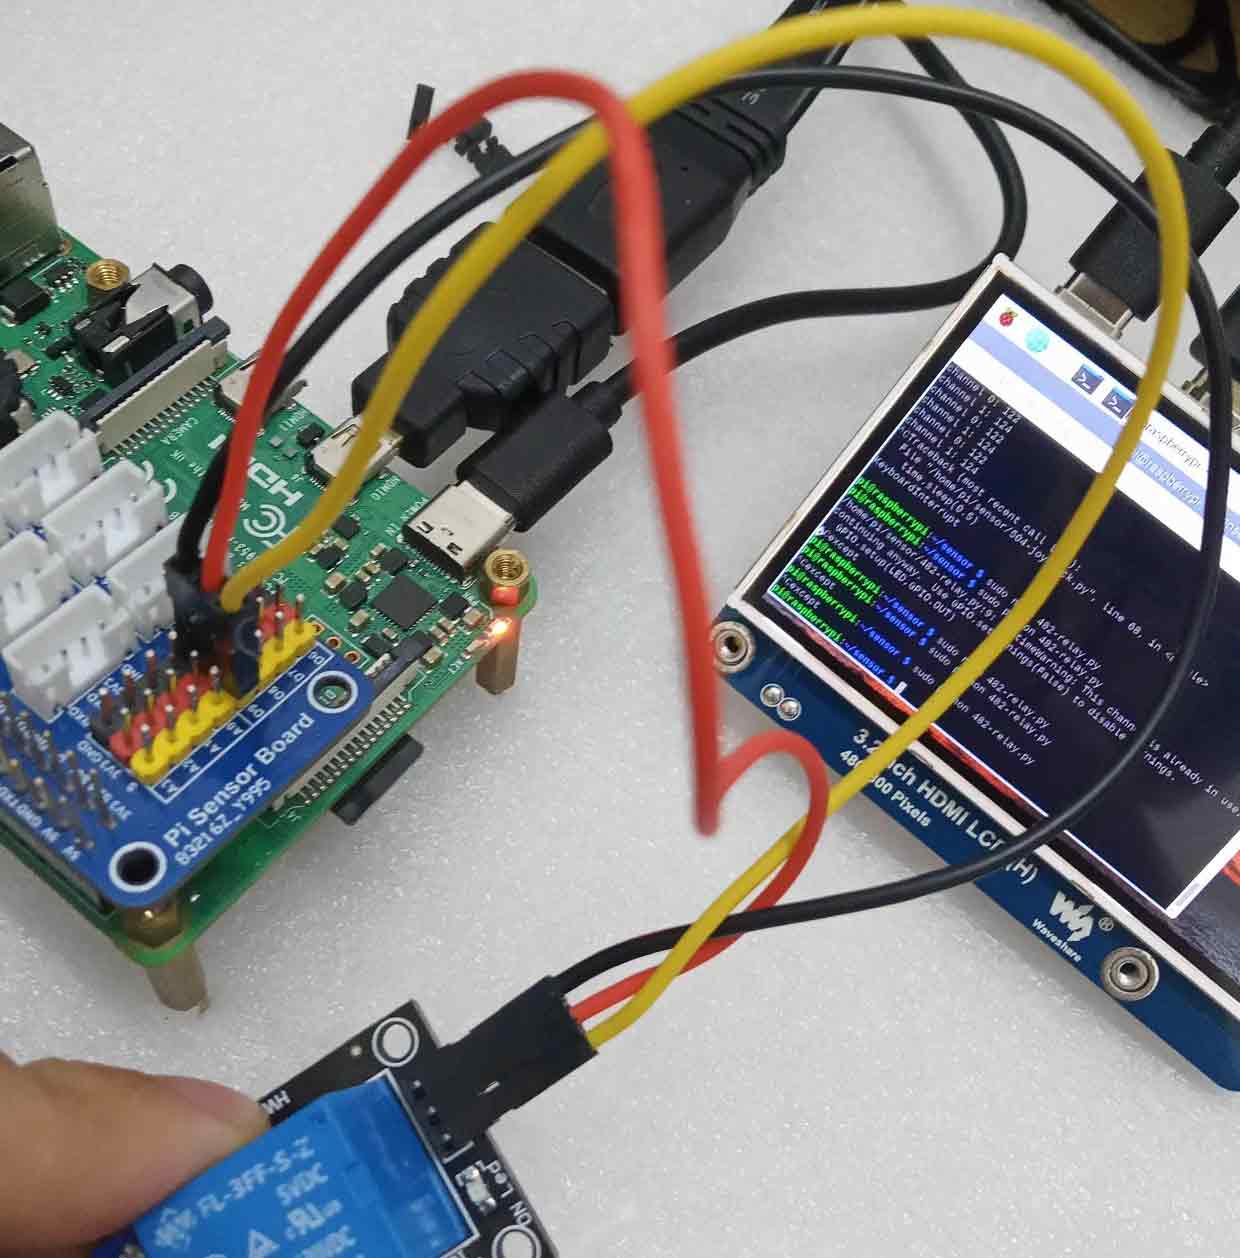
482-relay-relay module
Connection
Run the code
cd sensor/
sudo python 490-ir.py

Phenomenon
The relay module will make a sound with the control of the Raspberry Pi, and at the same time, the two output terminals B and C of the relay will be short-circuited with A.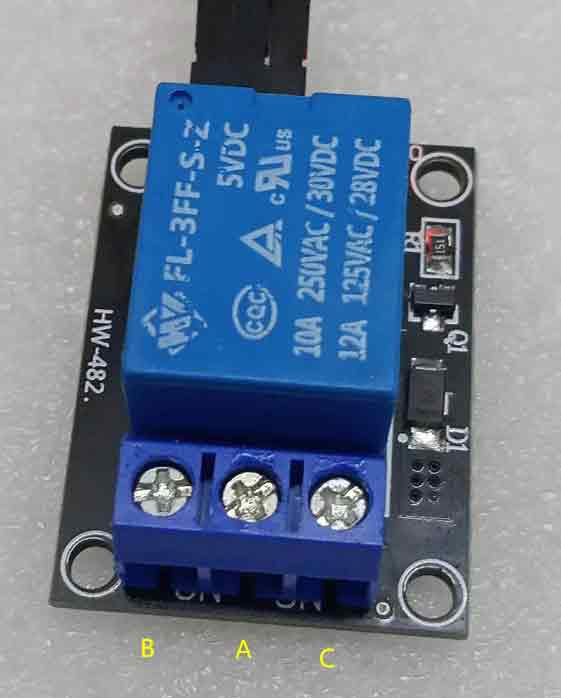
Principle explanation
The relay can control the switch of port A and port C through different control levels at the input end of one side
In this way, some household high-voltage electrical appliances can be controlled
Video
laser-laser emission sensor
Connection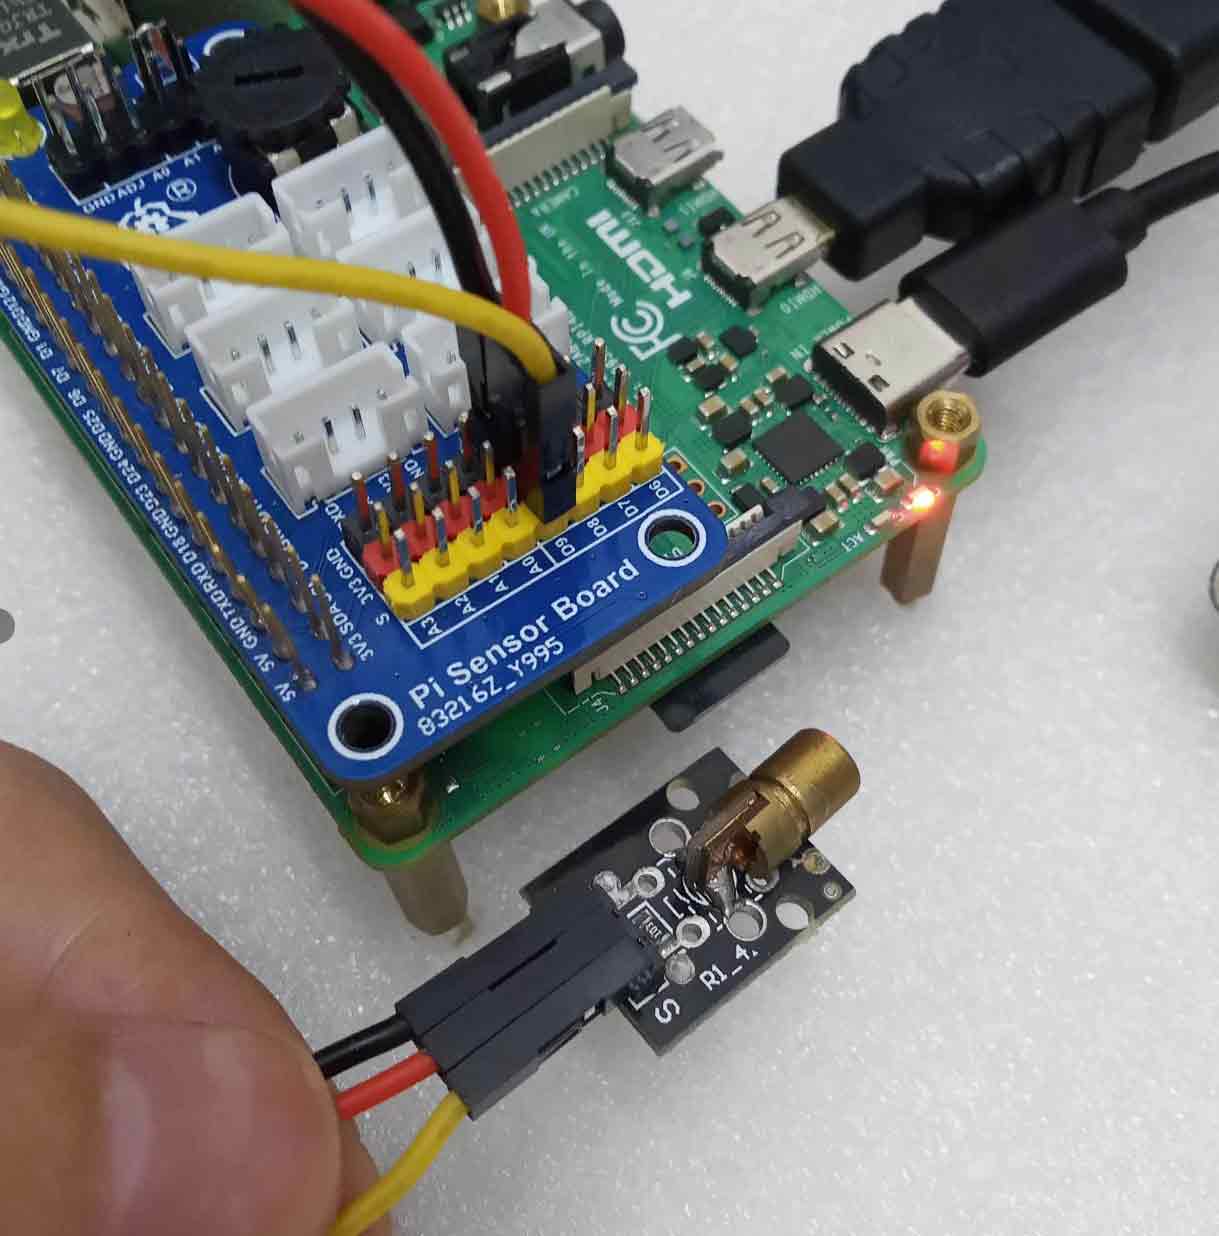
Run the code
cd sensor/
sudo python laser.py

Phenomenon
Laser head emits laser rays Principle explanation
The Raspberry Pi controls the GPIO output, and the laser sensor will emit laser rays after receiving the level control.
Video
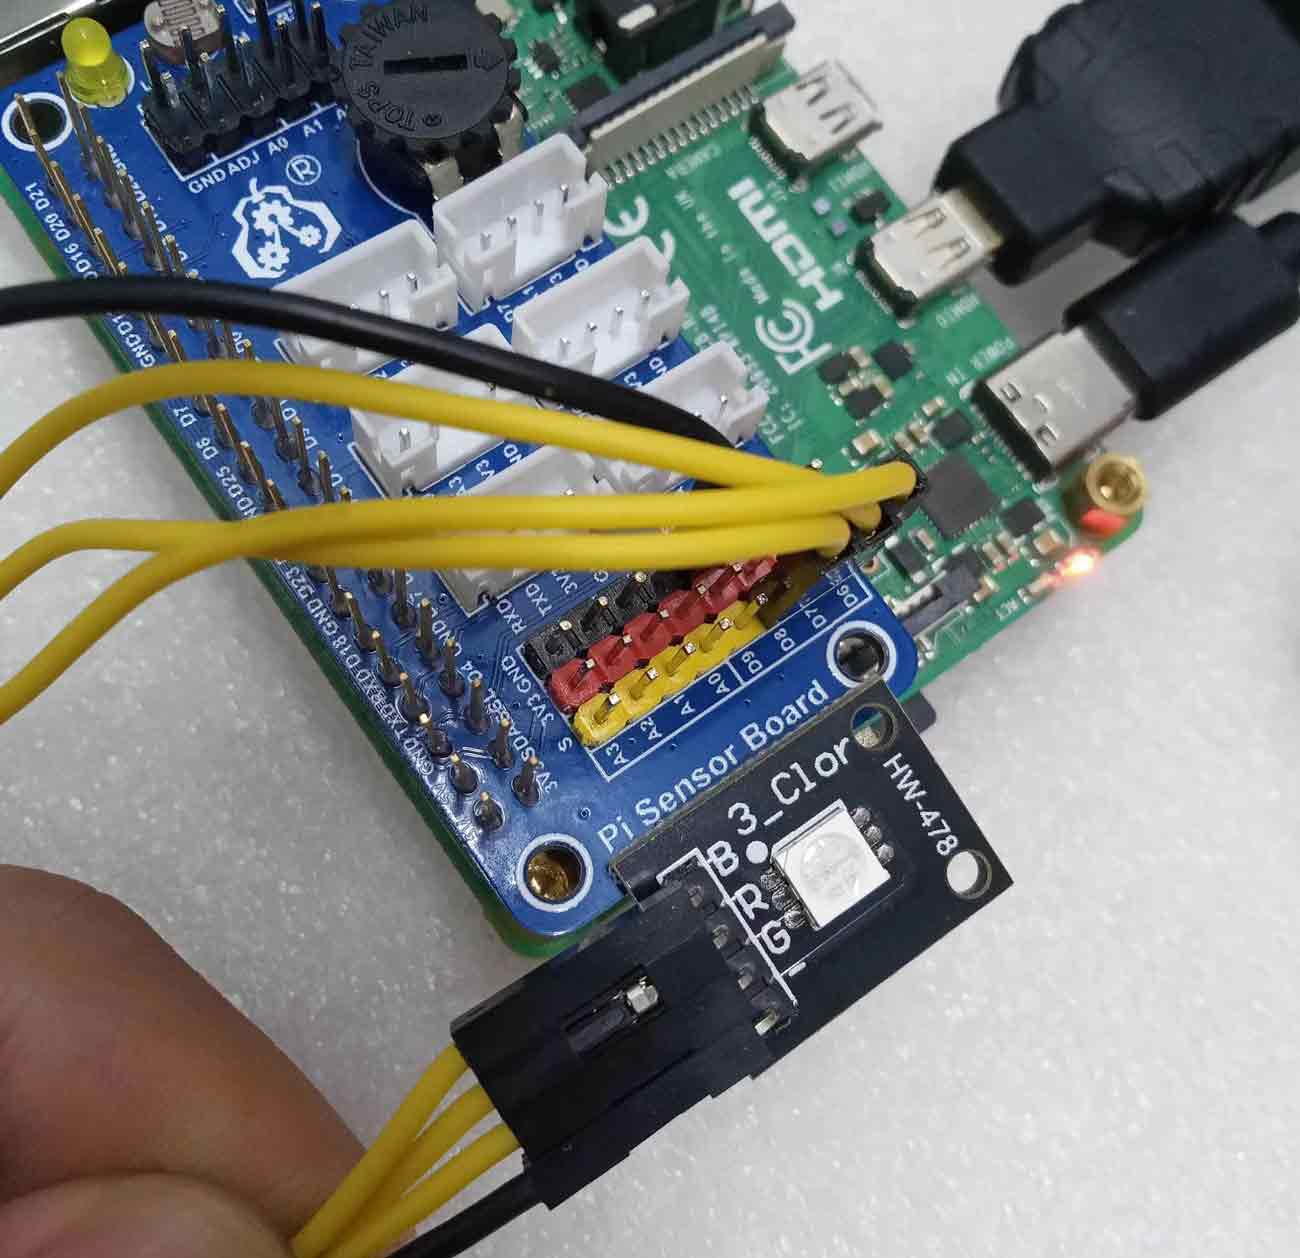
478-RGB LED light
Connection
Run the code
cd sensor/
sudo python 478-RGB.py

Phenomenon
RGB LED lights show red, blue and green respectively
Principle explanation
Common cathode 3-color RGB lights. Give high level to the control pin of each color light. The corresponding light will be on
Video
477-RG-Dual-color LED
Connection
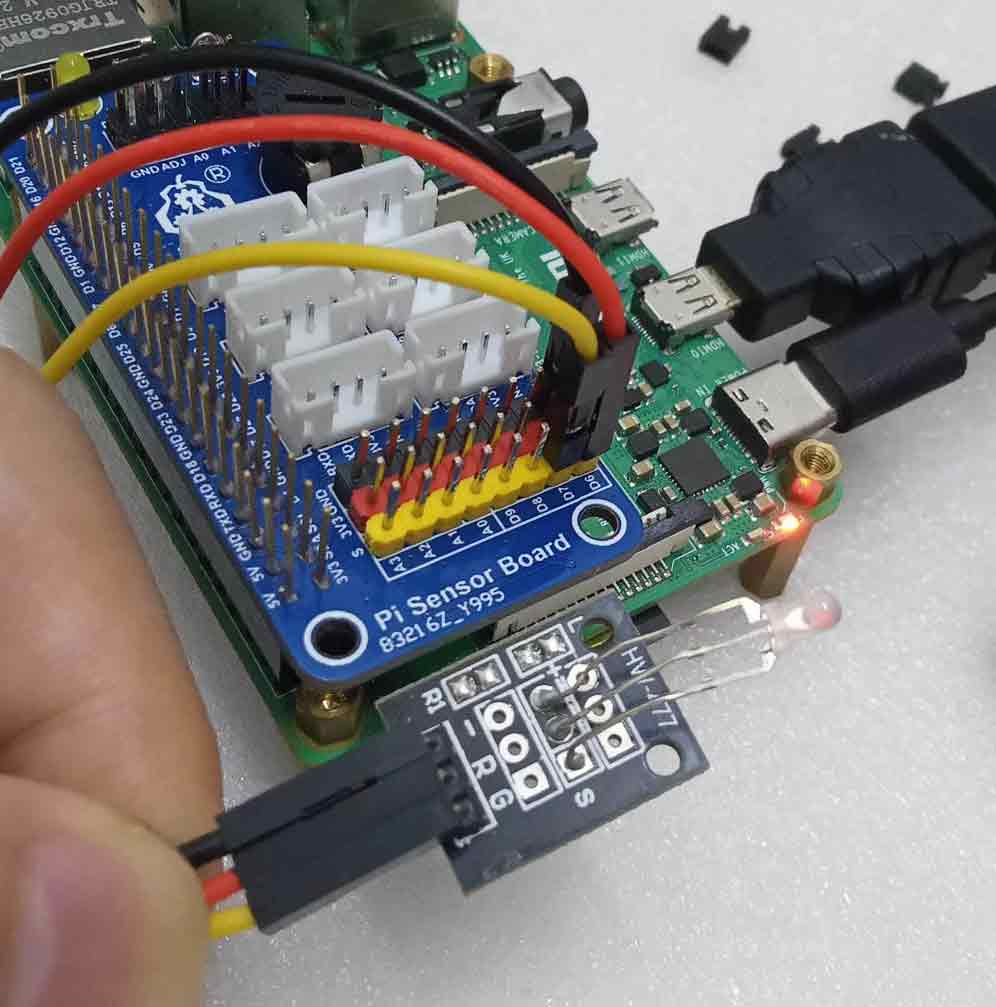
Run the code
cd sensor/
sudo python 477-RG.py

Phenomenon
Two-color light color change
Principle explanation
Common cathode 3-color RG bi-color light. Give high level to the control pin of each color light. The corresponding light will be on
Video


