- sales/support
Google Chat:---
- sales
+86-0755-88291180
- sales01
sales@spotpear.com
- sales02
dragon_manager@163.com
- support
tech-support@spotpear.com
- CEO-Complaints
zhoujie@spotpear.com
- Only Tech-Support
WhatsApp:13246739196
- Purchase/Shipping/Refund
WhatsApp:13424403025
- HOME
- >
- ARTICLES
- >
- Common Moudle
- >
- LCD
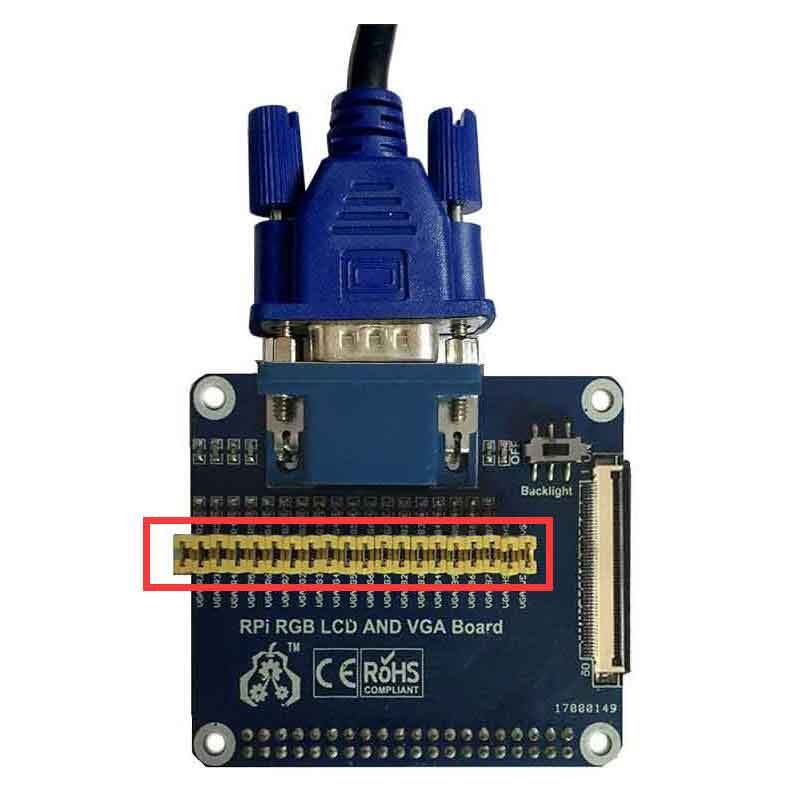
RPi RGB AND VGA Board
1. Insert the SD card to your computer.open the file "config.txt" at the SD card root directory by your computer
2.Change to the following code at the end of the file,Then save the changed file
Red color is the added code or changed code
2.1 If 800x480 Resolution LCD(such us 5 inch,7 inch):
#[pi4]
# Enable DRM VC4 V3D driver on top of the dispmanx display stack
#dtoverlay=vc4-fkms-v3d
#max_framebuffers=2
[all]
#dtoverlay=vc4-fkms-v3d
dtoverlay=dpi24
enable_dpi_lcd=1
display_default_lcd=1
dpi_group=2
dpi_mode=87
dpi_output_format=0x6f005
hdmi_timings=800 0 40 48 88 480 0 13 3 32 0 0 0 60 0 32000000 6
disable_overscan=1
[pi4]
# Enable DRM VC4 V3D driver on top of the dispmanx display stack
#dtoverlay=vc4-fkms-v3d
max_framebuffers=2
dpi_timings=800 0 40 48 88 480 0 13 3 32 0 0 0 60 0 26000000 6
2.2 If 1024x600 Resolution LCD(such us 7 inch,10.1 inch) :
[pi4]
# Enable DRM VC4 V3D driver on top of the dispmanx display stack
#dtoverlay=vc4-fkms-v3d
max_framebuffers=2
dpi_timings=1024 1 40 48 128 600 1 13 3 45 0 0 0 60 0 37000000 6
[all]
#dtoverlay=vc4-fkms-v3d
dtoverlay=dpi24
enable_dpi_lcd=1
display_default_lcd=1
dpi_group=2
dpi_mode=87
dpi_output_format=0x6f005
hdmi_cvt 1024 600 60 6 0 0 0
disable_overscan=1
2.3 If VGA and your vga display Resolution is 1024x600:
[pi4]
# Enable DRM VC4 V3D driver on top of the dispmanx display stack
#dtoverlay=vc4-fkms-v3d
max_framebuffers=2
[all]
#dtoverlay=vc4-fkms-v3d
hdmi_cvt 1024 600 60 6 0 0 0
disable_overscan=1
(If your VGA monitor is a different Resolution,change 1024 600 at "hdmi_cvt 1024 600 60 6 0 0 0" to fit yourself VGA monitor)
3.Insert the SD card to your Pi. Then work
PS:
1. If RGB LCD(5 inch,7 inch,10.1 inch) , do not need the Jumpers
If VGA,need connect the Jumpers like the picture.
2.please do not unplug or plug the RGB LCD when powered