- sales/support
Google Chat:---
- sales
+86-0755-88291180
- sales01
sales@spotpear.com
- sales02
dragon_manager@163.com
- support
tech-support@spotpear.com
- CEO-Complaints
zhoujie@spotpear.com
- Only Tech-Support
WhatsApp:13246739196
- Purchase/Shipping/Refund
WhatsApp:13424403025
- HOME
- >
- ARTICLES
- >
- Common Moudle
- >
- ESP
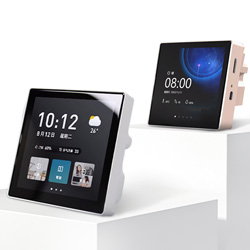
ESP32-S3-4inch-GC9503 User Guide
Resources
Product Specification:
http://doc.panel-tag.cn/_static/espboard/ESP32S3/ZX3D95CE01S-TR-4848.pdf
ESP-IDF Demo download:
https://cdn.static.spotpear.cn/uploads/picture/learn/ESP32/ESP32-S3-4inch/qmsd-esp32-bsp-master.zip
Arduino Demo download:
https://cdn.static.spotpear.cn/uploads/picture/learn/ESP32/ESP32-S3-4inch/lvgl_demo.zip
QMSD-ESP32-BSP
qmsd-esp32-bspIt includes screen drivers, touch functions, and UI frameworks, making it convenient for users to quickly develop the Qiming Smart Display development board。
Supported development boards:
- ZX2D10CE01S-4848
- ZX2D10GE01R-V-4848
- ZX2D80CECOF-2432
- ZX3D50CE02S-USRC-4832
- ZX3D95CE01S-AR-4848
- ZX3D95CE01S-TR-4848
- ZX3D95CE01S-UR-4848
- ZX4D30CE08S-4827
- ZX4D30NE01S-UR-4827
- ZX7D00CE01S-8048
Attention: Our development board is:ZX3D95CE01S-TR-4848
Supported UI drivers, default to LVGL-8.3.1
- LVGL-8.3.1
- LVGL-7.11
Supported sensors:
- aht20 - temperature and humidity sensor
- sht20 - temperature and humidity sensor
- al01 - Remote control driver chip
- aw9523 - IO expansion chip
- encoder_ab - AB encoder
- ltr303als01 - LIGHT
Other libraries:
- The I2C driver library has undergone some underlying encapsulation, making it more practical. When using I2C for touch, it is recommended to use this driver to ensure the safety of I2C read and write threads,exmaple
- Button support, with ADC button and regular button, supporting callback and blocking to read status
- MP3 decoding library, a FreeRTOS data stream encapsulation for libhelix-mp3
Instructions
ESP-IDF support
Dependency before use:
- Install ESP-IDFv4.4 (v5.0, v5.1) environment (Tutorial) ,The test can successfully compile the example/get started in ESP-IDF,
- Select ESP32-S3 chip and successfully compile example/get started again
Usage steps:
- Enter example/get start
- Load ESP-IDF environment
- Idf.Py load board loads the target development board configuration
- Idf.Py build compilation
Using qmsd esp32 bsp as a component
Method 1: Set the environment variable QMSD_8MS3TH to point to the address of the SDK, and add it to CMakeLists.txt
include($ENV{QMSD_8MS_PATH}/component.cmake)
Method 2: Copy the SDK to your personal project, name it xxx, and add it to CMakeLists.txt
set(ENV{QMSD_8MS_PATH} ${CMAKE_SOURCE_DIR}/xxx)
include($ENV{QMSD_8MS_PATH}/component.cmake)
参考example/get-start/CMakeLists.txt
ESP32 hardware peripherals used
- LEDC -> LEDC_TIMER_3,LEDC_LOW_SPEED_MODE,LEDC_CHANNEL_5,LEDC_TIMER_10_BIT
- I2C0 ->Touch usage, FREQ:400KHZ, When touch functionality is required and the I2C pin for touch is needed, please use the driver i2c_bus, Specific usage reference aw9523 Examples of Reading and Writing
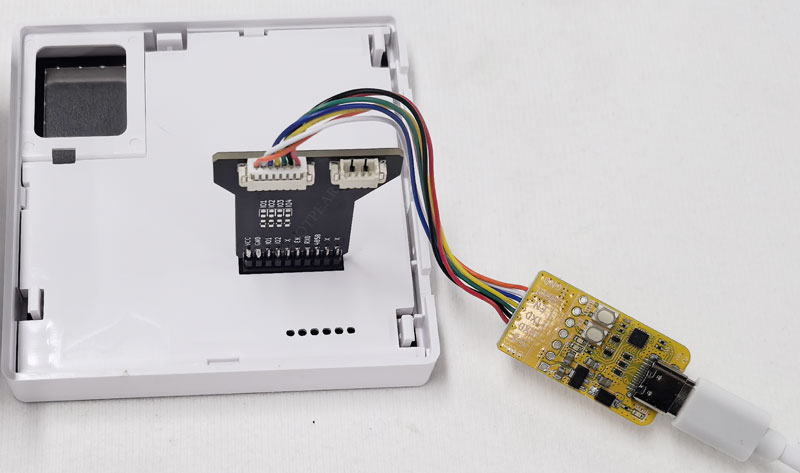
Firmware Download
- Downloader-A-For-4inch-GC9503(Debug port need solder by yourself)

- Downloader-B-For-4inch-GC9503
Quick Command
Load development board configuration
Operate under the project
idf.py load-board
The following options will appear, and the board model will dynamically change based on SDK support
--- Please select board to load sdkconfig ---
0): ZX1D28CEC27R-2424
1): ZX2D10GE01R-V-4848
2): ZX3D50CE02S-USRC-4832
3): ZX3D95CE01S-AR-4848
4): ZX3D95CE01S-UR-4848
5): ZX4D30NE01S-UR-4827
x): exit
Select board [0 ~ 5]:
Enter the target model and press Enter. The script will create the sdkconfig. faults file and configure sdkconfig to the target development board.
ifload-boardfail,You can solve it by following the steps below:
- Find the corresponding board in the components/qmsd-board/board directory.
- Find the sdkconfig. faults file in the directory of the board.
- Copy the sdkconfig. faults file to the project directory and replace it if it already exists.
- Delete the sdkconfig file from the project directory.
- Execute command: idf.py reconfigure。
This way, the configuration file can be manually loaded, and there is no need to execute the idf.Py load board command in the future
Package firmware
After the project is successfully compiled, run:
idf.py generate-firmware
The script will find the bin file generated in the build folder, then package and synthesize it into a single file, and generate firmware_ xxx. bin in the running directory, where xxx represents the offset address of the bin file burned
Publish project
Publishing project scripts can quickly package the components that need to be packaged and extract the compiled. a file for publishing
The rule for determining whether packaging is necessary: If there is a CMakeLists.release in the components directory of the project, the. c file under that component will be deleted and replaced with a cmake file. The. a file will be extracted from the build directory of the project and placed under the component
After the project is successfully compiled, run:
idf.py release-components
After running the project directory, generate a component-release directory under the build directory. The. a file and cmake file have been replaced, and it is a separate project
Other reference resources
- ESP-IDF Programming Guide, recommended version is ESP-IDF v4.4.5 https://docs.espressif.com/projects/esp-idf/zh_CN
- ESP32 programming example (note IDF version number) https://github.com/espressif/esp-idf/tree/master/examples
- LVGL Programming Guide https://docs.lvgl.io/8.3/