




- sales/support
Google Chat:---
- sales
+86-0755-88291180
- sales01
sales@spotpear.com
- sales02
dragon_manager@163.com
- support
tech-support@spotpear.com
- CEO-Complaints
zhoujie@spotpear.com
- Only Tech-Support
WhatsApp:13246739196
- Purchase/Shipping/Refund
WhatsApp:13424403025
Raspberry Pi 5 PCIE User Guide
Step 1 Enabling PCIe】
By default the PCIe connector is not enabled. To enable it you should add the following option into /boot/firmware/config.txt and reboot:
# Enable the PCIe External connector.
dtparam=pciex1
A more memorable alias for pciex1 exists, so you can alternatively add dtparam=nvme to the /boot/firmware/config.txt file.
NOTE
Enumeration of PCIe devices behind a switch is not currently supported.
Step 2 PCIe Gen 3.0】
The connection is certified for Gen 2.0 speeds (5 GT/sec), but you can force it to Gen 3.0 (10 GT/sec) if you add the following lines to your /boot/firmware/config.txt.
# Enable the PCIe external connector
dtparam=pciex1
# Force Gen 3.0 speeds
dtparam=pciex1_gen=3
WARNING
The Raspberry Pi 5 is not certified for Gen 3.0 speeds, and connections to PCIe devices at these speeds may be unstable.
You should then reboot your Raspberry Pi for these settings to take effect.
Step 3 Booting from PCIe】
Once enabled, and after you reboot, an NVMe disk attached via the PCIe should be visible. However, your Raspberry Pi won’t try to boot off the NVMe drive. If you wish to enable boot support you will need to change the BOOT_ORDER in the bootloader configuration. Edit the EEPROM configuration by,
sudo rpi-eeprom-config --edit
and change the BOOT_ORDER line to be as below.
BOOT_ORDER=0xf416
after saving your changes, reboot your Raspberry Pi to update the EEPROM.
NOTE】
Your Raspberry Pi will not boot from an attached NVMe drive unless you have the external PCIe port enabledd, and there’s a NVMe drive with a valid boot partition attached to the PCIe bus.
TAG:
USB Camera 2MP GC2093 ‌WDR Backlight Compensation‌ Onboard microphone
USB Binocular Camera 2MP AR0144 Distortion Free Binocular Synchronous Frame USB 2.0 Plug and Play
STLINK
Raspberry Pi Autofocus Camera
Raspberry Pi Pico 2 P2350-Plus Smart Car Kit PicoGo2 Autonomous Driving Learning Car
MPW7 Raspberry Pi 5 PCIe to WIFI7 Adapter Board HAT Pi5 For Google TPU BE200 AX210 AI
ESP32-P4 Pico WIFI6 Development Board C6 MIPI DSI 10.1-inch Display /CSI Camera /Audio Speaker Mic AI Deepseek
Raspberry Pi Pico Camera
Camera
Arducam CSI-to-HDMI
Adjustable Focus
UART To Ethernet
H618
Raspberry Pi Pico rp2040 Display image 1.3inch LCD ST7789 change bmp to hex
Raspberry Pi Pico 2 RP2350 ETH CH9120 TCP/UDP Ethernet Network For Arduino
Raspberry Pi 5.83 inch e-Paper link (G) RYBW 800x480 For Arduino / Jetson / STM32 /ESP32
RP2350B-MINI-A picotool Tutorial
Raspberry Pi Robot Dog Wavego Pro 12 quadruped ESP32 ESP-NOW color recognition and self-balancing control
JETSON NANO MINI
Bus servo driver board
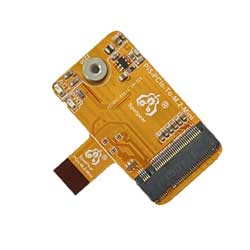
Raspberry Pi 5 PCIe to M.2 NVMe SSD Mini One-Body Board HAT Integrated-FPC & 90R Differential Matchi
TAG:
RTL8723 WIFI SDIO Expansion Module Board For Luckfox Pico Mini B /Luckfox Pico Plus /Luckfox Pico Pro /Luckfox Pico Max
VGA to TTL
Luckfox Lume Allwinner T153 Linux Development Board 128MB DDR3 Dual Gigabit Ethernet Ports
ESP32-P4 ESP32-C6 Development Board RISC-V WiFi6 MIPI CSI Camera 7/10.1 inch DSI Display /RJ45 Ethernet /Mic /Audio Size Compatible with Raspberry Pi
ESP32 Microcontroller Development Board 240MHz ESP32-WROOM/WROVER
2.42 inch 128×64
USB Camera 2MP GC2093 WDR Backlight Compensation Onboard microphone
Raspberry Pi 5
SMA Magnetic Mount Antenna Base SMA Connector 3m Coaxial Cable Compatible With Multiple GNSS Positioning Modules
JETSON NANO MINI
VGA to RGB
Luckfox Pico Ultra B RV1106G2
Luckfox Pico Pi A/B EMMC Mic Option WiFi6 /4G RV1106 G2/G3 RAM 128/256MB Core1106 Audio Display Port Size Compatible with Raspberry
Raspberry Pi 6.25 inch DSI Display MIPI LCD Capacitive TouchScreen 720x1560
Autofocus Camera
Raspberry Pi 3.5 inch LCD G Display Resistive TouchScreen 60fps ST7796 320x480 Also For Arduino/Pico2/ESP32/RP2040/RP2350
Servo PWM motor WP5320 WP5335 35/20KG.CM 180° PWM digital servo double ball bearings
ESP32-H2-MINI-1-N4 Module
1.5inch LCD
PC USB Monitor Screen