- sales/support
Google Chat:---
- sales
+86-0755-88291180
- sales01
sales@spotpear.com
- sales02
dragon_manager@163.com
- support
tech-support@spotpear.com
- CEO-Complaints
zhoujie@spotpear.com
- Only Tech-Support
WhatsApp:13246739196
- Purchase/Shipping/Refund
WhatsApp:13424403025
- HOME
- >
- ARTICLES
- >
- LuckFox
- >
- LuckFox Pico
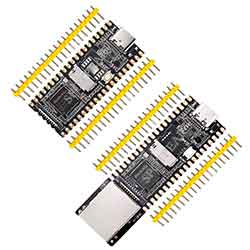
Luckfox Pico RV1103【(Plus)Burn the image into the onboard flash】
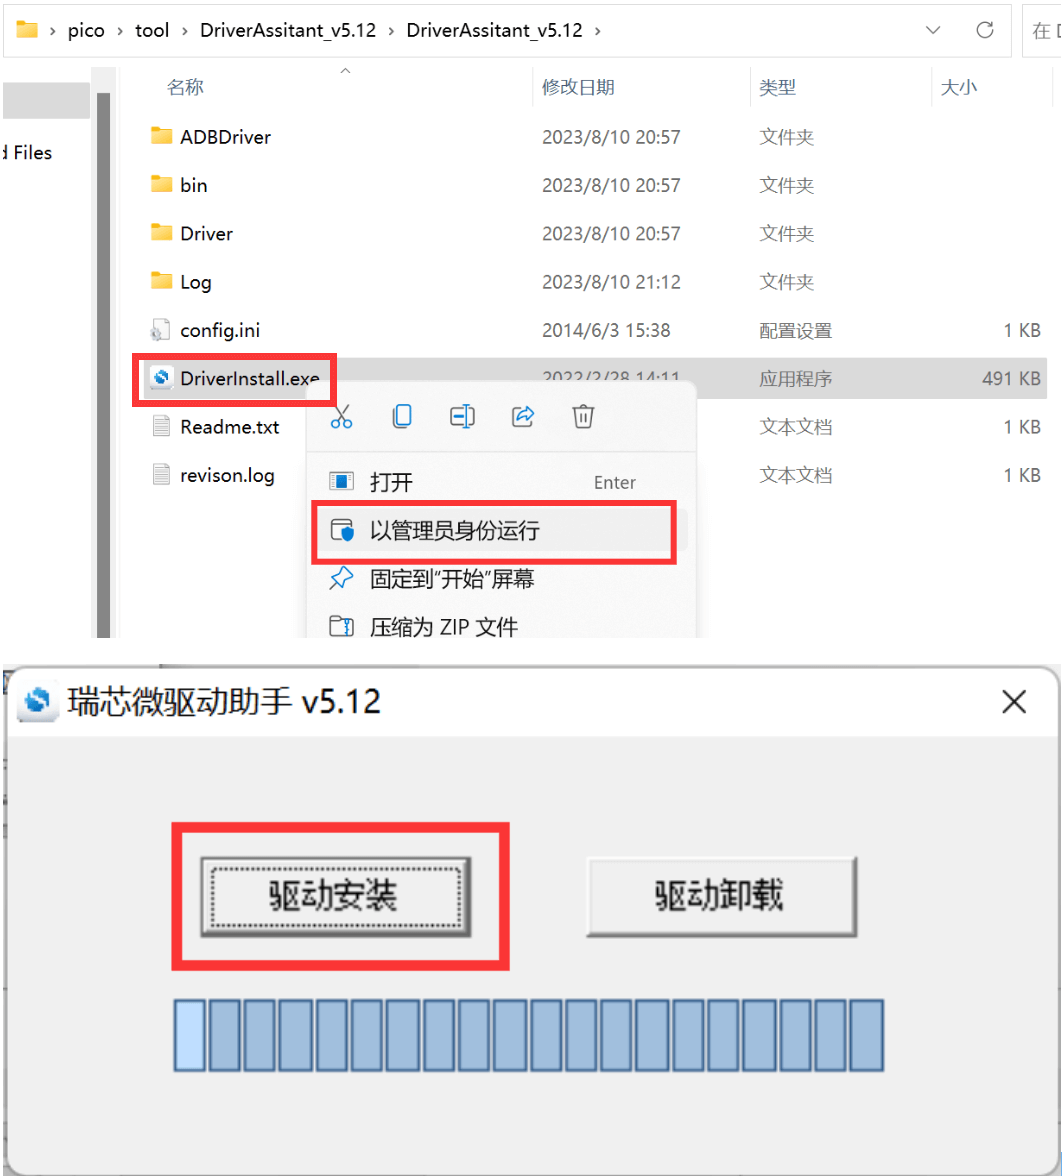
1] Download and install the USB driver :
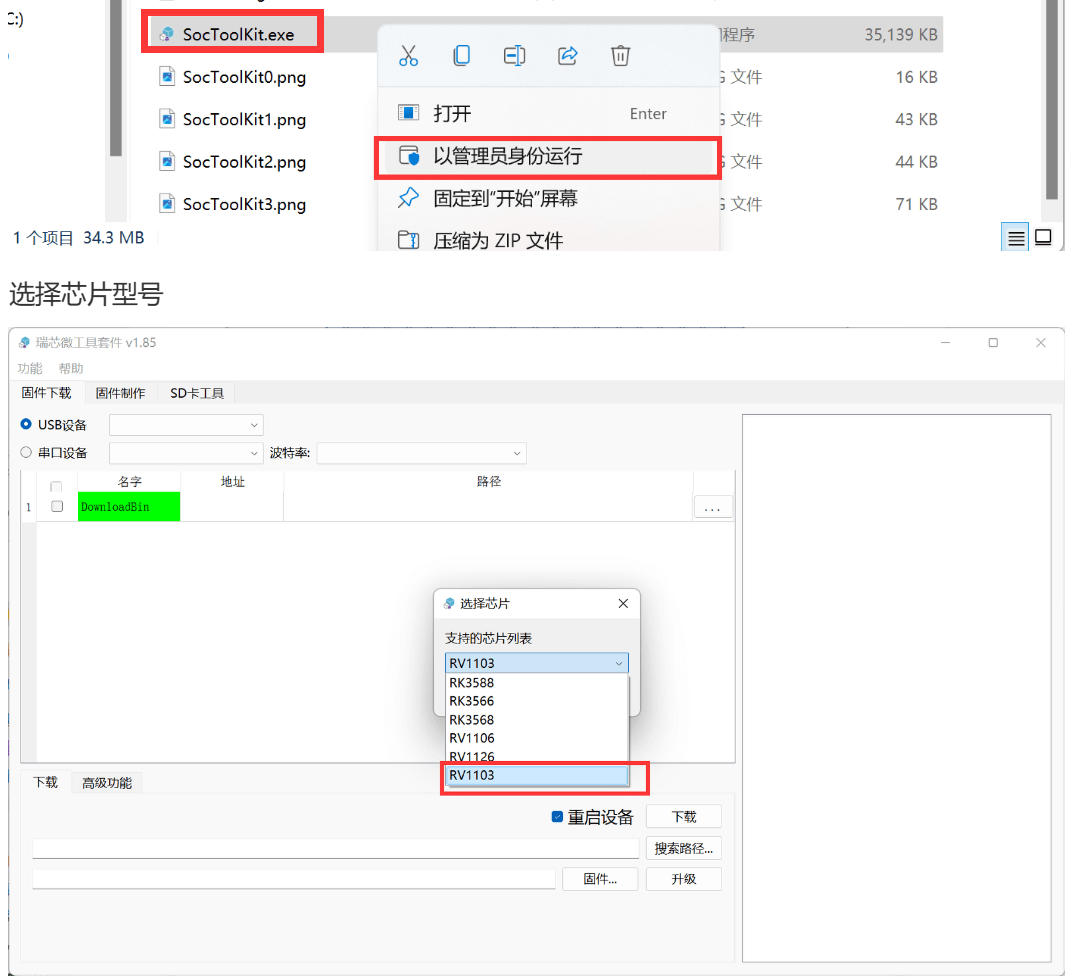
2] Download and install SocToolKit software:
3] Flashing the image via Flash:
Press and hold the Boot button on the Pico development board, then insert the USB cable. The USB device number (in this case, 211) will appear in the USB device bar.
In the firmware selection, choose the corresponding system image based on the development board:
] For Pico, select the update.img file in the imag folder.
] For Pico Plus, select the update.img file in the pico-plus-image folder.
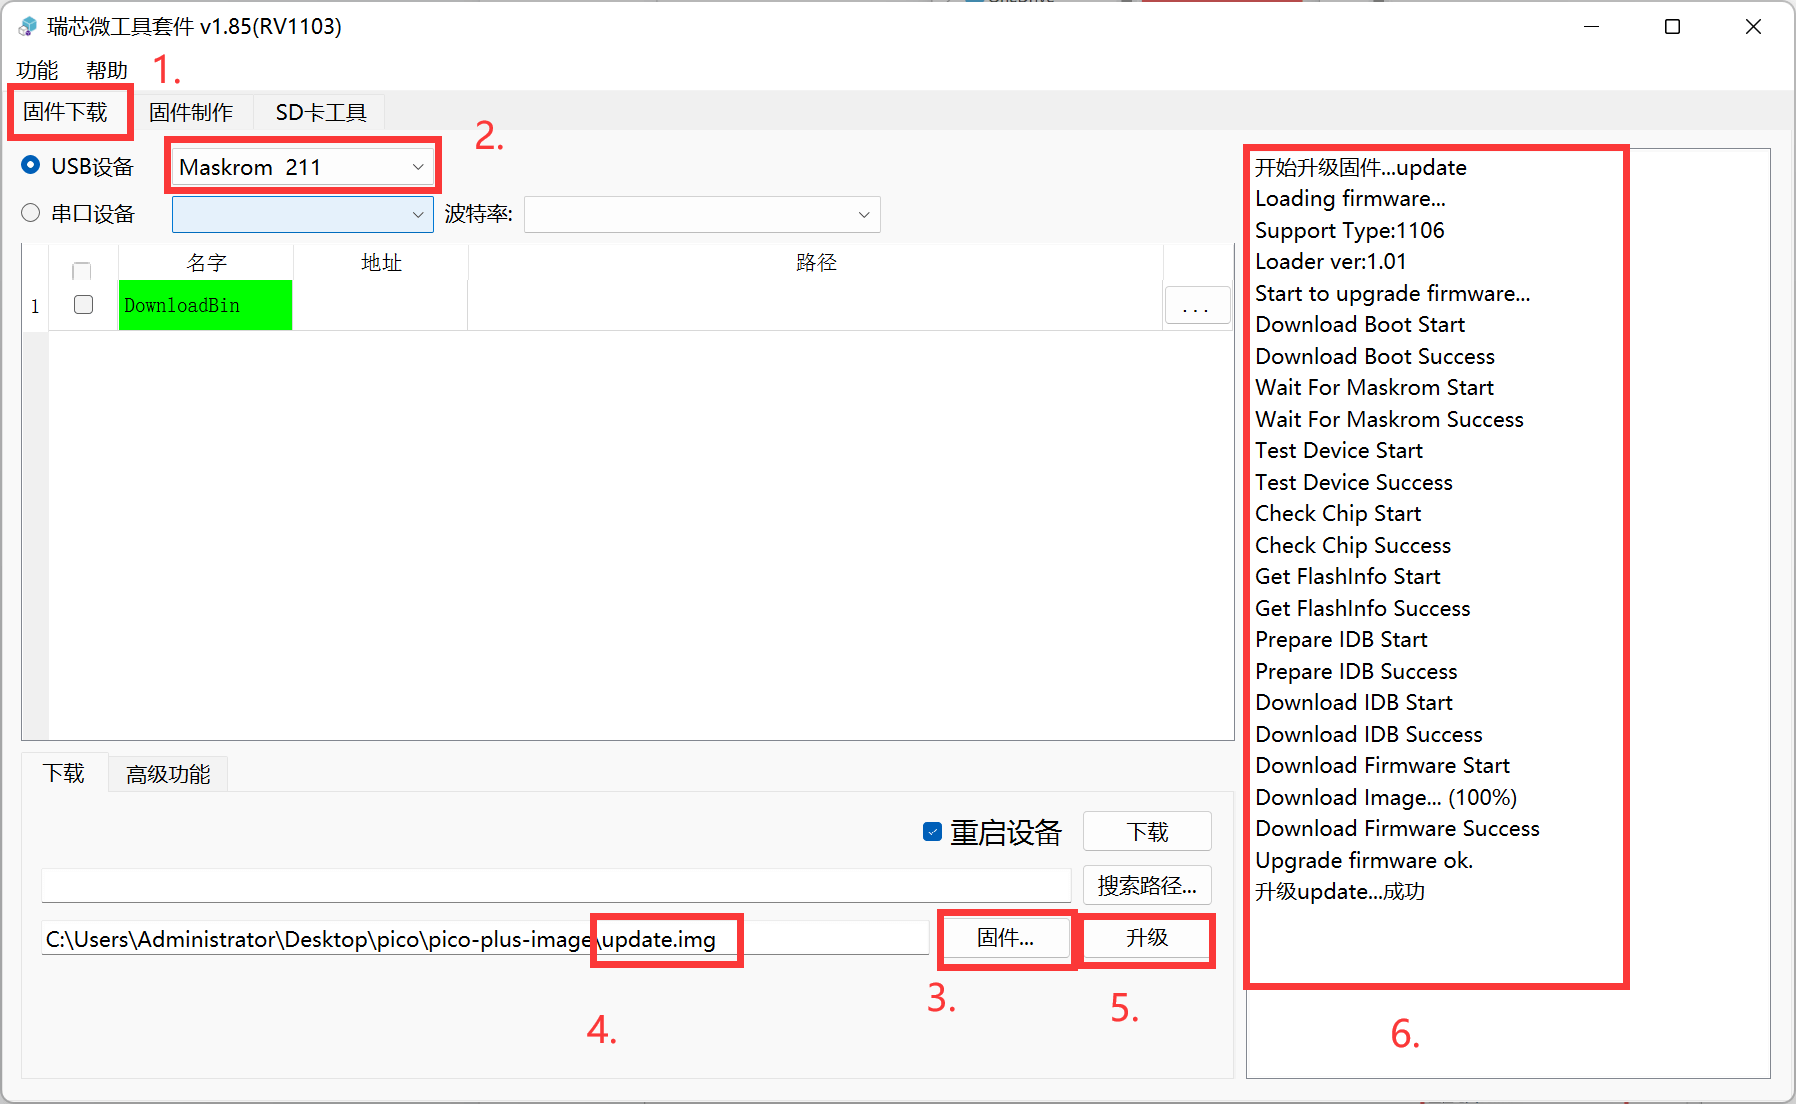
Once the progress displays "Upgrade update… successful," it indicates that the flash image has been successfully burned.
If the system status LED on the development board starts blinking after powering on, it means that the system is running normally.