- sales/support
Google Chat:---
- sales
+86-0755-88291180
- sales01
sales@spotpear.com
- sales02
dragon_manager@163.com
- support
tech-support@spotpear.com
- CEO-Complaints
zhoujie@spotpear.com
- Only Tech-Support
WhatsApp:13246739196
- Purchase/Shipping/Refund
WhatsApp:13424403025
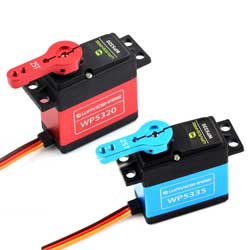
WP5320 User Guide
Overview
Introduction
The WP5320 is a high-performance PWM-controlled digital servo with a compact form factor that is reliable and durable. The servo has a fast response speed and a high torque output with a stall torque of up to 20kg.cm. In terms of control, the servo adopts the control signal of pulse width modulation, which can achieve an angle control range of 180°. Its internal control system uses a digital comparator architecture to ensure precise angle control and stable performance. At the same time, the servo is also equipped with an electronic protection function, which can automatically output protection torque during stalling, effectively protecting the safe operation of the servo and the system. WP5320 is suitable for robots, robotic arms, RC vehicles, remote control engineering models, and other application scenarios that require high performance and durability.
Features
- High Torque Output: With 7.4V operating voltage, the stall torque can reach 20kg.cm
- Copper-Aluminum Gears, Dual Ball Bearings: Adopts a combination of copper and aluminum teeth, and the gear shaft is thickened to 2.0. Optimized center distance, double ball bearing design, longer life.
- Digital Comparator: With a digital comparator control system, it realizes precise angle control and positioning to ensure accurate and stable movement.
- High Flexibility: With a 180° rotation angle and adjustable control parameters, it can adapt to various needs.
Specifications
| WP5320 Parameters | ||||||||
|---|---|---|---|---|---|---|---|---|
| Electrical parameters | Operating voltage range | 4V-8.4V | Mechanical specifications | Dimensions | 55*20*43(mm) | |||
| No-load speed | 0.151sec/60°(66RPM)@7.4V | Mechanism limit angle | Unlimited | |||||
| No-load current | 120mA@7.4V | Bearing type | Ball bearing | |||||
| Stall torque | 20kg.cm@7.4V | Weight | 67±1g | |||||
| Stall current | 3A@7.4V | Output shaft | 25T/5.9mm | |||||
| Static current | 6mA@7.4V | Reduction ratio | 1/275 | |||||
| Rated load | 6.5kg.cm@7.4V | Gear backlash | ≤0.5° | |||||
| Rated current | 1000mA@7.4V | Linkage play | 0° | |||||
| Kt constant | 6.5kg.cm/A | Angle sensor | Carbon film potentiometer | |||||
Pinout Definition
| Name | Color | Description |
|---|---|---|
| GND | Brown | Power Negative |
| VCC | Red | Power Positive (4-8.4V) |
| Signal | Yellow | PWM control signal input |
Control Features
- Control signal: PWM
- Control system type: Digital comparator
- Operating angle: 180°
- Bilateral angle difference: ≤5°
- Centering Deviation: ≤1°
- Neutral position: 1500μsec
- Dead band width: ≤4μsec
- Pulse width range: 500→2500μsec
Working with Raspberry Pi
You can use the Servo Driver HAT in conjunction with a Raspberry Pi to drive the WP5320 PWM servo.
Power Supply Description
- Connect the battery to the extension board and servo through the green terminal (VIN and GND) on the right. The input voltage range of this terminal is 6~12V. The input voltage is regulated by the onboard 5V voltage regulator to provide a 5V power supply to the servo, with a maximum output current of 3A.
- Please use independent power supply for Raspberry Pi and do not reverse power supply from the servo expansion board to Raspberry Pi, as such power supply is unsafe.
Hardware Connection
According to the figure below, the 40PIN interface of the Servo Driver HAT is defined as follows: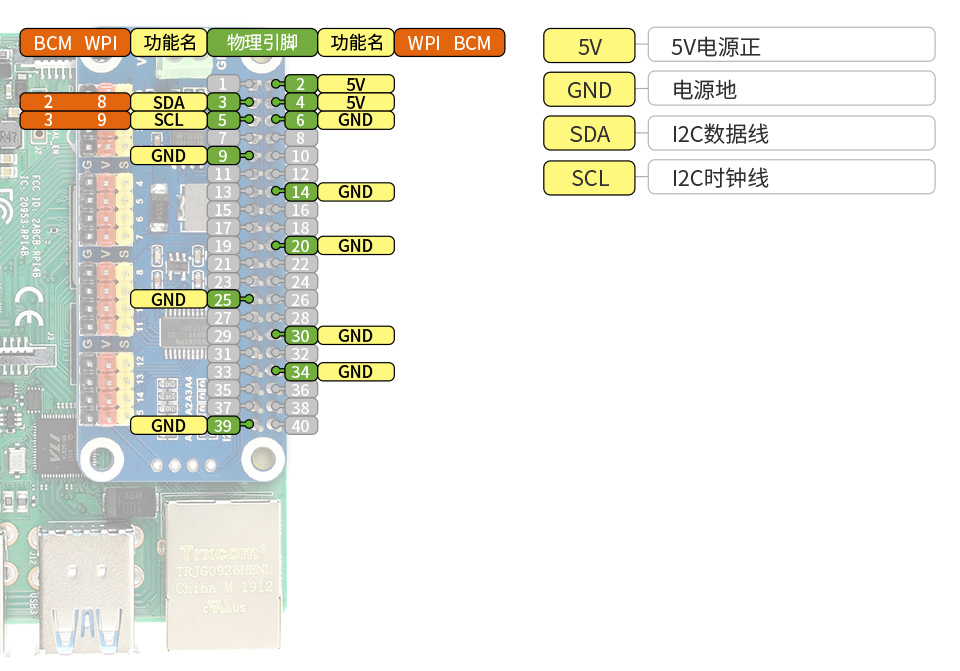
- Connection between Servo Driver HAT and Raspberry Pi
| Servo extension board pins | Raspberry Pi pins | Description |
|---|---|---|
| VCC | 3.3V or 5V | Expansion board power supply (3.3V recommended) |
| GND | GND | Shared ground |
| SDA | SDA (GPIO2) | I2C data pin |
| SCL | SCL (GPIO3) | I2C clock pin |
Software Configuration
Enable I2C Interface
Open the Raspberry Pi terminal and input the following command to enter the configuration interface:
sudo raspi-config
Select "Interface Options" -> "I2C" -> "Yes" to enable the I2C interface

After startup, enter the following command to restart the Raspberry Pi:
sudo reboot
Python Demo
1. Download the demo and unzip it
sudo apt-get install p7zip-full
Wget https://files.waveshare.com/wiki/common/Servo_Driver_HAT.7z
7zr x Servo_Driver_HAT.7z -r -o./Servo_Driver_HAT
sudo chmod 777 -R Servo_Driver_HAT
cd Servo_Driver_HAT/Raspberry\ Pi/
2. Run test demo
#If it is python2
cd python/
sudo python PCA9685.py
#If it is python3
cd python3/
sudo python3 PCA9685.py
Result: The servo is connected to channel 0, and the servo of channel 0 rotates from 0° to 180°, then from 180° to 0°, and the cycle is repeated.
Support
Monday-Friday (9:30-6:30) Saturday (9:30-5:30)
Email: services01@spotpear.com