- sales/support
Google Chat:---
- sales
+86-0755-88291180
- sales01
sales@spotpear.com
- sales02
dragon_manager@163.com
- support
tech-support@spotpear.com
- CEO-Complaints
zhoujie@spotpear.com
- sales/support
WhatsApp:13246739196
Raspberry Pi Install related software and settings User Guide
3.0 Install related software and settings
As the author of WiringPi stopped updating the WiringPi library on August 6, 2019, WiringPi cannot be used in the new 64-bit system of Raspberry Pi, and C files cannot be compiled.
If you are using the official 64-bit image of the Raspberry Pi, we recommend that you use the python code.
1. The Raspberry Pi opens the I2C settings.
PS: The Raspberry Pi RGB_Cooling_HAT and Raspberry Pi control method is operated by I2C, so we need to enable the Raspberry Pi I2C service.
Input command:
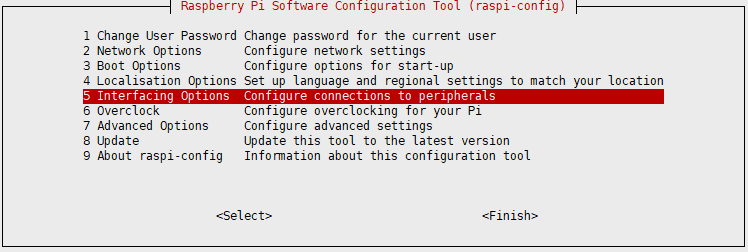
sudo raspi-config
Then, select the【Interfacing Options】

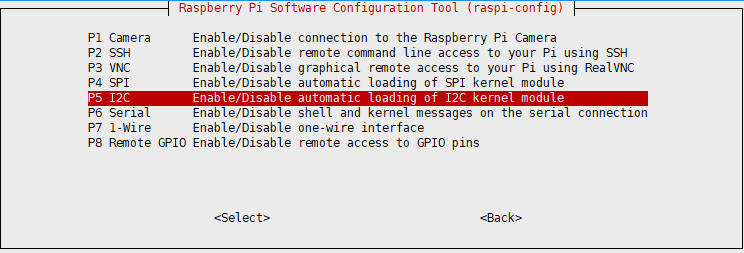
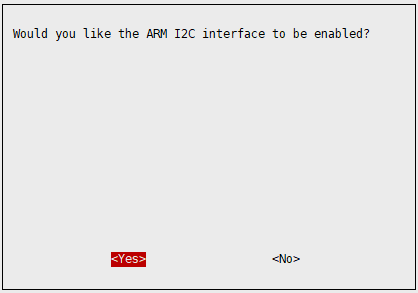
Select 【P5 I2C】 and confirm with “YES”.


2. Install wiringPi
PS: Raspberry Pi official raspbian system will bring its own wiringPi by default. You can run gpio –v to view the version. If there is, skip this step.
Input command:
cd ~
git clone git://git.drogon.net/wiringPi
If this command cannot be downloaded, use the following command to download the unofficial wiringPi image:
git clone https://github.com/WiringPi/WiringPi.git
cd WiringPi
sudo ./build
3. Install gcc
PS: Raspberry Pi official raspbian system will bring its own wiringPi by default. You can run gpio –v to view the version. If there is, skip this step.
Input command to install gcc:
sudo apt-get install gcc
4. Oled display drive
Just need to put the three driver files of the oled driver library (ssd1306_i2c.c/ ssd1306_i2c.h/oled_fonts.h) in the same folder as the source code need to be run, and compile with gcc command.
Eg:
gcc -o oled oled.c ssd1306_i2c.c -lwiringPi
./oled


