- sales/support
Google Chat:---
- sales
+86-0755-88291180
- sales01
sales@spotpear.com
- sales02
dragon_manager@163.com
- support
tech-support@spotpear.com
- CEO-Complaints
zhoujie@spotpear.com
- Only Tech-Support
WhatsApp:13246739196
- Purchase/Shipping/Refund
WhatsApp:13424403025
- HOME
- >
- ARTICLES
- >
- Hot Articles
- >
- Raspberry Pi
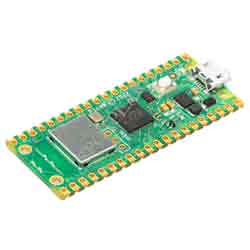
Raspberry Pi Pico W: webserver
At the tail end of last week launched Raspberry Pi Pico W. Based around RP2040 microcontroller, the Pico W brings 802.11n wireless networking to the Pico family.
Turning an LED on and off, over the network, with Raspberry Pi Pico W.
This means that your Raspberry Pi Pico W can now talk to the network, but also that the network can talk back to it; and you can run a webserver on your Pico W to allow you to control things remotely.
Installing MicroPython on Raspberry Pi Pico W
The fastest way to get MicroPython is to download the pre-built release binary from the Documentation pages.
Downloading and installing MicroPython on Raspberry Pi Pico W.
Then go ahead and push and hold the BOOTSEL button, and plug your Pico W into the USB port of your computer. Release the BOOTSEL button after your Pico W is firmly connected, and it will mount as a mass storage device called RPI-RP2. Drag and drop the MicroPython UF2 file onto the RPI-RP2 volume. Your Pico W will now reboot. You are now running MicroPython, and you can now access the REPL via USB Serial.
Controlling a LED via the web
When you’re writing software for hardware, turning an LED on, off, and then on again, is typically the first program that gets run in a new programming environment. Learning how to blink an LED gets you half way to anywhere. We’re going to do exactly that, via a web browser.
Connecting your Raspberry Pi Pico W to a LED.
We are in fact going to build a RESTful(ish) web server to control our LED.
I’ve chosen to attach an external LED to GP15 of our Raspberry Pi Pico W, but you could just as easily use the on-board LED for testing things out. Open up Thonny, and upload the following Python script to your Pico W. If you haven’t used MicroPython and Thonny before, full instructions on how to do that can be found in the Raspberry Pi Pico Python SDK book.
import network
import socket
import time
from machine import Pin
led = Pin(15, Pin.OUT)
ssid = 'YOUR NETWORK NAME'
password = 'YOUR NETWORK PASSWORD'
wlan = network.WLAN(network.STA_IF)
wlan.active(True)
wlan.connect(ssid, password)
html = """<!DOCTYPE html>
<html>
<head> <title>Pico W</title> </head>
<body> <h1>Pico W</h1>
<p>%s</p>
</body>
</html>
"""
max_wait = 10
while max_wait > 0:
if wlan.status() < 0 or wlan.status() >= 3:
break
max_wait -= 1
print('waiting for connection...')
time.sleep(1)
if wlan.status() != 3:
raise RuntimeError('network connection failed')
else:
print('connected')
status = wlan.ifconfig()
print( 'ip = ' + status[0] )
addr = socket.getaddrinfo('0.0.0.0', 80)[0][-1]
s = socket.socket()
s.bind(addr)
s.listen(1)
print('listening on', addr)
# Listen for connections
while True:
try:
cl, addr = s.accept()
print('client connected from', addr)
request = cl.recv(1024)
print(request)
request = str(request)
led_on = request.find('/light/on')
led_off = request.find('/light/off')
print( 'led on = ' + str(led_on))
print( 'led off = ' + str(led_off))
if led_on == 6:
print("led on")
led.value(1)
stateis = "LED is ON"
if led_off == 6:
print("led off")
led.value(0)
stateis = "LED is OFF"
response = html % stateis
cl.send('HTTP/1.0 200 OK\r\nContent-type: text/html\r\n\r\n')
cl.send(response)
cl.close()
except OSError as e:
cl.close()
print('connection closed')
Make sure to replace the ssid and password with the name and password for your own wireless network at home, and then hit the button to run the script on your Pico W.
Running our Python script on Pico W from the Thonny editor
After your Pico W connects to your wireless network, you should see the the IP address for your board appear on the REPL inside the Thonny shell window.
To turn our LED on, you can open up a web browser and go to http://10.3.15.120/light/on to turn the LED on, and http://10.3.15.120/light/off to turn the LED off again.
Turning our LED on from a web browser
You should subsitute your IP address, which for most home networks will probably be in the 192.168.1.X range, for the one shown here.
Going further
This example lets you remotely turn an LED on, and then off again. However, we can also extend this example to add buttons to the web page we’re serving to allow you to control the LED directly from a web interface rather than by using a RESTful server — which after all is more suited to programmatic use rather than working from a web browser. Alternatively we can go further and reimplement our server, so that rather than blocking, it will operate asynchronously.
More information about connecting your Pico W to the web can be found in the online documentation and the “Connecting to the internet with Raspberry Pi Pico W” book.