- sales/support
Google Chat:---
- sales
+86-0755-88291180
- sales01
sales@spotpear.com
- sales02
dragon_manager@163.com
- support
tech-support@spotpear.com
- CEO-Complaints
zhoujie@spotpear.com
- Only Tech-Support
WhatsApp:13246739196
- Purchase/Shipping/Refund
WhatsApp:13424403025
M.2 HAT+ Compact User Guide
Overview
Introduction
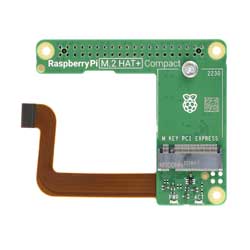
The Raspberry Pi M.2 HAT+ Compact is designed for use with the Pi case for Raspberry Pi 5. The Compact form factor enables you to connect M.2 M key peripherals with the 2230 form factor to Raspberry Pi 5, while allowing space for the case's integrated cooling fan.
Features
- Supports NVMe protocol M.2 interface hard drives, featuring high-speed read and write, and high work efficiency
- PCI-E×1 Gen2 or Gen3 mode
- Only supports PI5B
- Supports 2230 form factor M.2 Solid State Drive
- Onboard operational indicator lights, the PWR is continuously lit when powered on, and the ACT blinks during read and write operations, making the operational status easily visible
- HAT+ design, onboard EEPROM chip
Usage Guide
Hardware Connection
Pay attention to the direction of the cable, and the connection is shown in the figure: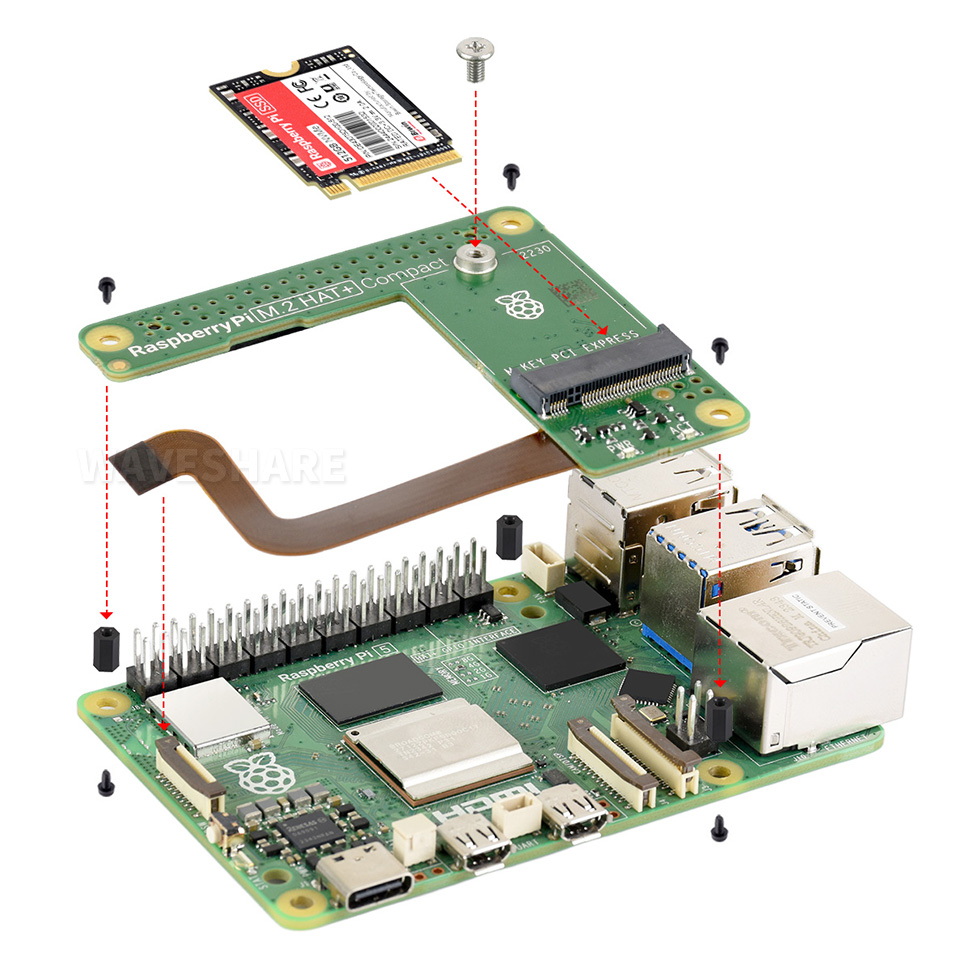
Mount
1. Enable PCIE interface
Connect the hardware, the latest system will have hardware detection, connecting the hardware will automatically enable PCIE
If it defaults to not having the PCIE interface enabled, execute: add "dtparam=pciex1" to /boot/firmware/config.txt
2. PCIE is gen2 by default, if you need to enable PCIE gen3, then add following to /boot/firmware/config.txt:
dtparam=pciex1_gen=3
3. After the modification, reboot the PI5, and the device can be recognized.
As shown in the figure below, SM2263 is identified as my SSD solid state drives, and the other PI5 is the RPI chip
4. Partition, skip this step if you have partitioned and formatted on other platforms (Note: Partitioning will delete all data on the SSD, please proceed with caution)
Lsblk This command is executed to view the disk (if you want to see the details, run the sudo fdisk -l command)Partition: sudo fdisk /dev/nvme0n1 The device number is the total device number, do not add p1, that is just a partition How to use the partitioning tool fdisk: n New partition q Quit without saving p Print the partition table m Print the selection menu D Delete the partition w Save and exit t Modify the ID number Add the partition and execute n, then save and exit with w
5. Format
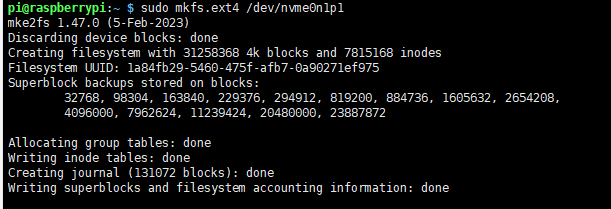
sudo mkfs. Execute the command and press Tab key, you will see a lot of different suffixes, and the different suffixes are the formats you need to formatIf I want to format it in ext4 file format, then execute the command: sudo mkfs.ext4 /dev/nvme0n1p1 Wait a moment, once all "done" appear as below, it indicates that the formatting is completed
6. Mount
Create a mount directory
sudo mkdir toshiba
Mount the device
sudo mount /dev/nvme0n1p1 ./toshiba
Check the disk status
df -h
Read/Write Test
Enter the directory where the disk is mounted
cd toshiba
- Free up the memory
sudo sh -c "sync && echo 3 > /proc/sys/vm/drop_caches"
- Copy Raspberry Pi memory content to the hard disk (write)
sudo dd if=/dev/zero of=./test_write count=2000 bs=1024k

- Copy the hard drive content to the Raspberry Pi memory (/etc/fstab read )
sudo dd if=./test_write of=/dev/null count=2000 bs=1024k

- Note: The test results vary for different cards and environments. The Raspberry Pi is significantly affected. If you want to test accurate performance, use a PC for the test
Auto Mount
Test shows there's no issue. If it's not required to be used as a system disk, but only for expanding the disk, set it to auto-mount
sudo nano /etc/fstab

#Add at the end
/dev/nvme0n1p1  /home/pi/toshiba  ext4  defaults  0  0
#/dev/nvme0n1p1 is the device name, /home/pi/toshiba refers to mounting to a directory, ext4 is the file system type, defaults uses the default mount option
#Make the changes take effect (reboot only after testing, otherwise it will fail to mount and boot)
sudo mount -a

#Then reboot
Check the device with lsblk
NVMe SSD Boot
Boot the Raspberry Pi with a TF card first, mount and test it, and make sure the hardware can work properly
Choose one of the following methods
Method 1
1. Run the following command:
sudo raspi-config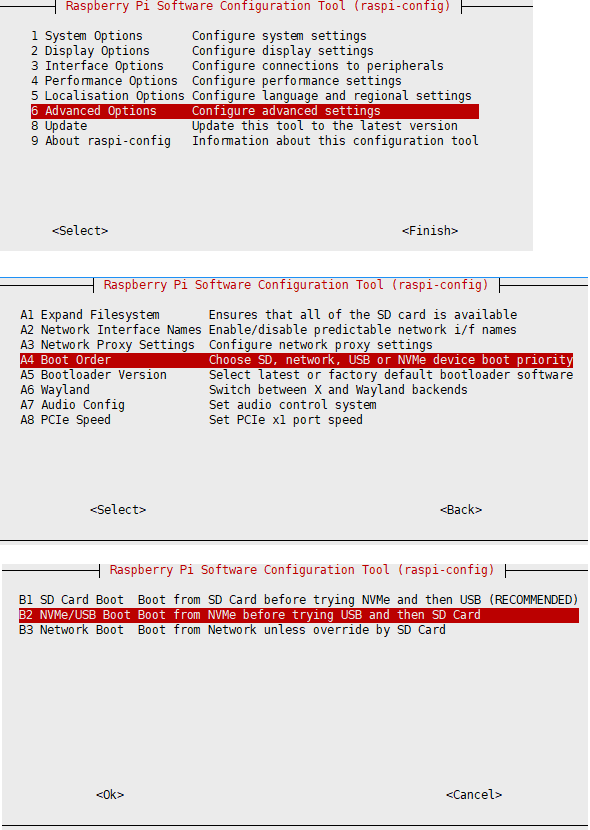
2. Reboot Raspberry Pi
If you find you can't modify it multiple times, please reconnect to the network and then try to modify it (wait for the network to synchronize the time automatically), or modify the file after setting the correct time
3. Flash the system to NVME, then connect the NVME to the expansion board, remove the TF card and power it on again
Method 2
1. Modify the BOOT_ORDER in the Raspberry Pi boot loader configuration:
sudo rpi-eeprom-config --edit Modify BOOT_ORDER=0xf41 to BOOT_ORDER=0xf416For more information, please refer to BOOT_ORDER
2. Reboot Raspberry Pi
If you find you can't modify it multiple times, please reconnect to the network and then try to modify it (wait for the network to synchronize the time automatically), or modify the file after setting the correct time
3. Flash the system to NVME, then connect the NVME to the expansion board, remove the TF card and power it on again
Support
Monday-Friday (9:30-6:30) Saturday (9:30-5:30)
Email: services01@spotpear.com