- sales/support
Google Chat:---
- sales
+86-0755-88291180
- sales01
sales@spotpear.com
- sales02
dragon_manager@163.com
- support
tech-support@spotpear.com
- CEO-Complaints
zhoujie@spotpear.com
- Only Tech-Support
WhatsApp:13246739196
- Purchase/Shipping/Refund
WhatsApp:13424403025
- HOME
- >
- ARTICLES
- >
- Common Moudle
- >
- LCD
101M-8001280-IPS-CT-K User Guide
Features
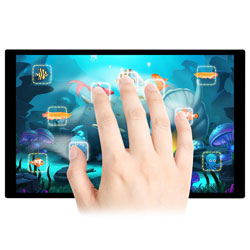
- 10.1inch DSI touch screen, ten-point capacitive touch control
- IPS display panel with hardware resolution of 1280×800
- Optical bonding toughened glass panel, clearer picture quality
- Toughened glass capacitive touch panel, hardness up to 6H
- Drive the LCD through the DSI interface, with a refresh rate of up to 60Hz
- Supports software control of backlight brightness
- Aluminum alloy back cover design, pure passive cooling design
Electrical Specifications
| Parameters | Minimum Value | Standard Value | Maximum Value | Unit | Note |
| Input voltage | 4.75 | 5.00 | 5.30 | V | Note 1 |
| Input current | - | 0.8 | TBD | A | Note 2 |
| Operating temperature | 0 | 25 | 60 | ℃ | Note 3 |
| Storage temperature | -10 | 25 | 70 | ℃ | Note 3 |
•Note 1: Input voltages exceeding the maximum or improper operation may cause permanent damage to the device.
•Note 2: The input current needs to be ≥ 2A, otherwise it will cause the startup failure or display abnormality, and staying in an abnormal state for a long time may cause permanent damage to the device.
•Note 3: Please do not store the display panel in a high-temperature and high-humidity environment for a long time. The display panel should operate within its limits, otherwise it may be damaged.
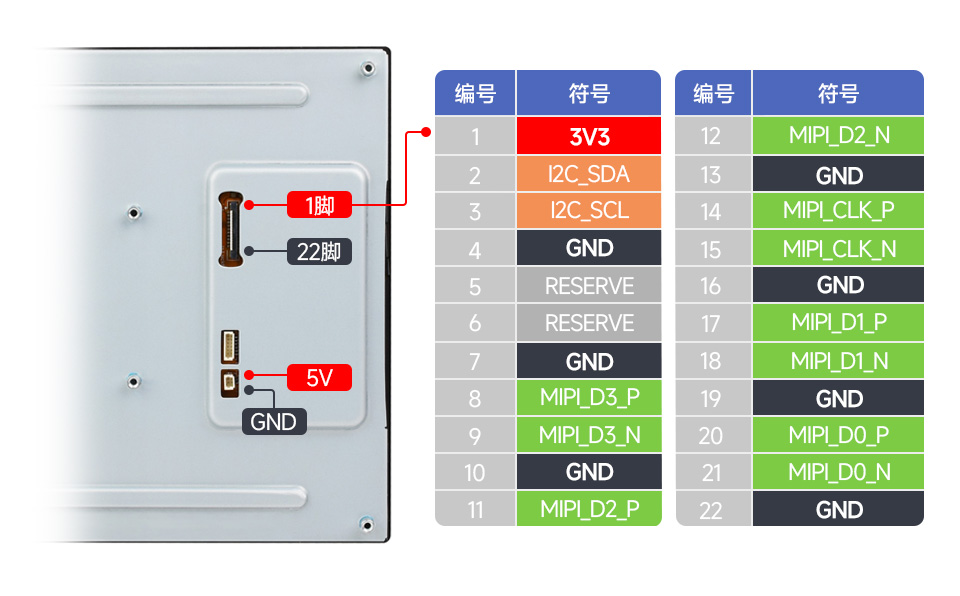
Interfaces
Usage Instructions
Luckfox-Omni3576
Hardware connection
1. Use a 22PIN FPC cable to connect the DSI interface of the display to the DSI interface of the Omni3576 motherboard.
2. Use a 2PIN power cable to connect the power interface of the display to the 40PIN GPIO interface on the Omni3576 motherboard. As shown in the figure below: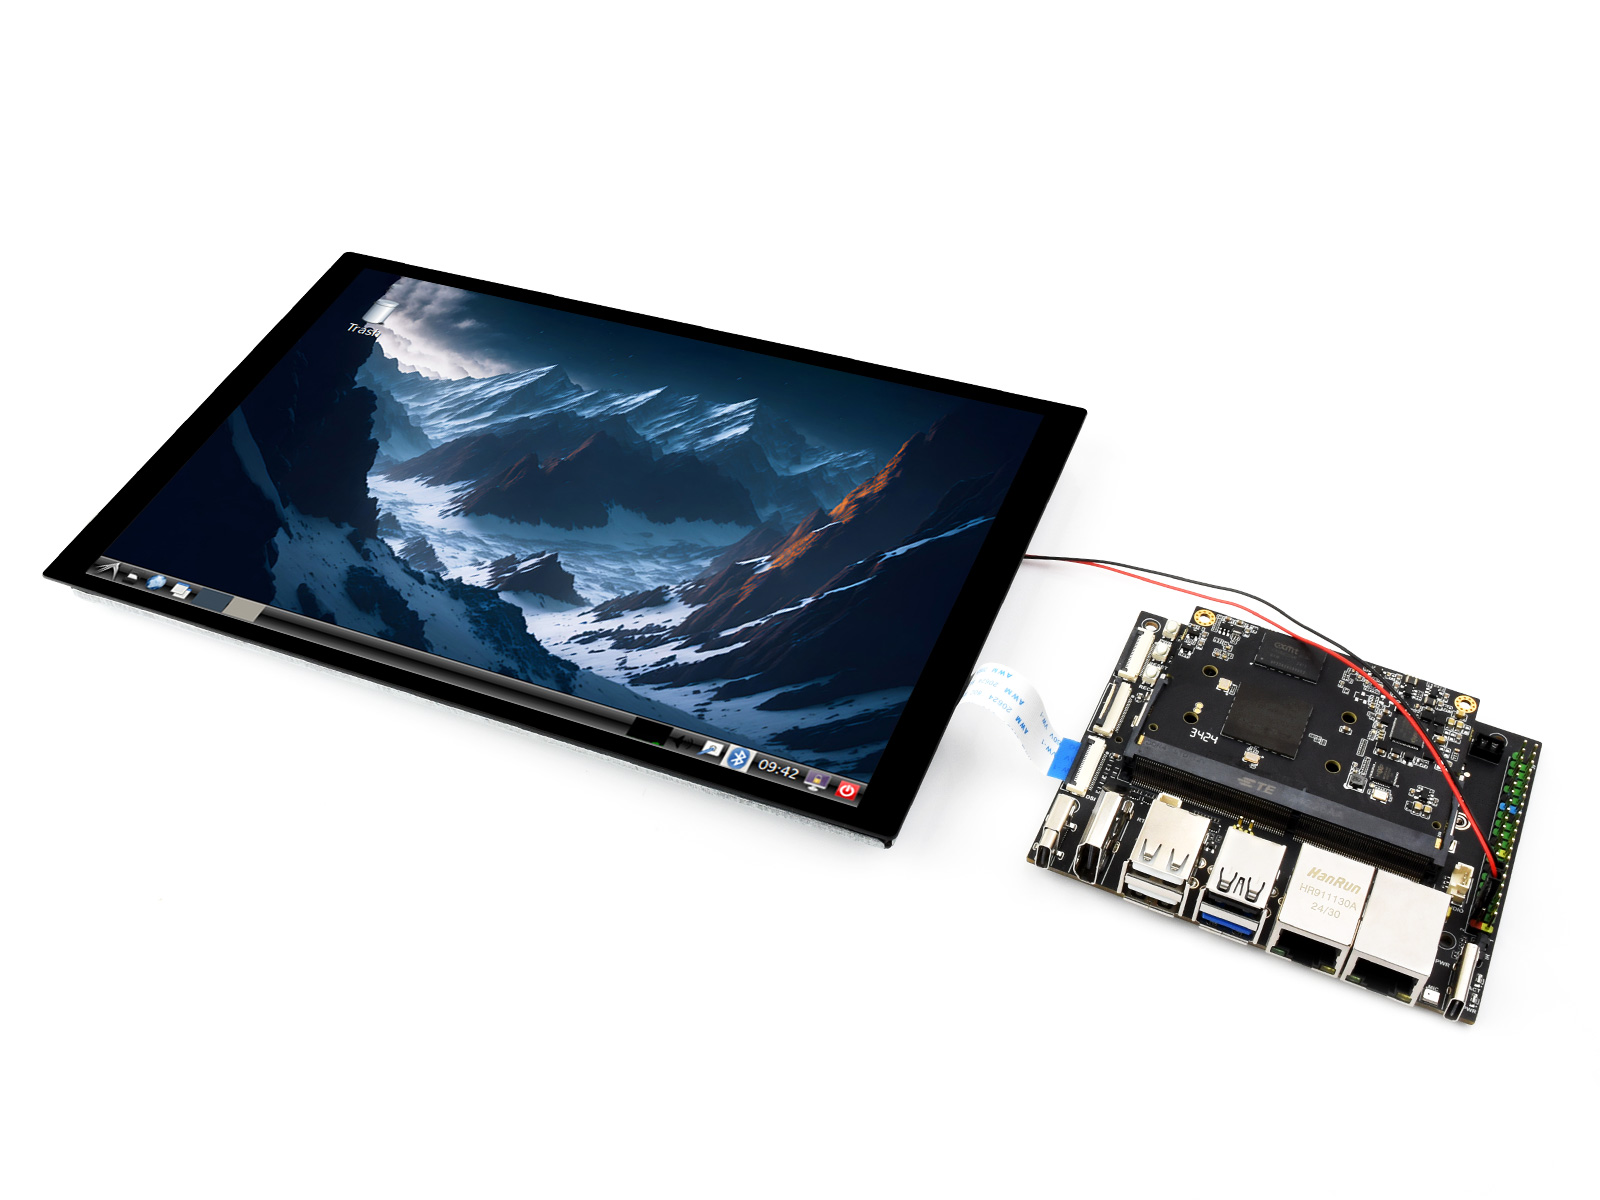
Software settings
1. Download and use the mirror file from the Luckfox official website to burn the corresponding system image.
2. Connect the Omni3576 motherboard to a 5V power supply, and the screen will light up after the system starts
View screen information
- The screen ID available in the current system can be viewed using the following command:
sudo cat /sys/kernel/debug/dri/0/summary
- Under normal circumstances, the following output will be obtained:
Video Port0: DISABLED
Video Port1: ACTIVE
    Connector:DSI-1     Encoder: DSI-203
        bus_format[100a]: RGB888_1X24
        overlay_mode[0] output_mode[0] SDR[0] color-encoding[BT.709] color-range[Full]
    Display mode: 800x1280p60
        clk[70000] real_clk[69883] type[48] flag[a]
        H: 800 840 860 880
        V: 1280 1300 1304 1324
        Fixed H: 800 840 860 880
        Fixed V: 1280 1300 1304 1324
    Esmart1-win0: ACTIVE
        win_id: 1
        format: XR24 little-endian (0x34325258) pixel_blend_mode[0] glb_alpha[0xff]
        color: SDR[0] color-encoding[BT.601] color-range[Limited]
        rotate: xmirror: 0 ymirror: 0 rotate_90: 0 rotate_270: 0
        csc: y2r[0] r2y[0] csc mode[0]
        zpos: 1
        src: pos[0, 0] rect[800 x 1280]
        dst: pos[0, 0] rect[800 x 1280]
        buf[0]: addr: 0x00000000fe44e000 pitch: 3200 offset: 0
Video Port2: DISABLED
Display rotation
- Rotation command
#Rotate 90 degrees
xrandr -o left
#Rotate 270 degrees
xrandr -o right
#Rotate 180 degrees
xrandr -o inverted
#Rotate 0 degrees
xrandr -o normal
- The effect of using xrandr rotation is a one-time and the screen orientation is restored after the system restarts. If you want the device to rotate automatically upon startup, you need to modify the configuration file:
sudo vim /etc/X11/xorg.conf.d/10-monitor.conf
Add the following statement:
### Valid values for rotation are "normal", "left", "right"
Section "Monitor"
#    Identifier "Default Monitor"
    Identifier  "DSI-1"
    Option      "Rotate" "left"
EndSection
Touch rotation
- After the system displays rotation, the touch direction is inconsistent, and you need to perform the following operations to touch and rotate:
sudo vim /etc/udev/rules.d/99-luckfox-touch.rules
- Add the corresponding configuration according to your rotation direction, save it, and restart the development board.
90 degrees:
ENV{ID_INPUT_TOUCHSCREEN}=="1", ENV{LIBINPUT_CALIBRATION_MATRIX}="0 -1 1 1 0 0"
180 degrees:
ENV{ID_INPUT_TOUCHSCREEN}=="1", ENV{LIBINPUT_CALIBRATION_MATRIX}="-1 0 1 0 -1 1"
270 degrees:
ENV{ID_INPUT_TOUCHSCREEN}=="1", ENV{LIBINPUT_CALIBRATION_MATRIX}="0 1 0 -1 0 1"
ESP32-P4
Screen driver
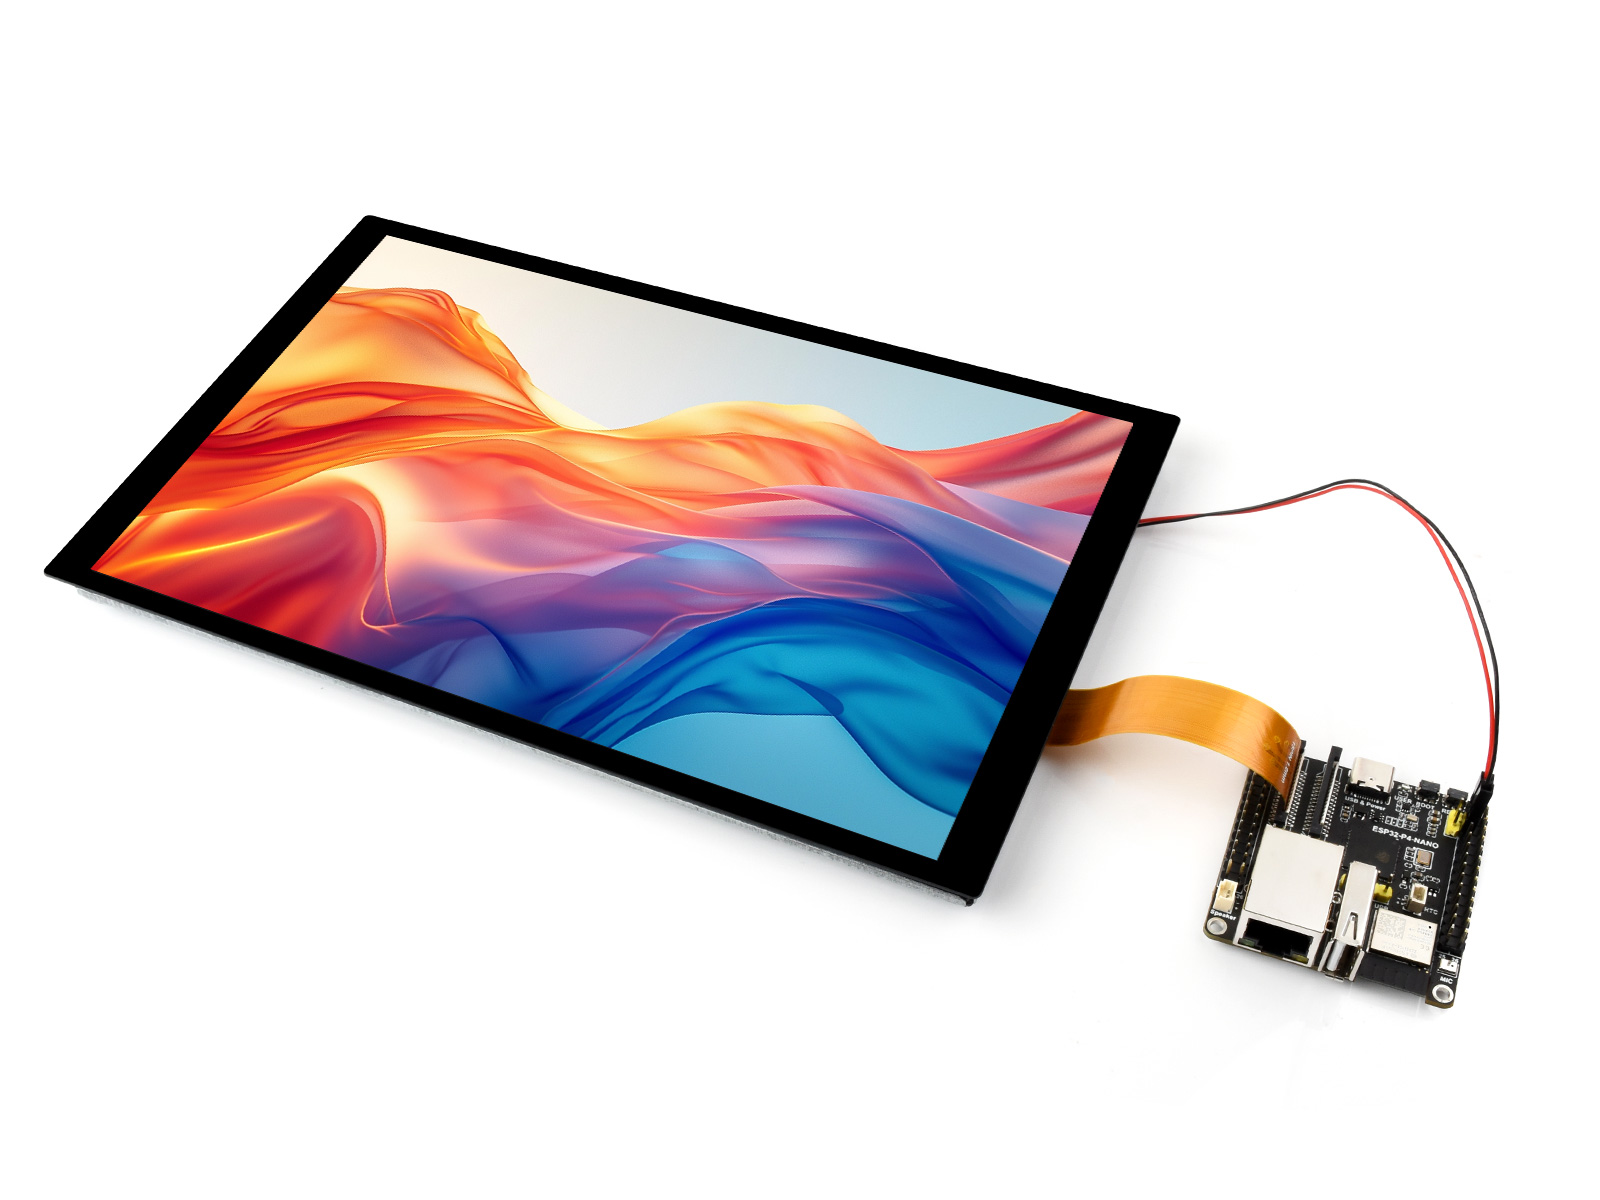
The ESP32-P4-NANO drives the screen via MIPI 2-lane
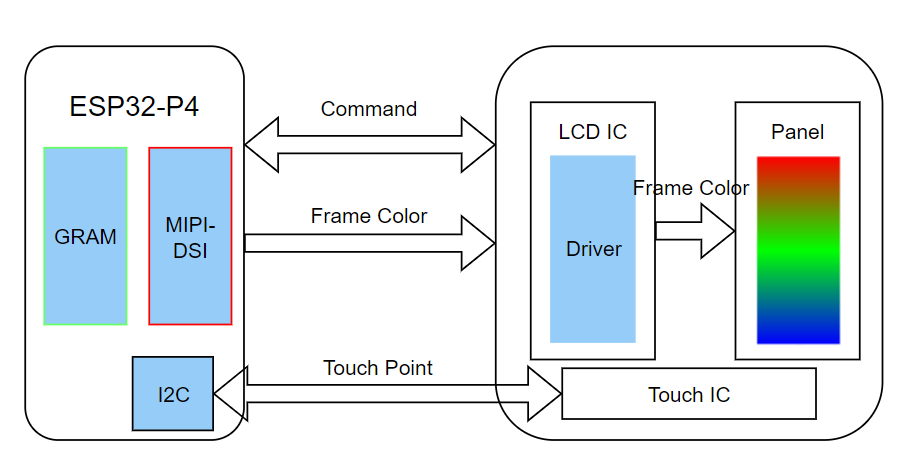
- The screen driver has been packaged as a component, with the component located at ESP Component Registry
Useidf.py add-dependency "waveshare/esp_lcd_jd9365_10_1"to add components to your ESP-IDF project - You can also directly view the ESP32-P4-NANO driver for this screen on the Wiki: ESP32-P4-NANO_MIPI-DSI
Backlight control
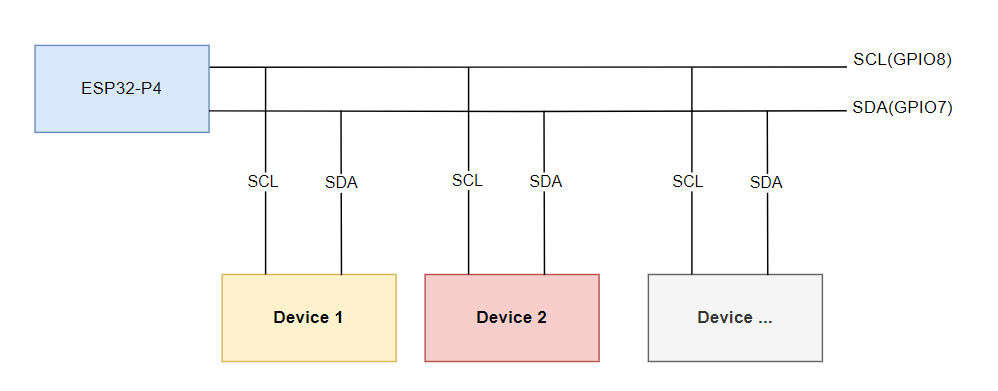
After connecting the ESP32-P4-NANO with the matching FPC cable and power cable, the backlight can be controlled by writing 0x00~0xFF (full brightness) to the 0x45 device and 0x86 register on the screen through the ESP32-P4-NANO I2C
If you use the ESP32-P4-NANO BSP component, you can control it directly by the following functions
bsp_display_brightness_init();   // Initialize the backlight

bsp_display_backlight_on();      // Turn on the backlight, default full brightness

Bsp_display_backlight_off();      // Turn off the backlight

bsp_display_brightness_set(95); // Set the specific backlight brightness, 0~100
Resources
Documents
- Screen initialization function
FAQ
Support
Monday-Friday (9:30-6:30) Saturday (9:30-5:30)
Mobile: +86 13434470212
Email: services01@spotpear.com