


- sales/support
Google Chat:---
- sales
+86-0755-88291180
- sales01
sales@spotpear.com
- sales02
dragon_manager@163.com
- support
tech-support@spotpear.com
- CEO-Complaints
zhoujie@spotpear.com
- Only Tech-Support
WhatsApp:13246739196
- Purchase/Shipping/Refund
WhatsApp:13424403025
- HOME
- >
- ARTICLES
- >
- Jetson Series
- >
- Jetson Acc
NVIDIA Jetson Nano T300-C3 User Guide
Overview
The T300-C3 case is compatible with T300 V1.1 2.5 inch SATA SSD/HDD Shield & Jetson nano A02/B01/2GB version.
Note: The NVIDIA Jetson Nano Developer Kit and antenna are not included, and the 4-pin cooling fan is not included aslo!
Features
- Compatible with Jetson Nano Development Board Rev A02 and Rev B01 and 2GB version!
- With power switch and Reset switch, it is convenient to start with one button;
- The power switch has an LED light display;
- The reset switch is placed on the back to prevent accidental touch;
- Support fan installation, reserve 22mm high fan installation height; easy to install the official recommended fan;
- The antenna hole is reserved to facilitate the arrangement of the external antenna;
- Easy to install;
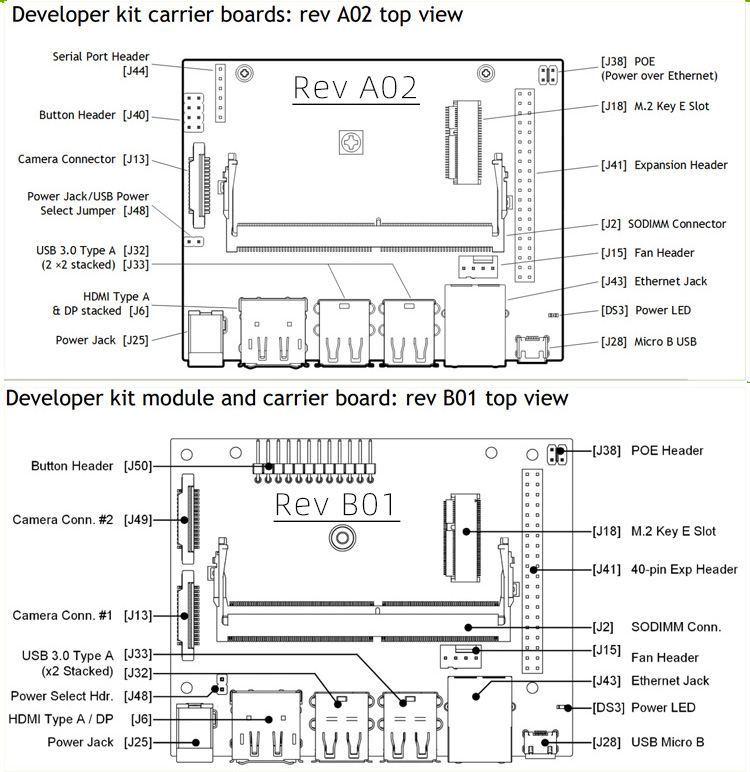
Check which version of JETSON NANO A02/B01 you are using
How to connect
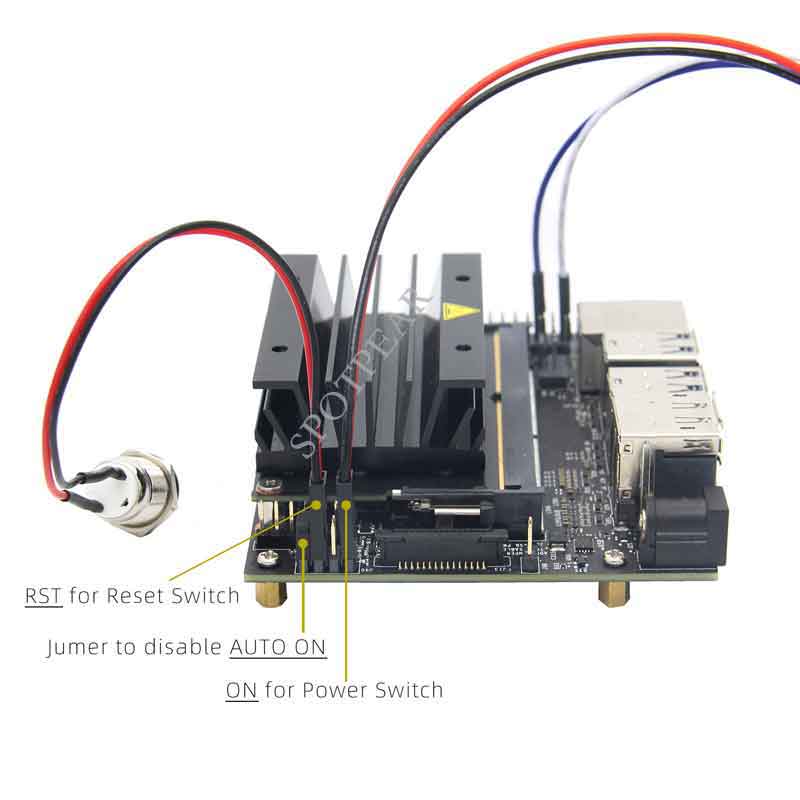
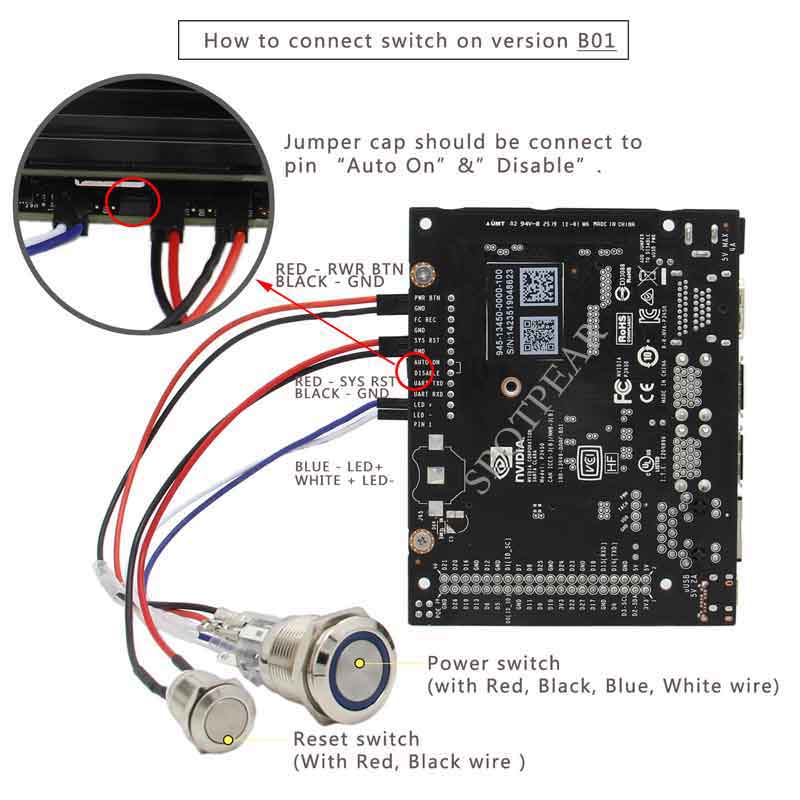
1) There are two jumper caps in the screws pack. ①Because this case has a power control switch, you need to disable the AUTO ON function firstly. Please insert one jumper cap into the “AUTO ON” position of the J40 pin to disable the AUTO ON function. ②Another Jumper cap is used to toggle the power supply between Micro USB and DC Jack. Insert this jump cap in "J48" Pin to disable Micro USB PWR to power (enable the DC 5V 4A jack PWR). The power control switch should be insert into “ON” pin at J40. And the blue and white cable of power control switch need to be insert in “3.3V” and “GND” pin at J41.
2) The reset switch should be insert in “RST” pin at J40. Please refer to the photo3 at the back.
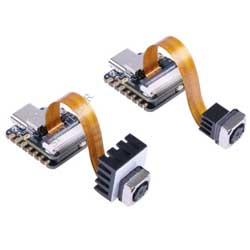
3) A camera bracket is added for raspberry pi official camera, can fix the camera on the top or side of the case, adjust the camera position as your requirement. Please refer to the photo1 at the back.
About cooling fan
The case is reserve 22mm high fan installation height , it is recommend to use Noctua NF-A4x20 5V PWM fan, we prepair 4 pcs PM2.5*22 screws and 4 pcs M2.5 nuts and 4 pcs gaskets to install this fan. You need to use the ABS tweezers when you install this fan.