


- sales/support
Google Chat:---
- sales
+86-0755-88291180
- sales01
sales@spotpear.com
- sales02
dragon_manager@163.com
- support
tech-support@spotpear.com
- CEO-Complaints
zhoujie@spotpear.com
- Only Tech-Support
WhatsApp:13246739196
- Purchase/Shipping/Refund
WhatsApp:13424403025
Raspberry Pi 3.2inch HDMI LCD (H) User Guide
Overview
This is a 3.2inch HDMI display, 480x800 resolution, supports Raspberry Pi, Jetson Nano, and Desktop Windows PC.
Features
- 3.2inch IPS display, hardware resolution is 480x800
- Working with Raspberry Pi, support Raspbian / Ubuntu/ Kali/ Win10 IoT and the Retropie, driver free
- Working with Jetson Nano, support Ubuntu, driver free
- Working with PC, support Windows 11/10/8.1/8/7, driver free
- Backlight is adjustable
Work with Windows PC
To use with Windows PC, the display supports Windows 11, 10, 8.1, 8 and Windows 7
- Connect the Only Power interface to the USB port of PC
- Connect the Display interface to the HDMI port of PC
Note: This display is a vertical display by default, resolution is 480 x 800. You can change the orientation by software.
Work with Raspberry Pi
To use display with the Raspberry Pi, you need to configure the resolution manually.
- Download the newest image from Raspberry Pi Website
- Unzip the image archive and get the .img file.
- Format the SD card by the SDFormatter software
- User the Win32DiskImager software, write the .img file to the SD card.
- After writing, modify the config.txt file:
max_usb_current=1
hdmi_force_hotplug=1
hdmi_group=2
hdmi_mode=87
hdmi_drive=1
hdmi_timings=480 0 50 20 50 800 0 19 20 20 0 0 0 60 0 38000000 6
- Save and eject the sd card.
- Insert the SD card to Raspberry Pi
- Connect the Only Power interface to the USB port of Raspberry Pi
- Connect the Display interface to the HDMI port of Raspberry Pi
- Waiting for a moment, and the display lights and works.
Orientation
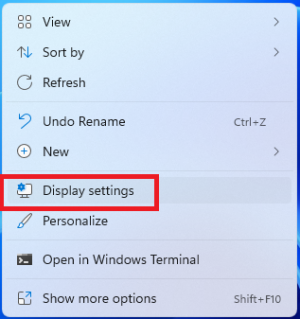
Windows PC
- Right-click and choose the Display setting
- Click the Identify to detect the display
- Choose the display, set the display mode to extend and change the orientation
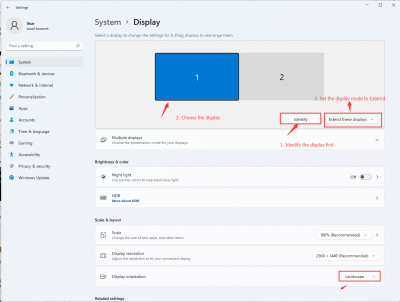
- Choose the display, set the display mode to extend and change the orientation
Raspberry Pi
- Open the Menu of Raspberry Pi
- Choose Preferences -> Screen Configuration
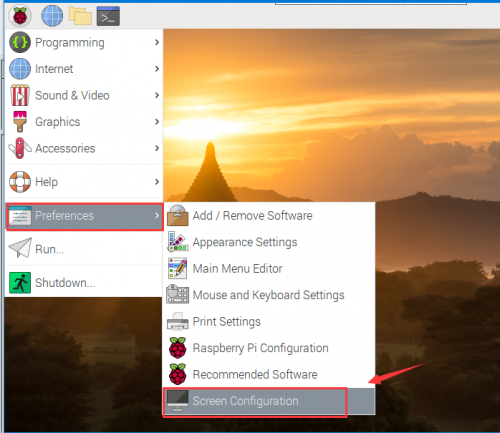
- Choose Preferences -> Screen Configuration
normal: Default orientation
Right: Rotate 90°
inverted: Rotate 180°
left: Rotate 270°
Note: If you use Raspberry Pi 4, please enable the dtverlay=vc4-fkms-V3D
Others
Control Backlight
The brightness can be adjusted by the buttons on the side。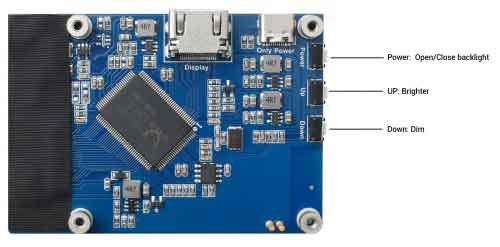
=Power saving
To disable the Power saving mode and keep the display lighting.
- Open the lightdm.conf file
sudo nano /etc/lightdm/lightdm.conf
- Modify the lightdm.conf file, find the xserver-command lin.
#xserver-command=X
Modify it to
xserver-command=X -s 0 -dpms
- -s # - disable the display saver
- dpms: diable the power saving.
- Reboot
sudo reboot