- sales/support
Google Chat:---
- sales
+86-0755-88291180
- sales01
sales@spotpear.com
- sales02
dragon_manager@163.com
- support
tech-support@spotpear.com
- CEO-Complaints
zhoujie@spotpear.com
- Only Tech-Support
WhatsApp:13246739196
- Purchase/Shipping/Refund
WhatsApp:13424403025
Raspberry Pi ------ 4.8 Raspberry Pi boot self-starting setting User Guide
Raspberry Pi boot self-starting setting
There are many ways to start the Raspberry Pi boot. Choose one of them (new .desktop file) as a demonstration.
1. Add boot self-starting
1.1 New startup script start.sh
nano /home/pi/RGB_Cooling_HAT/start.sh
Input following content:
#!/bin/sh
sleep 5s
python /home/pi/RGB_Cooling_HAT/RGB_Cooling_HAT.py
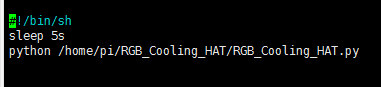
Press ctrl+X, press Y to save, press Enter.
2. New create boot startup program
2.1 Input following command to open.config folder
cd /home/pi/.config
2.2 Input following command to new create autostart folder
mkdir autostart
2.3 Input following command to enter autostart folder
cd autostart
2.4 Input following command to new create shortcut for self-starting
nano start.desktop
Input following content:
[Desktop Entry]
Type=Application
Exec=sh /home/pi/RGB_Cooling_HAT/start.sh
Press ctrl+X, press Y to save, press Enter.
Exec=Start command.
!!!Note:
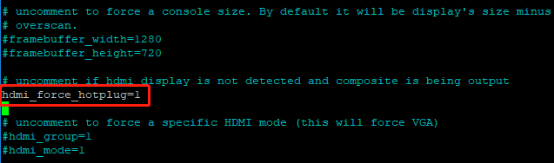
Since this self-starting method needs to be started after the desktop is started, the start up will be slower. If it is found that it cannot be self-started after adding, please check if there is a ## in front of hdmi_force_hotplug=1 in the /boot/config.txt file. If there is a # number, please delete the # number. The picture will prevail.
3. Restart Raspberry Pi
After restarting, the temp_control program will start automatically, and the fan, RGB light and oled screen will have corresponding responses.
Input following command to restart Raspberry Pi:
sudo reboot
4. Exit the program
Since the self-starting program is running in the background, we cannot directly exit the program in the open terminal. If you need to modify the program, but the background process interferes with our debugging results, so you need to see the process number (PID) of the daemon, and then end this process.
4.1 Input top in the terminal to open the process list.
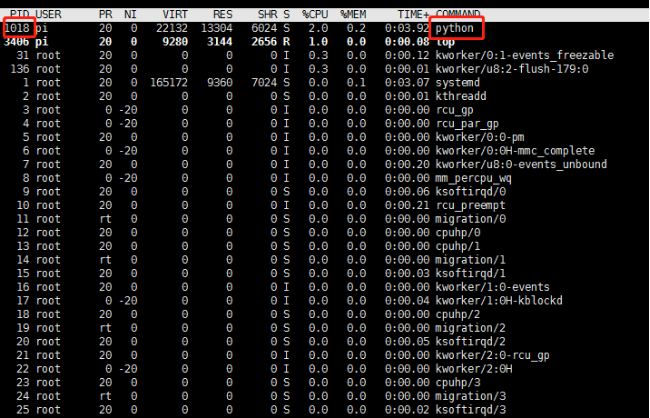
Sometimes it may take a while for the system to queue up processes that take up a lot of CPU resources. From the picture we can see the boot temp_control program, its PID is 718, so we kill this process number, temp_control program will not run in the background.
Press Ctrl+C to exit top.
4.2 Input following command to end the process
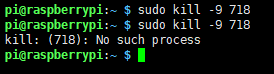
sudo kill -9 PID
For example: In the above case, we can run the sudo kill -9 718 command to end the temp_control process running in the background. If you run it again, it will be prompted that the process does not exist.
4.3 Restart the background operation
If we have finished the process running in the background, but we want to restart the background process.
First method: restart the Raspberry Pi,
Second method: Add an “&” to the running program.
For example, we still run the temp_control program in the background:
We need to input following command to enter the target folder (based on the location of the file saved by the individual)
cd ~/temp_control
./temp_control &
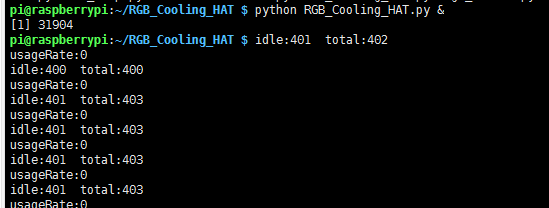
At this point, the system will prompt the PID of this process (1015).
Press Ctrl+C again. You can see that the terminal can enter other commands, and the program is running in the background.