- sales/support
Google Chat:---
- sales
+86-0755-88291180
- sales01
sales@spotpear.com
- sales02
dragon_manager@163.com
- support
tech-support@spotpear.com
- CEO-Complaints
zhoujie@spotpear.com
- Only Tech-Support
WhatsApp:13246739196
- Purchase/Shipping/Refund
WhatsApp:13424403025
Tutorial Initalize New SSD User Guide
Tutorial Initalize New SSD
This tutorial will walk you through how to initialize, partition and format a brand new SSD.
Any new drive you purchase unless clearly stated should come completely clean, meaning not formatted, not partitioned, and not even initialized.
This tutorial is specific to Windows operating systems, it is similar with Mac and Linux.
QUICK GUIDE: >Right Click Computer > Manage > Disk Manager > Initialize MBR > Right Click choose New Simple Volume > Follow the wizard.
Step 1. Plug in your Drive.
Step 2. Accessing the 'Disk Manager’: There are several ways to do this, but for the purpose of this tutorial, we will use the most visual method.
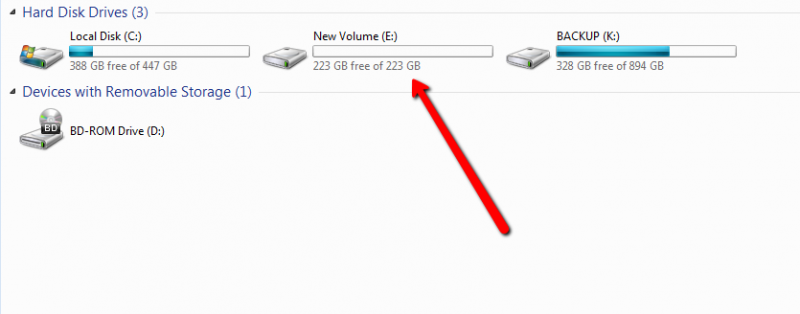
I. Open a folder:

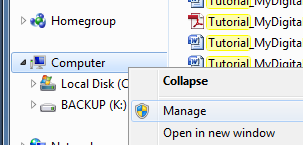
II. Right click on 'Computer' or 'This PC' and choose 'Manage' :
III. This will bring up the computer management console, click on 'Disk Management' in the left pane. If you installed the drive correctly, you will get a popup stating that you must initialize a disk before you can access it: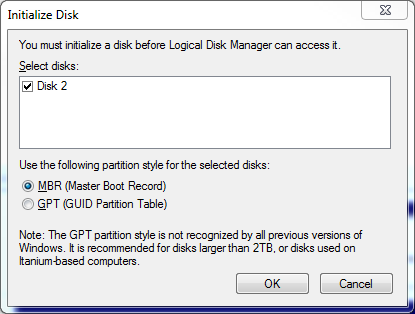
Example A:
For the purpose of this tutorial, we are going to click 'Cancel.' Now we can see the full disk management console: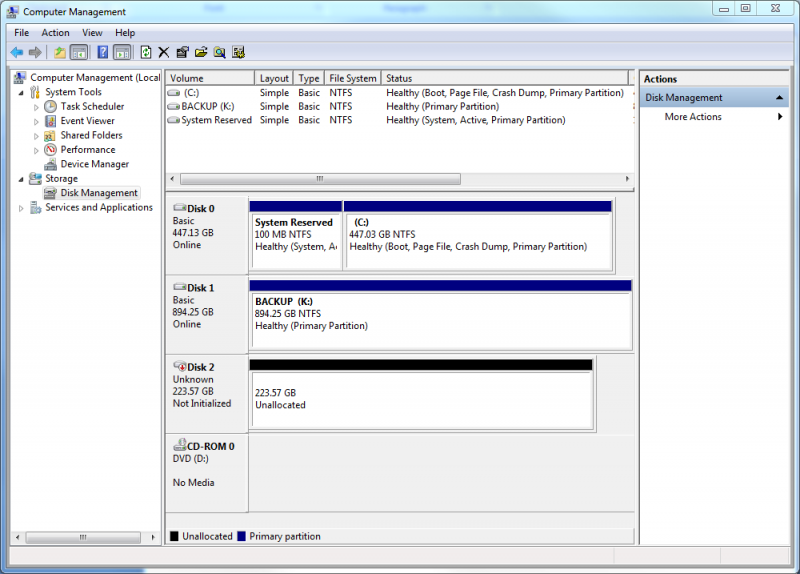
IV. As you can see from the photo above, Disk 2 has a red arrow pointing down and the area that would normally contain the drive letter and information about the drive states unallocated.
Step 3. Initialize the drive
I. Right click on the area where the red down arrow is located and select 'Initialize Disk' :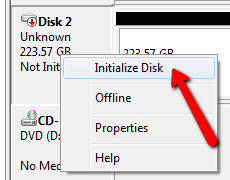
II. This will bring up the same dialog box we cancelled out of a moment ago, choose whether you want MBR or GPT and click okay. For the purpose of this tutorial, we are going to create a Master Boot Record. See Example A above.
Step 4. Partition the drive
I. Now that the drive is initialized, you can right click on the unallocated area and create 1 or many partitions.
II. Right click on the area and choose 'New Simple Volume' :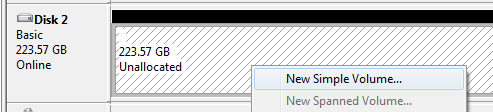
III. This will bring up a short Wizard that will walk you through the next steps, for the purpose of this tutorial, we are going to leave everything as default which will create 1 full size partition formatted in NTFS and a drive letter will be automatically assigned.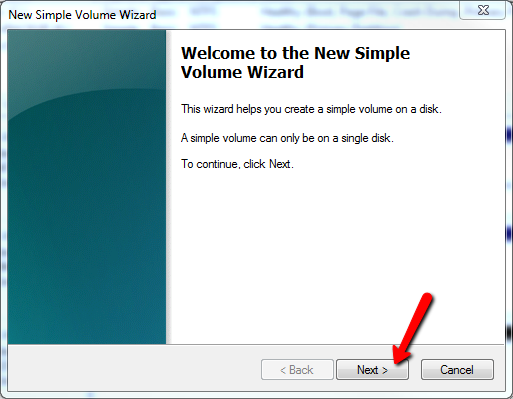
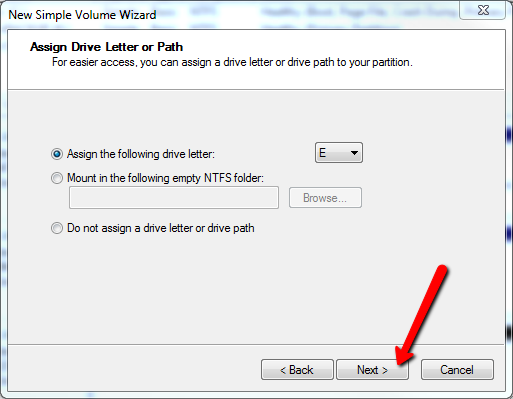
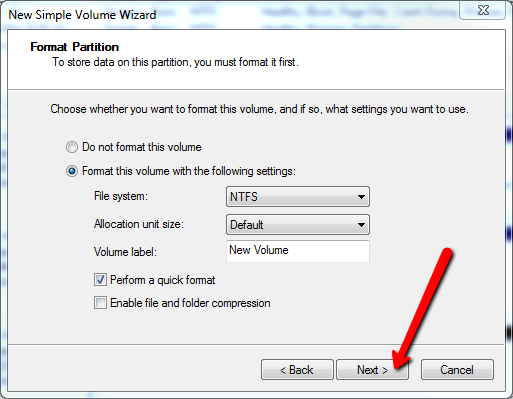
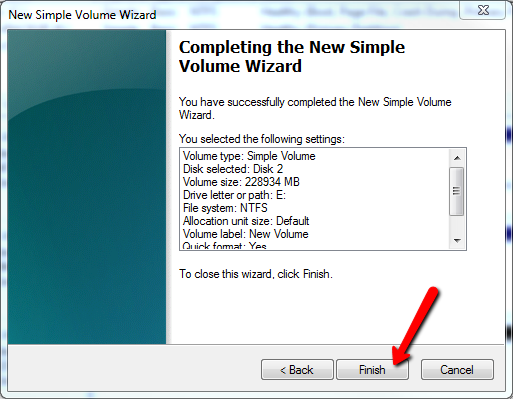
After clicking finish, depending on the size and speed of the drive, it should only take a few seconds to complete, and now, you can see your drive in the computer area and you can use it just like a thumb drive, wherever you plug it in.