- sales/support
Google Chat:---
- sales
+86-0755-88291180
- sales01
sales@spotpear.com
- sales02
dragon_manager@163.com
- support
tech-support@spotpear.com
- CEO-Complaints
zhoujie@spotpear.com
- Only Tech-Support
WhatsApp:13246739196
- Purchase/Shipping/Refund
WhatsApp:13424403025
- HOME
- >
- ARTICLES
- >
- Common Moudle
- >
- LCD
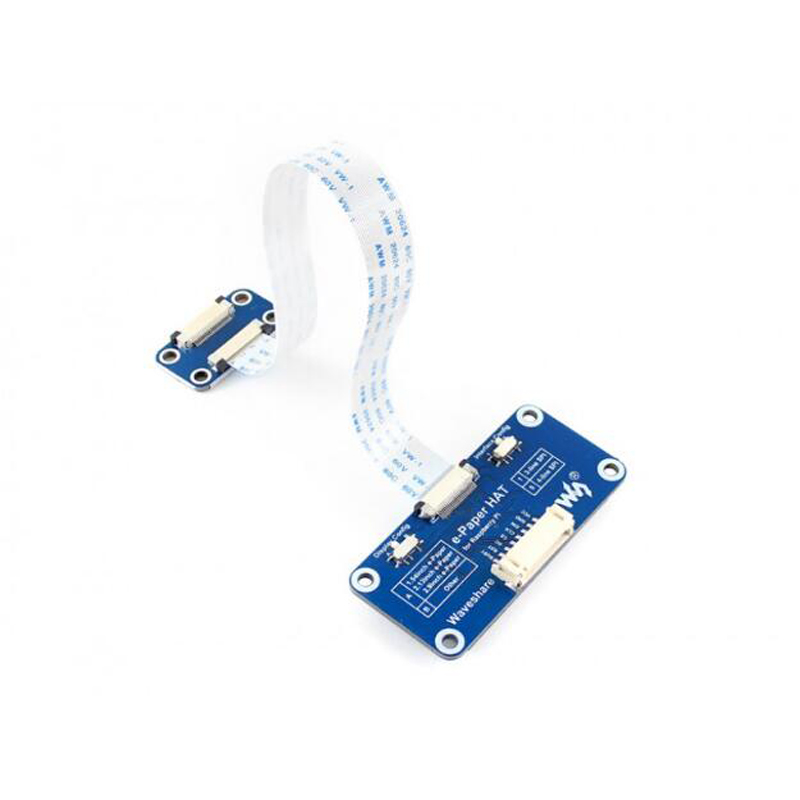
e-Paper Driver HAT
Introduction
Universal e-Paper Driver HAT, supports various Waveshare SPI interface e-Paper raw panels
Interfaces
| VCC | 3.3V |
| GND | GND |
| DIN | SPI MOSI pin |
| CLK | SPI SCK pin |
| CS | SPI chip select (low active) |
| DC | Data/Command control pin (high for data, and low for command) |
| RST | External reset pin (low active) |
| BUSY | Busy state output pin (low active) |
Switch settings
There are two switches on the front panel of Drive HAT: Display Config and Interface Config.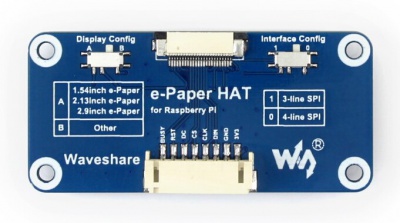
Display Config Switch
The Display Config switch on e-Paper Driver HAT is made for being compatible with various SPI interface e-Ink raw panels from Waveshare. This switch has A and B sides. For connecting to different e-Paper raw panels, you can set the Display Config switch refer to the table below:
| Switch to B | Switch to A |
|---|---|
Interface Config Switch
With Interface Config, you can change the SPI interface of e-Paper to 3-lin SPI or 4-line SPI
| Switch to 0 | Switch to 1 |
|---|---|
| 4-line SPI | 3-line SPI |
Note: Examples we provide use 4-line SPI by default
Example for 7.5inch e-Paper Switch Settings
Connecting the e-Paper Driver HAT to 7.5inch e-Paper, we must switch the Display Config to B according to the Display Config table above, and set the Interface Config to 0 to make the e-Paper work on 4-line SPI mode.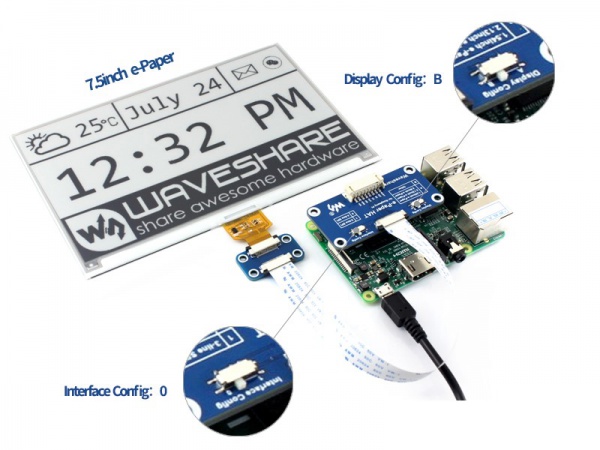
How to use
Working with Raspberry Pi
Installing libraries required
If you want to connect your E-paper screen to Raspberry Pi, you should install some necessary libraries, or else the Demo below may work improperly. For more information about how to install the Raspberry Pi libraries, please visit the website: Libraries Installation for RPi, where you can find the detailed presentation about the installations of libraries wiringPi, bcm2835 and python.
Hardware connection
Here is the connection between Raspberry Pi 3B and E-paper (BCM).
| e-Paper | Raspberry Pi 3B |
|---|---|
| 3.3V | 3.3V |
| GND | GND |
| DIN | MOSI |
| CLK | SCLK |
| CS | CE0 |
| DC | 25 (BCM) |
| RST | 17 (BCM) |
| BUSY | 24 (BCM) |
Expected result
1) After the corresponding libraries installed, you can copy the relative programs into your Raspberry Pi, and then enter the corresponding file.
- BCM2835: Execute the command:
make, to compile the code and generate a fileepd. Execute the command:sudo ./epd, the program will run. - WringPi: Execute the command:
make, to compile the code and generate a fileepd. Execute the command:sudo ./epd, the program will run. - Python: Execute the command:
sudo python main.py
2) Image will be displayed on the screen.
- Note:The refresh rate of this module is slow, and it will flicker for several times during refreshing. Please be patient.
Working with Arduino
Hardware connection
| e-Paper | Arduino UNO |
|---|---|
| 3.3V | 3V3 |
| GND | GND |
| DIN | D11 |
| CLK | D13 |
| CS | D10 |
| DC | D9 |
| RST | D8 |
| BUSY | D7 |
Expected result
- Copy the libraries file of Arduino demo code to the libraries folder which is under the installation directory of Arduino IDE, it usually is C:\users\username\documents\arduino\libraries. You can also designate the location on Arduino IDE--> File -->Preferences -->Sketchbook location
- Upload the project.
- E-paper will display the image.
Note:
- The refresh rate of this module is slow, and it will flicker for several times during refreshing. Please be patient.
Working with the STM32 development board
- Here we use STM32F103ZE development board or NUCLEO-F103RB. (The demo code of 1.54inch/2.13inch/2.9inch e-Paper are based on NUCLEO-F103RB,
Others are based on STM32F103ZE)
- The demo code is based on HAL, so you can port the demo code to other STM boards with STM32CubeMX.
- The demo code can be compiled successfully in Keil v5
Hardware connection
Connecting to the STM32F103ZE:
| e-Paper | STM32F103ZE |
|---|---|
| 3.3V | 3V3 |
| GND | GND |
| DIN | PA7 (MOSI) |
| CLK | PA5 (SCK) |
| CS | PA4 |
| DC | PA2 |
| RST | PA1 |
| BUSY | PA3 |
Connecting to the NUCLEO-F103RB:
| e-Paper | NUCLEO-F103RB |
|---|---|
| 3.3V | 3V3 |
| GND | GND |
| DIN | PA7 |
| CLK | PA5 |
| CS | PB6 |
| DC | PC7 |
| RST | PA9 |
| BUSY | PA8 |
Expected result
- Open the project (epd-demo.uvprojx), which is under the MDK-ARM directory.
- Click Build to compile the project.
- Click Download to load the code to your board.
- Reset, the screen will display image.
- Note: The refresh rate of this module is slow, and it will flicker for several times during refreshing. Please be patient.