- sales/support
Google Chat:---
- sales
+86-0755-88291180
- sales01
sales@spotpear.com
- sales02
dragon_manager@163.com
- support
tech-support@spotpear.com
- CEO-Complaints
zhoujie@spotpear.com
- Only Tech-Support
WhatsApp:13246739196
- Purchase/Shipping/Refund
WhatsApp:13424403025
- HOME
- >
- ARTICLES
- >
- Common Moudle
- >
- ESP
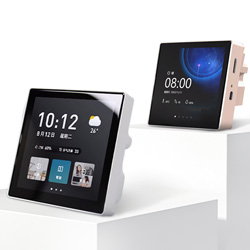
ESP32-S3-4inch-ST7701 User Guide
【Introduce】
The purpose of this article is to explain how to upload Arduino programs to JCZN's ESP32-4848S040 module. website: http://www.jczn1688.com
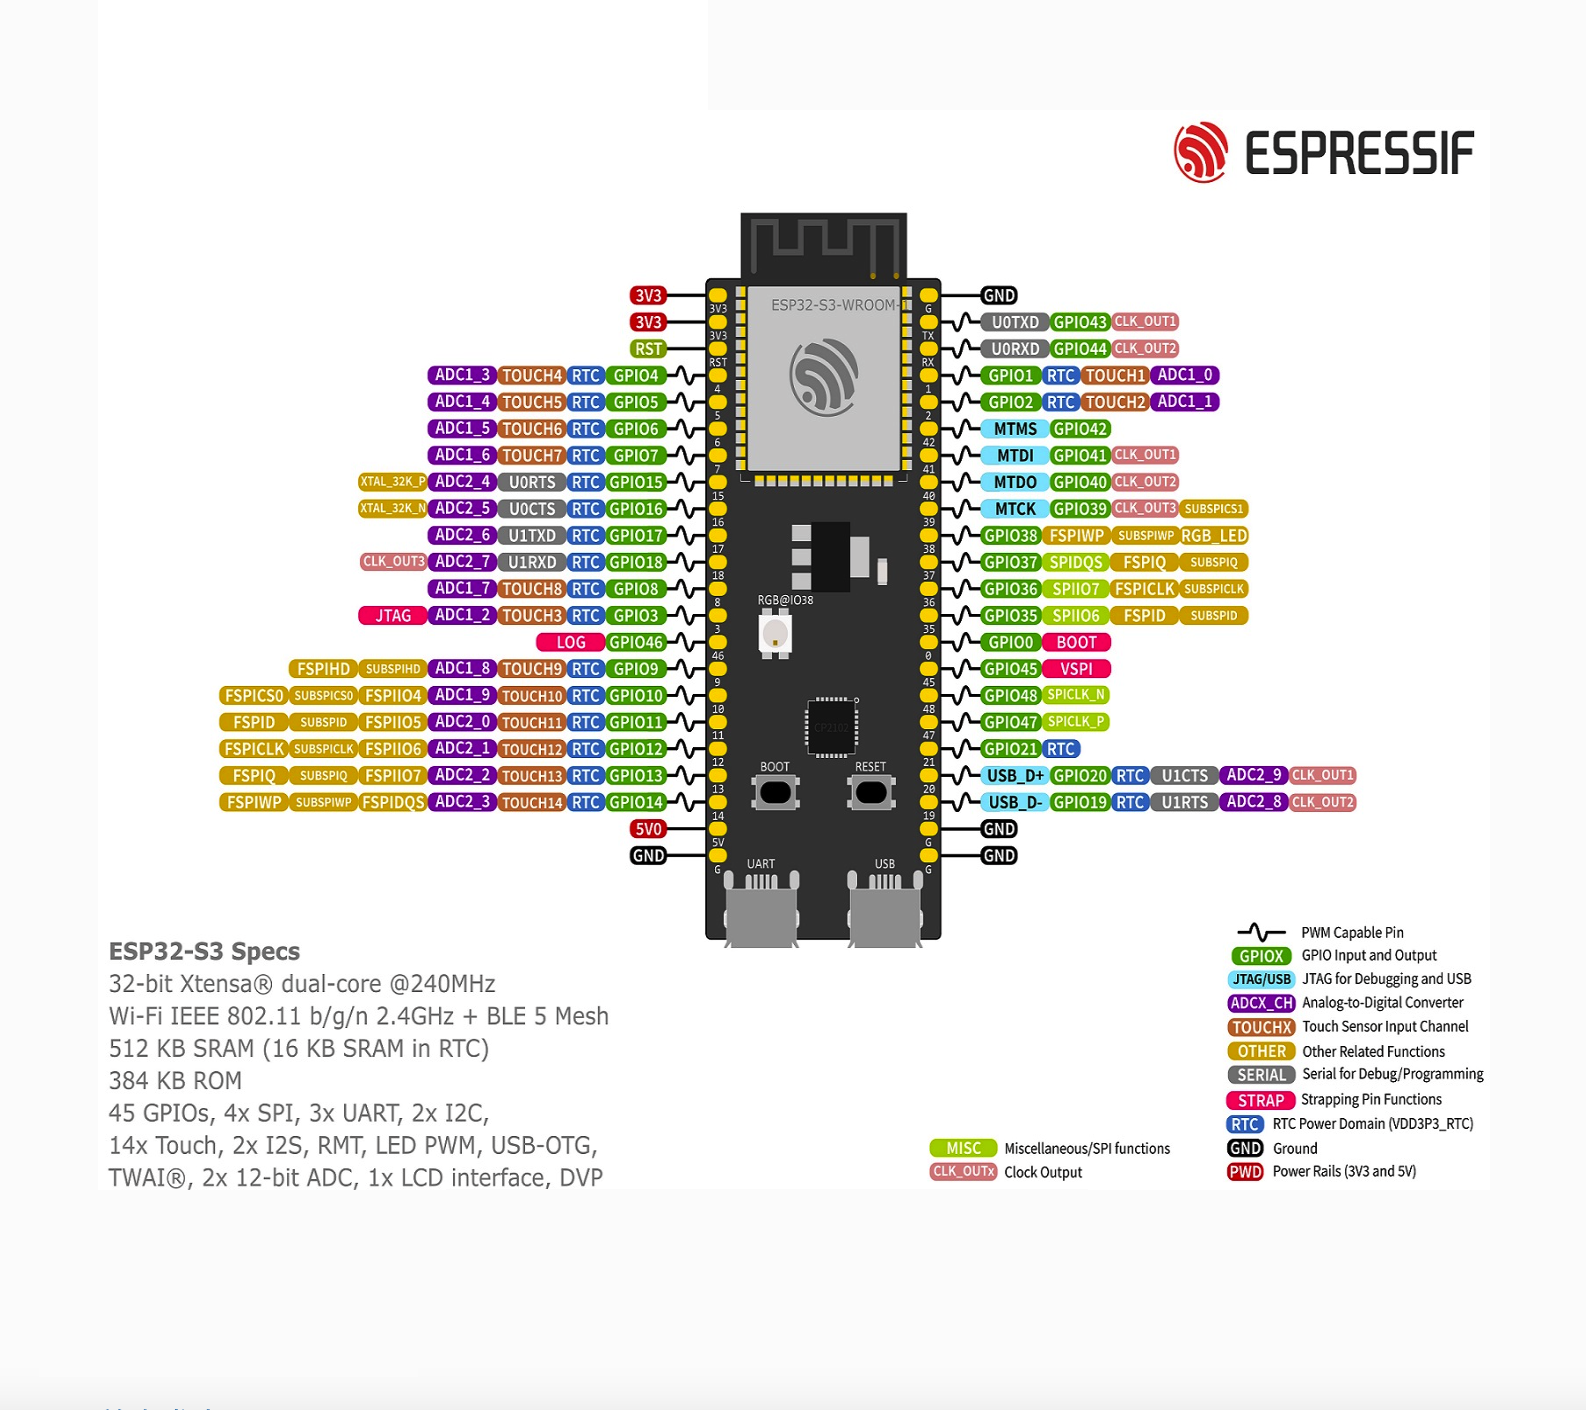
The ESP32 WiFi and Bluetooth chip is the latest generation of Espressif products. It has a dual core 32-bit MCU and integrates WiFi HT40 and Bluetooth/BLE 4.2 technology internally. ESP32-S3-wroom-1 has significantly improved performance. It is equipped with a high-performance dual core Tensilica LX7 MCU. One core handles high-speed connections, while the other core is used for independent application development. The dual core MCU has a frequency of 240 MHz and a computing power of 600 DMIPS. In addition, it supports Wi Fi HT40, classic Bluetooth/BLE 4.2, and more GPIO resources.
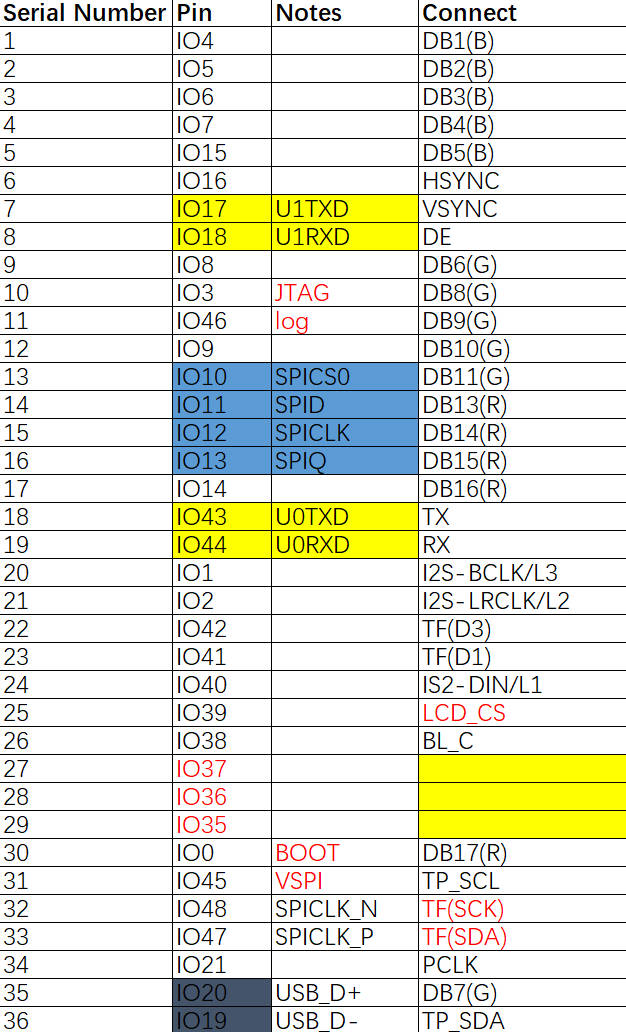
【Interface Description】
【Install using Arduino IDE】
Programming ESP32
A simple way to get started is to use a familiar Arduino IDE. Although this may not be the optimal environment for handling ESP32, its advantage is that as a familiar application, it can lower the learning curve. We will conduct experiments using Arduino IDE.
1. Install Arduino IDE
Firstly, we need to install version 1.8.19 (or higher) of Arduino IDE, for example, the installation path for Arduino is "C/Programs (x86)/Arduino". Open the official website software download page
2. Install Arduino ESP32 directly from Arduino IDE
(1)Open the Arduino IDE.
(2)Click on the "File" menu in the top menu bar.
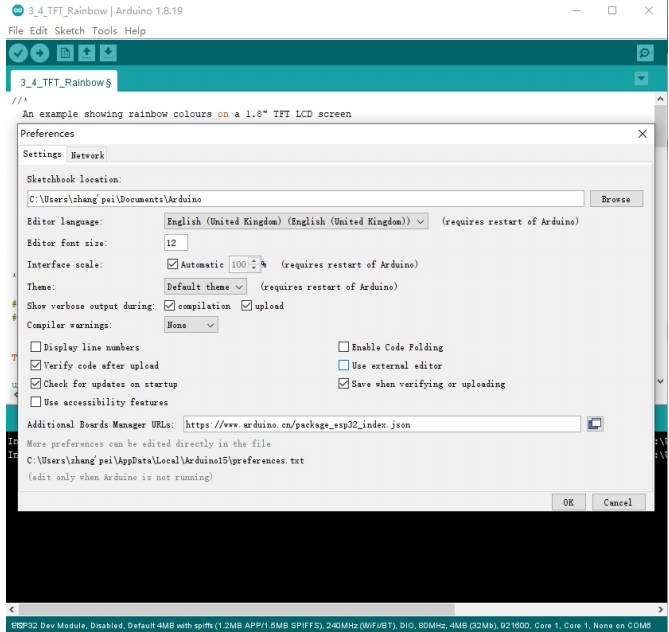
(3)Click on the 'Preferences' menu item. This will open a preference dialog box.

(4)By default, you should be located on the "Settings" tab in the preferences dialog box.
(5)Search for the text box labeled 'Additional Development Board Manager URL'.
(6)If there is already text in the text box, please add a comma at the end and proceed to the next step.
(7)Paste the following link into the text box:
Stable version link:
https://raw.githubusercontent.com/espressif/arduino-esp32/gh-pages/package_esp32_index.json
Development version link:
https://raw.githubusercontent.com/espressif/arduino-esp32/gh-pages/package_esp32_dev_index.json
(8)Click the 'OK' button to save the settings. An example of a text box containing a JSON link is as follows:
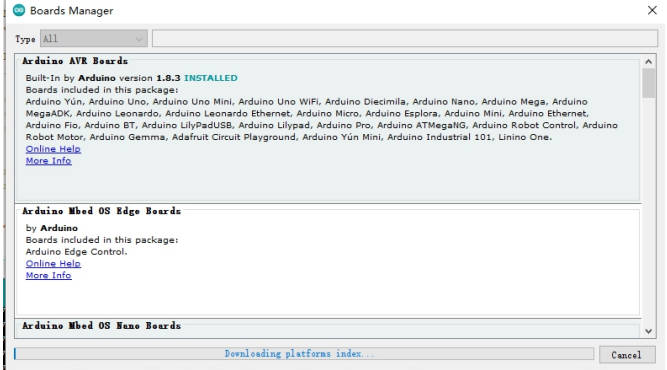
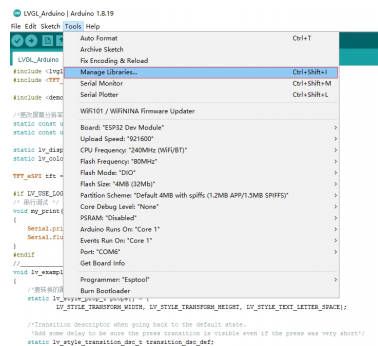
(9)In the Arduino IDE, click on the "Tools" menu in the top menu bar.
(10)Scroll down to the "Development Board:" item.
(11)When you highlight the "Development Board:" item, a submenu will open.
(12)At the top of the submenu is the 'Development Board Manager'. Click on it to open the Development Board Manager dialog box.
(13)Enter "esp32" in the search box of the development board manager.

(14)You should see an entry titled 'esp32 by Espressif Systems'. Highlight the entry and click the 'Install' button. This will install the ESP32 development board into your Arduino IDE.
After installation, we need to select the correct board options for the ESP32 Arduino development board. In the Tools tab, select "ESP32S3 Dev Module".
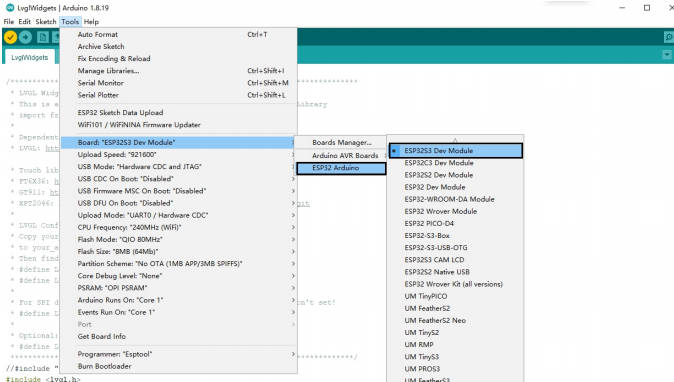
In the programmer entry of the same tab, select 'esptool'.

It should be noted that after the code is uploaded, the device will start running the code. Therefore, if we want to upload a new program, we need to reset the device's power to ensure it enters flash mode again.
【Example program usage】
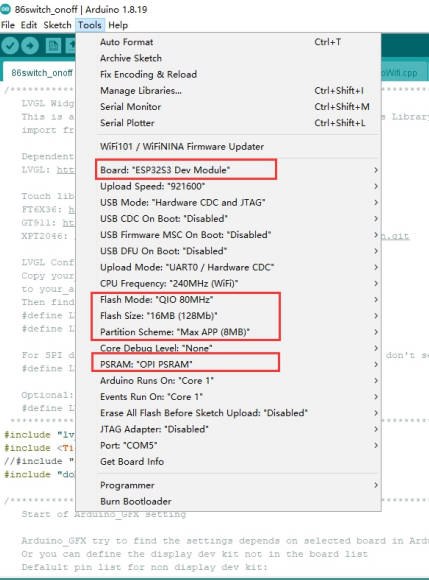
Attention: The 4-inch screen relay and I2S audio share IO ports, namely IO1 IO2、IO40, If audio is required, the 0 ohm resistors R25, R26, and R27 should be moved to R21 R22、R23。 The ESP32 installation package must not be lower than version 2.0.6.
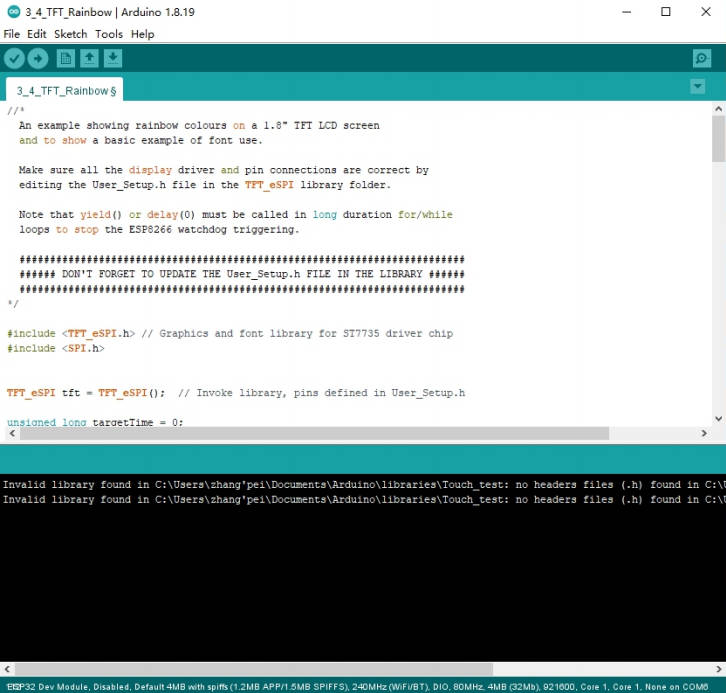
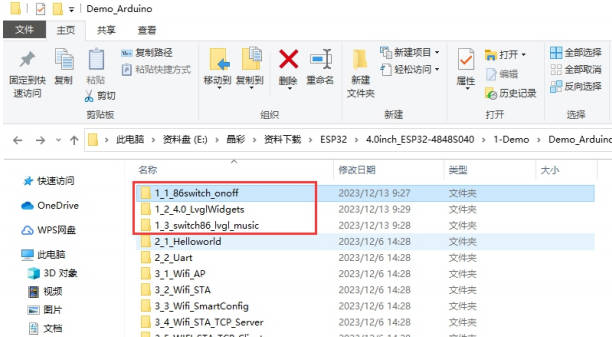
At present, the examples displayed on the screen only provide preliminary instructions and introductory usage. Relevant examples can be found in the data center, as shown in the figure:
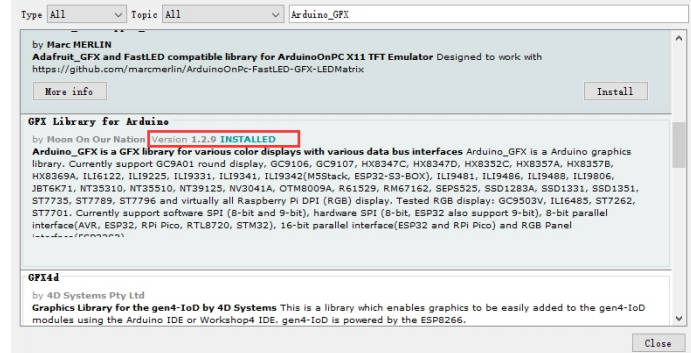
The examples in the red circle are all based on the Arduino. GFX library as the basic application. This library supports various commonly used driver chips, such as ST7735, ST7789, ILI9341, etc., and has good compatibility.
Installation of Arduino FX Library Files:
Open the Arduino library manager, search for Arduino. GFX, and click Install.

Despite the many advantages of the Arduino GXX library, it may also have a troublesome aspect for ordinary users after installation.
Regarding the use of touch and LVGL:
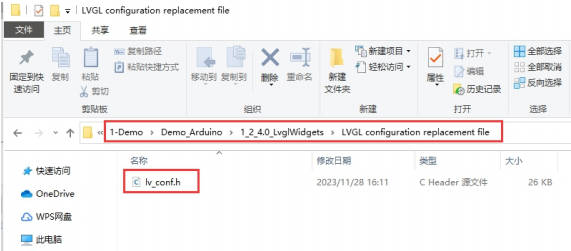
Find the data center 1-2-4.0-LvglWidgets as follows:

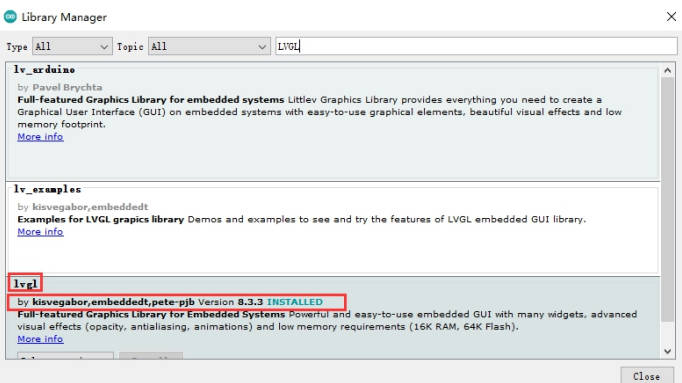
Download two library files.
One - Arduino gFX Library
二 - Lvgl
Copy the lv_comf. h file from the data center.
Place this file in the Arduino library folder, which must be located in the same directory as the library TFT_eSPI, as shown below:
After compilation, you can run LVGL and touch functions normally.
【Resources】
document
Tool Download
More
【Restore factory firmware】
Firmware Download
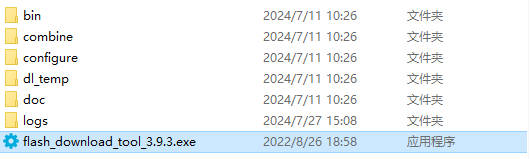
Download and open the burning software
How to use
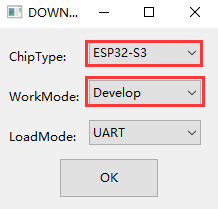
Just burn the factory firmware, as shown in the picture
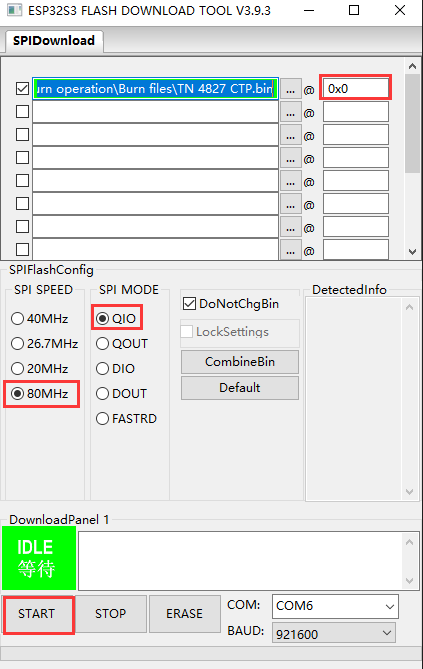
If the following effect appears, it indicates that the burning has been successful. Simply power it on again.

After Sales
Monday-Friday (9:30-6:30) Saturday (9:30-5:30) -China time
Email: services01@spotpear.com
TAG:
LuckFox
Raspberry Pi 5 PD Activation Module
H618
USB Monitor
ST servo driver
Raspberry Pi DSI Scr
AV to TTL
Raspberry Pi
Industrial CAN FD RS232/RS485 bidirectional converter CAN2.0A/B
Computer Monitor Screen
Image extraction User Guide
ESP32 S3 Development Board 1.43 inch AMOLED Display 1.43inch TouchScreen For Arduino LVGL With SD-Port/ QMI8658C 6-Axis Sensor
IO BASE MINI Board
JETSON-IO-BASE-A user Guid
Raspberry Pi 5 Official Case
Raspberry Pi 5 PCIe TO Gigabit ETH USB3.2 HAT+ USB HUB
Raspberry Pi IR Thermal Imagi
Raspberry Pi 5 PCIe to USB3.2 Gen1 Hub 5Gbps For Raspberry Pi OS Drive free
2.8inch Capacitive TouchScreen LCD Display ST7789 CST328 240x320 For Arduino/Raspberry Pi/ESP32/Pico
E-Paper