


- sales/support
Google Chat:---
- sales
+86-0755-88291180
- sales01
sales@spotpear.com
- sales02
dragon_manager@163.com
- support
tech-support@spotpear.com
- CEO-Complaints
zhoujie@spotpear.com
- Only Tech-Support
WhatsApp:13246739196
- Purchase/Shipping/Refund
WhatsApp:13424403025
- HOME
- >
- ARTICLES
- >
- Jetson Series
- >
- Jetson Kits
JetRacer Assembly Manual
- Screws/standoffs diagram
- To let you find the screws easily, we make this diagram for reference. Note that the screws come with servo wheel and cooling fan are not listed here.

1. Fixing the motors to metal chassis with screw M3*6. Note that you cannot replace the M3*6 screws by longer screw, otherwise the motor cannot work.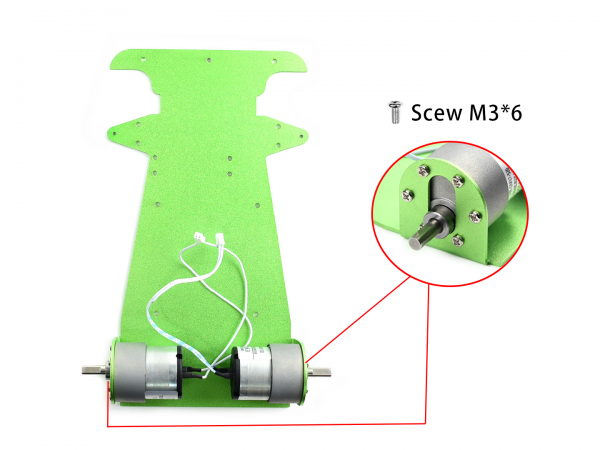
2. Put the coupler to wheels. You may need to hit it into the wheel by tools and fix it by M4*8 screw.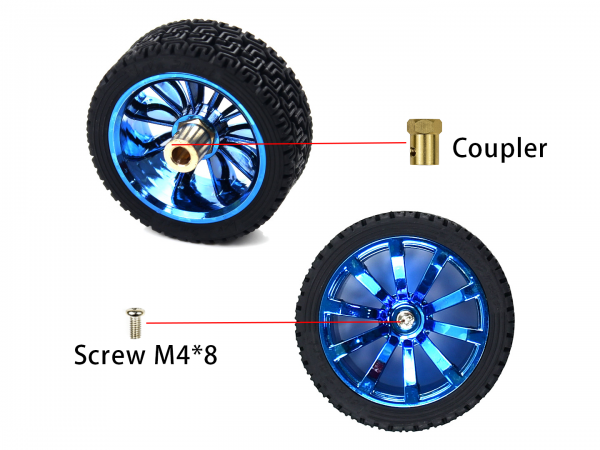
3. Assemble the wheels. Turn it tightly with the Black screw. You should turn the screw by the longer side of the little spanner.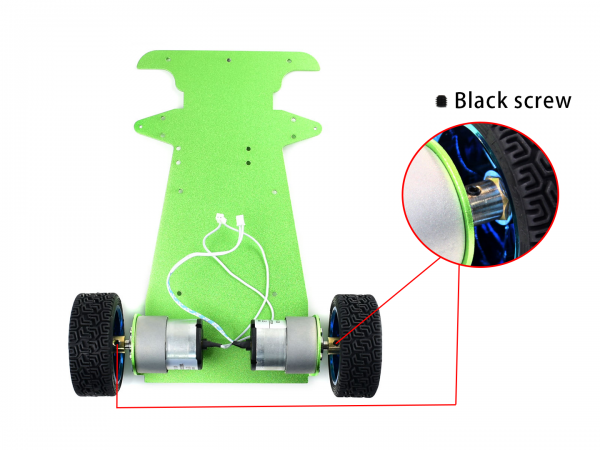
4. Mount the servo holder on metal chassis.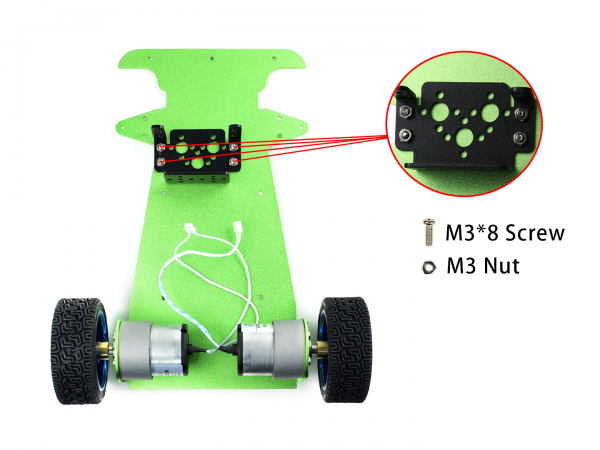
5. Set servo on the holder and fix it by screws and nuts. Please make sure that you put the sever in the correct way.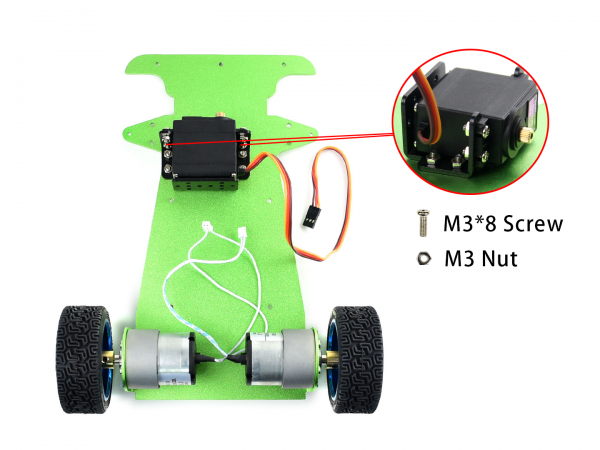
6. When you assemble the servo pull bar, please refer to the image below carefully. The pull bar is combined by two small ball joint and the short bar, Note that the two small ball should be perpendicular to each other. Fix servo wheel to the servo wheel holder by its own screws. Then fix the screw pull bar (the flat side) on the servo wheel holder by M2.5*12 screw and M2.5 locknut.Note that the groove of the servo wheel is toward outside.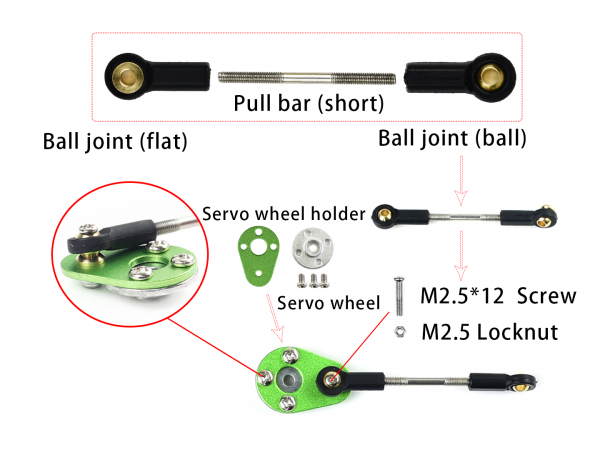
7. Assemble the front-wheel pull bar. The front-wheel pull bard is combined by two bard joint (big) and the long bar. Then put the bearings in steering knuckle.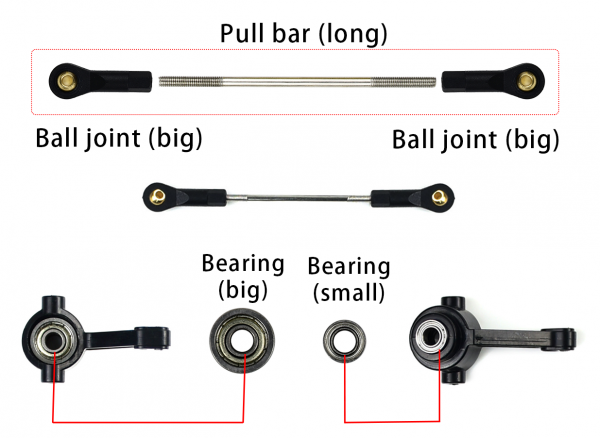
8. Together the servo pull bard, front-wheel pull bard, and steering knuckles. The servo pull bar in on the top, and then the front-wheel pull bard, finally the knuckles. The bigger bearing should toward inside. Please refer to the image below carefully.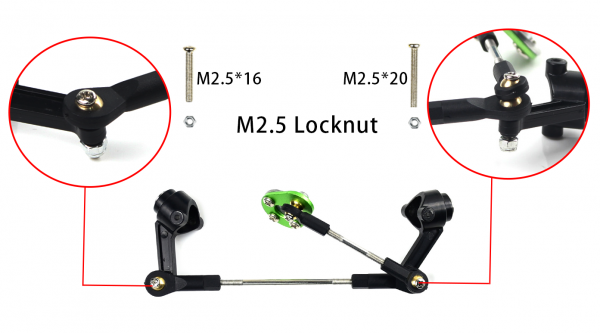
9. Fix wheel on the steering knuckle by M4 screws and locknut. Note that you cannot fix the wheel too tight or too loose. Please test if the wheel can run smoothly after fixing.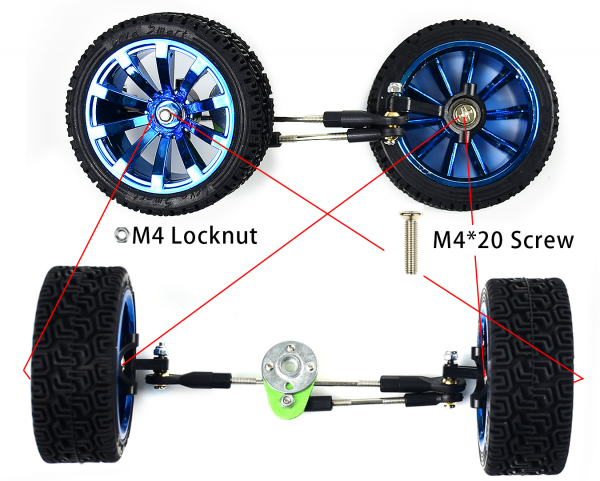
10. Set M3 standoffs for the front wheels.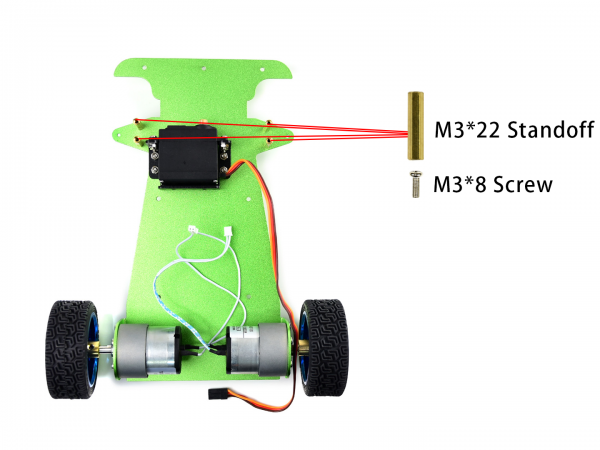
11. Assemble the front-wheels combination. Put the servo wheel to servo, fix it by M3 screw. Fix the wheels by M2 screws and locknut and the triangle board.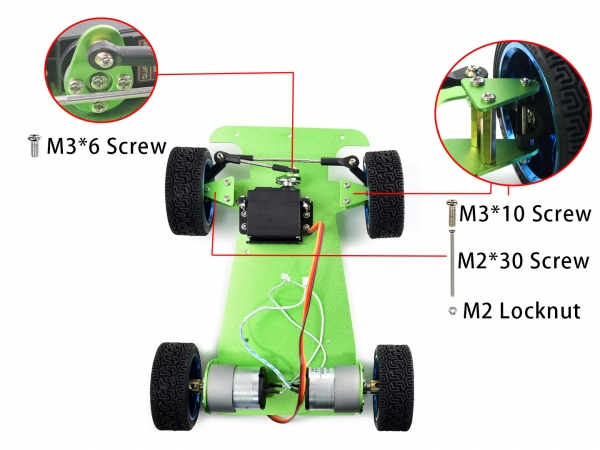
12. Put standoffs for JetRacer expansion board and bumper. Put the EVA felt pad.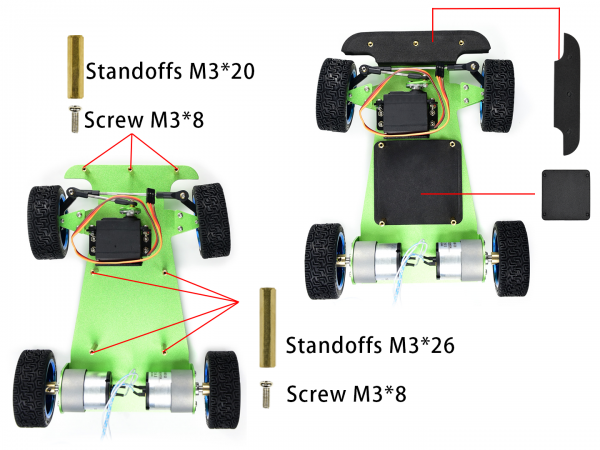
13. Set camera holder and antenna on JetRacer Expansion board, note that refer to the image below about the direction.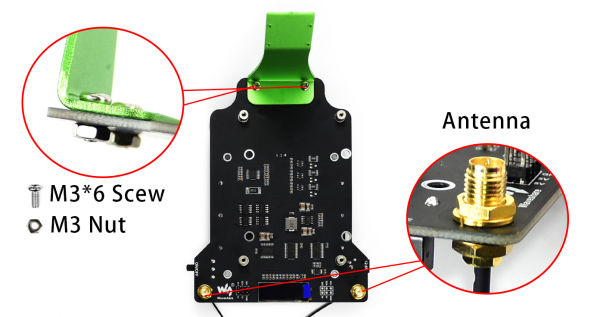
14. Assemble batteries in the correct direction. Connect wires of motor and servo to JetRacer Expansion board.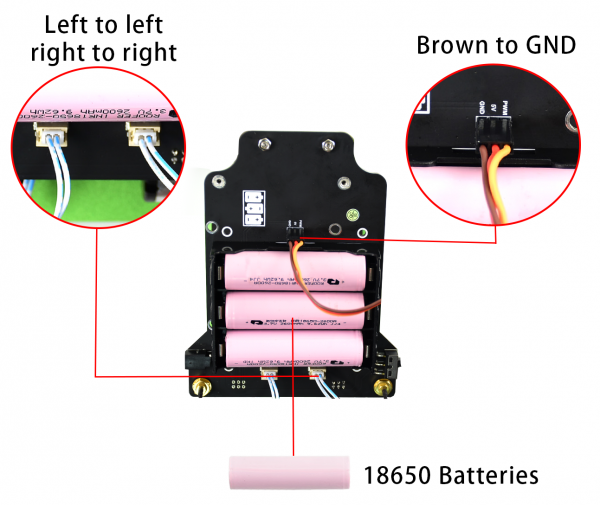
15. Adjust the place of wires then fix JetRacer Expansion board on metal chassis. Fix the metal bumper by M3 screws.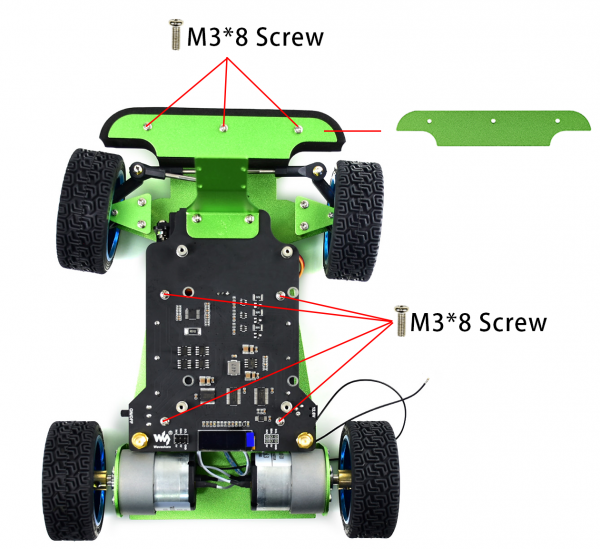
16. Put the Jetson Nano Developer Kit and fix.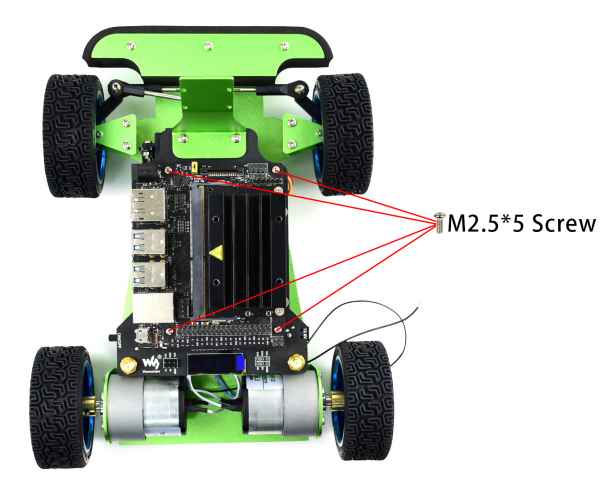
17. Remove the Jetson Nano board, connect the wireless card and connect the antenna.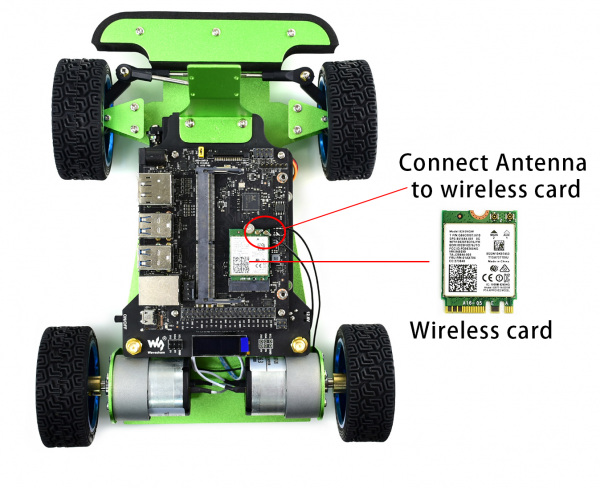
18. Replace Jetson Nano. Mount camera to its holder by nylon screws. Note that the Acrylic board should be put between camera and the metal holder to avoid shorting. Set the 3D-printed motor enclosure on motors. Connect the Jetson Nano Developer Kit to JetRacer Expansion board by 6PIN wires. You should connect 5V to 5V, 3.3V to 3.3V, please take care about it.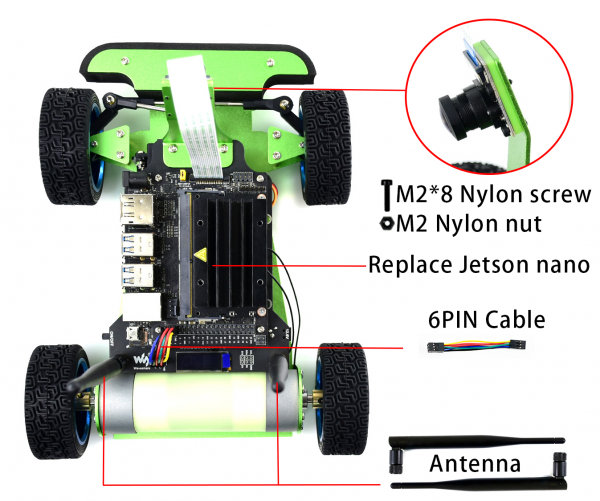
19. Assemble cooling fan by its own screws. Connect the wires to the fan interface. The black wire should be connected to the far-left pin (GND).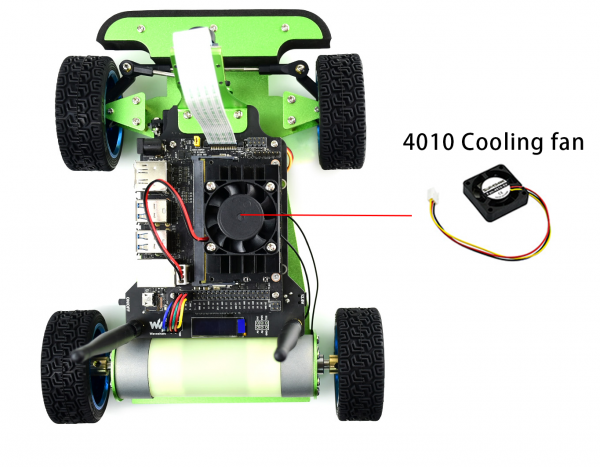
