- sales/support
Google Chat:---
- sales
+86-0755-88291180
- sales01
sales@spotpear.com
- sales02
dragon_manager@163.com
- support
tech-support@spotpear.com
- CEO-Complaints
zhoujie@spotpear.com
- Only Tech-Support
WhatsApp:13246739196
- Purchase/Shipping/Refund
WhatsApp:13424403025
- HOME
- >
- ARTICLES
- >
- Common Moudle
- >
- ESP
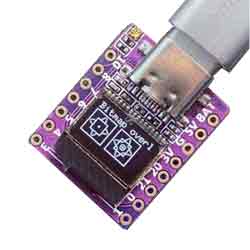
ESP32 C3 0.42LCD web WIFI
1、 Open the arduino IDE
2、 Select Chip
2.1. Click on tools
2.2. Click on board
2.3. Click on esp32 and select esp32-c3
3、Substitution code burning
#include<WiFi.h>
// Enter your WiFi SSID and password
charssid[] ="iPhone";// your network SSID (name)
charpass[] ="8888888888";// your network password (use for WPA, or use as key for WEP)
intkeyIndex =0;// your network key Index number (needed only for WEP)
intstatus = WL_IDLE_STATUS;
// if you don't want to use DNS (and reduce your sketch size)
// use the numeric IP instead of the name for the server:
//IPAddress server(74,125,232,128); // numeric IP for Google (no DNS)
charserver[] ="wifitest.adafruit.com";// name address for adafruit test
charpath[] ="/testwifi/index.html";
// Initialize the Ethernet client library
// with the IP address and port of the server
// that you want to connect to (port 80 is default for HTTP):
WiFiClient client;
voidsetup(){
//Initialize serial and wait for port to open:
Serial.begin(115200);
while(!Serial){
;// wait for serial port to connect. Needed for native USB port only
}
// attempt to connect to Wifi network:
Serial.print("Attempting to connect to SSID: ");
Serial.println(ssid);
WiFi.begin(ssid, pass);
while(WiFi.status()!= WL_CONNECTED){
delay(500);
Serial.print(".");
}
Serial.println("");
Serial.println("Connected to WiFi");
printWifiStatus();
Serial.println("\nStarting connection to server...");
// if you get a connection, report back via serial:
if(client.connect(server,80)){
Serial.println("connected to server");
// Make a HTTP request:
client.print("GET ");client.print(path);client.println(" HTTP/1.1");
client.print("Host: ");client.println(server);
client.println("Connection: close");
client.println();
}
}
voidloop(){
// if there are incoming bytes available
// from the server, read them and print them:
while(client.available()){
charc =client.read();
Serial.write(c);
}
// if the server's disconnected, stop the client:
if(!client.connected()){
Serial.println();
Serial.println("disconnecting from server.");
client.stop();
// do nothing forevermore:
while(true){
delay(100);
}
}
}
voidprintWifiStatus(){
// print the SSID of the network you're attached to:
Serial.print("SSID: ");
Serial.println(WiFi.SSID());
// print your board's IP address:
IPAddress ip =WiFi.localIP();
Serial.print("IP Address: ");
Serial.println(ip);
// print the received signal strength:
longrssi =WiFi.RSSI();
Serial.print("signal strength (RSSI):");
Serial.print(rssi);
Serial.println(" dBm");
}
1. Copy the code into the Arduino IDE
2. Use a type-c cable to connect the computer to the ESP 32-c3 development board. After successful connection, the serial port will be displayed in the computer management window
3.Click on Tools in the Arduino IDE, then click on Port and select the serial port Adafruit QT ESP32-C3
Click on Verify
5.Click on upload
6.The test results are as follows