


- sales/support
Google Chat:---
- sales
+86-0755-88291180
- sales01
sales@spotpear.com
- sales02
dragon_manager@163.com
- support
tech-support@spotpear.com
- CEO-Complaints
zhoujie@spotpear.com
- Only Tech-Support
WhatsApp:13246739196
- Purchase/Shipping/Refund
WhatsApp:13424403025
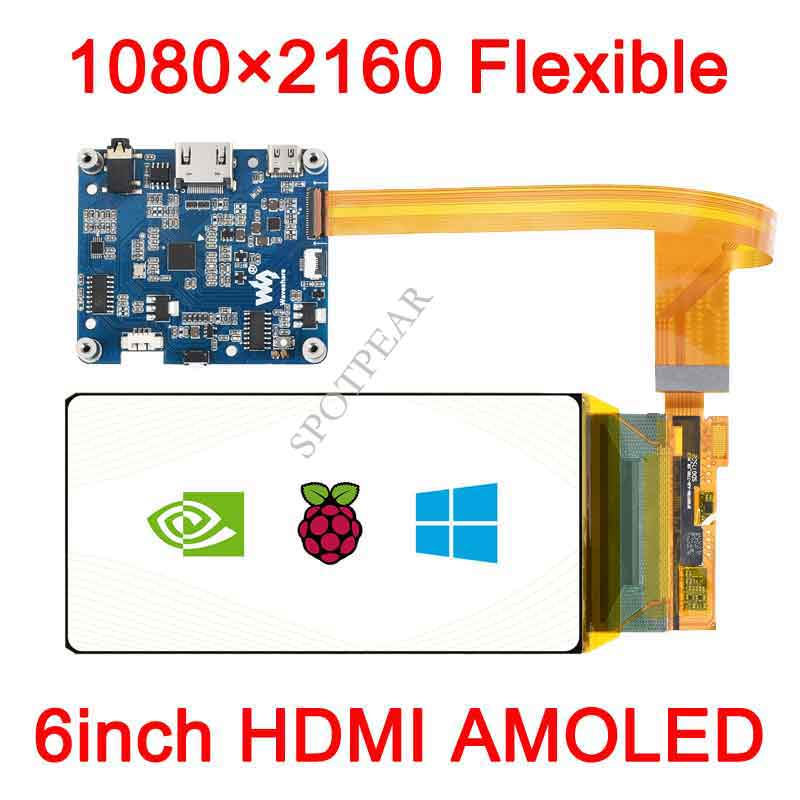
6inch HDMI AMOLED User Guide
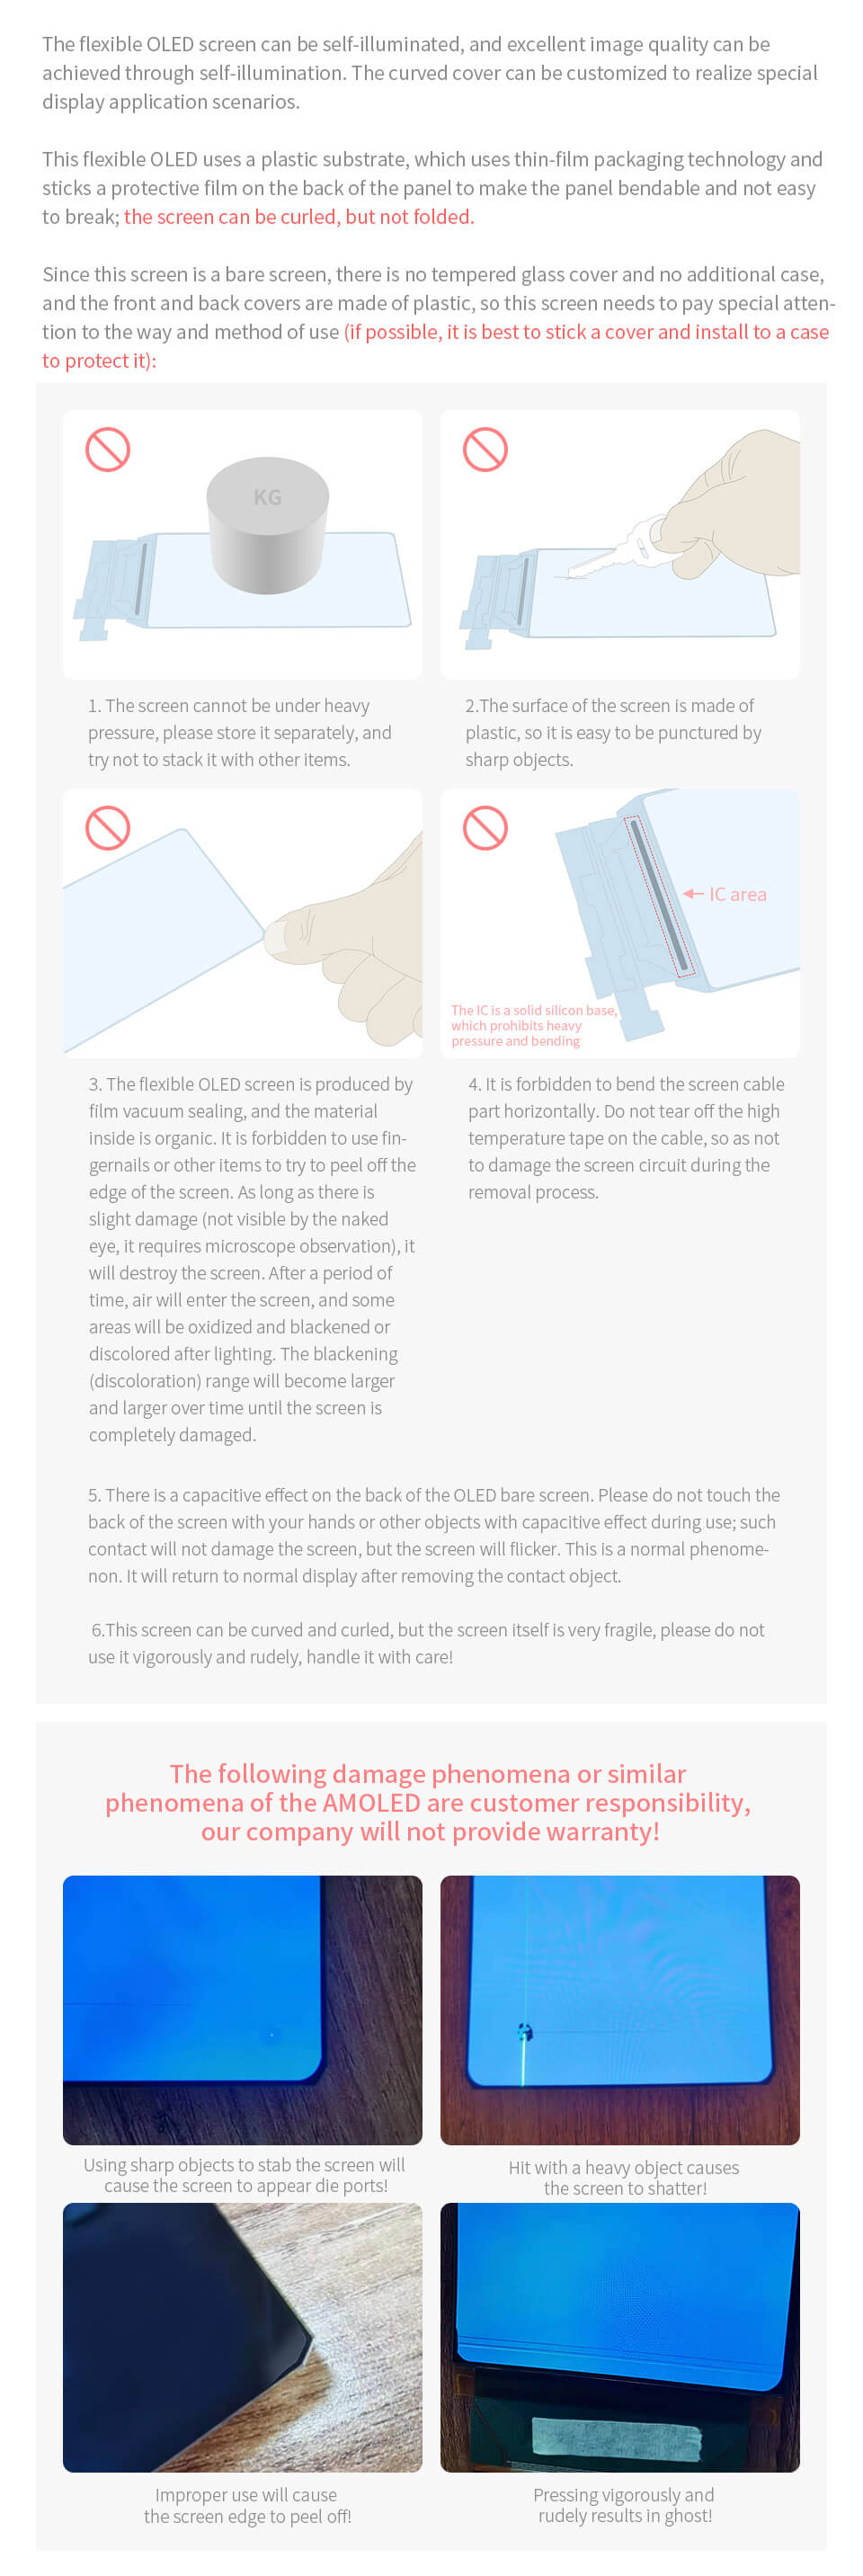
Note: Since the screen is the raw AMOLED screen by default, the front and back cover are made of plastic material, it is very fragile without adding a tempered glass cover or adding a protection case. It needs to be careful during research and development to avoid unnecessary damage.
Introduction
This product is a general-purpose 6-inch high-definition flexible HDMI AMOLED display with a resolution of 1080 × 2160. Supports Raspberry Pi and Jetson Nano and can also be used as a computer monitor.
Features
- 6-inch flexible AMOLED screen with a hardware resolution of 1080 × 2160.
- Screen thickness less than 1mm.
- When used with Raspberry Pi, it supports Raspberry Pi OS / Ubuntu / Kali and Retropie.
- When used with Jetson Nano, it supports Ubuntu.
- When used as a computer monitor, it supports Windows 11/10/8.1/8/7.
- With 3.5mm audio, it supports HDMI audio output.
- Support backlight control, saving more power.
Featured Design
Work with Raspberry Pi
When working with Raspberry Pi, 6inch HDMI AMOLED can support various systems like Raspberry Pi OS/Ubuntu /Kail and Retropie.
Raspberry Pi cannot recognize and adapted to the resolution of LCD plugged, therefore, we need to set the resolution of Raspbian manually.
- Download the newest image from Raspberry Pi Website
- Unzip the image archive and get the .img file.
- Format the SD card by the SDFormatter software
- User the Win32DiskImager software, write the .img file to the SD card.
- After writing, modify the config.txt file:
max_framebuffer_height=2160
hdmi_group=2
hdmi_mode=87
hdmi_timings=1080 0 36 4 26 2160 1 10 10 10 0 0 0 50 0 145467200 3
- Save and safely eject the TF card, insert the TF card into the Raspberry Pi.
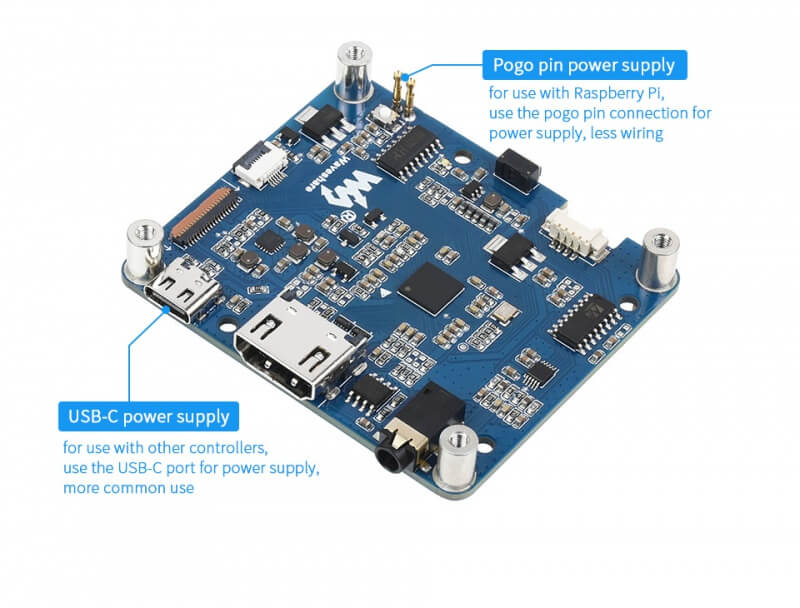
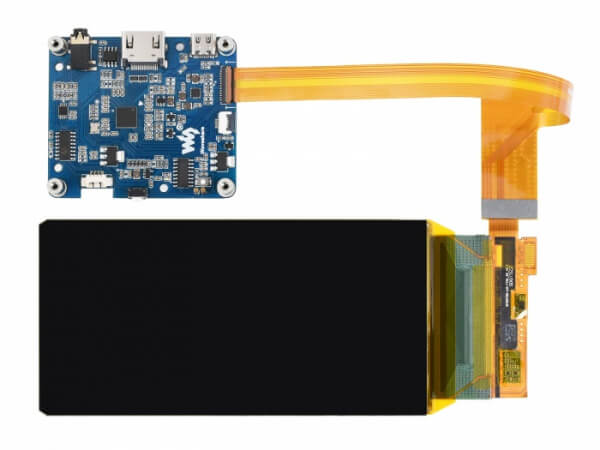
- Install the AMOLED baseboard through the back lock, and the Raspberry Pi GPIO interface will be connected to the AMOLED power supply pin through the thimble.
- Connect the HDMI port of the AMOLED to the HDMI port of the Raspberry Pi, power on the Raspberry Pi, and it will display normally after a few seconds.
The hardware connection is shown as following pictures: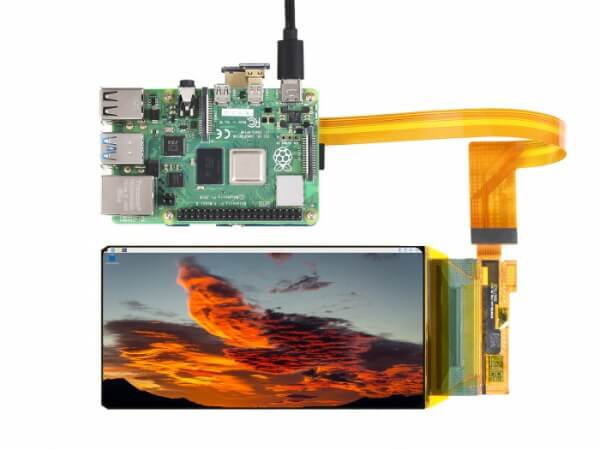
Note: This product is portrait mode by default, and the resolution (H×V) is 1080×2160. You can change the AMOLED to the horizontal mode by modifying the software settings. For details, see #Raspberry Pi display rotation.
Raspberry Pi display rotation
The resolution of this display is very high (1080×2160), so rotating the display will consume a lot of resources.
This model only supports Raspberry Pi 4, Raspberry Pi 400 and Compute Module 4 rotation now, the rotation cannot work on other Raspberry Pi.
Update software version
If you are using the Bullseye branch of the Raspberry Pi OS, you need to update the software version as below(If you are using the Raspberry Pi OS Buster branch you don't need to execute this step.
sudo apt-get update
sudo apt-get full-upgrade
Raspberry Pi OS display rotation
Use the following command to rotate the display:
sudo nano /etc/xdg/lxsession/LXDE-pi/autostart
#Enter the command corresponding to the display rotation angle at the end of the autostart file, and it will take effect after rebooting the system.
#0: rotate 0 degrees; 1: rotate 90 degrees; 2: rotate 180 degrees; 3: rotate 270 degrees
xrandr -o 3
Screen Saver
AMOLED screen has many advantages like high contrast, wide color range, wide view angle, and so on. However, it is easy to face a burn-in problem if displaying the same content for a long time. In this case, we recommend you set a screen saver and do not let the AMOLED display the same static image for a long time (cannot longer than 1h).
You can install screen saver with the command below:
sudo apt-get install xscreensaver
Work with Windows PC
When used as a Windows PC, the 6inch AMOLED can supports Windows 11/10/8.1/8/7.
1) Connect the USB Type-C port of the AMOLED to the USB port of the PC. The green light on the baseboard will light up after a few seconds, which means the baseboard is in a normal power supply state. (If the green light flashes, it means that the power supply is abnormal, please unplug and reconnect the power cable again)
2) Connect the HDMI port of the AMOLED to the HDMI port of the PC, and wait for a few seconds to see that the AMOLED displays normally. The sound can be output by connecting an external 4PIN speaker, or you can connect to a 3.5mm earphone through the HP audio output port for use.
【Note】 1: The USB interface of some PCs may cause insufficient power supply due to aging. At this time, you can use the USB interface on the back of the PC host, or an external 5V 2AType-C power adapter to supply power to the USB Type-C port of the screen.
【Note】 2: This product is portrait mode by default, and the resolution (H×V) is 1080×2160. You can change the AMOLED to the horizontal mode by modifying the software settings. For details, see #Windows PC display rotation
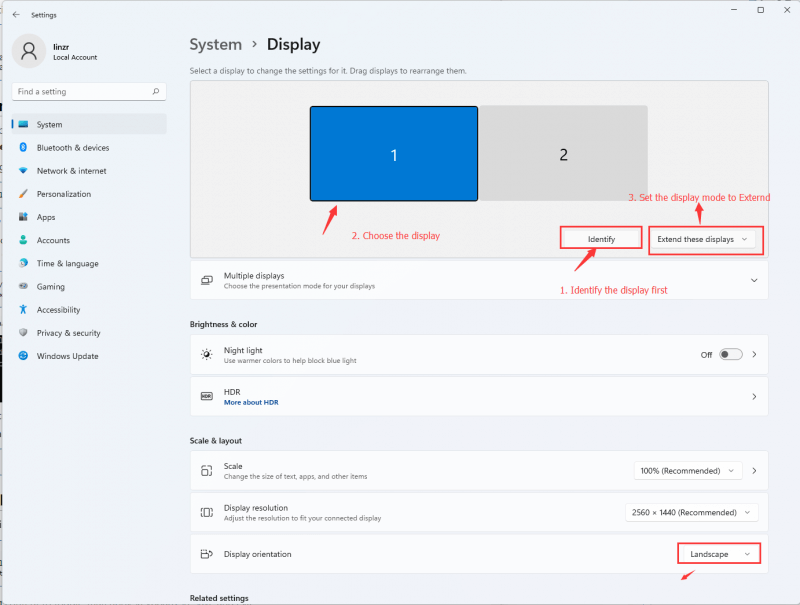
Windows PC display rotation
- Right-click and choose the Display setting
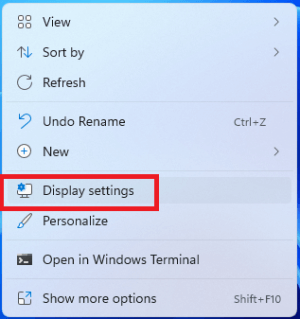
- Click the Identify to detect the display
- Choose the display, set the display mode to extend and change the orientation

