


- sales/support
Google Chat:---
- sales
+86-0755-88291180
- sales01
sales@spotpear.com
- sales02
dragon_manager@163.com
- support
tech-support@spotpear.com
- CEO-Complaints
zhoujie@spotpear.com
- Only Tech-Support
WhatsApp:13246739196
- Purchase/Shipping/Refund
WhatsApp:13424403025
- HOME
- >
- ARTICLES
- >
- Common Moudle
- >
- Camera
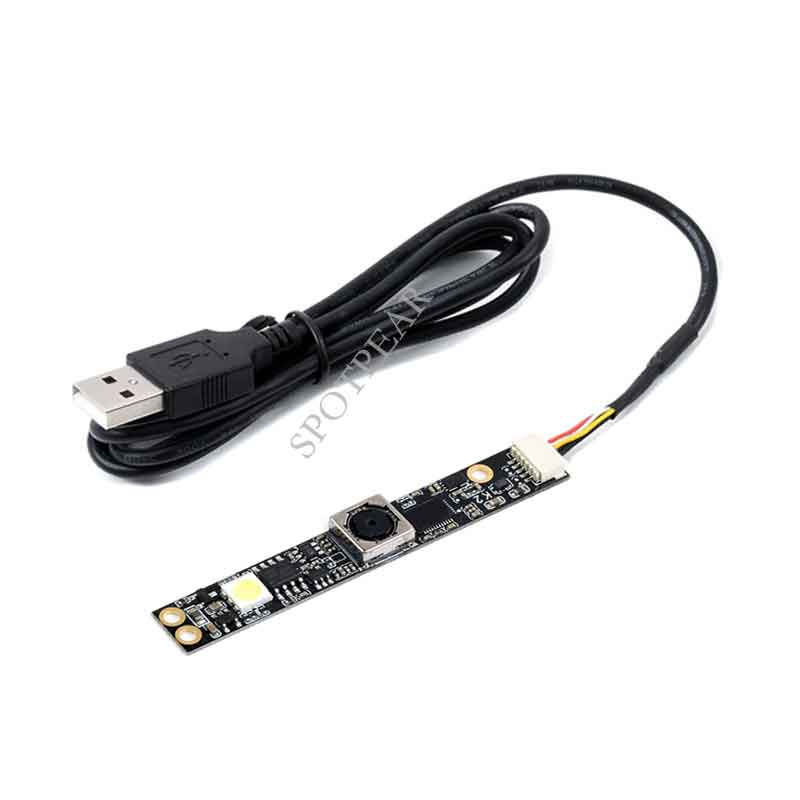
OV5640 5MP USB Camera User Guide
Introduction
USB Camera, OV5640 sensor. 5 megapixel. Supports UVC protocol.
Specification
- Pixel:500 Megapxixel
- Resolution:2592×1944
- Video:
- 15FPS 2592 x 1944
- 30FPS 1920 x 1080
- 30FPS 1280 x 720
- Sensor:OV5640
- DSP :Automatic white balance(AWB)\Automatic exposure(AEC)\Automatic gain control(AGC)
- Camera Specification:
- CCD Size:1/4inch
- Aperture(F):2.8
- Focus Length(EFL):3.29mm
- Field of View(FOV):68°
- Focus Type: Auto focus (B type), Fixed focus (C type)
- Interface:USB2.0
- Image Format:MJPEG、YUV422
- Working Temperature:0°C ~ 50°C
- Dimension:9mm×62mm
- Support OS:Windows、Linux
Working with Windows PC
Test Software
Most of the Windows 10 PC has pre-install Camera software, you can use it to test the USB camera
If your PC doesn't have Camera software, you can also download the AMCap test software from Resouces->Software and test.
Testing
- Use Camera software of Windows
- Search "Camera" and open the software
- Click the setting icon of the top-left to configure the image/video.
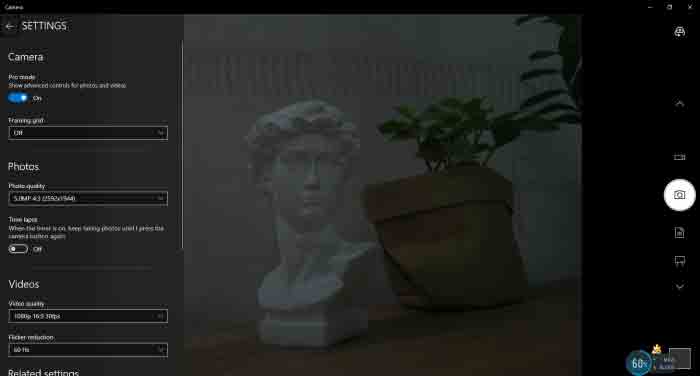
- You can click the icons on the right to switch between Image Capture or Video Recording.
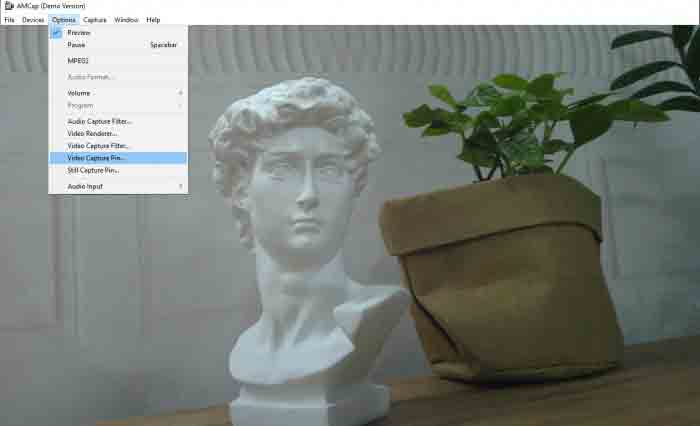
- AMCap Software
- Download and install the AMCap software
- You can click the Options option, choose Video Capture Pin... or Still Capture Pin... to configure image/video
Working with Raspberry Pi
- Open a terminal of Raspberry Pi (You can use Ctrl+Alt+T shortcut)
- Ues command sudo raspi-config to open the configuration
- Choose Interface Option -> Camera -> Yes to enable camera and reboot.
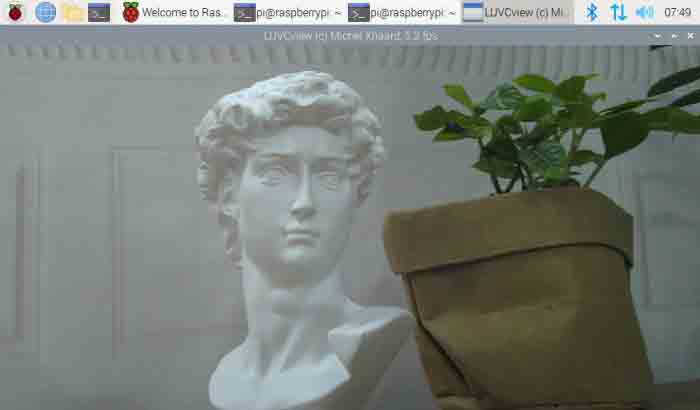
- Open a Terminal of Pi and install luvcview tool with the following command
- sudo apt-get install luvcview -y
- After installing, use the following command to test the USB camera.
- sudo luvcview -s 1920x1080
Working with Jetson Nano Developer Kit
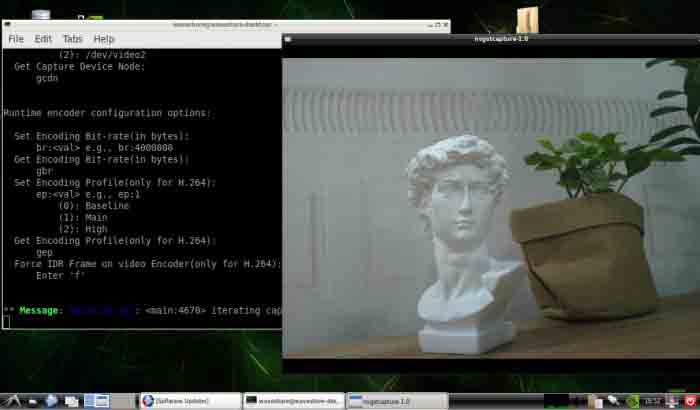
- Open a terminal of Jetson Nano Developer Kit (You can use Ctrl+Alt+T shortcut or open it by Mouse)
- Use the following command for previewing:
- nvgstcapture-1.0 --camsrc=0
- With the command, a preview window is opened
【Notice】You may need to use the camera by script/codes, in this case, you can refer to tools/libraries like Opencv yourself.
TAG:
3key Keyboard
Raspberry Pi 10.1 inch DSI MIPI LCD TouchScreen Display 10.1inch 720x1280 For Luckfox Lyra RK3506/ESP32-P4/Luckfox Omni3576
Luckfox Pico LCD
Digital Photo
Raspberry Pi PCM5122 I2S DAC HIFI Sound Card DAC Audio expansion Board Free-Driver For PI5/PI4/Zero
ESP32 Thermal imaging camera
ESP32 1.9 inch LCD Capacitive TouchScreen 1.9inch Display ST7789 170x320 for Arduino /Raspberry Pi /Pico
RS232 to RS422
ESP32-S3 ETH Camera Development Board PoE RJ45 / OV2640 OV5640 Port / W5500 / Micro-SD Compatible With Raspberry Pi Pico Size
VGA to LVDS
1.28 inch Round Rotary LCD Smart Screen 1.28inch Knob Display 240x240 Option Touch/No-Touch
ESP32 MLX90640
RV1103
Raspberry Pi 5 27W
800x480
ESP32-S3 1.69inch Touchscreen LCD Round Display WiFi Bluetooth With QST Attitude Gyro Sensor QMI8658
Arduino MLX90640
TTL UART To CAN Mini
DeepSeek AI Voice Chat ESP32-S3 Box N16R8 AUDIO Board Support External LCD/Camera AI deepseek
Raspberry Pi 0.96inch LCD
TAG:
Jetson 0.85inch LCD
Raspberry Pi 5
Raspberry Pi Pico
Raspberry Pi 15.6 inch TypeC Monitor DisplayScreen Computer PC 1920x1080
Jetson Orin NX Case
SpeedyBee F405 WING MINI Flight Controller FC ArduPilot INAV Drone
MP2.5G POE RTL8125 Raspberry Pi 5 PCIe 2.5G HAT Pi5
Raspberry Pi PICO LoRa-HF
Spotpear
JETSON NANO IO BASE Board
Raspberry Pi 5 Official Original SSD NVMe PCIe Gen3
Raspberry Pi PICO LoRa
Raspberry Pi 16-inch Type-C/HDMI 2K TouchScreen 2560×1600 16inch 165Hz computer
Raspberry Pi Camera Case
Raspberry Pi Robot Dog Wavego Pro 12 quadruped ESP32 ESP-NOW color recognition and self-balancing control
X1202 Raspberry Pi 5 UPS
ESP32-S3 AI Camera 1.28inch LCD Dual MIC Development Board Display 1.28 inch Voice Interruption Object Recognition 10-in-1 Multifunctional
15.6 inch Dual Double LCD Computer PC Monitor Display Secondary Screen TypeC Mini HDMI Windows MacOS
Raspberry Pi 5 Audio Card
ESP32-H2 BLE