- sales/support
Google Chat:---
- sales
+86-0755-88291180
- sales01
sales@spotpear.com
- sales02
dragon_manager@163.com
- support
tech-support@spotpear.com
- CEO-Complaints
zhoujie@spotpear.com
- Only Tech-Support
WhatsApp:13246739196
- Purchase/Shipping/Refund
WhatsApp:13424403025
- HOME
- >
- ARTICLES
- >
- Common Moudle
- >
- LCD
2. Driving the LCD screen User Guide
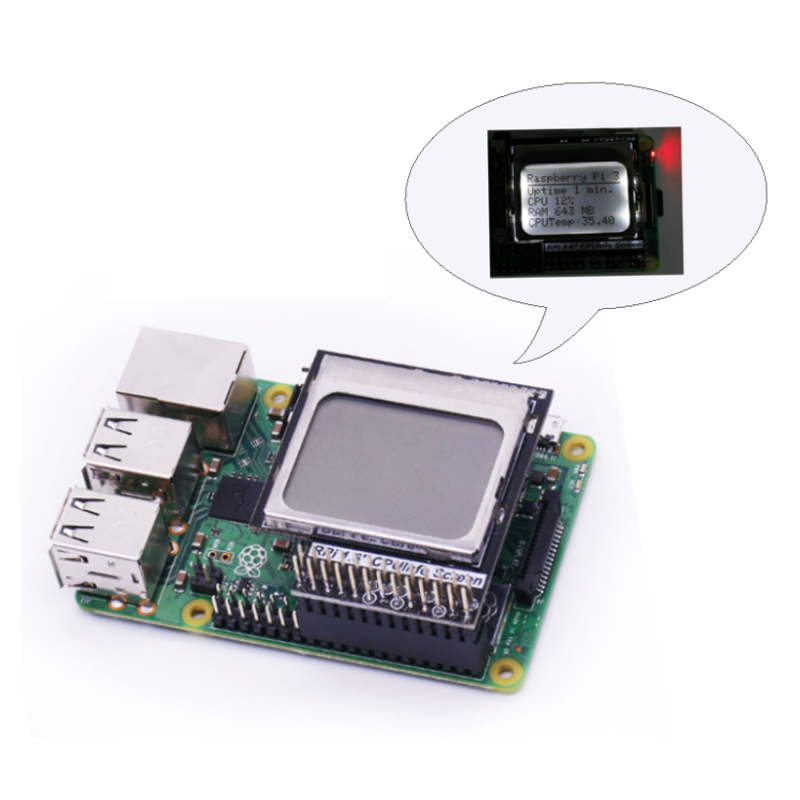
Driving the LCD screen
After CPU Info LCD screen is correctly inserted into the Raspberry Pi, you need to install the driver. The user can display information such as CPU occupancy, Memory occupancy, CPU temperature,etc.
1. Install the wringPi library
CPU Info LCD screen is used for data communication through the GPIO port of the Raspberry Pi, so we must install the wiringPi library file.
Enter the following command to install the wringPi library. Users who have already installed the wiringPi library can ignore this step.
cd ~
git clone git://git.drogon.net/wiringPi
cd wiringPi
./build
2.Install Drive
2.1 Transfer the driver file to the Raspberry Pi
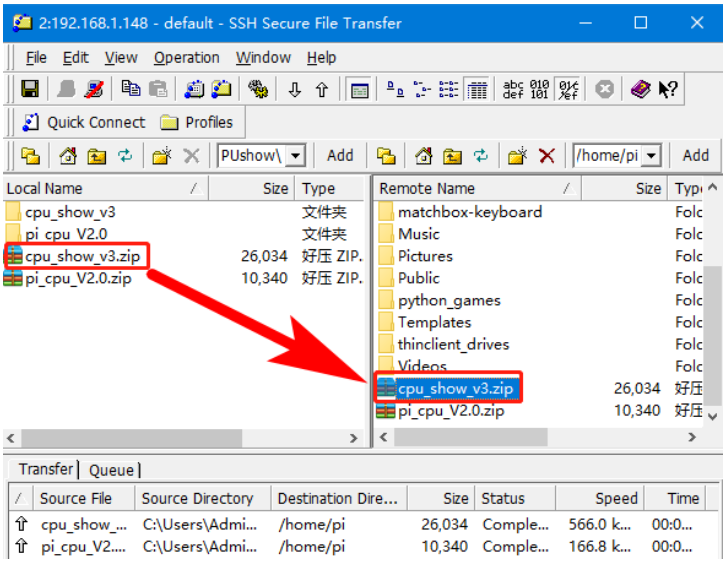
You need to install the SSH Secure Shell Client tool on your computer. After connecting to the Raspberry Pi, transfer the cpu_show_v3.zip package from this folder to the pi directory of the Raspberry Pi.
As shown blew, drag and drop cpu_show_v3.zip directly into the Raspberry Pi system.
Download: cpu_show_v3.zip
2.2 Extract file
Open the Raspberry Pi terminal and find the cpu_show_v3.zip file.
Enter command:
ls

Enter command:
unzip cpu_show_v3.zip

2.3 Enter the program folder
Enter command:
cd ~/cpu_show_v3/cpu_show
ls

2.4 Compile file
Enter command:
cc -o cpushow pcd8544_rpi.c PCD8544.c -L/usr/local/lib -lwiringPi
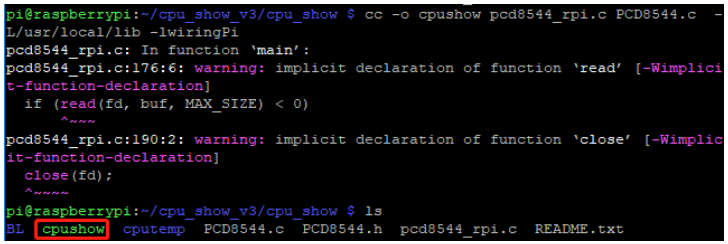
Check again with the ls command, cpushow has become an executable file.
cc is the compile command, -o is the compile parameter, cpushow is the generated program name, pcd8544_rpi.c and PCD8544.c are the source files in the current directory, -L/usr/local/lib and -lwiringPi are referenced libraries file.
2.5 Running procedure
Enter command:
sudo ./cpushow
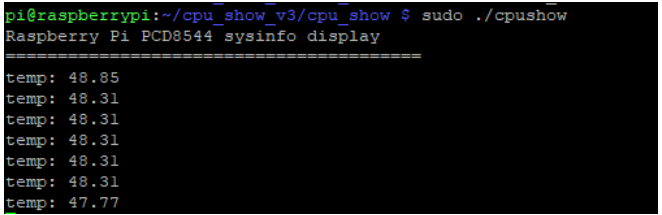
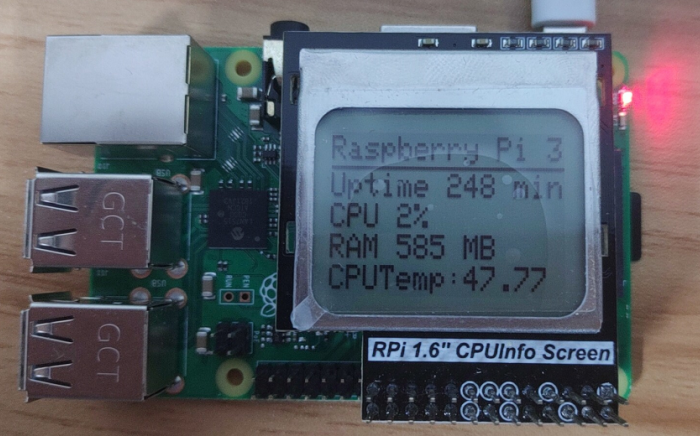
The system will jump out of the current CPU temperature value and display the following on the CPU Info screen.
3. Set the system to automatically start the program when booting
Enter command to create startup script start.sh
nano /home/pi/cpu_show_v3/start.sh
Enter following content in the start.sh:
#!/bin/sh
cd /home/pi/cpu_show_v3/cpu_show
./cpushow
After enter is complete, we need to press ctrl+X, then we need to press “Y” to save, then we need to press“Enter”on the keyboard.
Next, we need to create a new boot program:
Input the following command to open the .config folder:
cd /home/pi/.config
Create a new autostart folder and ignore this step if it already exists:
mkdir autostart
Input the following command to enter the autostart folder:
cd autostart
Create self-starting shortcut:
nano start.desktop
Then,we need to enter the following:
[Desktop Entry]
Type=Application
Exec=/home/pi/cpu_show_v3/start.sh
After enter is complete, we need to press ctrl+X, then we need to press “Y” to save, then we need to press“Enter”on the keyboard.
Exec = “the path to the startup script.”
Since this self-starting method needs to be started after the desktop is started, the startup will be slower.
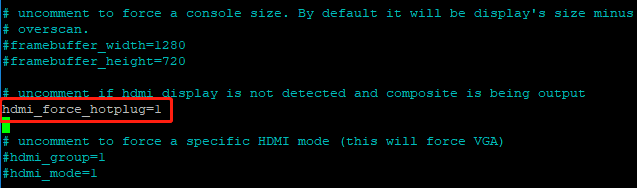
If it is found that it cannot be self-started after adding, please check if there is a “#” in front of hdmi_force_hotplug=1 in the /boot/config.txt file.
If there is a # number, we need to delete the “#” . As shown below.
4.Restart Raspberry Pi
Enter command:
sudo reboot
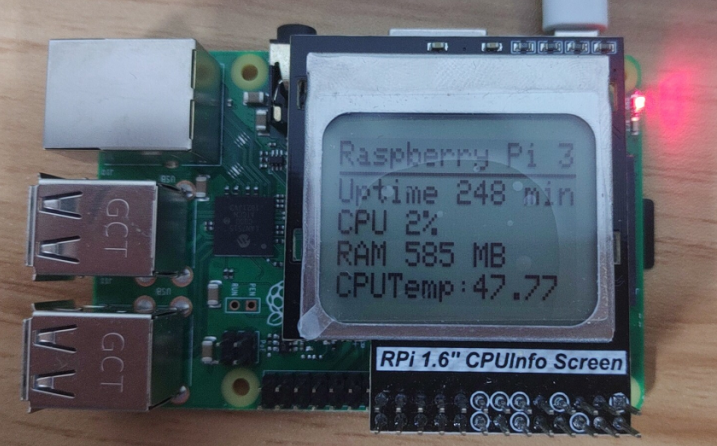
After restarting, the CPU Info LCD will display the Raspberry Pi usage time, CPU usage, Memory occupancy, and CPU temperature. As shown in the figure blew.