- sales/support
Google Chat:---
- sales
+86-0755-88291180
- sales01
sales@spotpear.com
- sales02
dragon_manager@163.com
- support
tech-support@spotpear.com
- CEO-Complaints
zhoujie@spotpear.com
- Only Tech-Support
WhatsApp:13246739196
- Purchase/Shipping/Refund
WhatsApp:13424403025
RP2040 and ESP32 code example
1】 Download the decompression package
2】 Code for burning ESP32
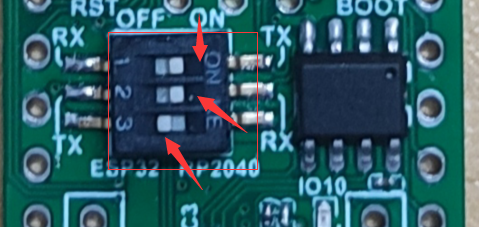
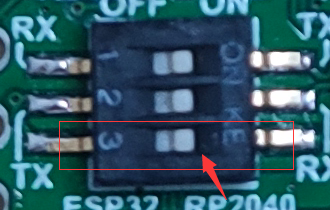
2.1] Turn the dial switch to ESP32, RT and TX to RP2040
2.2] In the extracted package, enter the RP2040andESP32 folder, and then enter RP2040 again_ ESP32 folder, open RP2040_ ESP32.ino
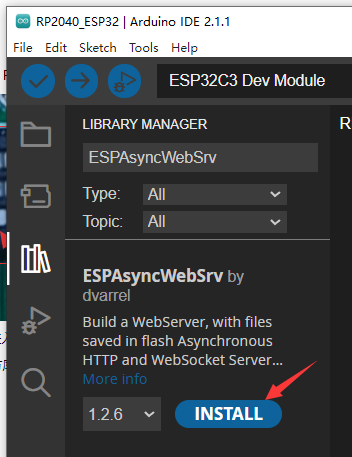
Install the ESPAsyncWebSrv third-party library
Open the Arduino library path: click File, click (Preferences).
(Note: Each person's path is different)
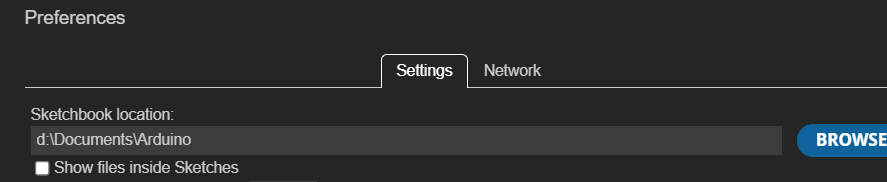
Copy the path to my computer path search box

After entering librariesh, locate the ESPAsyncWebSrv folder and enter,

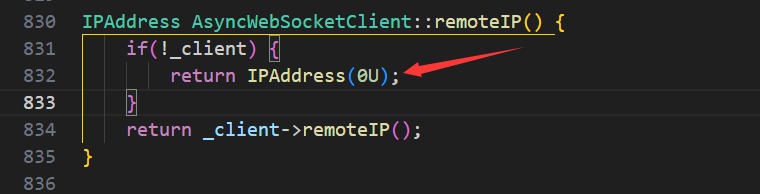
Then enter src and open the AsyncWebSocket.cpp file

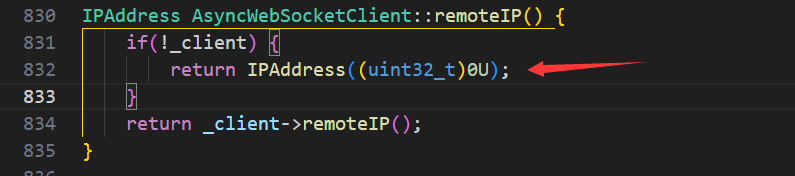
Modify the I PAddress AsyncWebSocketClient:: remoteIP() in it
Before modification
After modification
2.3] Configure Arduino IDE_ ESP32C3 parameter
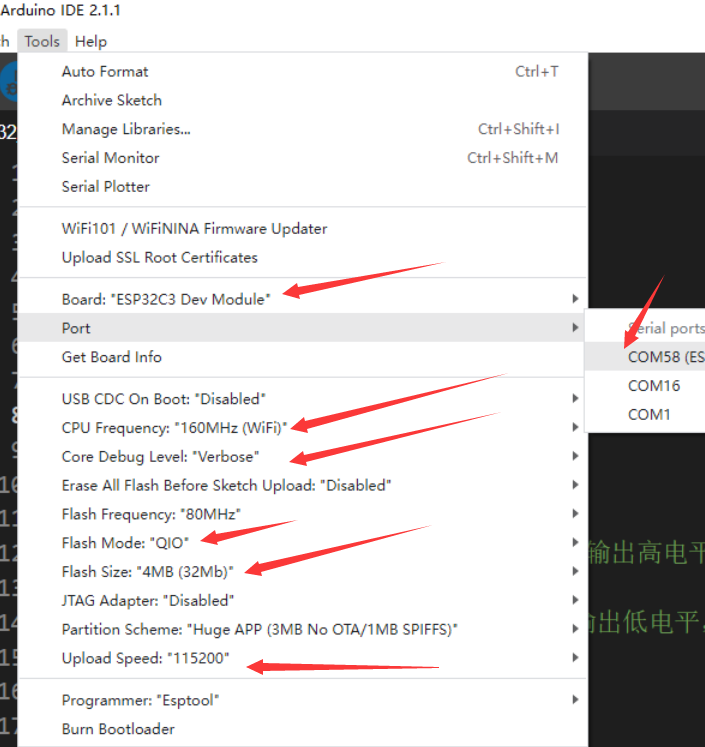
After configuring the parameters as shown in the above figure, enter the WIFI name and password
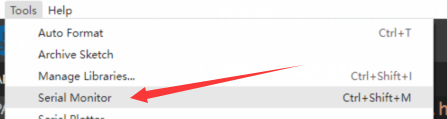
2.4] After burning, open the serial port monitor

After burning, open the serial port monitor
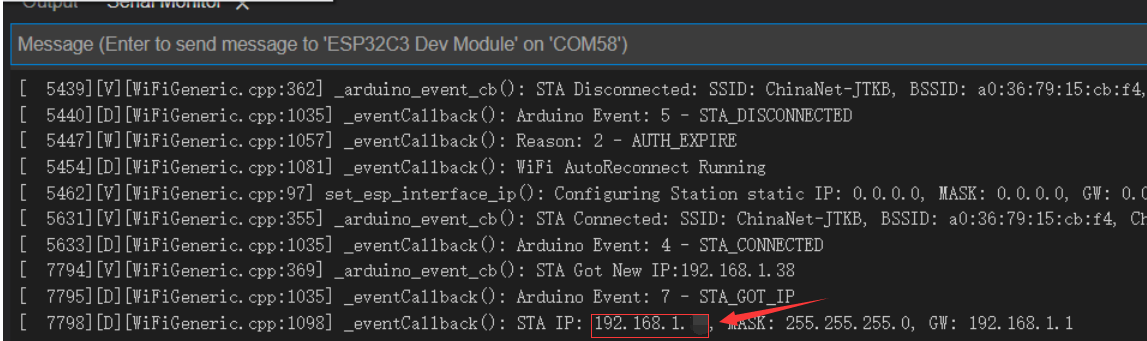
At the beginning, there will be a connection process, and after a moment, you can see the STA IP address (the WIFI address is different for everyone). Copy to website
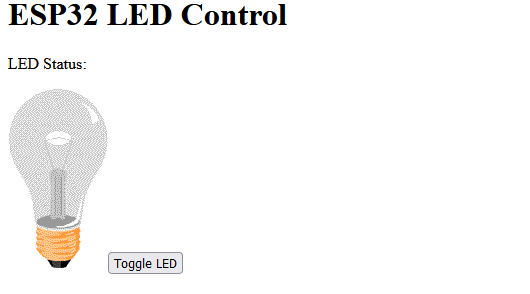
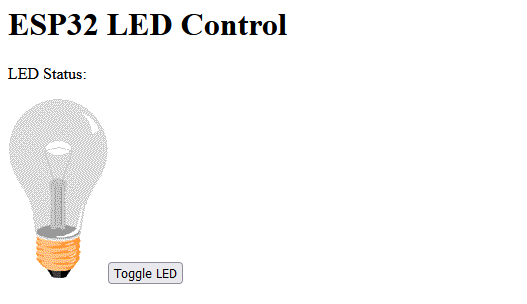
After copying the IP address to the website, the following figure appears
3】 Burn RP2040
3.1] Turn the dial switch to RP2040
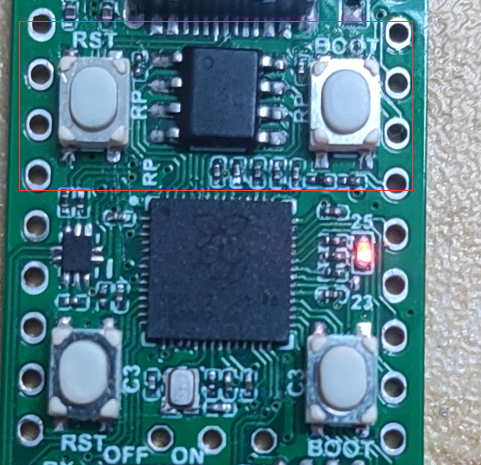
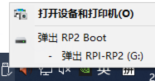
3.2 】 To enter the boot loading program, please press and hold the BOOT button, and while continuing to press and hold (do not release!), press and release the (RST) reset button. Continue to press and hold the BOOT button until the RPI-RP2 drive appears!
Copy rpi pico honey.uf2 from the package to RPI-RP2
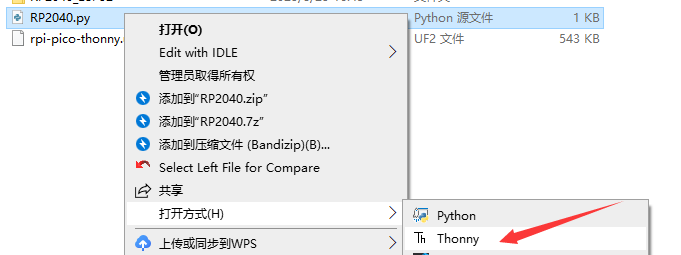
3.3] Open RP2040. py and select Thanny as the opening method
3.4] After opening, choose to stop compiling

3.5】这页面左下角时候会出现

3.6 Click main.py, hold down Ctrl+shift+S on the keyboard
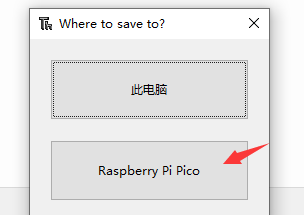
Select Raspberry pi Pico
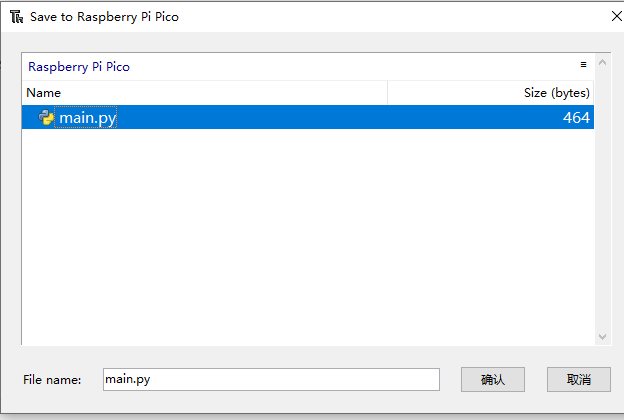
Select main,py and click ok.
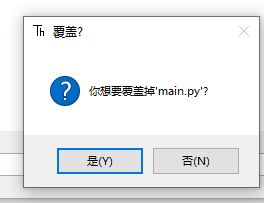
Choose to overwrite main.py.
After the coverage is completed, press the RST button once to complete the burning.
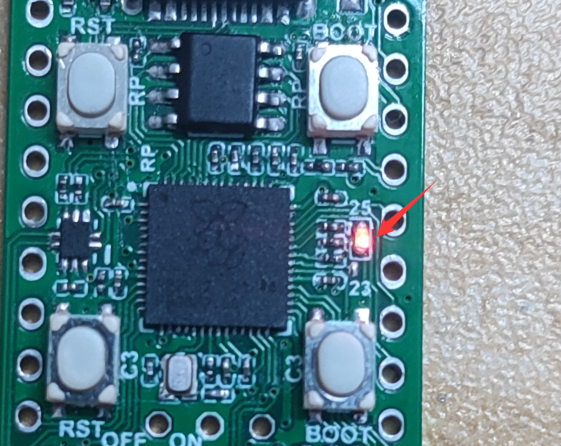
4】 Experimental phenomenon: Clicking on the Trigger LED will flip the 25LED light in RP2040.